
Quick Answer
Launch the simplest revenue-share model your platform can reconcile. If one transaction cannot be traced from signup and identity verification through split logic, payout status, and tax handling, simplify the setup before you add more automation.
Start with Corridor and Payout Reality, Not Split Percentages#
If you are designing indiehacker platform revenue share payments, start with payout and market reality before you debate split percentages. The main risk is assuming that if you can charge a buyer, you can also pay sellers in your target countries on your promised timeline.
Before you start. Founder communities are a useful way to spot where payment operations actually break. Indie Hackers centers on founders sharing strategy and revenue numbers, and payment threads there include discussions about VAT, US sales tax, and payment setup. A recent Hacker News thread asks how others handle VAT and sales tax filing, and a Reddit r/SaaS post highlights pressure to switch providers because of onboarding constraints. The pattern is practical. Payout operations sit downstream of tax, onboarding, and country coverage.
Step 1. Check whether your first corridor is actually payable. For a platform model, the flow sounds simple: accept money and pay it out to third parties. In practice, your first launch decision is not just tooling. It is whether your entity country, seller countries, and buyer countries can work together without manual exceptions.
Do not stop at a provider page that says a country is "available." Community guidance on Connect warns that "available" does not always mean full cross-border capability. India-based Connect accounts are one example that gets cited. If you cannot confirm cross-border payout behavior for your exact corridor, treat that market as a hold.
Step 2. Decide how much control you need over payout timing. Payout cadence is an operating control, not a cosmetic setting. The provider documents daily, weekly, monthly, and manual payout schedules, and says the initial payout after the first successful live payment is typically scheduled in 7-14 days. For manual payouts, support says funds typically arrive in 1-4 business days after initiation. In Connect, transferred funds default to daily rolling payouts for connected accounts, and documentation also covers cases where the platform can schedule connected-account payouts.
Set expectations from those constraints before launch. If you need more hold time while you learn, the docs describe delay_days_override up to 31 for supported payout setups.
Step 3. Lock the five decisions this guide is built to help you make. Make these five decisions in order:
If you are implementing revenue shares with lean operations, ground the build on Stripe's Connect marketplace payout tasks and identity verification guidance rather than ad hoc admin workflows.
- Pick the first market corridor you can actually support.
- Decide who absorbs processor, FX, refund, and dispute costs.
- Set a starting payout cadence that matches risk.
- Put compliance and tax gates in front of first disbursement.
- Define recovery handling for failed payouts, refunds, and chargebacks.
By the end, you should be able to state your launch corridor, fee ownership rule, starting cadence, onboarding gates, and recovery path on one page.
For a step-by-step walkthrough, see Building Subscription Revenue on a Marketplace Without Billing Gaps.
What to prepare before choosing revenue share#
Before you set percentages, lock the operating inputs that will force those percentages to change later if you ignore them. The four you need are your first corridor, your evidence pack, your liability source of truth, and named owners.
Step 1 Define the first corridor#
Write one launch corridor in a single line: legal entity country, seller country mix, and buyer country mix, for example, US entity, EEA sellers, US and EU buyers. This is a gating decision because Connect cross-border payouts are region-limited, not globally open-ended.
The provider states that platforms based in the United States, United Kingdom, EEA, Canada, and Switzerland can transfer funds to connected accounts in those same regions. Opening an account in another country also requires a legal entity registered in that country. Verify your exact seller countries before you make product promises.
Checkpoint: can your current entity country open the required account, and can that account pay the connected accounts you plan to onboard?
Step 2 Collect the evidence pack early#
Collect onboarding evidence before implementation: entity registration details, business identification, bank account information, and any identity documents your provider may request. Connected-account verification can also require a government ID, proof of address, or both, so do not assume form fields are the full requirement.
Prepare tax documentation by corridor, not as one global file:
- EU in scope: confirm whether VAT OSS fits your reporting setup.
- Australia in scope: GST registration can become mandatory at
$75,000turnover, with registration required within21 daysonce required. - US buyers in scope: sales tax can apply even without physical US presence, and registration is jurisdiction-specific.
Step 3 Map the stack and name the liability source#
List every money-moving dependency: processor, MoR provider (for example, Polar), invoicing, accounting, and your internal ledger. Then assign one system as the source of truth for payout liabilities.
This helps avoid reconciliation gaps. With manual payouts, the provider states it cannot determine which transactions directly correlate to a payout. If you use manual flows, your internal ledger or accounting record has to carry liability tracking.
Step 4 Assign two owners before build starts#
Name one owner for payout policy and one owner for tax and compliance sign-off before implementation begins. Also log real-person filing details early where relevant, including EIN responsible-party details, since EIN applications require a qualified responsible party. If you cannot name these owners now, narrow or pause launch scope until operating ownership matches product scope.
If you want a deeper dive, read Revenue Share Architecture: How MoR Platforms Split Payments Between Platform and Contractor.
Choose markets before choosing tools#
Pick your launch markets first, then choose tools based on verified coverage and tax readiness for those exact corridors. If you reverse that order, you can end up with an entity setup that still cannot support the payouts you want to offer.
Step 1 Build a country screen before integration work#
Build a country screen before you write integration code. Start with your first six candidate markets: India, Indonesia, Pakistan, Nigeria, Australia, Singapore. Keep the screen practical: processor access, settlement options, and tax obligations.
| Country | Processor access check | Settlement options check | Tax obligations check |
|---|---|---|---|
| India | Global page currently labels India as Preview | Do not assume Connect payout coverage. Verify your platform country, enabled features, and whether cross-border payouts are supported for your setup | Verify local registration rules with the relevant authority |
| Indonesia | Global page currently labels Indonesia as Preview | Same rule as India. Coverage depends on platform location and features | Verify local registration rules with the relevant authority |
| Pakistan | Confirm processor status with the provider | Do not promise payouts until you confirm available rails and program support directly | Verify local registration rules with the relevant authority |
| Nigeria | Global page currently labels Nigeria as Extended network | That label is not the same as payout readiness. Verify actual connected-account and payout support | Verify local registration rules with the relevant authority |
| Australia | Check current processor and Connect support for your platform country and features | Confirm settlement timing and first-payout timing. Stripe says initial payout is typically scheduled 7-14 days after the first successful payment | GST registration is required at $75,000 turnover; ATO examples show 21 days to register after the threshold is met |
| Singapore | Check current processor and Connect support for your platform country and features | Confirm local-currency payout options and cross-border eligibility | For overseas vendors, GST OVR can apply if annual global turnover exceeds S$1 million and B2C Singapore supplies exceed S$100,000 annually |
Use evidence for each row, not assumptions. Stripe states connected-account country coverage depends on your platform business location, country availability is feature-dependent, and cross-border payout eligibility is determined by program rules.
Step 2 Compare direct onboarding vs Stripe Atlas by operating burden#
Compare setup paths by ongoing burden, not just setup speed.
Stripe Atlas is one route. Atlas is described as incorporating a Delaware company, obtaining an EIN, and issuing founders equity. It lists 500 USD upfront, then 100 USD annually for registered-agent maintenance after year one. Delaware formation also requires filing a Certificate of Incorporation. Atlas is not a guarantee of payment approval. The docs explicitly say it cannot guarantee approval to use payments.
An operator example from Indie Hackers reflects that constraint: “Since Stripe is not available in my country and it's not yet affordable for me to incorporate a company in the USA.”
Step 3 Set explicit go/no-go rules before launch promises#
Set go and no-go rules before anyone makes launch promises:
- Go only when payout rail coverage is confirmed for your platform country, seller countries, and required Connect features.
- Go only when tax registration timing is clear for the corridor, including concrete triggers such as Australia’s $75,000 GST threshold and Singapore’s OVR thresholds.
- No-go when evidence is generic, for example, "country supported," without confirmation that your program can pay connected accounts as planned.
- No-go when Atlas is the only setup path and you have not committed budget and ownership for ongoing admin.
Treat "coverage varies by market/program" as a launch gate. Stripe also states self-serve cross-border payouts are not supported outside listed regions.
Step 4 Defer weak markets instead of forcing first-wave launch#
If settlement coverage or tax timing is still unclear for a market, defer it. Aim for two lists: launchable countries with evidence, and deferred countries with named blockers.
Related: Monetization Models for Creator Platforms: Subscriptions Tips Ads and Revenue Share.
Design the split so margins survive real costs#
Model gross-to-net before you promise any split. Most margin misses come from the same places: international card surcharges, currency conversion, payout rail fees, VAT handling, and dispute losses.
Step 1 Build the split from named buckets, not one headline percentage#
Build your model from explicit buckets in order: gross receipts, platform revenue share, processor fees, FX or conversion impact, tax treatment, and net distributable balance. If you collapse all of that into one "fees" line, you cannot see which corridor is failing.
Keep two views for each transaction:
- Customer charge amount
- Amount economically available to share
That distinction matters because provider balances may exclude tax and apply conversion at settlement. Polar states its balance excludes captured VAT and that non-USD orders are converted into USD. In MoR-style setups, do not split from tax-inclusive checkout totals by default. For processor-led flows, anchor the model to provider math: the balance transaction net is amount - fee.
Step 2 Run separate United States and European Union scenarios#
Run at least two scenarios with the same product price so the drag is comparable.
For a domestic United States card flow, Stripe's published pricing shows 2.9% + 30¢ per successful transaction. If payouts run through Connect under handle-pricing, the docs also show 0.25% + 25¢ per payout sent. So domestic scenarios should include both collection and payout costs.
For a European Union cross-border case, model separate line items:
- +1.5% for international cards
- +1% when currency conversion is required
- Connect cross-border payout cost starting at 0.25% of payout volume
Model tax separately too. For electronically supplied services, EU guidance states taxation where the customer belongs, effective 1 January 2015. Do not copy the US model and only swap currency.
Step 3 Compare split structures by how they behave under disputes#
A revenue share only works if it survives disputes and fee drag. Compare structures by failure mode, not just by how generous they sound.
| Split structure | How it works | Failure mode to test as dispute pressure rises |
|---|---|---|
| Platform-first | Platform takes share before creator payout; dispute/fee recovery defined in terms | Can be more durable when offsets from pending balances are possible, but creator payout volatility may increase friction |
| Creator-first | Creator paid early; platform absorbs more downstream reversals/fees | Can compress platform margin on thinner corridors if the platform carries dispute and payout costs |
| Fixed-fee-plus-share | Fixed amount plus lower percentage share | Low-ticket cohorts can become fragile when fixed payout fees and fixed dispute costs dominate |
Polar documents $15 per dispute regardless of outcome, deducted from balance. On low-ticket cohorts, that fixed cost can erase multiple successful transactions.
Step 4 Set a thin-margin rule and verify against provider statements#
Set one operating rule: if net margin falls below your floor after processor fees, FX impact, tax treatment, and expected dispute cost, reduce the share percentage or pause that corridor.
Then check the model against real statements:
- In the processor dashboard, use itemized all-fees reporting, including processor, network, and external-partner fees.
- Reconcile payouts as settlement batches so your assumptions match the transactions actually included.
- In Polar, verify post-VAT balance, USD-converted settlement amounts for non-USD orders, and dispute deductions before you lock split percentages.
This keeps the split tied to real settlement economics, not spreadsheet-only math.
Related: How Solo SaaS Operators Use RevOps to Stabilize Revenue.
Decide who absorbs each fee and when#
Once the split works on paper, make fee ownership explicit in the agreement and in your payment setup. If processor fees, FX, refunds, or disputes are left ambiguous, your provider configuration can determine how cash moves.
Step 1 Map every fee to a named owner#
Add a fee-ownership matrix to the agreement and keep it aligned with your provider configuration. Stripe Connect and Polar can debit balances differently depending on the flow, so the contract should match the actual money path.
| Cost item | What provider behavior can do | Contract requirement |
|---|---|---|
| Processor fee | Fee handling and debit path can vary by provider setup | State whether platform absorbs it or nets it before seller share |
| FX conversion | Can occur on payments, transfers, payouts, application fees, and other transactions | Name where FX can occur and who absorbs it |
| Refund cost | In Connect, direct-charge refunds can debit the connected account; destination charge or separate charge-and-transfer refunds debit the platform first | Define first debit point and recovery method |
| Dispute cost | Connect dispute-fee responsibility depends on controller; Polar charges $15 per dispute and deducts it from balance | Separate owner of disputed principal from owner of dispute fee |
Use explicit owners only: platform, seller, or a defined split party. Avoid fallback wording like "shared as applicable."
Step 2 Match the contract to your live provider setup#
Before launch, compare three things against the matrix: charge type, controller or liability setup, and settlement-currency path. Those settings determine where debits and FX costs actually land.
The docs say that dispute-fee responsibility depends on controller configuration. They also document different refund debit behavior by charge type. So if your agreement says the seller absorbs refunds but your flow debits the platform first, you still need a recovery clause and a timing rule.
Step 3 Set an explicit FX rule#
Handle FX as its own policy, not a vague payment-cost line. The docs note conversion can happen in payments, transfers, payouts, application fees, and other transactions. Polar also publishes cross-border conversion fees of 0.25% (EU) to 1% (other countries).
Use a simple rule: decide upfront whether the platform absorbs FX costs or passes them through with clear disclosure. Where eligible, multi-currency settlement can reduce FX-fee exposure for those flows.
Step 4 Tie negative-balance recovery to Payout Cadence#
Negative-balance recovery should follow the same timing rules as payouts. The provider states negative balances happen when refunds, disputes, and fees exceed available balance, and eligible accounts may be auto-debited from the bank account within two business days.
Write a recovery order tied to Payout Cadence. During the typical initial payout window of 7-14 days, keep stricter controls. After that, define how you recover seller negatives from upcoming payout batches, reserves, or platform balance if the agreement allows it. If you offer manual payouts, support says they typically arrive in 1-4 business days, so avoid same-day recovery promises. For Connect, decide whether to maintain a reserved balance to offset connected-account negatives.
Set payout cadence and reserve rules before launch#
Set conservative payout and reserve controls first. Relax them only after you see real refund and dispute behavior. For a new platform, payout cadence and reserve policy protect cash flow while the risk profile is still mostly a guess.
Step 1 Start with corridor-specific delayed payouts#
Start with corridor-specific delays, not one global payout rule. The provider documents that payout availability varies by industry and country, with a typical initial payout window of 7-14 days after the first successful live payment. Support guidance also notes first-payout waits can be up to 14 days for some industries. In countries such as Brazil, they can be up to 30 days. That initial timing requirement may not be waivable.
After that initial window, payouts follow your configured schedule. For daily automatic payouts, delay_days controls how long after charge creation funds are paid out, and Connect allows delay_days_override up to 31.
Before launch, verify that three things match: live provider settings, corridor rules, and seller-facing payout promises.
Step 2 Define a rolling reserve by segment#
Treat reserve as held risk capital, not free operating cash. The provider defines reserve as a temporary hold to cover anticipated processing losses, and a rolling reserve model holds a percentage of incoming transactions and releases it later on schedule.
Set reserve policy by segment, for example by risk profile, and document the hold basis, hold period, release timing, and escalation owner. If you use example formats like 10% held for 90 days, label them clearly as examples, not defaults. Make release timing explicit in your policy and seller reporting. Reserve funds should be released according to the defined reserve term.
Step 3 Tighten reserve and timing before changing share rates#
When dispute or refund behavior worsens, review cash controls first. Reserve sizing is risk-based and can reflect dispute rate, refund rate, and financial stability.
Use a clear rule: when dispute volume rises past your internal threshold, tighten controls for the affected segment, such as increasing reserve requirements or extending payout timing for new charges where supported. Revisit share rates only if the loss pattern persists after those controls.
Define this escalation before launch, because refunds can fail when reserve and payout balances are insufficient.
Step 4 Separate policy auto-adjustments from operator approvals#
Document which changes run automatically and which require human approval in the same payout policy.
Auto-adjustments can include:
- Applying provider-required initial payout holds for new accounts
- Releasing reserve funds on the scheduled date
- Sending alerts when reserve balance falls below a configured percentage of the reserve threshold, where supported
Operator approvals should include:
- Increasing reserve percentage or extending hold periods
- Changing seller segment assignment
- Shortening payout timing after elevated disputes or refunds
This matters because provider tooling may support thresholds and alerts, but many reserve decisions still need operator judgment.
Related: Payments for On-Demand Service Platforms: Delivery Rideshare and Home Services.
Build compliance and tax gates into onboarding#
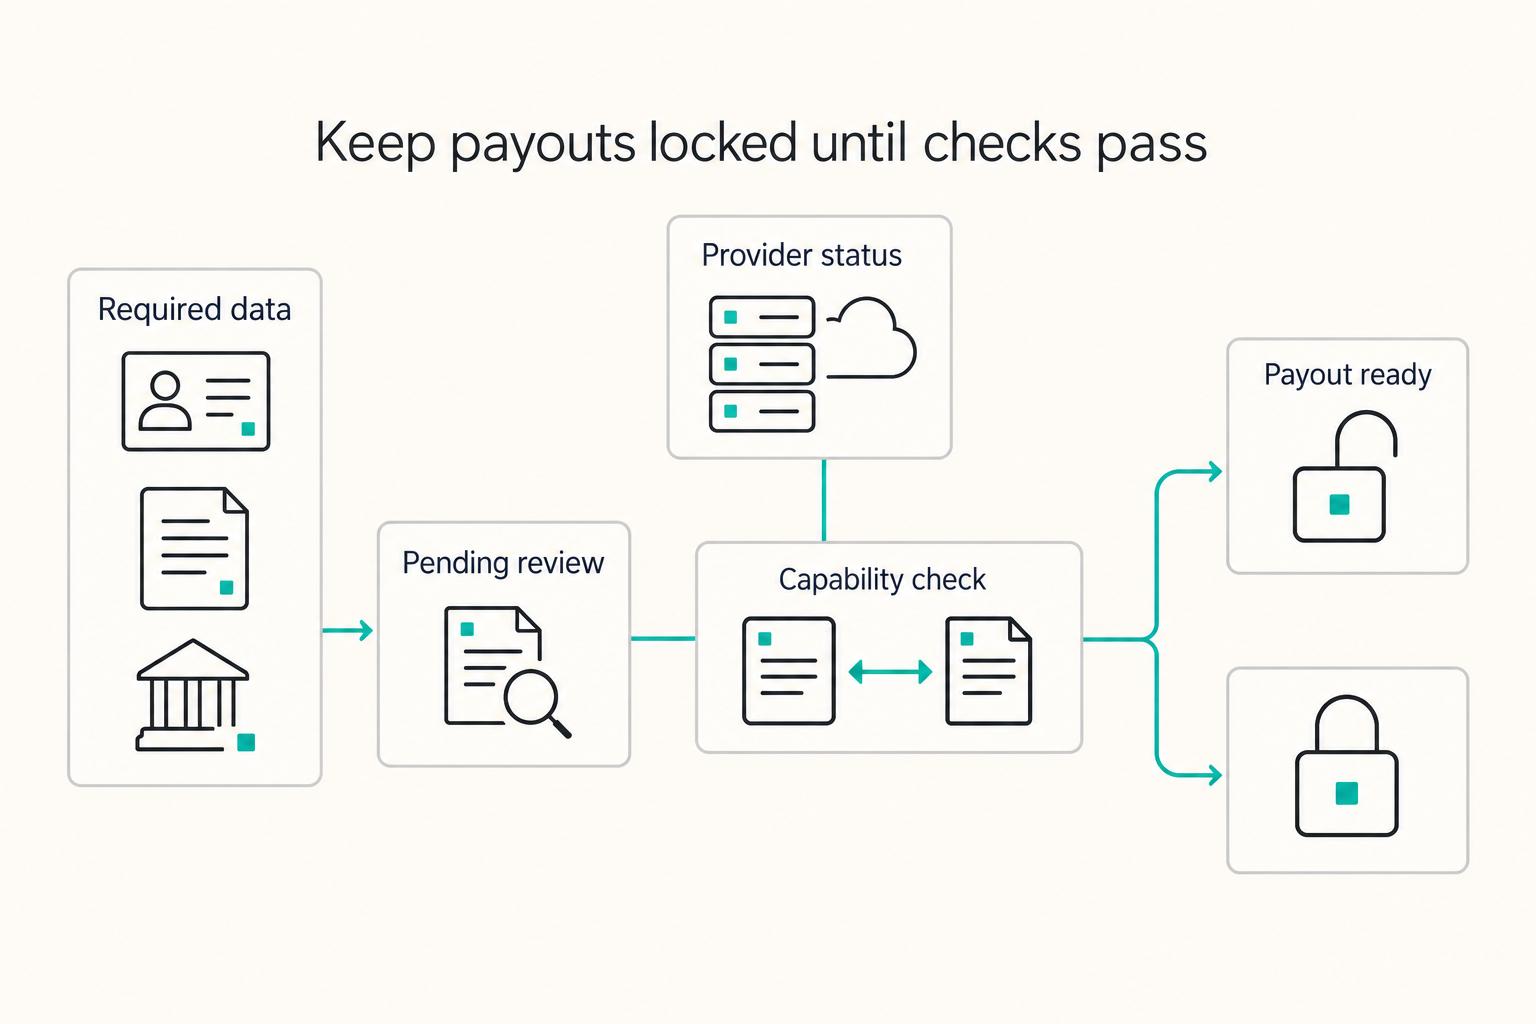
Treat onboarding as a payout-eligibility gate, not a signup form. Keep payouts locked until identity, ownership, and tax-profile data are complete for the specific corridor.
Step 1 Gate payouts before the first disbursement#
If you use API onboarding, your platform is responsible for collecting and submitting required KYC data for connected accounts. Required information must be in place before charges and payouts are enabled, and accounts can be disabled when required data stays missing or unverified.
Make that visible in product status. A seller can finish profile setup and still remain "pending review," but payout status should stay locked until required checks pass. For legal entities, include beneficial-owner identification in your process.
Before marking an account "payout ready," confirm provider capability status matches your internal status. If your UI says approved while processor requirements are still due or pending, payouts can remain unavailable.
Step 2 Capture tax data by corridor, not one global form#
Use corridor-aware tax capture instead of one generic tax form. The relevant indirect tax categories are Sales Tax, VAT, and GST. Whether they apply depends on seller location, customer location, and which entity in your model is responsible for collection and reporting.
Decide the tax-liable entity during onboarding, then collect location fields you can actually use. Tax determination is location-sensitive, so a minimal country-only profile may not be enough.
Your minimum tax-profile record per account should include:
- Seller country and legal-entity type
- Tax registration status where relevant
- Customer sales corridors
- Tax-liable entity for collection or reporting
- Evidence references for submitted tax forms
Step 3 Define US tax ID rules before exceptions pile up#
Set US-facing tax ID rules before go-live. A W-9 is for US residents or citizens and confirms the payee’s TIN, whether SSN, ITIN, or EIN. Your policy should define when EIN is required and when another valid TIN is acceptable.
Keep exceptions manual. If an account presents as a US company but cannot provide required TIN details at onboarding, route it to review instead of letting support improvise. If onboarding asks users to obtain an EIN, account for the IRS online limit of 1 EIN per responsible party per day.
Validate tax identity before payouts, not only at year-end. Incorrect 1099 submissions can carry IRS fines of up to 310 USD per incorrect submission.
Step 4 Keep an auditable account checklist#
Keep an account-level checklist that records what was collected, what is pending, who approved exceptions, and when status changed. It should be easy to review later, including submitted or pending W-8 or W-9 status.
At minimum, store:
- Identity and beneficial-owner check status
- Tax-form status
- Corridor eligibility decision
- Exception reason and approver
- Payout lock or unlock timestamps
The checklist should let you answer one operational question quickly: why this account was allowed to receive payouts on that date.
We covered this in detail in How Independent Professionals Build a PCI-Compliant Workflow for Card Payments.
Implement payment flow and ledger checkpoints#
Once an account is payout-eligible, timing becomes your next control. Do not release payout instructions until funds are settled, and ensure the ledger entry and split are finalized first.
Step 1 Wait for settlement before you create payout liability#
Finalize payout liability after settlement. Use a consistent sequence for money movement: collect payment, confirm settlement, post the ledger journal, calculate the split, then release payout instructions. This is an operational control, not a universal provider-mandated order.
Treat pending and available balances differently. Pending funds are not withdrawable, so your ledger should anchor to actual funds movement, not just payment success. A practical gate is requiring both the payment reference and the related BalanceTransaction reference before marking funds distributable. If you skip that gate, you increase the chance of paying out funds that are not actually available.
Step 2 Set the Merchant of Record (MoR) boundary before checkout goes live#
Set the Merchant of Record boundary before checkout goes live. The MoR is responsible for processing customer payments and carries the financial, legal, and compliance responsibility for transactions. If you need centralized tax and payment responsibility, choose that model explicitly.
Then keep the rest of the stack aligned with that same boundary: checkout identity, receipts, dispute handling, and ledger assumptions should all match. If you use a product that shifts responsibilities, validate exactly what changes for that product. For example, Stripe Managed Payments states it handles indirect tax compliance in more than 80 countries, plus fraud and dispute response, within that setup.
Before launch, confirm the same entity and responsibility model appear in checkout, contracts, tax handling notes, and finance operations.
Step 3 Make retries duplicate-safe across webhooks and payout creation#
Assume duplicate and concurrent calls will happen, then design for them. The provider may deliver the same webhook event more than once, undelivered events can be resent for up to three days, and Checkout fulfillment can run multiple times for one session.
Use two controls together:
- Track processed webhook event IDs in your database with handled status and timestamp.
- Send idempotency keys on payout-creation POST requests so retries return the same result instead of creating duplicate payout actions.
Do not treat idempotency keys as complete duplicate protection by themselves. Map each key to the business action, not a single request attempt. Persist that mapping in your own records even though the provider can prune keys after at least 24 hours.
Step 4 Reconcile twice before you trust the numbers#
Reconcile at two checkpoints before you trust the numbers. For manual payouts, reconciliation remains your responsibility.
First, match provider references to ledger entries. Each funds movement creates a BalanceTransaction, and payout reconciliation is settlement-batch based. Filtering BalanceTransaction by payout ID helps map a bank payout back to the underlying activity.
Second, match ledger liabilities to payout batch totals. The unpaid seller liabilities selected for a batch should equal that batch’s payout instruction total. If provider-level totals match but liability-level totals do not, individual seller payouts can still be wrong.
Need the full breakdown? Read How to Choose a Merchant of Record Partner for Platform Teams.
Plan failure handling for refunds, chargebacks, and returns#
Run payout failures, returns, and chargebacks through one recovery path with one owner. Fragmented ownership slows response while dispute deadlines and balance impacts keep moving.
Step 1 Create one incident path with one accountable owner#
Use one intake across dashboard alerts, email, webhooks, and API events, since dispute notifications can come through all of them. Assign one accountable owner for triage, seller communication, and final ledger action.
Set internal timers by event type. Formal disputes usually require a response within 7 to 21 days, so first review should happen well before that deadline. Returned payouts are typically sent back in 2-3 business days, so track failed, returned, and canceled payout states directly instead of waiting for support tickets. At minimum, each incident should include a platform case ID, provider object ID (for disputes, the dispute id and disputed charge ID), affected seller account, and customer-message status.
Step 2 Write your reversal order as policy, not assumption#
Do not leave reversal order to guesswork. The provider does not define one universal internal reversal waterfall, so document your own sequence in ops policy and contracts. One possible internal order is:
- Offset against future seller inflows, including unpaid or pending payouts, where possible.
- Then use platform reserve balances set aside for connected-account negatives.
- Then absorb the remaining amount at platform level if needed.
This keeps recovery tied to liabilities you already control and reduces surprise debits after payout.
Step 3 Attach evidence packs to the charge and ledger record#
For each dispute, keep one evidence pack linked to the dispute id, disputed charge ID, internal ledger entry, customer communications, and relevant activity logs. Keep those records tied to transaction IDs so the response is fast and auditable.
Also separate pre-dispute inquiries from formal disputes in your queue. Responding at the inquiry stage can prevent escalation and reduce fee and rating impact.
Launch in one corridor and expand with hard gates#
Launch in one corridor first, then expand only when your own gates are clearly passed. One practical starting point can be a platform based in the United States paying sellers in the European Union, after confirming both base-region and destination-region eligibility.
Step 1 Start with one corridor and define what a clean cycle means#
Use "three clean payout cycles" as an internal rule, not an external requirement. In practice, define a clean cycle as each payout tracing to included transactions, with reconciliation exceptions resolved before close.
Treat that as a hard checkpoint. With automatic payouts, the provider maintains transaction-to-payout association, which makes reconciliation easier. With manual payouts, your team owns that matching work directly, so wait to expand until payout totals and transaction history tie out consistently.
Step 2 Gate new countries on three pass criteria#
Before adding markets like India or Nigeria, require evidence in three areas:
- Stable reconciliation
You can identify which transactions were included in each payout without after-the-fact spreadsheet cleanup.
- Acceptable dispute performance
Track dispute rate by charge date, consistent with provider measurement. Do not rely on a made-up universal threshold. If trends could push you into card-network monitoring programs and recurring fees, hold expansion.
- Tax workflow readiness
Confirm where VAT, GST, or Sales Tax obligations exist and whether registration must happen before collection starts. If registration steps are still unclear, do not launch that corridor.
Step 3 Write a proceed or hold memo before GTM commits#
Before GTM commits, write a short memo for each new corridor with one explicit decision: proceed or hold. Include the base entity, destination country, payout method, reconciliation owner, dispute trend, and tax status so market promises stay aligned with operating capacity.
Step 4 Re-run the market screen when support changes#
Recheck corridor readiness whenever processor country availability or cross-border payout support changes. Support is not static, and the global page can label markets differently, for example, India Preview and Nigeria Extended network. For self-serve cross-border payouts, stay within listed supported regions. Atlas also costs 500 USD plus state fees and does not guarantee payment-processing approval, so incorporation alone is not corridor readiness.
Related reading: How to Invoice as a Freelancer Without Chasing Late Payments.
Before you commit to a new country pair, confirm operational coverage and payout constraints for that corridor with Gruv Payouts.
Conclusion and copy/paste launch checklist#
The safest launch sequence is simple: market feasibility first, split math second, payout controls third, then expansion. That order keeps you from promising seller payouts before corridor support, tax handling, and reconciliation are actually workable.
- Screen markets before committing publicly.
Start with your real launch corridors: United States, European Union, and the next two target markets. Validate payment acceptance, payout support, and tax exposure separately. That separation matters because payout coverage can differ from payment availability, and country or program support changes over time. For EU consumer sales, check whether OSS applies and whether the EU-wide EUR 10,000 cross-border threshold is relevant to your supplies.
- Validate split math with current provider statements.
Build gross-to-net using explicit fee buckets, not placeholder assumptions. Where relevant, verify transaction fees, payout fees, and cross-border payout conversion ranges of 0.25% (EU) to 1% (other countries) against current processor or Polar documentation. If margins fail after refunds, FX, and disputes, adjust share terms or delay that corridor.
- Lock fee ownership, reserve policy, and payout cadence before first payouts.
Document who absorbs processor fees, FX, refunds, and dispute losses in contracts and internal approvals. Define a Rolling Reserve policy and a clear Payout Cadence. Delayed payouts can reduce refund risk, but manual payouts are still subject to country limits.
- Require compliance and recovery proof before expansion.
Tie payout eligibility to onboarding evidence based on location, business type, and requested capabilities. Map VAT/GST/Sales Tax requirements by corridor instead of relying on one global form. Before expanding GTM, test refund and dispute recovery end to end and confirm payout reconciliation from provider records to your ledger, including BalanceTransaction tracing and idempotent retry controls.
- Country screen completed for launch corridors (United States, European Union, and next two target markets)
- Split model validated with real statements from processor or Polar
- Fee ownership, Rolling Reserve, and Payout Cadence documented and approved
- Compliance gates mapped for VAT/GST/Sales Tax and onboarding evidence captured
- Refund and dispute recovery path tested with reconciliation proof
- Expansion gate defined with explicit pass/fail criteria before GTM commits
When you turn this checklist into rollout tasks, use Gruv Docs to map webhooks, retries, and reconciliation steps.
Frequently Asked Questions
How do indie platforms set Revenue Share payouts without a finance team?
Start with a simple operating model: one source of truth for seller liabilities, clear rules for who absorbs each fee, and delayed payouts while you validate operations. If you use Connect, the provider advises new platforms to have it take responsibility for negative balances on connected accounts. Reconciliation is the gate: each payout should tie back to included transactions, refunds, and held amounts, with minimal manual cleanup.
Which costs reduce margins the most in cross-border revenue share payments?
Margin loss is often cumulative, not from a single fee. A domestic card baseline of 2.9% + 30¢ can add +1.5% for international cards and +1% for currency conversion, and cross-border payouts can add +0.25% to 1.25%. If you model only core processing and skip FX or payout fees, corridor economics can look stronger than they are.
What is the safest starting Payout Cadence for a new platform?
There is no universal safest cadence, but delayed payouts are a conservative starting point. The provider notes initial payouts are typically 7-14 days after the first successful payment, and delay_days_override can be set up to 31. Use that delay window to catch refunds early and watch dispute behavior before you speed anything up.
How should a platform handle Chargeback losses between platform and sellers?
Set dispute ownership rules before launch and document them clearly. A chargeback is a formal cardholder dispute, and the disputed amount plus dispute fee is deducted from your balance, while the full process can take 2-3 months. If your platform is liable for negative balances on connected accounts, the provider states your platform is also responsible for disputes on those accounts.
What should be verified before expanding payouts to a new country like Singapore or Australia?
Verify three things before you commit: country support, connected-account verification requirements, and tax exposure. Market coverage and feature availability vary by country, and onboarding requirements also vary by country and account setup. For Singapore, overseas businesses can be required to register for GST when annual global turnover exceeds S$1 million and B2C supplies to Singapore exceed S$100,000 annually. For Australia, GST can apply to imported services and digital products, and the GST rate is 10%.
When does it make sense to use a Merchant of Record setup instead of direct processor payouts?
Use a Merchant of Record model when you need one entity to own the transaction-layer payment and tax responsibility. The MoR is the legally authorized entity that processes customer payments and is responsible for calculating, collecting, and remitting sales tax, VAT, or GST. Choose this path when centralized compliance ownership is the priority, not because you assume it is always cheaper.
Researched and edited by the Gruv editorial team. Gruv builds cross-border billing, payouts, and finance-operations software for global businesses.
Sources
- ato.gov.au/businesses-and-organisations/gst-excise-and-...trusted
- corplaw.delaware.gov/forming-delaware-corporationtrusted
- docs.stripe.com/payoutstrusted
- docs.stripe.com/connect/manage-payout-scheduletrusted
- ecfr.gov/current/title-31/subtitle-B/chapter-X/part-1...trusted
- iras.gov.sg/taxes/goods-services-tax-%28gst%29/gst-and-d...trusted
- irs.gov/businesses/small-businesses-self-employed/re...trusted
- irs.gov/businesses/employer-identification-numbertrusted
Educational content only. Not legal, tax, or financial advice.
Related Posts

The Freelance Payment Penalty: A Modeled Audit of Platform Fees, FX Spreads, and Payout Delays
The money rarely disappears through a single, easy-to-spot fee. The real loss is stacked. A marketplace takes its commission, a processor adds a charge for international cards, a bank or payment company converts the currency at a spread, a platform holds the funds before release, and a wire sheds a little to intermediaries on the way in. Each layer looks defensible on its own, but the worker feels the combined result as a smaller deposit and a later payday.
How to Respond to a Subpoena for Business Records
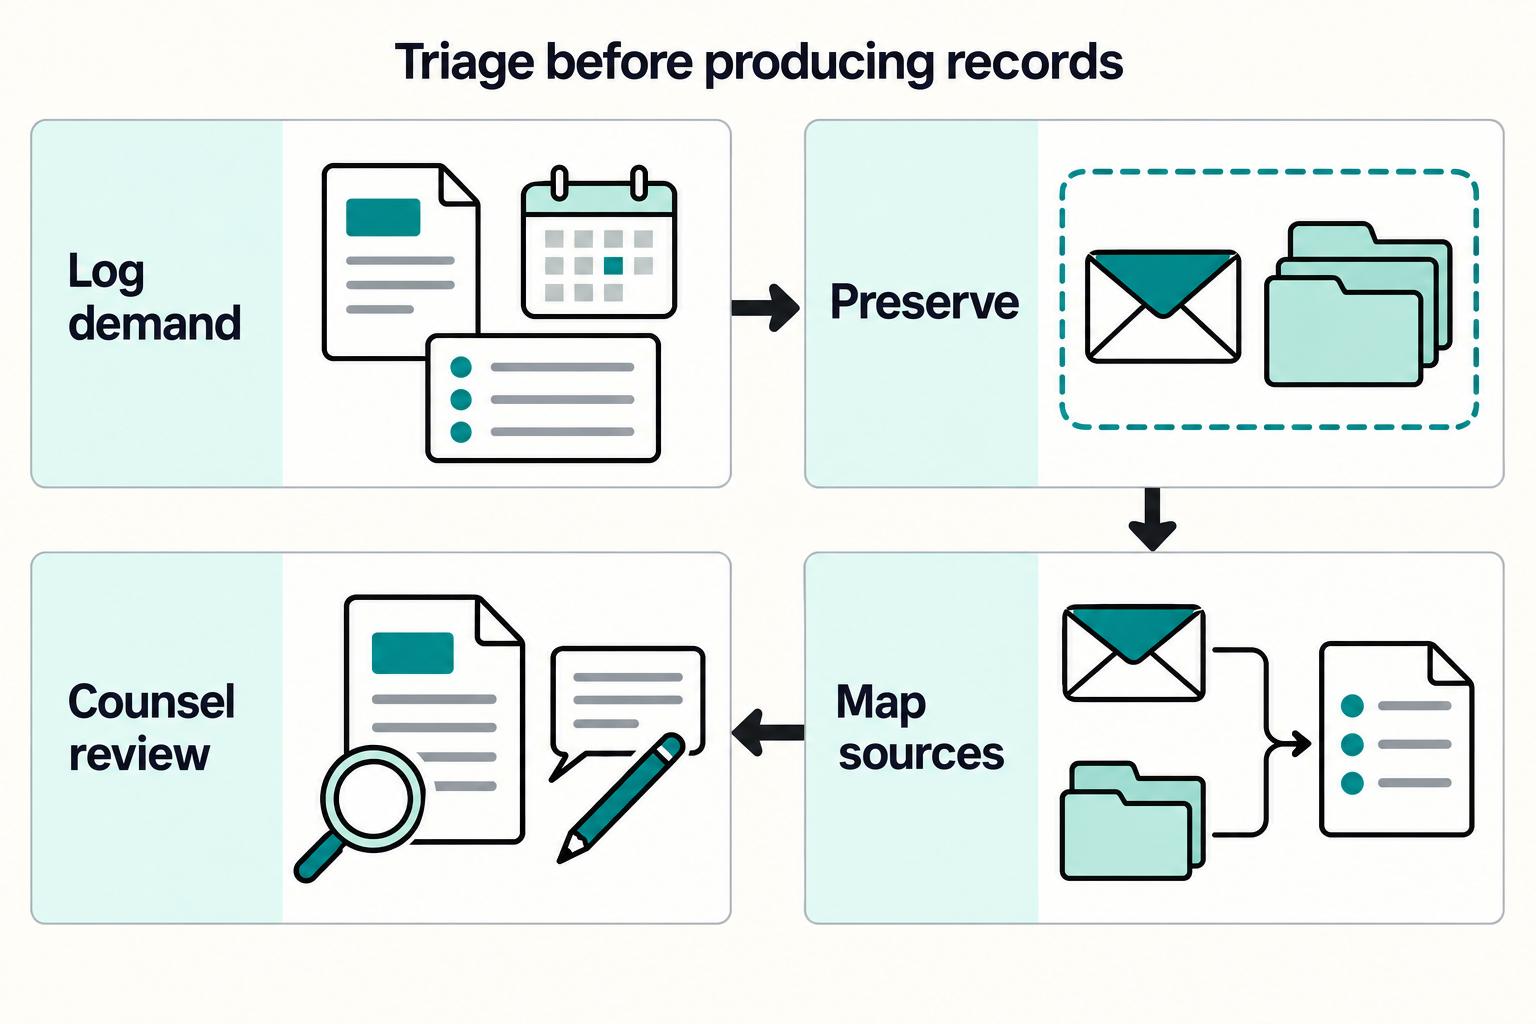
Move fast, but do not produce records on instinct. If you need to **respond to a subpoena for business records**, your immediate job is to control deadlines, preserve records, and make any later production defensible.
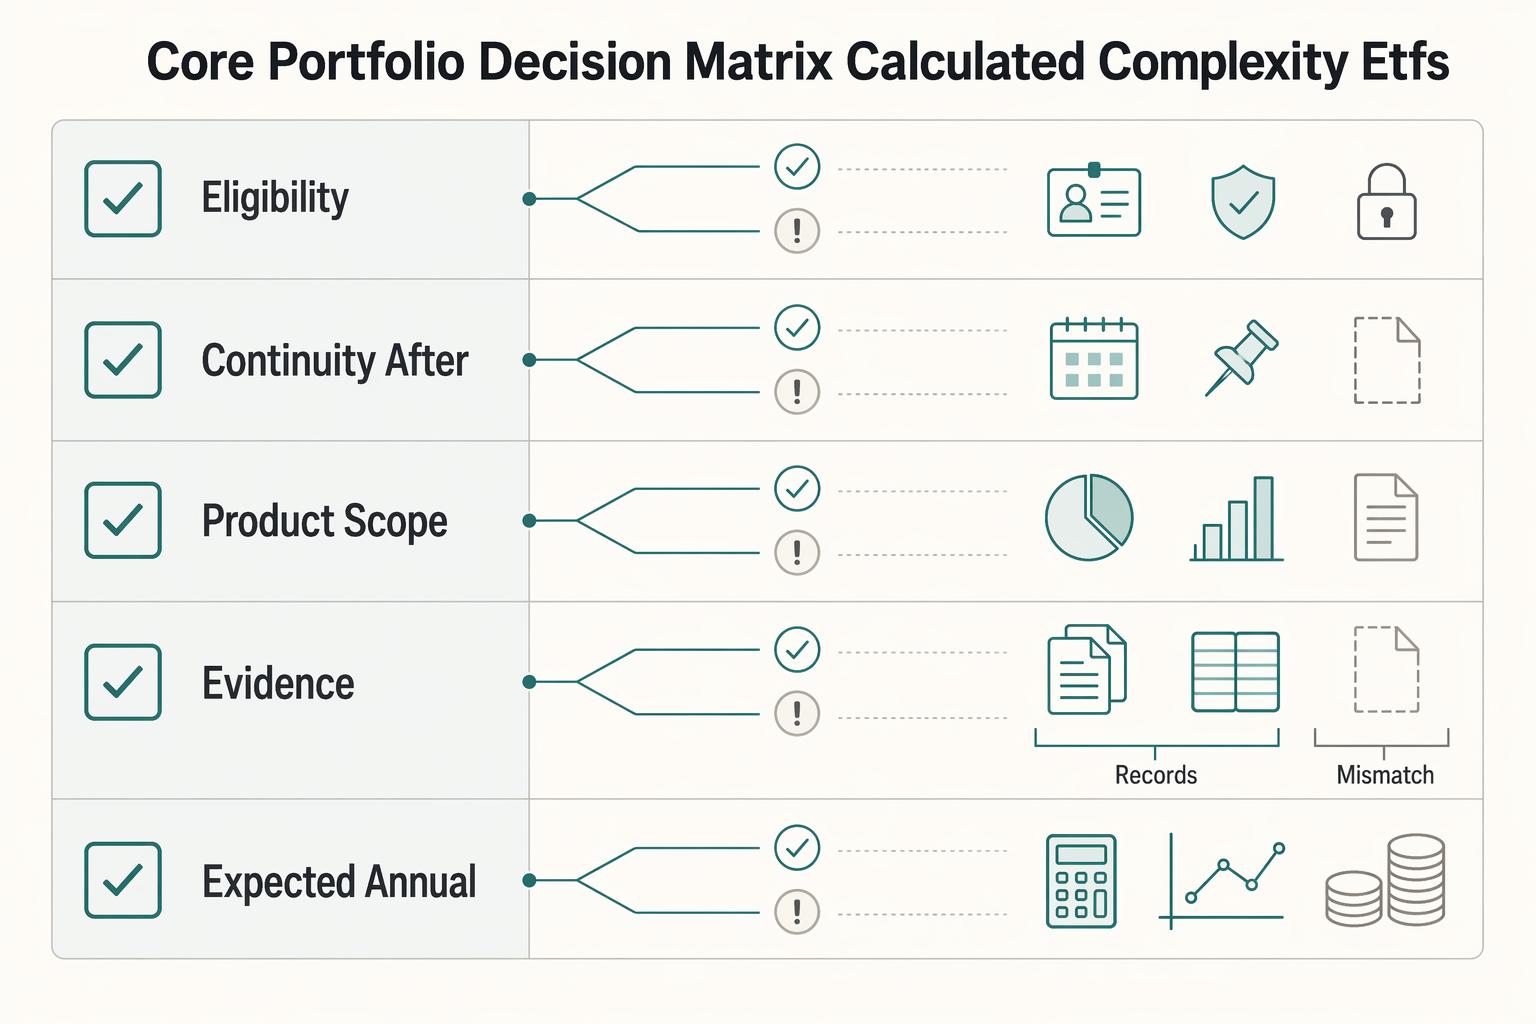
A US Expat's Guide to Investing in UCITS ETFs to Avoid PFIC Issues
The real problem is a two-system conflict. U.S. tax treatment can punish the wrong fund choice, while local product-access constraints can block the funds you want to buy in the first place. For **us expat ucits etfs**, the practical question is not "Which product is best?" It is "What can I access, report, and keep doing every year without guessing?" Use this four-part filter before any trade: