
Quick Answer
Start by mapping expense reimbursement workflows clients use into named states, then set a release gate before money moves. Require four checks on every claim: who submitted it, what evidence is attached, who approved it, and what payout was sent. Keep approval and payout as separate decisions, log reason codes for exceptions, and verify claim, receipt, and payout records match under one traceable chain. This gives faster payback without losing control when volume and cross-team handoffs increase.
Why client reimbursements break as you scale#
Step 1: Design for both fast payback and finance control from day one. If you are building reimbursement flows your clients will rely on, the job is not just paying someone back quickly. The harder part is paying fast while keeping a clean audit trail, handling policy exceptions, and making reconciliation routine enough that Finance can trust it.
The break usually starts when teams optimize for only one side. Product wants fewer taps, faster approvals, and less claimant frustration. Finance needs proof of spend, clear approval routing, and a record of who did what before money moves. Skip either side early, and you usually end up rebuilding the process later under pressure.
Check: before you add automation, confirm you can answer four questions for any claim: who submitted it, what evidence was attached, who approved it, and what payout actually went out.
Step 2: Treat approval drag as the scaling problem, not just policy. One source attributes many reimbursement delays to process drag in approval queues rather than policy itself. Manual expense management still shows up as spreadsheet handoffs, email approvals, and people chasing receipts after the fact. In practice, that can trap claimant money in approval queues, and people can end up covering costs out of pocket while waiting weeks to be reimbursed.
This is where scale gets expensive. Finance teams can spend up to 30% of month-end close chasing receipts and reconciling fragmented data. That is not just an internal productivity problem. It creates visible reimbursement drag for the claimant and added control risk for the business. Manual entry also raises the odds of errors and approval delays.
A practical red flag: if one person can intake the claim, approve it, and trigger payout, you have a segregation of duties problem. That setup can work when the team is small, but it does not hold once volume rises or exceptions become common.
Check: sample ten recent reimbursements and see whether the supporting receipt, approval decision, and payout record live in one traceable chain. If not, scale will make the gaps worse.
Step 3: Be explicit about scope before you redesign anything. Here, "client reimbursements" can be broader than a standard employee expense tool, depending on your setup. It may include contractor payouts, cross-border disbursements, or platform-led approval workflows where your product sits between claimant, approver, and money movement.
That scope matters because the failure modes can differ by workflow design. More payout states and cross-team handoffs can make status tracking and reconciliation harder, especially when ownership is fuzzy.
Your first decision rule is simple: if faster reimbursement would make it harder to reconstruct the claim later, do not ship the shortcut yet. Speed matters, but only if every approved claim can still be verified end to end.
Related reading: How to Upsell and Cross-Sell Existing Freelance Clients.
What to prepare before you redesign reimbursements#
Before you change screens or approval rules, document the current process so anyone can trace a claim end to end.
| Prep item | What to capture | Check or example |
|---|---|---|
| Written policy | Start with the written policy and keep exact wording | Example: "submit within 30 days of the expense" |
| Submission process | Capture how and where the claim is submitted | Someone outside the team can trace one claim from submission to payout |
| Approval flow | Capture who signs off | Note where status gets stuck, such as email approvals |
| Payout path | Capture how payout happens today | Note claims that are approved but not paid |
| Evidence pack | Use sample receipts, policy exceptions log, payout failure list, and audit trail exports | Use real examples, not polished ones |
Step 1: Write the current expense management workflow on one page. Start with the written policy, then capture in plain language: what is reimbursable, the submission process (how and where), the approval flow (who signs off), and how payout happens today. Add where status gets stuck, such as email approvals, missing receipts, or claims that are approved but not paid.
If your policy already uses exact wording, keep it exact. For example, if it says submit within 30 days of the expense, keep that language instead of replacing it with "submit promptly." Check: hand the one-pager to someone outside the team and confirm they can trace one claim from submission to payout without follow-up questions.
Step 2: Pull a minimum evidence pack from real claims. Use real examples, not polished ones: sample receipts, your policy exceptions log, a payout failure list, and audit trail exports showing who submitted, who approved, and what payout record exists. Since unclear coverage rules can delay or deny reimbursements, include edge cases along with clean approvals.
Check: for each sample claim, match the receipt, the exception decision if any, and the final payout outcome.
Step 3: Name decision owners before you touch automation. Set explicit ownership across Product, Payments Ops, and Finance for KYC readiness, AML review, VAT validation, and payout release decisions. Make handoffs explicit so each claim follows a clear decision path.
Check: for any sampled claim, you can identify who owns each decision from submission through payout release.
Related: Expense Management Software for Platforms: How to Automate Reimbursements and Policy Enforcement.
Map the end-to-end flow with owners and checkpoints#
Map reimbursements as a staged workflow with one accountable owner and one clear checkpoint at each handoff. That is what makes delays visible and makes automation useful instead of cosmetic.
Step 1: Split the reimbursement path into concrete states. Treat it as staged work, not one undifferentiated task. An Inputs, Process, Outputs view keeps the flow practical: spend and submission are inputs, scanning/review/approval are process controls, and reimbursement/tracking are outputs.
| State | What happens | Accountable owner | Handoff checkpoint |
|---|---|---|---|
| Spend | The expense occurs | Claimant or client ops contact | Core expense details are captured |
| Submission | The claim is entered | Support or operations intake owner | Claim is created and linked to the claimant |
| Receipt scanning | Receipt data is extracted or checked | Ops analyst or automation owner | Receipt is readable and matched to the claim |
| Review | Policy fit is checked | Finance or policy reviewer | Claim is evaluated against written policy |
| Approval | Reimbursement decision is made | Named approver | Decision record is complete |
| Reimbursement | Payment is released | Payments ops | Payout instruction matches the approved claim |
| Real-time tracking | Status is visible after release | Product or support owner | Claim can be traced from approved to paid or failed |
Check: hand a sample claim to someone outside the team and ask them to identify the current state, owner, and next checkpoint without extra explanation.
Step 2: Assign one owner per state and one verification point per handoff. Do not use shared ownership at the state level. Shared awareness helps, but one accountable owner prevents the common stall where each team assumes another team has the next step. Keep checkpoints specific enough to fail clearly, not vague sign-offs.
Step 3: Define the release gate before funds move. Make reimbursement release binary based on your existing written policy and required records. If a claim does not meet that gate, it should not move to payout. This is how you avoid claims that look approved in one system but remain blocked later.
Check: pull five recent claims and confirm each can be traced from receipt through decision to payout outcome. If traceability breaks, fix the state map before changing tools. Mapping first also clarifies where automation should remove repetitive data entry and reconciliation work.
If you track reimbursable client costs in QuickBooks, How to Automate Pass-Through Expense Tracking from Clients in QuickBooks walks through the workflow in more detail.
Choose your operating model before you buy tools#
Choose the operating model first, then pick tools that fit it. If claim volume is rising and your team keeps fixing duplicate entries, email version conflicts, or rekeyed line items, treat that as an operating-model problem, not a UI preference.
Step 1 Compare the three models by failure points#
Map each option against where your flow breaks: intake, approval traceability, payout handoff, and reconciliation.
| Operating model | Good fit when | What you gain | What usually breaks first |
|---|---|---|---|
| Spreadsheet and email process | Claim volume is low and one team can inspect each handoff | Low switching cost and simple process control | Version drift, missing attachments, manual re-entry, and late reconciliation |
| Point expense tool | You need structured submission, approval routing, custom rules, and reporting | Cleaner intake and approval discipline | Payout status and reconciliation still need cross-tool stitching |
| Platform-native reimbursement tied to Virtual Accounts and payout batches | You need reimbursement to sit close to balances and disbursement operations | Fewer boundaries between approval and money movement | Integration gaps can shift hidden work into ops and finance |
A documented manual pattern is: Excel templates, emailed submissions, scanned receipt attachments, then line-by-line manual entry into accounting software. That pattern is described as error-prone, dependent on manual reconciliation and controls, and associated with slower client invoicing.
Step 2 Use decision rules, not preferences#
Use correction work as your trigger, not volume alone. If people repeatedly fix duplicate claims, chase receipt quality, or re-enter the same details in multiple systems, the manual path is no longer low-cost.
A practical rule:
- Stay manual only while claims can be reviewed end to end without re-entry and handoff checks stay reliable.
- Move to a point tool when intake and policy review are the bottlenecks.
- Consider a platform-native model when payout visibility and reconciliation handoffs are the bottlenecks.
When you evaluate tools, map needs first, then prioritize integrations, custom rules, and reporting. Automation is commonly used to reduce human error and improve data quality.
Step 3 Test integration depth before buying#
Treat integration depth as a pre-purchase test, not a post-purchase surprise. Validate with your own sample claims:
- Webhooks coverage across submission, approval, payout initiation, payout failure, and final status
- Idempotent retries for duplicate events or duplicate payout requests
- Ledger journal completeness for the state changes Finance must audit
- Reconciliation export quality, including stable IDs across claim, approval, and payout records
Step 4 Mark unknowns and run a pilot#
Current evidence does not establish vendor-to-vendor performance deltas, implementation effort ranges, or ROI ranges. It also does not establish comparative outcomes for Virtual Accounts, payout batches, webhooks, idempotent retries, or ledger-journal completeness across vendors.
Use a controlled pilot and score manual touches per claim, correction frequency, and how often Finance needs off-platform evidence to reconcile reimbursement.
Set approval rules that speed good claims and catch risky ones#
Split approvals into two lanes: a fast lane for clean claims and an exception lane for anything that needs review.
| Claim condition | Routing | Required note |
|---|---|---|
| Documentation is complete, business reason is clear, policy check passes, and no exception flag exists | Release reimbursement | No extra manual review |
| Documentation is missing or unclear | Hold | Use a reason code and correction SLA |
| Policy checks fail | Route to manual review | Named owner and escalation path |
| Payout readiness or risk status blocks disbursement | Hold release | An approved claim can still be held before funds move |
| An approver does nothing | Trigger the defined action after a defined number of days | Send step-level event notifications to the right queue or app |
Step 1 Define the fast lane with two checks: proof and policy. A claim should move quickly only when documentation is complete and the policy check is clean. In practice, that means you can back it up with a receipt or invoice plus a clear business reason, and it follows your expense policy. If those checks pass and no exception flag exists, release without extra manual review.
Use one routing system so the logic stays consistent from submission onward. Then test recent claims to confirm the fast lane fires only when those fields are actually complete.
Step 2 Keep payout readiness as a separate release gate. Expense approval and payout release are not the same decision. If your operation already uses payee-readiness checks or risk holds, keep those as separate gates before funds move. An approved claim can still be held if payout readiness is not clear.
When you hold a claim, use a specific reason code instead of a vague pending status so the next action is obvious and traceable.
Step 3 Define exception ownership and timeout actions. Patchwork workflows built on spreadsheets, email chains, and unwritten rules become unpredictable because stuck claims have no clear owner. Assign owners by exception type before launch so cases do not stall.
Also define what happens when an approver does nothing. The same pattern used in tools like SAP Concur Expense, where an action is triggered after a defined number of days, is useful even if you use a different stack. Pair that with step-level event notifications so the right queue or app gets alerted.
If you are changing workflow logic, copy your current workflow, edit the copy, and test it before promotion.
Step 4 Write release logic as explicit if-then rules. Document the decisions in plain language:
- If documentation is complete, business reason is clear, policy check passes, and no exception flag exists, release reimbursement.
- If documentation is missing or unclear, hold with a reason code and correction SLA.
- If policy checks fail, route to manual review with a named owner and escalation path.
- If payout-readiness or risk status blocks disbursement, hold release even when the claim itself is approved.
After rollout, verify ten claims end to end. Each held claim should show a reason code, owner, and next action, and each released claim should be traceable without side-channel email or screenshots.
Build the payment rail sequence from claim approval to money out#
Treat reimbursement as a sequence, not a single action: record approval, post ledger journals, issue the payout instruction, capture provider status, and then reconcile end to end. This gives Finance an auditable trail and makes failures easier to investigate.
| Stage | What happens | Control point |
|---|---|---|
| Approval record | Create a distinct approval record and keep it linked to the claim | Record approval before any money moves |
| Journal posting | Post the accounting entry before sending payout instructions | Hold if the approved amount, ledger amount, and payout amount do not align |
| Ownership boundaries | Document how Virtual Accounts, payout batches, or a Merchant of Record are used | Who owns each handoff is explicit |
| Provider status handling | Store provider updates as a traceable event history | Design retries so one claim does not accidentally produce duplicate payouts |
| Closure | Match the claim, approval record, journal posting, payout instruction, provider status trail, and settlement result | Close only when the full chain reconciles |
Step 1 Record approval as its own control point. Create a distinct approval record before any money moves, and keep it linked to the claim. In practice, this is your first audit anchor when someone asks why a reimbursement was released.
Step 2 Post journals before payout release. Post the accounting entry before sending payout instructions, and keep those records tied together. Add a release check so the approved amount, ledger amount, and payout amount stay aligned; if they do not, hold the claim with a clear reason. Keep reconciliation on a regular cadence; monthly review is a stronger control than annual cleanup.
Step 3 Define ownership boundaries in the rail design. If your flow includes Virtual Accounts, payout batches, or a Merchant of Record, document exactly how each one is used and who owns each handoff. The key is not a universal default, but clear internal responsibility so exceptions and payout issues do not stall in ambiguity.
Step 4 Keep provider status handling replay-safe. Store provider updates as a traceable event history, and design retries so one claim does not accidentally produce duplicate payouts. A clear status trail is what keeps operations and reconciliation reliable under real-world payment issues.
Step 5 Reconcile the full chain before closure. "Paid" is not enough on its own. Close only when you can match the claim, approval record, journal posting, payout instruction, provider status trail, and settlement result without relying on side spreadsheets or email.
Add tax and jurisdiction logic without freezing operations#
Keep tax logic connected to reimbursements, but out of the payout release path. Use one audit trail ID across two lanes: reimbursement execution and tax artifact collection. That keeps approved claims moving while preserving a defensible record for Finance and Tax.
Step 1 Separate payout execution from tax artifact intake. Create a tax record tied to the same claim ID, payee ID, and payout ID used in approval and reconciliation. Reimbursement ops should release claims based on policy, ledger, and payout readiness, while Tax tracks document status in parallel.
For every paid claim, you should be able to pull one view showing the reimbursement event, jurisdiction tag, and tax-document status. The common break point is keeping W-8, W-9, or reporting notes in systems with no shared ID.
Step 2 Define collection rules explicitly, even when the outcome is "tax review required." These sources do not define exact W-8/W-9 triggers, and they do not define 1099 thresholds or deadlines. Do not infer them. Write your own rule by entity type and market, then mark each payee as required, not required, or tax review required.
Your tax evidence pack should track:
- payee legal classification
- jurisdiction coverage flag
- W-8/W-9 document status
- review flags for 1099, FATCA, and FBAR relevance where applicable
If the basis is unclear, hold the tax profile for review instead of automatically blocking the payout lane, unless your policy requires payment hold.
Step 3 Flag foreign-asset reporting cases early. For certain U.S. taxpayers, FATCA reporting is generally done on Form 8938, and that form is attached to the annual tax return. IRS guidance also says some taxpayers may need FinCEN Form 114 (FBAR) in addition to Form 8938, and points filers to an IRS comparison table to determine whether Form 8938, FBAR, or both apply.
Use jurisdiction/entity flags so these cases route to Tax before year-end cleanup. IRS states that foreign assets generally must exceed $50,000 to be reportable on Form 8938 in some cases, and thresholds can be higher. For specified domestic entities, the instructions cite $50,000 on the last day of the tax year or $75,000 at any time during the tax year. Entity type drives the decision, so avoid one-rule-fits-all logic.
Step 4 Connect U.S. reimbursement policy choices to the tax record. If you use an Accountable Plan, store that policy status on the reimbursement record and the payee/worker profile. Do the same for S-Corp cases that need separate review. This section does not define those rules; it defines an ops requirement: the distinction should be visible in-system, not reconstructed later.
If you need policy detail, see A Guide to Accountable Plans for S-Corp Expense Reimbursements. For a step-by-step walkthrough, see How to Calculate Quarterly Estimated Taxes With US and Foreign Clients.
Handle failures and recover without duplicate payouts#
Treat reimbursement recovery as a continuation of the same claim, not a new payment request. Keep one audit trail, require updated evidence, and only re-release when records align.
Step 1 Classify the failure before retrying#
Use a single failure code per claim so Approval Routing, Payments Ops, and Finance are resolving the same issue the same way.
| Failure mode | Recovery action | Owner | Evidence required before retry |
|---|---|---|---|
| Missing receipt | Return the claim for a missing or clearer receipt; keep the original claim ID | Claimant or support ops | Receipt attached, amount and merchant readable, no unresolved policy exceptions |
| Stale approval state | Reopen approval, require a current approval event, and void the old release intent | Approver or finance reviewer | Fresh approval timestamp, approved amount still matches claim, no changed policy or account status |
| Webhook retry storms | Pause auto-release, dedupe incoming events, and verify provider status out of band if needed | Integrations or payments ops | Provider event ID logged once, payout state confirmed, no second payout instruction created |
| Payout return | Mark the original payout as returned, correct destination details, then retry from the same claim record | Payments ops | Return reason recorded, payee details revalidated, original payout closed in ledger journals |
Before retry, your team should be able to view claim ID, payout ID, failure code, current owner, and collected evidence in one place.
Step 2 Make retries idempotent and reconcile before re-release#
Duplicate payments are common and expensive, and they usually come from multiple control gaps rather than one mistake. Retries should always reference the same claim and prior payout attempt, not create a fresh payable because someone retried.
Before re-release, reconcile ledger journals with the payout record. If you see a settled entry, an in-flight payout, or an unresolved return, stop and investigate before retrying.
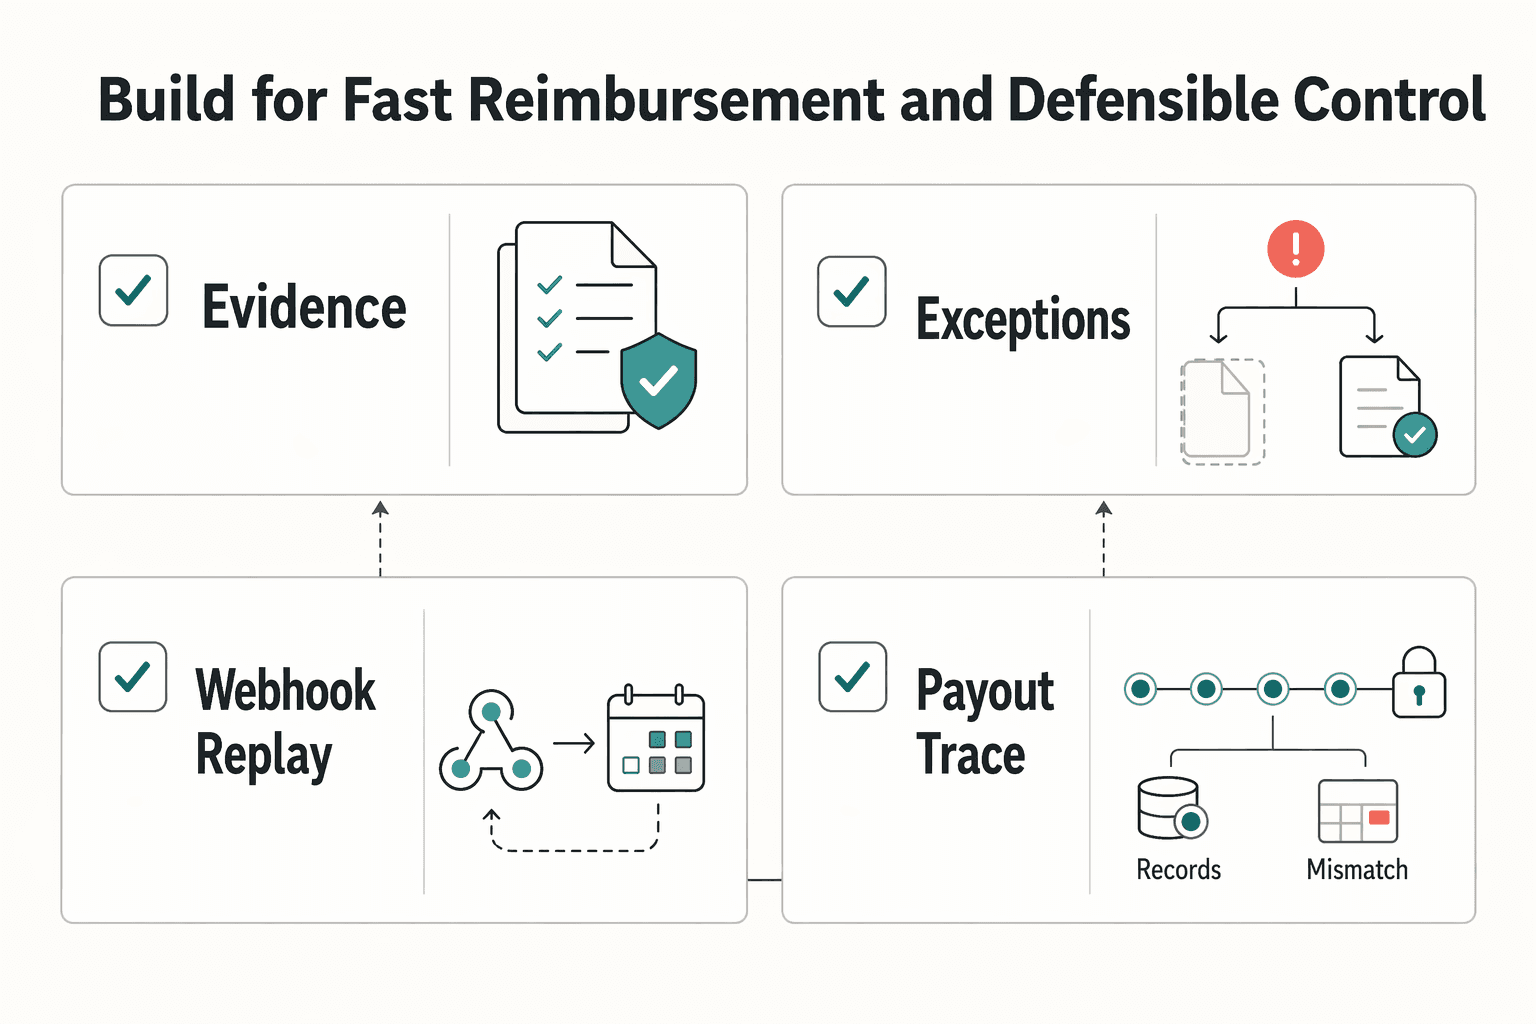
Build for fast reimbursement and defensible control#
Build for speed and control together: reimburse quickly only when your routing, documentation, and records are clear enough to defend later.
Step 1: Map the workflow as named states with one owner per state. Keep the states explicit: submission, receipt/document check, review, approval, reimbursement, provider status, and reconciliation. A workflow is not only tasks in order; it also includes the people, resources, and interactions needed to complete each step. If a handoff has no owner, it is not production-ready.
Use one verification standard across states: each change should show who acted, when they acted, and what evidence unlocked the next step.
Step 2: Define the written policy before automation. Document what is reimbursable, what documentation is required, submission and approval deadlines, and the reimbursement timeline. This is what makes approvals repeatable instead of case-by-case.
If you operate a US accountable plan, keep the documentation tight. Without proof that accountable-plan requirements are met, reimbursements may be treated as taxable wages; under a non-accountable plan, reimbursed amounts are treated as taxable wages.
Step 3: Set release checkpoints and exception handling before launch. If your tools use webhooks, define how your team handles duplicate or late events. Treat ledger records as a payout-release gate, not a cleanup step after money moves.
Use this launch checklist:
- Map states, owners, and required handoff evidence.
- Define approval routing rules for standard claims and policy exceptions.
- Wire webhook-triggered updates and document duplicate/late-event handling.
- Require ledger-record checks before payout release.
- Document exception recovery for missing documents, stale approvals, and payout mismatches.
A common failure mode is status mismatch across tools. If approval, payout instruction, and records do not align, hold reimbursement and rebuild the evidence pack before release.
Step 4: Validate coverage and constraints, then pilot. Before broad rollout, confirm your market and program constraints for payout methods, tax-document collection, and compliance checks. Then run one controlled pilot cohort and expand only after it shows both fast reimbursement and defensible records.
If a reimbursement has slipped into an overdue balance, How Freelancers Collect Overdue Invoices When Clients Stop Paying covers how to handle the follow-up.
Frequently Asked Questions
What is an expense reimbursement workflow for clients in a platform context?
It is the path from a client-related spend being submitted to the claimant being paid back. It includes approval routing, document checks, reimbursement release, and reconciliation tied together. The important distinction is that reimbursement is not just a payment. It is a payment backed by evidence, policy review, and an audit trail.
What are the required steps from submission to reimbursement?
There is no single universal checklist, but most workflows include submission with documentation, policy review, approval routing, reimbursement, and reconciliation records. A useful checkpoint before release is to confirm the key claim details match the approved record. If something does not line up, hold the claim for review rather than fixing it after release.
What usually breaks first in a manual expense approval workflow?
Usually it is not the payment step first. It is the patchwork around it: spreadsheets, email chains, and unwritten rules that make approvals unpredictable and inconsistent from one claimant to the next. That is where duplicate entries and inconsistent decisions start to appear.
When should we automate approvals instead of keeping manual review?
Automate when manual handling is slowing reimbursements or creating frequent rework. The practical benefit is not only speed. Automation can speed reimbursements, reduce duplicate entries, flag policy exceptions in real time, and maintain a full audit trail. Keep manual review for exceptions and unusual cases.
When should a claim be held for manual review even if speed is a priority?
Hold it when required documentation is missing or unclear, the claim appears outside policy, or key claim details are inconsistent. Fast reimbursements are valuable, but not when they create avoidable cleanup work later.
What records are mandatory for an audit trail and reconciliation?
Keep the original claim submission, supporting documents, approval decisions, policy-exception flags, and reimbursement records together. Your reconciliation process should preserve a consistent claim ID across records so failed or returned reimbursements can be traced back to the same claim.
How do we balance fast payouts with KYC, AML, and tax-document checks?
Requirements for KYC, AML, and tax documentation vary by company and jurisdiction, so avoid assuming one universal rule. Define the required compliance checks in policy, apply them consistently in the approval flow, and balance fast reimbursement with oversight.
Try a related tool
Researched and edited by the Gruv editorial team. Gruv builds cross-border billing, payouts, and finance-operations software for global businesses.
Sources
- docs.cpuc.ca.gov/PublishedDocs/SupDoc/A2407003/8118/565499133...trusted
- fincen.gov/report-foreign-bank-and-financial-accountstrusted
- irs.gov/businesses/corporations/fatca-information-fo...trusted
- irs.gov/forms-pubs/about-form-8938trusted
- ncbi.nlm.nih.gov/books/NBK2638trusted
- sec.gov/Archives/edgar/data/0000104889/0001193125261...trusted
- southpasadenaca.gov/files/assets/public/v/1/finance/documents/fy...trusted
- va.gov/budget/docs/summary/fy2024-va-budget-volume-...trusted
Educational content only. Not legal, tax, or financial advice.
Related Posts

How to Run an S-Corp Accountable Plan With Defensible Records
Start here: treat reimbursements as a formal employer process, not informal owner spending. That matters most when you are a solo owner-employee, because you are both the spender and the approver. When the business purpose and support are unclear, you are not running a reimbursement process you can defend. You are moving money and creating cleanup risk later.

How to Create a Travel Policy for a Remote Team
A travel policy for a remote team works only if it tells you what to verify, what to log, and when to stop and ask for advice. The job is simple: do not rely on generic travel lore when tax, immigration, or contractor-status rules may change from one country to the next.

How Platform Teams Automate Reimbursements With Enforceable Policy Controls
Buy an expense tool only if it can do two things at once: enforce policy before money moves, and leave a clean trace after reimbursement hits payment and accounting. Feature-led buying often misses that. You may get easier submissions and faster approvals, but Finance inherits the cleanup when a claim cannot be tied back to the right evidence, payment record, or ledger entry.