
Quick Answer
Start with one Stripe Payment Link for a single SKU, then keep traffic limited until controls are proven. For no-code payment page creation, run a live payment and a refund, confirm each result is visible in both provider records and your internal Ledger, and block duplicate postings with webhook deduplication plus idempotent writes. Use finance-approved methods only, especially when costs can vary from 2.9% + 30¢ cards to method-specific add-ons.
Launch a no-code payment page fast without creating finance ops debt#
For platform teams, no-code payment page creation is a two-part job: a simple page can go live quickly, and teams then need additional time to verify operational fit. Visual builders, templates, and configuration can make the first publish fast. The real work is treating that first publish as the start of an operational process, not the finish.
Step 1 Set expectations early on launch speed and readiness#
Set expectations early: the page can go live quickly, but operational readiness takes longer. A simple, fixed-price offer is often the cleanest fit for a no-code start.
Before you send live traffic, confirm four basics: what is being sold, who owns the page, how finance will identify each payment later, and what still needs engineering follow-up. In practice, no-code and pro-code usually meet here.
Step 2 Confirm the use case actually fits a no-code launch#
Confirm the use case actually fits a no-code launch. No-code is generally a better fit when pricing and plans can be configured through visual interfaces without code deployments.
It is a weaker fit when pricing depends on metered usage such as API calls, compute minutes, or storage. In those cases, use the page for a fixed-price component rather than your full pricing logic.
Step 3 Define success before setup starts#
Define success before setup starts. The goal is not just to publish a checkout page. It is to choose the right page type and include enough control for finance, ops, and engineering to run it safely.
Use a simple handoff check: someone outside the builder should be able to tell what page type was chosen, what transaction it supports, and what still needs code or process follow-up. If that is unclear, the launch is not ready.
Step 4 Document the limits before rollout#
Document the limits before rollout so teams do not overpromise.
Keep a short evidence note with provider, page type, intended use case, and open questions. That helps surface gaps before launch instead of after customers are already trying to pay.
Related: How to Use Stripe Payment Links for Easy Invoicing.
Pick the right no-code path before you build#
Your first real decision is the payment path. Pick it based on where customers will discover and complete payment, then confirm the platform supports the pieces your flow actually needs. No-code can be fast, but it is not the answer for every scenario.
Step 1 Start with a simple path comparison#
Start with a simple path comparison, then pressure-test it against the platform's real feature set and limits.
| Path | Setup speed | Flexibility | Customization/performance control | Integration effort |
|---|---|---|---|---|
| No-code platform | Often days or weeks | Limited by the platform feature set | Lower than a custom build | Lower initial effort |
| Real code | Often months or even years | High flexibility | High control | Higher implementation effort |
Use this as a decision draft, not a universal ranking. The core tradeoff is speed and cost-efficiency versus customization and performance.
Step 2 Stress-test the choice against operating reality#
Before rollout, stress-test the choice against operating reality.
Check three things:
- Where customers first see the payment request.
- What page and flow context the platform can support.
- Which transaction details your process must retain for later reconciliation and support.
Then verify the required pre-built components are present, not just the payment screen itself, including basics like payment buttons and any user or account-related elements your flow depends on.
Step 3 Set an upgrade trigger before launch#
Set an upgrade trigger before launch. No-code can move you to market in days or weeks, while deeper custom builds may take months or even years.
Move beyond the basic path when platform limits start blocking required customization or performance. If workarounds keep replacing supported configuration, that is your signal to plan a deeper integration.
For a step-by-step walkthrough, see How to Build a Contractor Payment System for a Nursing or Allied Health Staffing Agency.
Gather the minimum inputs before the 5-minute build#
The fastest clean launch starts before you open the builder. Lock the minimum inputs first so you do not create avoidable cleanup later.
Step 1 Define the objective and list the key functionality#
Define the objective for this payment page and list the key functionality it needs. As a practical pre-build artifact, sketch a short workflow/data-flow outline so the team agrees on what the buyer does and how finance will recognize the transaction.
Use a quick check: a teammate should be able to read the outline and understand what the customer is buying and how the transaction is tracked.
Step 2 Confirm the policy limits that affect your flow#
No-code payment collection is available on some form platforms, but launch limits still depend on provider policy. Confirm the policy limits that affect your flow, especially fair-usage conditions and privacy posture.
Document where those limits apply before you publish.
Step 3 Run early user validation on the draft flow#
Run early user validation on the draft flow and fields before full rollout. This reduces a common failure mode: building extra features your audience would not use.
Keep the buyer-facing surface as simple as possible for day-one support.
Step 4 Define tax-profile dependencies up front#
If your flow may trigger tax reporting, define tax-profile dependencies up front. IRS instructions cover both Forms 1099-MISC and 1099-NEC and explicitly include filing dates and taxpayer identification numbers (TINs), so capture TIN collection ownership, storage location, and downstream Form 1099 matching in your pre-build inputs.
Before you publish the page, test the full flow in a sandbox so you can catch errors before customers see them. How to Build a Payment Sandbox for Testing Before Going Live walks through that setup.
Build the first live page in under 5 minutes#
Start narrow. Launch one live page for one real SKU, get it working end to end, then expand. That is the simplest way to keep the first setup clean and reconcilable.
| Method or fee | Listed pricing | Note |
|---|---|---|
| Domestic cards | 2.9% + 30¢ | Per successful transaction on Stripe standard pricing |
| Manually entered cards | +0.5% | Adds to card pricing |
| International cards | +1.5% | Adds to card pricing |
| Currency conversion | +1% | Adds when currency conversion applies |
| ACH Direct Debit | 0.8% | $5.00 cap |
| Klarna | 5.99% + 30¢ | Shown in standard pricing |
| Managed Payments | 3.5% | Separate fee per successful transaction on top of standard processing fees |
Step 1 Create the page using a prebuilt UI option#
Create the page in Stripe using a prebuilt UI option for your primary SKU. Use a pricing setup that matches the billing cadence you already approved.
The prebuilt UI is designed to save engineering time, so it is a practical first move for a no-code launch. Keep the product name plain and finance-friendly so the payment is recognizable later.
Checkpoint: before publish, compare the page preview to your SKU sheet line by line: name, amount, currency, and tax handling.
Step 2 Enable only the checkout options you can price and reconcile#
Enable only the checkout options you can price, support, and reconcile. More payment methods can help conversion, but they also change cost and operations.
On Stripe standard pricing, domestic cards are 2.9% + 30¢ per successful transaction. Manually entered cards add +0.5%, international cards add +1.5%, and currency conversion adds +1%. ACH Direct Debit is listed at 0.8% with a $5.00 cap. Klarna is shown at 5.99% + 30¢ in standard pricing, while Managed Payments can add a separate 3.5% fee per successful transaction on top of standard processing fees, and country pricing pages can override listed tables.
Because gateway costs can change, re-check current fees before you publish.
Use a hard rule: if finance has not approved the fee path, do not enable the method yet.
Step 3 Publish one canonical distribution path first#
Publish one canonical distribution path first: the direct URL. Use it as your source of truth for testing and internal sign-off.
Then add channel variants only where your setup supports them. If a scan-to-pay option is available, generate and test it on a phone. If an embed option is available and useful for your site, point it to the same live page so reporting stays aligned.
Checkpoint: test every enabled path and confirm they land on the same price, currency, and product identity.
Step 4 Confirm the buyer-facing trust details before you share#
Before you share the page outside your team, confirm the buyer-facing trust details from your own launch checklist.
Run one final pass in private browsing and on mobile, then save an ops evidence pack: live URL, publish date, enabled payment methods, page screenshot, confirmation screenshot, and internal SKU mapping.
Once one live payment succeeds end to end, move straight into reliability hardening for reconciliation, support, and refunds.
Turn a quick launch into a production-safe checkout in 30 minutes#
A fast launch is only useful if it holds up under real operations. Before you send broader traffic, run a short controls review so payments, refunds, and reconciliation work in practice, not just in a demo.
Step 1 Document control boundaries and treat unknowns as blockers#
Document control boundaries first, and treat unknowns as launch blockers. PCI scope, tokenization requirements, and encryption requirements are not confirmed, so do not assume those are covered until your provider documentation and security owner confirm them.
If you use an embedded flow, capture exactly what was published. In PayPal's Buy Buttons flow, PayPal provides a generated snippet and says account-side updates sync automatically to your website, so checkout behavior can change without a code deploy.
Checkpoint: save current checkout evidence before any edits: live URL, screenshots, provider-side configuration, and the embed artifact if used.
Step 2 Define how payment outcomes are recorded#
Define how payment outcomes are recorded in your own system. Success, failure, and refund outcomes should be traceable in your internal records, not only visible in the provider dashboard.
Keep webhook schemas, delivery guarantees, and ledger mapping implementation-specific and explicit inside your team.
Checkpoint: run one payment and one refund, then confirm both appear in provider records and your internal records with a clear match path.
Step 3 Add retry safety on every write path you control#
Add retry safety on every write path you control. A retried action should not create duplicate charges, orders, or refunds.
Because idempotency formats and retention details are not specified here, define duplicate-handling rules in your own implementation and make sure support and ops workflows follow the same rule.
Checkpoint: test repeated submissions for key write actions and confirm duplicates are prevented or safely detected.
Step 4 Set a go or no-go gate before scaling traffic#
Set a clear go or no-go gate before scaling traffic. "One payment worked" is not enough.
Use a short pass list:
- Live payment path succeeds on the real page you will share.
- Refund path completes and is visible in provider and internal records.
- Reconciliation is clear enough that your team can match customer action to provider and internal records without guesswork.
If any check fails, keep rollout limited, fix the gap, and rerun the same tests before expanding traffic.
Related reading: How to Create a High-Converting Freelance Services Page.
Set compliance gates before you scale traffic#
Once checkout and reconciliation work, compliance becomes the next hard stop. Before you scale traffic, document where KYC, KYB, and AML checks happen, who owns each check, and which actions are blocked when checks are incomplete or unresolved.
Step 1 Map checks to the customer journey#
Separate onboarding checks from ongoing monitoring first. KYC and KYB focus on proving who a customer or business is, typically at onboarding with periodic refreshes, while AML starts at onboarding and continues through sanctions screening and transaction-pattern monitoring.
Map those checks to your payment-page stages: account creation, business activation, first payment acceptance, first payout, and post-launch monitoring. Then define the blocked action for each stage in your policy. Keep those rules explicit by provider, program, and jurisdiction.
Checkpoint: maintain a one-page matrix for each stage: required check, blocked action, owner, and evidence location.
Step 2 Prepare the document pack before go-live#
If onboarding depends on KYC or KYB, assemble the document pack before broad launch. Common evidence includes government-issued photo ID, proof of address, certificates of incorporation, shareholder registers, passports, website screenshots, projected transaction volumes, and clear business context such as business model, ticket size, monthly volume, and geographic disclosures.
Fast launches can stall here when ownership documents are incomplete or the team cannot clearly explain who is paying, from where, and for what. No-code speed only helps when the operating process is just as explicit.
Checkpoint: run a dry review with finance or ops and confirm each required document has an owner, a current file, and a retrieval location.
Step 3 Set coverage promises before sales makes promises#
Set this decision rule early: treat coverage as variable, not universal, and validate promises against provider, program, and jurisdiction requirements.
Document approved markets, restricted geographies, required verification states, and items still under review so commercial teams do not overpromise.
Step 4 Add exception paths for holds and reviews#
Plan post-launch exception handling up front, because AML continues after onboarding.
| Exception state | Immediate action | Evidence to keep |
|---|---|---|
| Hold on funds or account activity | Follow your escalation policy and pause affected payout or expansion steps when required | provider notice, internal case owner, affected transaction IDs |
| Verification failure | Keep the action blocked and request missing or corrected documents | failed check result, resubmission request, new document versions |
| Manual review queue | Keep the case in review and record a decision before unblocking activity | review notes, timestamps, provider references, decision outcome |
Operator rule: any hold, verification failure, or manual review should route to a named queue with an owner and a next-action date. If your payment-page setup cannot represent those states clearly, treat that as a scaling constraint.
Define ownership across product finance and engineering#
Controls do not hold unless ownership is explicit. In merchant processing, the flow spans transaction intake, authorization, fund collection, and reimbursement, so ownership should cover the full path rather than just the page itself.
Step 1 Assess risk first, then assign owners by control#
Assess fraud and error risk before assigning controls. Then map each control to a named owner in the relevant functional area based on which part of the flow it influences, and keep IT-related controls tied to the related financial operation.
Document this in a written internal control manual, and distribute it to the managers and department heads responsible for implementation and supervision.
Step 2 Clarify accountability for transaction-impacting changes#
Before teams change payment operations, make sure accountability for affected controls is clear across the relevant functional areas. When ownership is unclear, cost controls and risk management are harder to keep effective.
Treat unclear control ownership or missing control documentation as a control gap to fix before scaling.
Step 3 Run a recurring controls and exceptions review#
Hold a recurring operating review focused on control exceptions, not just growth reporting. Review unresolved issues and leave with clear owners and dated next actions.
Use case sampling to verify that documented controls are being applied consistently and that supporting evidence aligns.
Step 4 Track growth and control quality together#
Track performance so growth is not read in isolation from control quality. Merchant processing is high-volume and low-margin, so control breakdowns can become costly.
If control exceptions increase, treat that as an operating risk that needs remediation before further scaling.
Connect payment events to reconciliation and payouts#
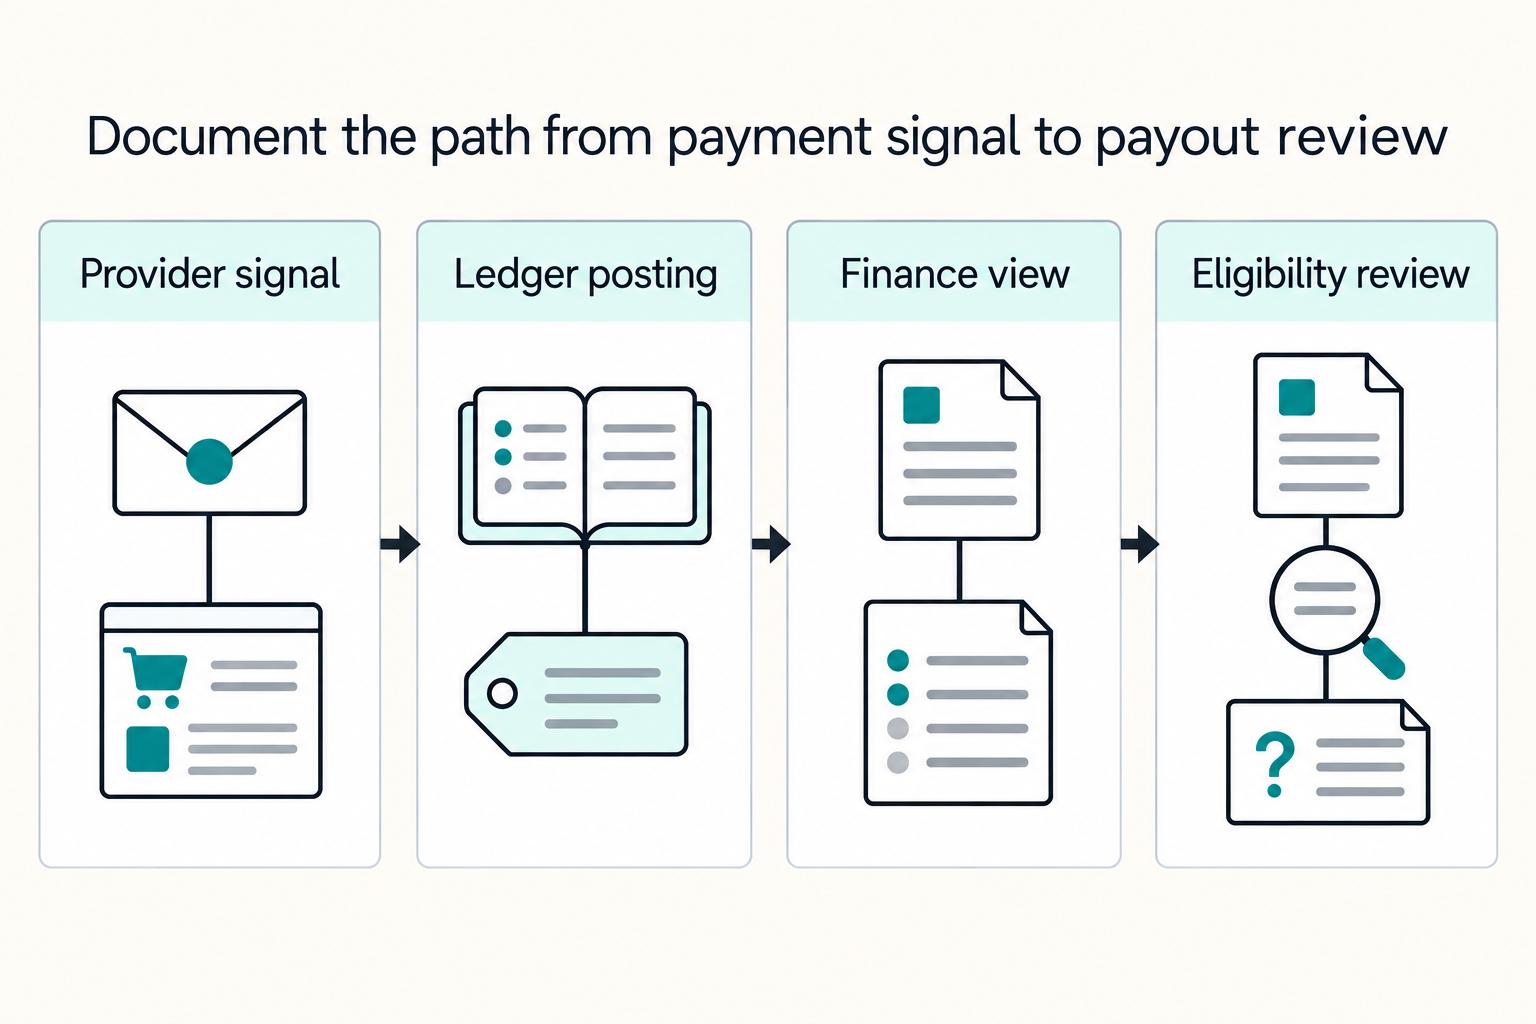
A payment flow is only controllable if you can trace it from provider signal to internal posting to payout decision. Define exactly when a provider payment signal becomes a Ledger entry, when finance can rely on that entry, and when it becomes payout-eligible. Do not treat a raw success signal as payout authorization by itself.
Step 1 Map the payment sequence in writing#
Write the order of operations down:
- Ingest the checkout result from your provider.
- Post the economic event to your internal
Ledger. - Expose the resulting balance or receivable state to finance.
- Evaluate payout eligibility against policy.
The Payment Links documentation separates tracking from post-payment status, which is a useful operating model. Use provider tracking and post-payment states as inputs, then apply your own internal posting and eligibility logic.
Your target state is one traceable chain per transaction: payment link or checkout reference, provider payment reference, internal order or case ID, Ledger posting timestamp, and payout-eligibility status.
Step 2 Link inbound collections to outbound obligations with Payout Batches#
If you collect from one side and disburse to another, enforce a hard join between collections and payouts. Xendit describes support for receiving and sending payments, and lists Batch Payouts as a send capability using a simple Excel upload. Treat that batch artifact as evidence only when your own mapping keys are included.
At minimum, store batch ID or file name, obligation period, currency, total amount, item count, and the underlying payable-item list. Finance should be able to answer quickly which inbound collections funded the batch and which obligations are still open.
Step 3 Handle non-link intake as a separate confirmation path#
If your setup includes bank-transfer rails or other non-link collection methods, confirm that capability in your provider configuration before you design around it. Do not assume link-based checkout behavior and non-link behavior follow the same timing or return patterns.
When you consume Webhooks or similar notifications, treat them as one signal and match against expected reference, amount, and customer record before posting to the Ledger. This section does not establish webhook schema, delivery, or replay guarantees. Route mismatches, missing references, and late returns to an unmatched-item queue instead of marking them payout-eligible.
Step 4 Add daily and month-end verification points#
Use standing checks, not ad hoc cleanup:
- Run a daily completeness check between provider-tracked and post-payment items and internally ingested events plus
Ledgerpostings. - Maintain an unmatched-item queue with owner, age, amount, currency, provider reference, and last action.
- Export a month-end evidence pack with provider payment reports, internal posting extracts, payout batch files, and final exceptions.
These checks turn payment-link operations into a repeatable reconciliation and close process.
Handle failure modes before customers find them#
Assume failure modes are normal. Duplicate events, delayed statuses, and configuration drift can happen. Use your Ledger as the final decision point before support or ops tells a customer anything.
Step 1 Check the page and method configuration before traffic lands#
Common preventable incidents come from link state and method mismatch. Provider docs note that deactivated payment links show a deactivation page, so run a live-link check at publish time and again after pricing or campaign changes. If you use Payment Links, verify the active URL, expected amount, currency, support contact, and confirmation-page behavior.
Check payment methods separately. Available methods vary by country, currency, and integration choices, so re-test the exact checkout combination after country, currency, or product changes instead of assuming the current method set still fits.
Step 2 Receive first, then deduplicate and post once#
Acknowledge webhook receipt quickly, store the message, and process it asynchronously. This queue-first pattern helps prevent downstream slowness from causing delivery-failure cascades.
Assume duplicate delivery can happen. Stripe recommends logging processed event IDs and skipping already handled events, so enforce dedupe before posting to the Ledger. If an event repeats, return success and avoid a second posting.
Use Idempotency for retryable writes that create or update payment-side objects. Reusing the same key returns the same result, and keys can be removed after at least 24 hours. Beyond that window, route retries to manual review against provider references and Ledger state.
Step 3 Hold ambiguous status changes instead of guessing#
With Stripe, delayed updates are expected, including automatic retries of undelivered webhook events for up to three days. Keep an explicit operating state for "payment signal received, final status pending," and do not treat checkout success alone as final settlement or dispute/refund resolution.
If payloads are incomplete or conflicting, move them to an exception queue instead of forcing a state change. Give support and finance a clear case record: provider event ID, event type or eventCode, received time, internal order or case ID, current Ledger state, and block reason.
Step 4 Give support a decision tree tied to technical signals#
Support should be able to resolve common payment tickets without engineering escalation. Their case view should include the payment-link URL, provider payment reference, latest webhook time, current Ledger status, refund or dispute flag, and exception-queue status so they can quickly separate delayed confirmations, method mismatch, and duplicate-event cases.
Keep decline handling explicit. Provider decline codes and network advice codes can imply different next steps by network, so avoid a single "card declined" bucket. Map internal categories to actions like retry later, use another method, update card details, or escalate, and keep the deeper playbook linked in support docs: Payment Decline Reason Codes: A Complete Reference for Platform Engineers.
If customer claims and technical signals conflict, pause the action and reconcile to Ledger truth before making refund, retry, or payout decisions.
Validate vendor readiness and coverage before rollout#
Even a clean internal setup can fail if the provider is not ready for your actual rollout. Treat vendor readiness as a launch gate, not a cleanup task.
| Area | What to confirm | Article detail |
|---|---|---|
| Pricing model | Published rates and whether your baseline is a standard card price | 2.9% + 30¢ |
| Geographic and currency coverage | Presentment currencies supported for your exact methods | Not just "over 135 currencies" |
| Payment-method limits | Invite-only access, documented market limits, and provider-controlled non-card currency support | Some payment methods are invite-only |
| Payout constraints | Supported payout rails, countries, and stated limitations | Require evidence before approval |
| Incident communication | Public status channel, subscription options, and communication caveats | Email, SMS, and Slack subscriptions; information may not always be complete or up to date |
Step 1 Verify public status and legal operating signals#
Start with records you can verify directly. For UK entities, check Companies House for company status and the Financial Services Register for whether a firm is or was authorised for regulated activity.
In this research, Naudapay Limited appears in Companies House as active (company number 11741664, incorporated 27 December 2018), and Noda's terms page lists FCA reference 832969.
Save the legal entity name, registration number, and regulator reference in your vendor file, then confirm those details match the provider's legal pages. Keep one caveat explicit: an active company record does not mean the product is open to new business or that all payment flows you need are available.
Step 2 Confirm onboarding and transaction availability before procurement advances#
Check the vendor's current live onboarding state, not historical sales material. The clearest caveat here is Noda / Naudapay Limited: Noda says it is not onboarding new customers and is not accepting or facilitating any new payment transactions or new funds, while continuing limited support for refunds/returns and chargebacks where applicable.
Treat language like that as a hard availability constraint for a new rollout unless you have written clarification.
Apply the same check to similar no-code products: account registration and email verification may be required before use, and some payment methods are invite-only. A practical rollout risk is building the page first, then discovering method or currency access is restricted by provider or payment-method rules.
Step 3 Build a known-unknowns list and require evidence#
Before approval, require a short procurement evidence pack that covers:
- Pricing model: published rates and whether your baseline is a standard card price such as 2.9% + 30¢
- Geographic and currency coverage: not just "over 135 currencies," but the presentment currencies supported for your exact methods
- Payment-method limits: invite-only access, documented market limits, and provider-controlled non-card currency support
- Payout constraints: supported payout rails, countries, and stated limitations
- Incident communication: public status channel, subscription options, and communication caveats
For incident quality, note both sides: one status page supports email, SMS, and Slack subscriptions, and also states information may not always be complete or up to date. Use the same diligence framing risk teams use before production rollout: verify where data resides, how it is managed, and how it is protected.
Use a launch scorecard your team can approve in one meeting#
If the launch decision cannot fit on one page with clear pass or fail evidence, do not send traffic. The scorecard exists to force product, finance, and engineering to make the same go or no-go call before real customers hit the page.
| Control | Pass condition | Evidence |
|---|---|---|
| PCI compliance assumptions | Setup fits SAQ A-style outsourcing conditions and you are not collecting or storing payment data outside that boundary | Hard pass/fail |
| KYC/AML gating behavior | Define the exact blocked action when checks are incomplete, such as account creation, payment acceptance, payout release, or both | If manual review exists, name the owner and required evidence |
| Webhooks reliability | Require both a fast 2xx response before slow downstream work and duplicate-event protection via processed event IDs | Hard pass/fail |
| Retry safety | Require idempotency keys on write paths | Retry assumptions match the provider key-retention window, at least 24 hours in docs |
Step 1 Build a one-page scorecard with evidence, not opinions#
Use one format for every line: item | owner | pass/fail | evidence | blocker. Group items under conversion readiness, control readiness, and operational readiness.
Conversion readiness should stay short: confirm the page works, the method and currency combination is available for your target market, and the customer-facing business identity, support contact, and refund terms are correct. If market or program coverage is still unclear, add a direct CTA on the line item: request access, read docs, or talk to sales.
Control readiness is usually where launches slip. Operational readiness confirms alerting, incident visibility, and whether finance can trace funds after the first payment.
Step 2 Mark PCI, KYC/AML, and webhook controls as hard pass/fail#
Do not accept "mostly ready" for these controls.
PCI Compliance assumptions: mark pass only if your setup fits SAQ A-style outsourcing conditions and you are not collecting or storing payment data outside that boundary.KYC/AML gating behavior: if checks are required in your flow, define the exact blocked action when checks are incomplete, such as account creation, payment acceptance, payout release, or both. If manual review exists, name the owner and required evidence.Webhooks reliability: require both a fast2xxresponse before slow downstream work and duplicate-event protection via processed event IDs.Retry safety: require idempotency keys on write paths, with retry assumptions that match the provider key-retention window, at least24 hoursin docs.
Step 3 Prove finance can trace funds from collection to payout#
Anchor finance readiness in money-movement records. For flows on this provider, map settlement to balance transactions, then confirm payout linkage with a payout reconciliation report your team can review as a settlement-batch view.
Run one end-to-end trace test: payment reference, ledger posting time, refund status, and payout linkage must align. For refunds, require explicit lifecycle visibility: pending, requires_action, succeeded, failed, canceled. If finance cannot answer "where is this money now?" from one record, rollout is early.
Step 4 Gate traffic in phases and stop at first dirty reconciliation#
If you use phased launch gates, a common sequence is internal test, limited cohort, then full rollout. This sequence is operational risk control, not a legal mandate.
Internal test: prove successful payment, failed payment, and refund flows with matching ledger outcomes.Limited cohort: prove duplicate webhooks are handled and daily reconciliation remains clean.Full rollout: allow only when checkout events, ledger entries, and payout reporting have no unexplained mismatches.
If country, method, or program coverage is still ambiguous, hold the phase. Resolve it with docs, access confirmation, or written sales confirmation before approval.
If your scorecard passes but you still need an implementation reference for event handling and control checks, review the Gruv docs.
Close with the 35-minute execution checklist#
Use this as the final go-live gate: launch fast only if reconciliation, audit trail, and failure recovery are already designed.
- Choose the page type.
If speed is the priority, start with Payment Links (no-code, reusable, and shareable across email, social, text, website, and QR). If you already need tighter payout orchestration or seller-accountability decisions, confirm those first, because page speed does not resolve MoR or payout design.
- Prepare minimum inputs.
Set your live/test product setup, currency, refund terms, support contact, and day-one checkout settings. A non-builder should be able to see who is charging them, what they are buying, and how to get help with a reversal.
- Build and publish the page.
Publish the shareable URL with only the payment methods you actually support. If you distribute by QR, remember provider docs say Payment Link QR codes do not expire, so old printed assets can stay active after pricing or policy changes unless you control where they were posted.
- Test payment and refund before real traffic.
Use test mode first. The provider documents test cards for validating flows without moving real money; pass only when success, decline/failure, and refund each produce the expected internal state and support can trace the result.
- Validate
Webhookhandling into yourLedger.
Confirm payment success, failure, and refund events map to the correct internal states. Provider docs warn webhook endpoints can receive duplicate events, so log processed event IDs and ensure retries do not create duplicate postings.
- Confirm compliance and payout gates.
If you need speed first, go live with Payment Links only after core testing and an initial successful live transaction, then harden controls immediately. If you need tighter compliance and payout orchestration, confirm Merchant of Record (MoR), Virtual accounts support in your provider and country setup, and whether payout release can be policy-gated in your program before scaling traffic.
- Approve one launch scorecard.
Require product, finance, and engineering sign-off that the page flow works, refunds work, duplicate events are contained, event mapping is verified, and exception handling is owned. Include payout-failure ownership, for example who monitors payout.failed and what happens next, before you increase traffic.
Need to confirm market coverage, compliance gating, or MoR fit before rollout? Talk to Gruv.
Frequently Asked Questions
What is the fastest way to launch no-code payment acceptance for a platform team?
Start with Payment Links when speed is the priority. The provider positions them as no-code, says you can create a full payment page in a few clicks, and explicitly supports selling without a website. Treat that as the fastest starting path, then run your go-live checks before sending real traffic.
When should we use `Payment Links` instead of `Hosted Checkout` or a `Buy Button`?
Use Payment Links when you want no-code, shareable payment acceptance without integration work first. Use hosted Checkout when payments need to sit inside your website flow, since Checkout still requires integration. Use a Buy Button when you already have a website and want to embed generated code there.
Can we accept payments without a website and still keep finance controls intact?
Yes. Payment Links are designed for selling without a website. Finance controls are stronger when you can reconcile payouts back to the underlying transaction batches. If that trace is unclear, hold the launch.
What minimum security checks should we pass before publishing a payment page?
Confirm payment pages use TLS 1.2 or above. Confirm whether your business stores, processes, or transmits cardholder data, because PCI DSS applies to entities that do so. Do not assume no-code removes PCI DSS scope.
What must engineering verify in `Webhooks` and `Idempotency` before go-live?
Verify webhook signatures before processing events. Build for retry-safe handling because the provider can automatically resend undelivered webhook events for up to three days. On write paths, use Idempotency keys and align retry behavior with the documented key-retention window of at least 24 hours.
How do we connect checkout events to reconciliation and `Payout Batches`?
Use the payout reconciliation report to match bank payouts to the related batches of payments and other transactions. That is the practical basis for treating those grouped records as Payout Batches. Confirm report availability before relying on it, because the provider notes it is only available with automatic payouts enabled.
What vendor details should we confirm before committing to one provider?
Confirm due diligence items in writing: country and payment-method coverage, support for your PCI DSS-aligned security requirements, and incident visibility. Ask for exact method and market coverage instead of relying on headline counts, since Checkout pages currently show both "more than 100" and "more than 40" local payment methods. Where relevant, validate authorization status on the FCA Financial Services Register and subscribe to provider status notifications.
Try a related tool
Researched and edited by the Gruv editorial team. Gruv builds cross-border billing, payouts, and finance-operations software for global businesses.
Sources
- aspe.hhs.gov/sites/default/files/documents/a7b364098ed97b...trusted
- cms.gov/files/document/r10802demo.pdftrusted
- docs.stripe.com/api/idempotent_requeststrusted
- docs.stripe.com/webhookstrusted
- dodcio.defense.gov/Portals/0/Documents/CMMC/AssessmentGuideL2.pdftrusted
- ecfr.gov/current/title-31/subtitle-B/chapter-X/part-1...trusted
- ecfr.gov/current/title-31/subtitle-B/chapter-X/part-1...trusted
- federalregister.gov/documents/2022/08/10/2022-16472/medicare-pro...trusted
Educational content only. Not legal, tax, or financial advice.
Related Posts

The Freelance Payment Penalty: A Modeled Audit of Platform Fees, FX Spreads, and Payout Delays
The money rarely disappears through a single, easy-to-spot fee. The real loss is stacked. A marketplace takes its commission, a processor adds a charge for international cards, a bank or payment company converts the currency at a spread, a platform holds the funds before release, and a wire sheds a little to intermediaries on the way in. Each layer looks defensible on its own, but the worker feels the combined result as a smaller deposit and a later payday.
How to Respond to a Subpoena for Business Records
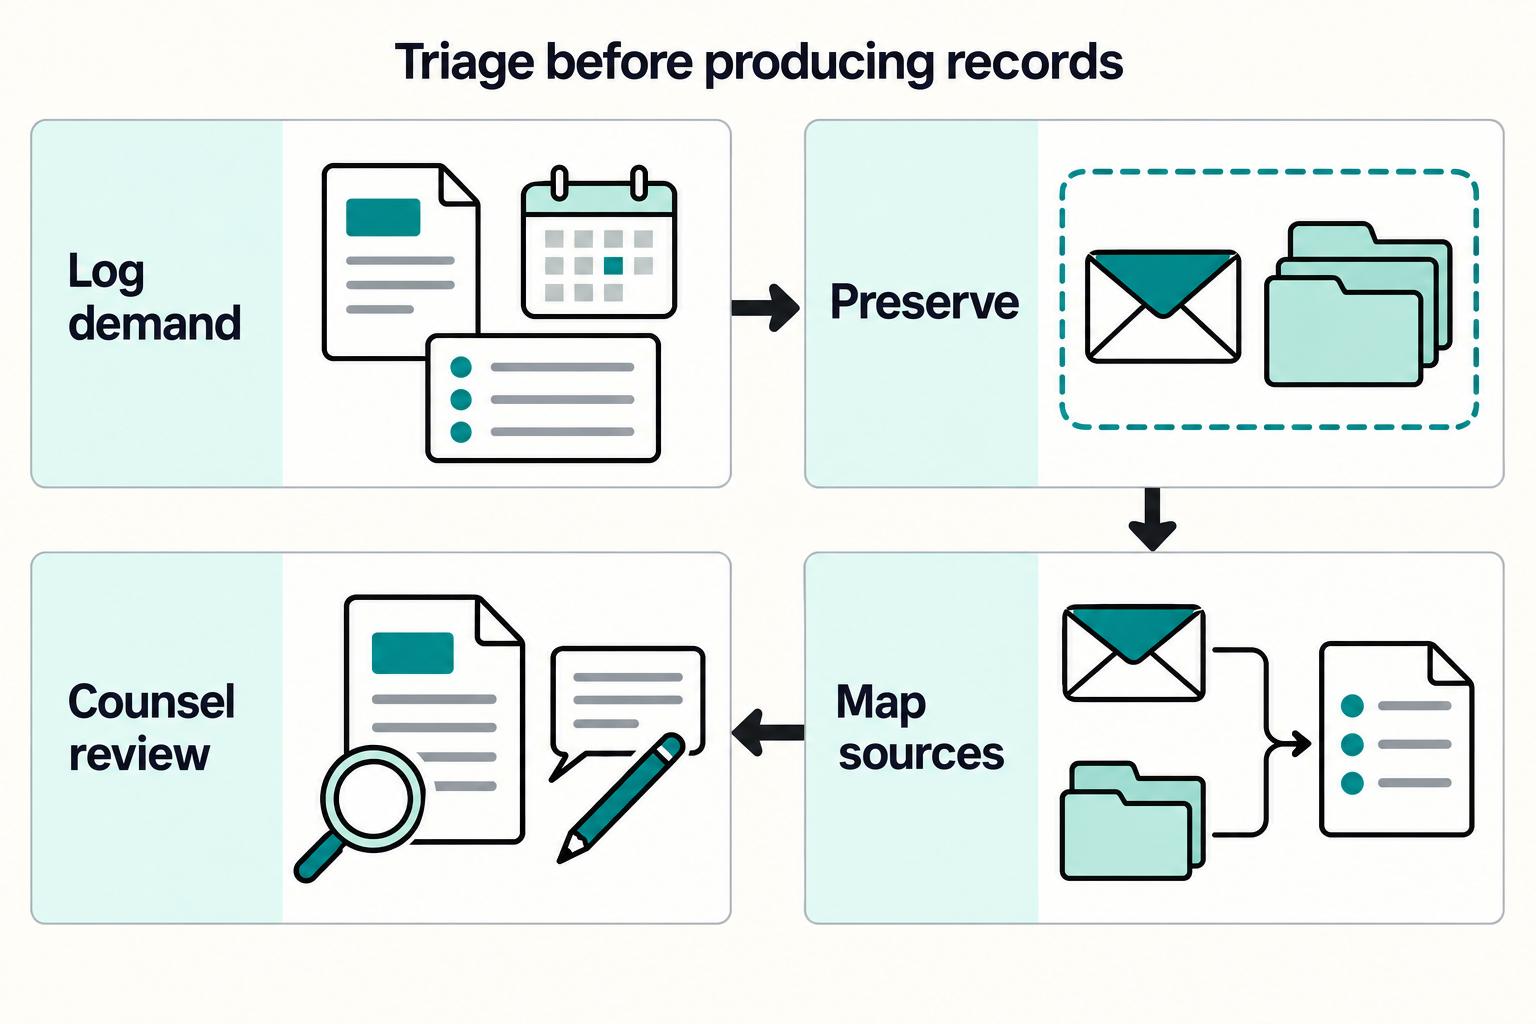
Move fast, but do not produce records on instinct. If you need to **respond to a subpoena for business records**, your immediate job is to control deadlines, preserve records, and make any later production defensible.
A US Expat's Guide to Investing in UCITS ETFs to Avoid PFIC Issues
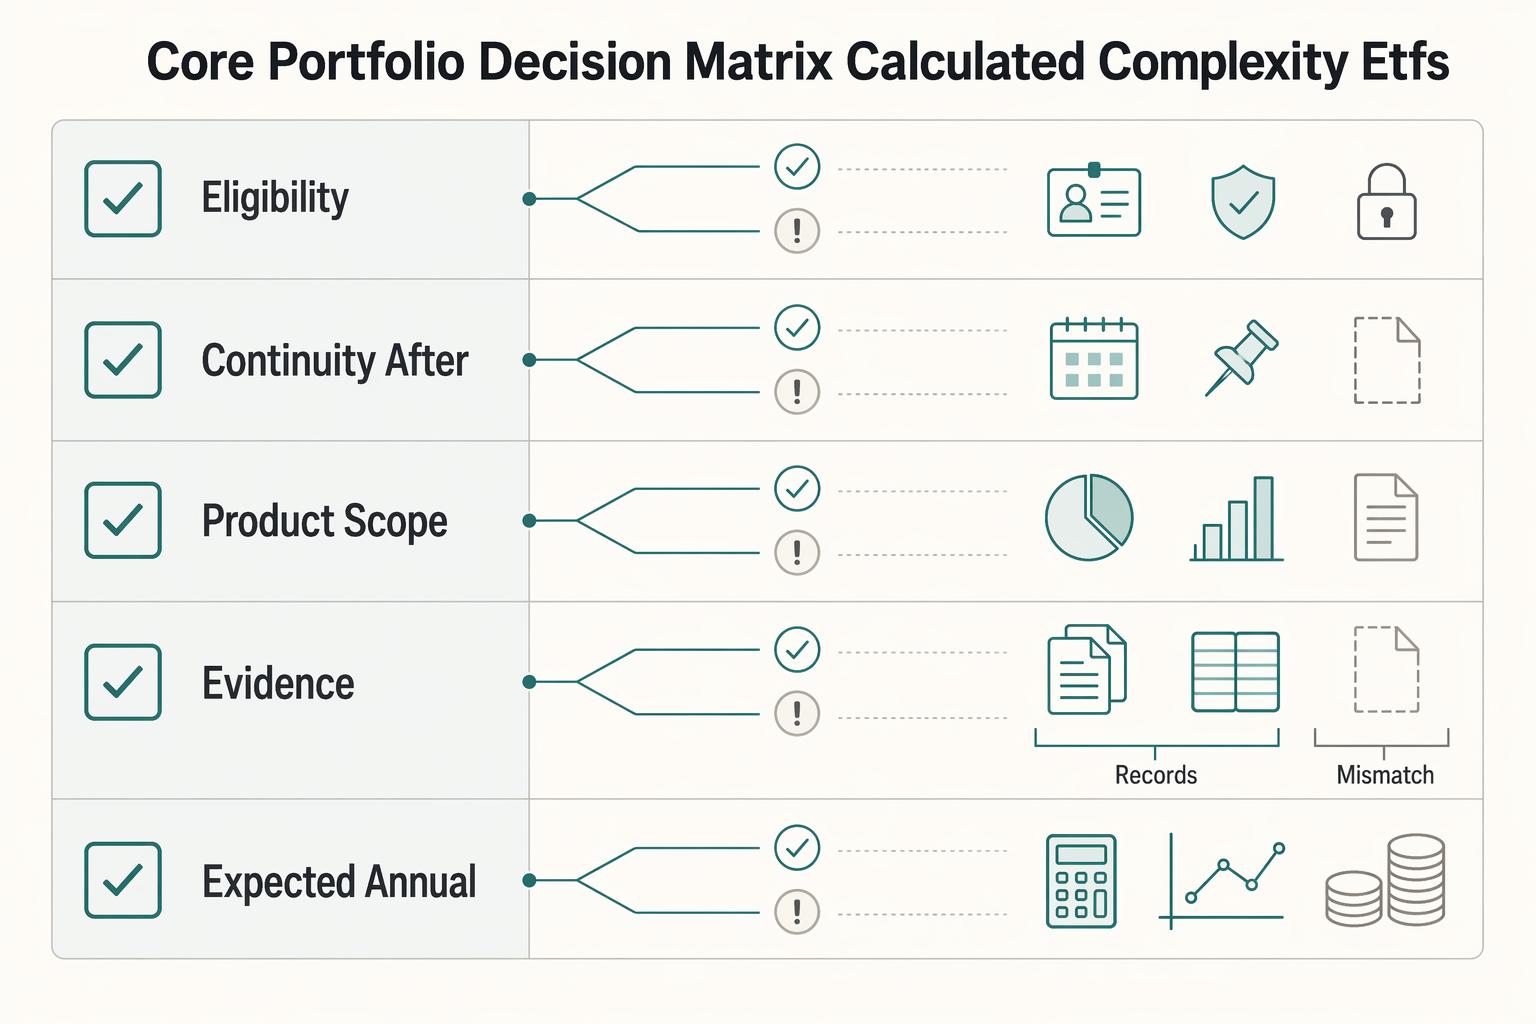
The real problem is a two-system conflict. U.S. tax treatment can punish the wrong fund choice, while local product-access constraints can block the funds you want to buy in the first place. For **us expat ucits etfs**, the practical question is not "Which product is best?" It is "What can I access, report, and keep doing every year without guessing?" Use this four-part filter before any trade: