
Quick Answer
Start with battery realism: for the best gps watches for hiking, estimate tracked hours for your route and keep only models that clear 1.5x that need with a 50% buffer. Next, confirm on-watch route use on the exact variant page, including offline coverage and sync flow. Then run one proof pass before purchase: plan a course, sync it, open it on the watch, and keep a backup GPX or phone copy.
Choose among the best GPS watches for hiking and trail running the same way you would handle any other risk-management decision. Start with battery runtime in the tracking mode you will actually use. Then verify on-watch navigation and the companion platform you will rely on before and after the trip.
In high-stakes work, you vet critical assets, plan contingencies, and make decisions from evidence. In the backcountry, it is easy to lose that discipline and shop like a consumer, comparing feature lists instead of evaluating a tool you may need to trust when the margin for error is thin.
There is a simpler way to choose. Judge the watch on three things: Unbreakable Autonomy, Absolute Control, and Strategic Intelligence. That gives you a workable way to evaluate not just a piece of gear, but a device you can rely on beyond cell coverage.
It also keeps you from wasting time on spec-sheet theater. A watch can look impressive in a roundup and still fail your actual use case. The battery math may be based on the wrong mode, the route workflow may depend on the wrong app, or the platform may make post-hike review too clumsy to use consistently.
Pillar 1: The Best GPS Watches for Hiking Start with Autonomy#
Start with battery math, not brand names. If a watch cannot cover your trip in the tracking mode you will actually use, with at least a 50% operational buffer, it is a no-buy. When you compare the best gps watches for hiking, make this your first cut. It removes models that only look strong in flattering spec-sheet modes.
Keep the rule simple: estimate your real battery need, then multiply by 1.5. If your trip demands 20 hours of actual tracked use, look for enough published runtime in the relevant mode to clear 30 hours, not 20. Headline numbers often reflect the most favorable scenario, and that is how people end up with a watch that works on paper but not on trail.
That buffer is not pessimism. It protects you when the day runs longer, the weather slows you down, or you end up checking the watch more often because a route is less obvious than expected. A battery plan that only works if the day unfolds perfectly is not a plan. It is wishful thinking.
1. Plan the battery around your route#
Use your route, not the product page, to set the requirement. Count total days, expected moving hours, how often you check the watch for navigation, and how much tracking detail you need if you have to confirm or retrace a route. Then pull runtimes from the official spec page for the exact variant you are considering and the exact mode names it lists.
That detail matters because tracking labels are not standardized across brands, and names can change. Save a screenshot of the exact spec page you used so you have a record of what you actually compared.
Before you compare anything, write down your trip requirement in plain language. Think in terms of the mission: how long the watch must actively track, whether you expect frequent route checks at junctions, whether backtracking would matter, and whether you are bringing a charging option at all. That short note makes it much easier to reject watches that only seem viable because you silently changed assumptions halfway through the comparison.
| Tracking strategy | What it usually means | What you gain | What you give up | Buy signal |
|---|---|---|---|---|
| Standard tracking | Frequent position recording, often every second | Highest track detail and strongest breadcrumb record | Highest drain | Good fit for day hikes, technical terrain, and trips where backtracking matters |
| Lower-power tracking mode (label varies by brand) | Often less frequent logging than standard mode | More runtime potential | Less route detail | Acceptable only if the reduced detail still works for your route |
| Endurance-style mode (label varies by brand) | Can prioritize runtime over track density | Maximum published runtime potential | Sparse track detail, weaker review and retrace value | Treat as contingency, not your default operating mode |
The red flag is simple: if a watch only survives your trip in its lowest-detail endurance mode, it is probably underpowered for the way you hike. The failure is not just a dead battery. It is reaching the last day with tracking too sparse to confirm a junction or retrace a bad turn.
This is also where you can talk yourself into a bad fit. It is easy to tell yourself you can "just use battery saver" without asking whether you would still trust the resulting track if you needed to verify a fork, review a missed turn, or backtrack through messy terrain. If the answer is no, then that mode is not your real operating mode. It is an emergency fallback, and the watch still has to clear your trip without depending on it.
2. Treat solar as backup#
Treat solar as margin, not as your main charging plan. If base runtime already clears your trip with buffer, solar may widen your cushion. If you need solar just to make the math work, move on.
| Solar use case | Decision rule |
|---|---|
| Base battery already covers the trip | Solar is useful as contingency support |
| You want extra margin, not salvation | Reasonable to count as a bonus |
| You need solar to replace charging entirely | Do not build your decision around it |
| Your chosen tracking setting drains fast | Assume solar may help, but may still fall short |
A good checkpoint is a full-day field test with your planned settings. Start at 100%, record the route as you would on the real trip, and note the end-of-day drop. That gives you a practical signal before you commit.
When you run that field test, try to use the watch the way you actually would on trail. Open the route, check the map or course line when you normally would, and keep the settings unchanged for the full test day. The point is not a lab result. It is to see what the watch does under your actual habits. A watch that looks efficient only when you avoid normal navigation checks is not giving you a realistic planning number.
3. Verify the runtime assumptions before you trust them#
Battery life planning only works when the exact spec-page details match your real use. Do a short pre-purchase check on the official page for the exact variant you are evaluating:
- Confirm runtime for the exact tracking mode you plan to use.
- Confirm any battery-estimate conditions listed on that page.
- Confirm the mode names for that variant, since labels can change.
- Save a screenshot of that exact page for your shortlist record.
Be careful here. Do not rely on a review that is discussing another size or version, and do not carry old mode labels forward without re-checking the current official page. Variant-level checking is tedious, but it is what keeps a shortlist honest.
Once a watch clears the autonomy test, the next question is whether you can actually navigate with it when the route gets messy. For that side of the decision, How to Plan a Multi-Day Hiking Trip pairs well with the next pillar.
Pillar 2: The Best Trail Running and Hiking Watches Still Need Navigation Control#
Navigation control is about sequence, not brand: verify map independence, then GNSS behavior, then route workflow, then minimum stack by trip type. That order keeps you from overvaluing battery life when navigation breaks down in real conditions.
"Navigation" labels vary, so focus on behavior: can the watch do your core route job when you are away from signal and not leaning on your phone at every decision point?
1. Verify real map independence. Do not stop at a "navigation" label. Confirm that the route tasks you care about work on-watch in your region, with dependencies you can actually live with.
| Checkpoint | What to confirm | Verify on the current model page |
|---|---|---|
| Map coverage | Your actual hiking region is supported | Check the exact variant page, not a family overview |
| Offline map loading | How maps or route data get onto the watch, and whether that workflow is practical for you | Confirm the current loading method and any required app step |
| Routing dependency risk | Whether route creation, sync, rerouting, or prompts depend on phone or partner steps | Look for explicit wording on on-watch vs companion-assisted behavior |
| Readability in harsh conditions | Whether you can read the route in glare, rain, or cold | Verify screen details and current on-watch map visuals |
If the current page is vague, treat that as risk. Older reviews are useful for questions, not final decisions on current variants; for example, a review dated April 22, 2020 is context, not a guarantee of how the current model behaves.
2. Treat GNSS as a verification job. GPS performance is terrain-aware. USGS explicitly flags canopy and topographic obstruction as error factors, so test by terrain instead of assuming one setting always wins.
| Terrain | What to test | What to note |
|---|---|---|
| Open sky | Track repeatability on a known route | Use as baseline before harder terrain |
| Dense canopy | Whether the course line stays usable at junctions | Watch for drift, delayed updates, and breadcrumb clarity |
| Steep valleys | Off-course handling and position confidence near walls/cliffs | Do not use altitude alone as a sanity check |
Start in open terrain first. According to USGS, mapping-grade handheld GPS can show 1-5 m precision in open, unobstructed settings, which is a useful baseline signal, not a wrist-watch promise in all environments. For shortlist inputs, use review date as a recency check after spec verification; a guide dated March 12, 2026 is a more current signal than older coverage.
3. Run the route workflow before every trip. Run the full flow early: How to Plan a Multi-Day Hiking Trip is a good companion for the broader pre-trip process, and How to Use Gaia GPS for Backcountry Navigation is a useful parallel check before you trust a watch-centered route flow.
- Plan the route in the platform you actually use.
- Sync it to the exact watch you are taking.
- Validate on-watch by opening the course, zooming in, and confirming render quality.
- Backup the route on your phone or as a GPX file.
Failure branch:
- If sync fails or rendering looks wrong, resend and reopen the course before departure.
- If offline map tiles are missing, re-download coverage on Wi-Fi, then re-check with the phone set aside.
If that flow does not pass, treat the watch as not navigation-ready.
4. Match the minimum stack to the trip. Keep the setup proportional to consequences.
| Trip type | Minimum viable navigation setup |
|---|---|
| Familiar day hike | Reliable course loading and on-watch course access |
| Unfamiliar day route | On-watch route viewing plus confirmed offline area coverage |
| Multi-day or remote trip | On-device maps, verified offline coverage, and a tested plan-sync-validate-backup workflow |
The goal is not maximum complexity. It is the minimum navigation stack that stays trustworthy for the terrain and trip stakes you actually face. If the trip stakes are high enough that a route miss creates a bigger problem, pair the watch plan with the best emergency communication devices for off-grid travel instead of treating the watch like a rescue tool.
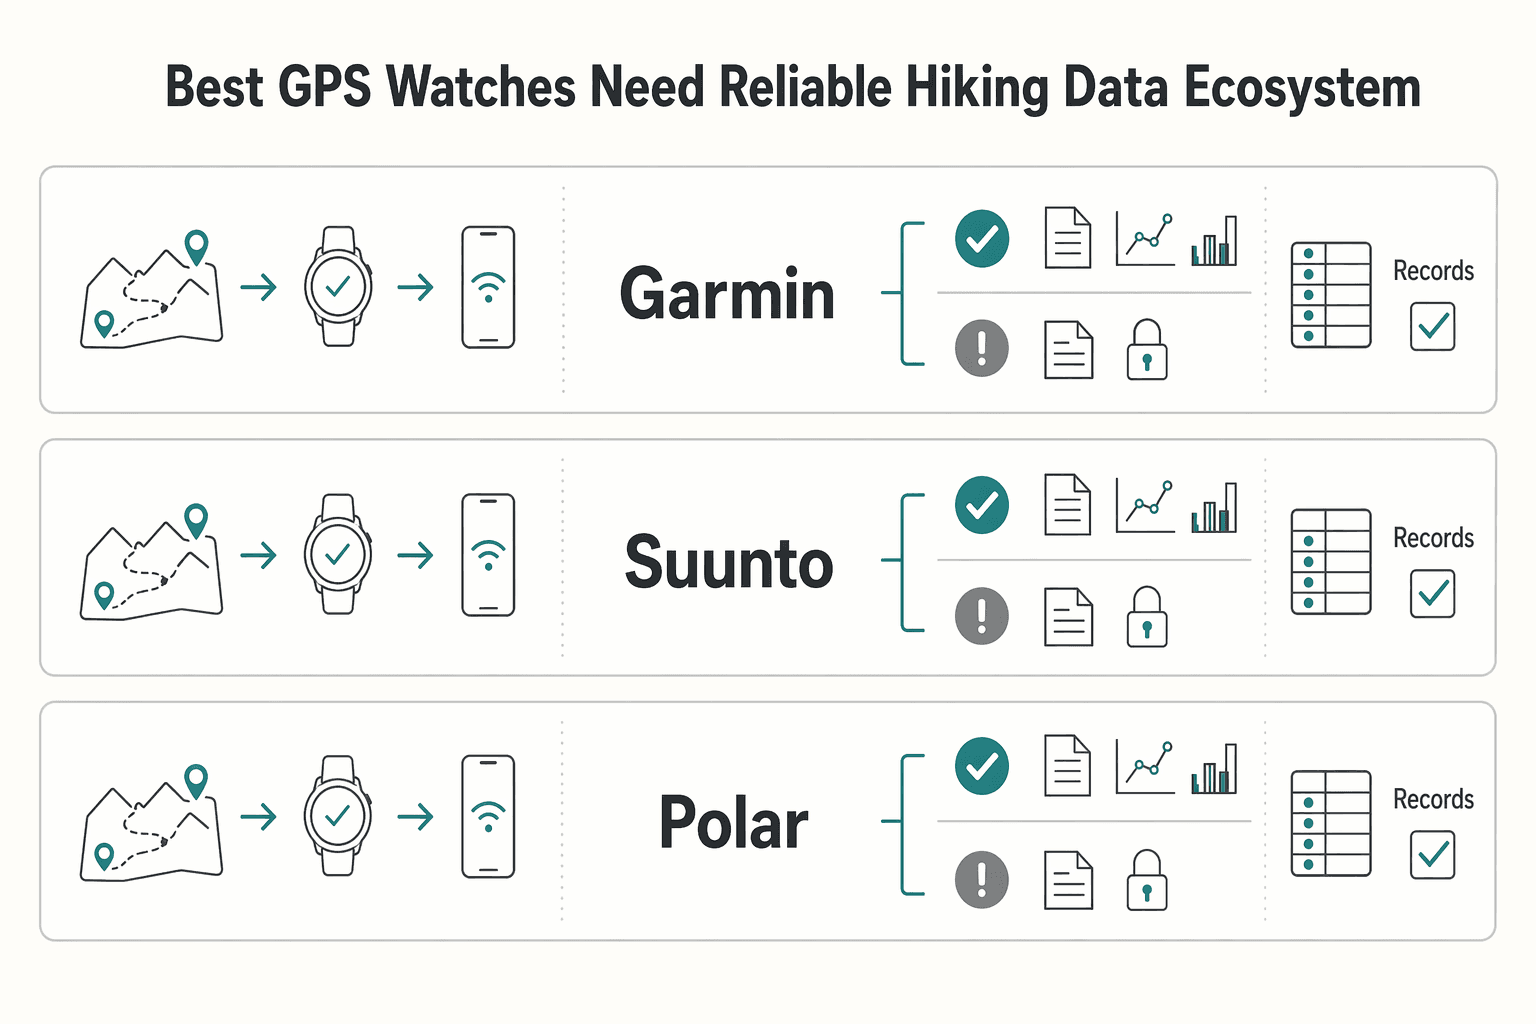
Pillar 3: The Best GPS Watches Need a Reliable Hiking Data Ecosystem#
Platform fit is a purchase decision, not a post-purchase detail: if planning, sync, review, and export are weak, the hardware advantage fades fast.
1. Audit the companion app before you buy. Run a practical proof pass with your own workflow: plan one route, sync it, open it on the watch, then review the activity afterward. Use these decision prompts during that pass:
- Is route planning usable for how you actually build hikes?
- Is sync reliable enough that you trust preloaded courses?
- Is history review clear enough to support better next-trip decisions?
- Is export portability acceptable for your process?
- Do key functions depend on a partner service at the wrong point in your workflow?
Save a screenshot of the exact spec or feature page you used, and document any app or partner-service dependency in your comparison notes before purchase.
| Brand family | Useful starting point | Verify on current official pages and recent field reviews |
|---|---|---|
| Garmin | Garmin Connect is a core platform check. | Route-planning flow, sync behavior, and whether review views are clear enough to use consistently. |
| Suunto | Suunto App should be evaluated pre-purchase, not later. | Planning-to-watch flow, review quality, and integration behavior that affects your route process. |
| Polar | Older reviews are question generators, not current truth. A Polar Grit X review dated April 22, 2020 described Hill Splitter as automatically counting hill repeats. | Whether your exact current model still supports routing, review, and dependency behavior you can rely on. |
2. Keep only decision-useful metrics. If a metric does not change your next action, treat it as noise. Standard GPS mode often records every second, which can improve route detail, but it also increases battery use.
Set your shortlist metrics in advance, and tie each one to a decision: route planning, pacing, recovery, or next-trip adjustments.
3. Run the same post-hike loop every time. Keep it simple: record, review, adjust, repeat. Review the same small set of items, then make one change only for the next outing.
- Review the route file and note where navigation flow worked or failed.
- Check whether battery behavior matched your expectation for that mode.
- Log one app or partner-service dependency that helped or blocked the workflow.
- Make one deliberate adjustment for next time.
Keep the same recency discipline here too: a review from November 25, 2015 can show what changed, but it cannot confirm how a current app behaves now.
Your Strategic Shortlist: The Best GPS Watches for Hiking and Trail Running#
Use this shortlist as a pre-purchase filter, not a brand debate: keep only models that pass runtime realism first, navigation execution second, and app fit third. If you are tightening the rest of your kit around the watch, How to Pack a Backpack for a Multi-Day Hike is a good companion checklist.
- Runtime realism first: estimate your trip need, multiply by
1.5, and keep only options that still clear that plan with a50%operational buffer in the mode you will actually use. - Navigation execution second: require reliable on-watch use, not just feature claims.
- Network fit third: keep only the app workflow you will actually use for planning, sync, and review after each hike.
Most "close" options stop being close once you apply this order. Headline battery numbers can be flattering, and standard tracking modes often use every-second recording, which can increase drain, so check the exact mode before you decide.
Verify exact variant before checkout (checkpoint):
- Confirm offline map loading on the exact variant page.
- Confirm off-course behavior on the exact variant page.
- Confirm route readability on the watch for your route style.
- Confirm the exact GNSS and mode labels for that variant, since names vary by brand and can change.
- Save a screenshot of the exact spec or feature page you used for your assumptions.
Quick-pick path by intent:
- If your routes are complex, prioritize verified offline map loading, off-course handling, and readable on-watch routes.
- If battery risk tolerance is low, prioritize runtime margin in your real tracking mode before all other features.
- If you dislike app friction, prioritize the cleanest planning-sync-review loop.
- If your budget is tight, reject anything that only looks good in headline specs and fails the verification checkpoint.
Before you buy, run one practical proof pass with your own route workflow, then cross-check your trip plan with How to Plan a Multi-Day Hiking Trip.
Conclusion: Choose the Best GPS Watch for Hiking and Trail Running#
If you take one rule from this guide, make it this: the best GPS watches for hiking and trail running are the ones you buy for the conditions you actually face, not for the biggest headline spec. The right watch keeps giving you dependable tracking, usable navigation, and battery confidence when your day gets longer, slower, colder, or messier than planned.
Keep the decision simple. Start with autonomy, which means using the GPS mode you will really use and keeping at least a 50% operational buffer beyond your trip length. Then check control by validating navigation execution on the exact current variant page: offline map loading, off-course behavior, and route readability.
Finish with intelligence, because companion-app usability matters before the trail and after it too. Route creation, sync, and review are part of the product, not extra credit.
A practical sequence is to check runtime in your real GPS mode first, then on-watch navigation reliability, then companion-app usability. Before you buy, save a screenshot of the exact product page you used for runtime and mode checks, and keep the best hiking watch shortlist tied to the route style you actually plan to hike.
Final decision filter#
| Decision filter | What to confirm |
|---|---|
| Fit | If the watch feels too large, hard to read, or awkward to operate, move on. |
| Mapping workflow | Test how you load, sync, and follow a route. Confirm offline map loading, off-course behavior, and route readability on the exact variant you plan to buy. |
| Battery mode behavior | Check the mode table, not the headline claim. Battery gains can come with tradeoffs, and standard GPS mode can increase drain because it often records more frequently. |
| Network usability | Open the app you will live in. If route planning and post-hike review feel clumsy now, they will not improve after checkout. |
Pick your priority profile, confirm the must-haves in the table, and shortlist the model that matches how you actually hike.
Frequently Asked Questions
Is solar charging worth paying extra for?
Sometimes. Check the manufacturer’s battery mode table for the exact watch and treat solar as added runtime support, not as your main power plan. If your trip only works when the sun cooperates, skip that assumption and plan to charge anyway. A simple test helps: if you would not buy the watch without the solar claim, you are probably leaning on it too heavily.
Do you really need on-device maps, or is your phone enough?
If your phone is the only place you can see and follow a route, that can create a single point of failure. Before you buy, verify how the watch handles a synced course and whether navigation depends on a live connection, then test that full route flow before your trip. For easier trips, course viewing may be enough. For more remote trips, set a higher bar and make sure your backup plan is already in place before you go.
How much battery life is enough for multi-day hiking?
Use the runtime for the tracking mode you will actually use, not the longest headline claim. Verify the mode-level battery table on the official product page, then add margin for cold, delays, and extra navigation checks. If the watch only gets there in a reduced logging mode you would never choose on trail, it is not enough. If you are unsure, work backward from the trip and decide what level of breadcrumb detail you would still trust late in the trip before you compare watches.
How should you choose between Garmin Fenix, COROS, and Suunto families?
Start with the route workflow, not the logo. Include battery life, screen size, features, and durability in the comparison, but use course creation, sync, on-watch navigation, and post-hike review as the real checkpoint. If two watches look close on paper, pick the one whose planning and review experience you will actually stick with. Brand family can help you organize a shortlist, but it should not override variant-level verification and an honest workflow test.
What matters most in a hiking watch?
For many buyers, the core priorities are navigation you can trust, battery margin, and durable hardware. Check whether the watch includes map or compass functions and an integrated barometer if elevation tracking matters to you. One failure mode is bad elevation interpretation, especially when a device or companion tool relies on a 3D terrain model that can miss fine rolling terrain or add errant elevation. In practice, ask one blunt question: when conditions are messy, will this watch still help you make a good next decision?
How current do roundup recommendations need to be before you trust them?
Current enough that the guide clearly shows recent maintenance and explains how the picks were tested. Check the publication or update date, then read the how-to-choose, FAQ, and testing methodology sections before treating any shortlist as reliable. If a review is old enough to describe a different product generation, use it for context only and confirm every spec on the live product page. You do not need every roundup to agree, but you do need enough recency and method to tell whether the advice still applies to the exact models you are considering now.
Try a related tool
Researched and edited by the Gruv editorial team. Gruv builds cross-border billing, payouts, and finance-operations software for global businesses.
Sources
Includes 2 external sources outside the trusted-domain allowlist.
- govinfo.gov/content/pkg/CHRG-110shrg46256/html/CHRG-110s...trusted
- govinfo.gov/content/pkg/CFR-2023-title3-vol1/html/CFR-20...trusted
- ntrs.nasa.gov/search.jsptrusted
- pmc.ncbi.nlm.nih.gov/articles/PMC7509623trusted
- pubs.er.usgs.gov/publication/70121299trusted
- science.gov/topicpages/h/hand+held+gpstrusted
- alibaba.com/showroom/2017-best-outdoor-watch.htmlexternal
- aliexpress.com/s/wiki-ssr/article/men-s-tactical-watchexternal
Educational content only. Not legal, tax, or financial advice.
Related Posts

Value-Based Pricing for Freelancers Under Real Payment Risk
Value-based pricing works when you and the client can name the business result before kickoff and agree on how progress will be judged. If that link is weak, use a tighter model first. This is not about defending one pricing philosophy over another. It is about avoiding surprises by keeping pricing, scope, delivery, and payment aligned from day one.

The Best Travel Backpacks for Digital Nomads
Start by ruling out bad fits, not by chasing a universal winner. If a bag does not match how you move, how you work, or what you can comfortably carry, drop it early. That matters far more than one extra pocket or a slick product page.

How to Plan a Multi-Day Hiking Trip
If you want to plan a multi-day hiking trip with fewer avoidable mistakes, treat it like something you build on purpose, not something you improvise the night before. By the end, you should have a practical phase-by-phase plan and a checklist mindset you can use right away.