
Quick Answer
Use a go/no-go filter before spending: verify whether your passport path is TRV or eTA, keep date-stamped official notes, and assume only a 6-month plan unless confirmed otherwise. Build a 60-to-30 day packet with matching names, dates, and addresses across immigration, housing, insurance, and financial records. Book refundable travel first, then a short Vancouver stay, and delay long leases until your entry basis and budget threshold both hold.
Vancouver Digital Nomad Guide for 2026#
If you are planning a longer stay in Vancouver, make the go or no-go call before you commit to non-refundable flights, deposits, or a long lease. This guide is about remote work planning in Canada, not short-trip sightseeing. The goal is to help you validate route, documents, and budget in the right order so one weak assumption does not force a rushed decision later.
For 2026, treat route labels as orientation, not permission. In the material used for this draft, there is no specific digital nomad visa for Vancouver. Common labels include eTA, visitor visa, and working holiday, with examples like about 6 months on visitor status and 1-2 years on some working holiday paths. Those labels are useful as a starting map, but they are not enough on their own. What matters is what applies to your nationality and your actual case, and that needs to be confirmed before any irreversible spend.
This guide gives you three things in sequence:
- Go or no-go checkpoints tied to commitment timing, with route clarity first, then refundable travel, then housing commitments.
- A practical document packet with proof of funds and the core records to prepare before travel.
- A first-month execution plan, with clear priorities for the first 2 weeks and first 30 days in Canada.
Use your checklist and budget as hard filters, not rough notes. Third-party estimates often place monthly costs around $2,500-$4,000+ and one-bedroom rent around $1,500-$2,800. Those are planning ranges, not official benchmarks. If your runway is tight, the safer move is usually a shorter initial stay that lets you validate reality before you act like the move is settled.
That is the thread through the whole piece. First confirm the route. Then build the evidence packet that supports that route. Then book travel in a way that stays reversible. Then use your first month in Vancouver to prove that your work setup, recordkeeping, and cost assumptions hold up under real conditions. If one checkpoint fails, stop there and fix it before the next payment.
Use one commitment rule throughout: verify route assumptions, complete your evidence packet, and pass your budget threshold before you travel. If you want route context first, start with Canada remote-work route context.
Understand the Rules Before You Book Anything#
The rule is simple: do not make irreversible bookings until your entry basis is verified for your specific case. Treat visa labels and remote-work wording as something to verify, not as a shortcut that lets you move faster.
Start by separating labels from permission. Third-party pages often use the phrase "Canada digital nomad visa," but that wording alone does not establish an official standalone legal category in the excerpts reviewed here. Some pages also use "digital nomad stream" language and tie it to the Tech Talent Strategy. That may help with orientation, but it is not automatic permission for your situation. If you want route context, use Canada's Digital Nomad Stream: How to Live and Work in Canada, then test what applies to you against current official guidance.
The next distinction matters even more. Remote work is an activity. Permission is an entry and status question. Those are related, but they are not the same thing. A lot of confusion starts when you read a short summary about remote work, assume that settles the permission question, and then start spending money as if the legal part is already done.
Keep a small verification log. It will save you more trouble than a big pile of tabs. As you research, save the page title, link, access date, and a short note on what that page actually supports. If a page helps with city planning only, mark it that way. If it helps with nationality-based document path, mark that too. The point is to stop practical travel advice from being treated as permission advice by accident.
Use this sequence before booking anything major:
- Check official government pages first and save date-stamped notes.
- Use third-party pages for context, then test each claim. A tax-focused article dated October 5, 2025 can help with orientation, while a Vancouver lifestyle guide updated October 23, 2025 can help with city planning rather than entry permission.
- If anything still feels unclear after that, get licensed legal review before you commit to flights or long housing contracts.
Freshness matters, but source type matters more. Lifestyle guides and short mindset posts, including pieces dated Jul 28, 2024 and marked as a 4 min read, can be useful for broad travel thinking. They are not enough for a legal decision. That does not make them bad resources. It just tells you where they belong in the process.
In practice, the failure mode is rarely dramatic. It is usually a small assumption that quietly spreads into every later decision. A label sounds official, so you book a flight. A blog says visitor entry is common, so you start thinking in longer housing terms. A city guide sounds current, so you stop checking official text. By the time you notice a conflict, the money is already committed and your choices are worse.
That is why sequence beats volume. You do not need infinite research. You need enough verified information to explain your route in plain language and support it with current official text for your case. Until you can do that, every booking carries more risk than it looks.
Hard stop: no non-refundable spend until you can explain your route clearly and back it with current official text for your case.
Choose Your Entry Path With a Go or No-Go Decision#
Decide on the route before you spend money. Either run a short validation stay or delay a longer move until your entry basis is verified for your exact case. Those are two different plans, not two versions of the same plan.
Start with three inputs and keep them separate:
- Intended stay length: plan around a 6-month window and do not assume an extension.
- Nationality: your document track is framed as TRV or eTA depending on passport.
- Work pattern: remote activity and permission are not always treated as the same thing.
If one of those three inputs is still unclear, you do not have a settled route yet. You have a draft plan. That distinction matters because a draft plan should stay reversible.
An exploratory short stay is not a half-committed relocation. It is a deliberate way to reduce scope when route questions, timing questions, or budget pressure are still unresolved. A longer relocation is the opposite. It only makes sense when the route, document packet, and monthly burn already fit together without needing future exceptions or best-case outcomes.
| Decision point | Exploratory short stay | Longer relocation after entry basis is verified |
|---|---|---|
| Best fit | You still have unresolved entry or timing questions | You can explain your route with current official text for your case |
| Timeline assumption | Works inside a 6-month plan without extension assumptions | Starts only after uncertainty is resolved |
| Main risk | Assuming a short stay can be stretched if plans change | Committing early based on label language instead of confirmed permission |
When sources conflict, stop and verify. One source in the material frames this as visitor-status entry without a formally named digital nomad visa, while another describes a new digital nomad visa tied to the Tech Talent Strategy. That kind of conflict is not a green light. It is a warning that you need to validate the point before you book flights or pay a deposit.
Use this test before any commitment:
- Go only if you can map your nationality to the right entry-document path and keep date-stamped notes from official pages.
- Go only if your plan still works without any extension assumption.
- No-go if your plan depends on implied remote-work permission you cannot confirm in current official text for your case.
- No-go if your route still relies on blog wording alone. Get legal review first.
One more check will keep you honest: ask whether the move still works if you have to stay conservative on everything else. If your budget needs an immediate longer lease to work, or your timing only works if every approval and booking lands perfectly, then the plan is still fragile. A fragile plan is not a real go decision. It is a set of optimistic assumptions wearing a confident label.
The cleanest decision standard is boring by design. You should be able to explain your nationality, intended stay, work pattern, and entry path without hand-waving. If you cannot do that yet, delay the bigger move and keep the next step reversible.
Hard stop rule: no irreversible payments until your immigration assumptions are confirmed.
If your pathway is still ambiguous, use this digital nomad visa cheat sheet to compare requirements before paying for flights or long-stay housing.
Build Your 60 to 30 Day Document Packet#
Your document packet only works if it holds together. It is ready only when every file supports one confirmed entry path, TRV or eTA, and no critical item is still unverified.
The easiest way to build it is to use one master checklist and label each item verified, unverified, or expired. That alone cuts down a lot of last-minute confusion because you stop treating "I think I have that somewhere" as the same thing as "I can produce that now."
Use this core checklist:
- Passport and identity documents for your planned travel window, with exact validity minimums to confirm with the relevant authority.
- Entry-path proof, meaning your TRV or eTA determination, plus date-stamped notes showing how you confirmed nationality-based eligibility.
- Immigration paperwork aligned to that same path, with specific required documents to confirm with the relevant authority.
- Accommodation proof for your initial stay, with requirement and accepted format to confirm with the relevant authority.
- Health insurance evidence for your initial period, with whether it is required and any coverage minimum to confirm with the relevant authority.
- Financial continuity records, including active client work and backup-funds documentation, with any required amount or threshold to confirm with the relevant authority.
- A tax admin starter folder with organized records and a clear filing structure for later residency and tax review. This is a planning item, not confirmed entry proof.
Keep one terminology note attached to the packet: this route is often described as visitor status for digital nomads, not a formally named standalone digital nomad visa, so labels vary across explainers. That note matters because it keeps your packet aligned with the route you actually verified instead of drifting toward whatever headline wording is most common online.
Usability matters as much as completeness. You are not building a museum of documents. You are building a set of files you can use quickly, even when you are tired, traveling, or opening everything on your phone. If you are asked who you are, where you are staying first, how you support yourself, and which route you are relying on, the answer should be easy to pull up without digging across old inbox threads, random downloads, or chat attachments.
For cost and timeline planning, stay conservative:
- Do not rely on one fixed visa fee, since cost can vary by nationality.
- Treat quick-fact wording like 6 months and no extension as risk flags, and avoid plans that only work if an extension is granted later.
A strong packet is also internally consistent. Check that your name format matches across travel booking records and identity records. Check that your accommodation dates match your arrival plan. Check that any work evidence you carry fits the same story as the route you are using. In practice, most avoidable friction comes from contradiction, not from lack of volume.
Use clear filenames and current versions so you know which file is final. Old duplicates and half-finished drafts create exactly the kind of confusion that shows up when you are on weak connectivity and need the right document fast. Cloud access helps, but keep offline copies of the exact files you would want at check-in or on arrival.
Before you book, run one final packet check:
- Remove unusable evidence pages, such as pages that only return cookie text and no immigration detail.
- Store every critical document in cloud and offline copies.
- Confirm that names, dates, and versions match across immigration, accommodation, insurance, and financial files.
If one critical item is still unverified, pause bookings and close that gap first. That pause is not wasted time. It is what keeps the rest of your move from being built on a weak file trail.
Book Flights and Housing Without Creating Compliance Risk#
Use the safest booking order: reversible travel first, a short Vancouver stay second, and a longer lease only after your entry assumptions still hold after arrival. If you reverse that order, housing urgency can start making legal decisions for you.
Start with flights. At check-in, the practical issue is often boarding risk, so keep verifiable proof of travel intent and a clear exit date. If you are looking at a one-way or multi-entry setup, weak onward planning can make the trip look improvised even when your broader plan feels reasonable to you. The goal is not to build a perfect story. It is to avoid avoidable friction.
Then book short housing with consistency in mind. If accommodation records are requested, keep details aligned across your documents. This is not about forcing one legal format. It is about reducing contradictions. If your travel dates, housing details, insurance record, and identity records all line up cleanly, the rest of the review tends to be simpler.
Use this sequence before larger payments:
- Reserve travel with flexible terms and keep onward evidence ready.
- Book a short initial stay and confirm your accommodation details, insurance, and travel plan are consistent.
- Move to a longer lease only after local fit is clear and your entry assumptions remain valid.
That order protects you from two common traps. The first is paying more upfront to manufacture certainty you do not actually have yet. The second is letting housing pressure override route uncertainty. If you catch yourself thinking that a long lease is the only way to make Vancouver affordable, that is a sign to slow down. A short validation phase keeps the budget question and the legal question from getting tangled together.
Timing is a real tradeoff here. Fixed dates can feel efficient, but if your first month still contains legal or admin uncertainty, flexibility is usually worth more than a small upfront saving. The goal is not to keep every option open forever. It is to keep the big commitments open until the critical assumptions are proved.
Before departure, run one last cross-check across flights, accommodation details, insurance, and identity records so key names and dates line up. Make it a deliberate scan, not a quick glance. Look for spelling differences, shortened names, date conflicts, missing address details, and old policy files that no longer match your stay. Those are small issues, but they are exactly the kind that turn a straightforward review into a longer one.
Keep basic financial safeguards active while booking. Travel insurance, a backup source of funds for delays, and enough cash for your first days all reduce avoidable stress. If you are carrying $10,000 or more in cash, treat that as a separate compliance check before departure.
Hard stop: avoid irreversible payments until your travel evidence is coherent and your short-stay records match your paperwork.
Execute Your First Week in Vancouver in the Right Order#
Once travel and a short stay are locked in, the first week is about stabilization, not speed. Keep key records in one controlled place, test your routine under real conditions, and only then add more client load or bigger commitments.
This week sets the tone. If you treat arrival week like a normal work week before transit, records, payments, and workspace are settled, small issues stack fast. If you stay disciplined for seven days, the rest of the month usually gets easier because your basic assumptions are already tested.
Day 1-2: Lock records and city access#
Your first job is reliable access: to the city and to your own records. A practical arrival option is the Canada Line from Vancouver International Airport, then a Compass Card so transit is active and reloadable online from day one. That gives you a working baseline for movement before you start making neighborhood judgments.
At the same time, get your records under control. Do not leave important details scattered across email, chat, screenshots, and booking apps. If you are carrying ID or booking documents, keep names, dates, and address details consistent across files. Put the final versions in one place you can reach quickly, and make sure the same set is available offline.
This is also when you should test the city against your plan, not your hopes. Downtown areas like Yaletown and the West End are compact and walkable, but they are often the most expensive. Areas outside downtown, like Kitsilano, are worth comparing, but the city-centre trip is often around 25 minutes, so commute time needs to be treated as part of daily operating cost, not as an abstract inconvenience.
Use these first days to lock the basics you will rely on all month. Confirm how you will access your booking records without hunting through old messages. Test the route from your housing to the place you expect to work most often. If that route is longer, more expensive, or less reliable than expected, that is useful information now, when adjustment is still cheap.
A good outcome for Day 1-2 is modest but important. You know where your documents live, how you move around the city, and which daily assumptions already need revision. That is enough. You do not need to solve the whole stay in two days.
Day 3-4: Prove your work base before adding client load#
Do not add more deadlines until your work base proves itself. Run at least two full workdays from your intended base before you take on more client load or commit to a heavier schedule.
Those workdays should be real tests, not casual check-ins. Test call conditions, backup locations, and transit timing at the same hours you actually work. Use weekday checks for places that affect your schedule, because busy spots often behave very differently on weekends. If a location breaks during a real meeting window, that is a reason to fix the setup first, not to hope it behaves better later.
Go beyond basic internet speed assumptions. What matters is whether your actual workflow holds up. Can you log in without friction? Is there call privacy when you need it? Does background noise stay manageable? Do you have dependable power access? How long does it take to reach a backup spot if the first location stops working? A place that feels fine for browsing or email can still fail as a repeatable work base.
Test the routine at the exact times that matter for delivery. A place that feels quiet in mid-morning may be crowded when your core calls happen. A commute that feels acceptable once may become draining when repeated. These are not lifestyle details. They are operating conditions, and you want to learn them before your calendar gets dense.
The standard is not perfection. It is repeatability. You are looking for a setup you can trust even on an ordinary or lower-energy day, when you do not want to troubleshoot every step between waking up and getting on a call.
Day 5-7: Keep payment and record tracking simple#
By the second half of the week, resist the urge to build a complicated admin setup. If you are invoicing during the stay, set one primary path for incoming payments and one method for expense tracking. Simple beats clever here.
Log each payment with basic details, store receipts as they happen, and separate personal and business spending in your notes. Create a clear folder structure so records are easy to review later, and keep a running list of open questions instead of guessing. If you need a deeper primer, use Canadian tax basics for self-employed and non-residents as your next read.
The biggest risk at this stage is silent complexity. It starts innocently. One payment arrives through one channel, another through a different channel, some receipts stay on your phone, others sit in email, and you tell yourself you will sort it out later. Later usually arrives when you are tired, busy, and already missing pieces. A simple log started early prevents most of that.
Keep the setup boring on purpose. You want one place to see what has been billed, what has been paid, what expenses have been captured, and what still needs attention. If you cannot explain your own records at the end of week one, the system is already too messy.
By the end of the first week, the useful checkpoint list is:
- A controlled record set with consistent personal and stay details.
- Transit working end to end, including a funded Compass Card and tested routes.
- A repeatable Vancouver work routine validated in real meeting hours.
- If relevant to your work, a payment and expense log with organized records.
- A written list of unresolved questions to review with qualified advice.
Set Up Money Operations and Tax Hygiene in Days 8 to 30#
From Day 8 onward, shift from arrival logistics to explainable records. The job now is to make your money trail easy to follow later: one invoicing rhythm, payment records that tie back to invoices, and tax records captured as you go instead of rebuilt under pressure.
This matters because messy money operations usually do not fail all at once. They fail link by link. An invoice is sent, but the time log is not saved. A payout arrives, but no one notes how it connects to the invoice. An expense exists, but the receipt is buried in a message thread. Good tax hygiene is mostly about keeping those links intact while the month is still fresh.
Days 8 to 14: Lock one billing rhythm#
Pick one cadence for active clients and keep it consistent long enough to expose gaps. Each invoice should map to a time record and related expenses, because invoicing, time tracking, and expense management are the core tools at this stage.
If Gruv rails are available and supported, keep the flow strict: issue the invoice, track payout visibility, then move funds after invoice details match your client and contract records. Avoid splitting one client across multiple collection paths unless there is a clear reason. Fragmentation creates documentation gaps, and those gaps usually show up at the worst moment.
For each payment, keep one linked record set:
- Invoice file and invoice ID.
- Time log snapshot for the billed period.
- Payout status record.
- Transfer confirmation and final received amount.
- Expense receipts tied to that client period.
Store these in the same folder tree as your existing document checklist so tax records and other required documents are easy to cross-check by name and date. That small choice pays off later because it lets you move from identity and route records into billing records without changing your filing logic halfway through the month.
A consistent rhythm is valuable because it surfaces weak points early. If a client detail is wrong, if payout visibility is unclear, or if a contract record is missing, you will notice it faster when everything runs through one pattern. That is much easier to fix in the second week than at month close.
Days 15 to 21: Apply a simplification rule#
By the middle of the month, stop adding tools and start removing friction. If payment issues or missing documentation keep showing up, simplify accounts and standardize one primary collection path. One path makes reconciliation cleaner and reduces conflicting records across tools.
Treat tax planning as separate work, not as something that magically happens once invoicing is done. Run a weekly close that confirms paid invoices, open invoices, captured expenses, and unresolved questions in one pass. If something is unclear, flag it and get qualified advice before the ambiguity spreads into the rest of your records.
This is also the right moment to cut optional complexity you picked up during arrival week. If you created extra folders, duplicate logs, or multiple expense capture habits, keep the version that is easiest to maintain and stop feeding the others. A process you can repeat every week is better than a perfect setup you abandon halfway through the stay.
Use one simplification rule all month: if a step does not improve clarity, remove it. If a tool creates another place where records can go missing, stop relying on it as your main source. The more mobile you are, the more that principle matters.
Days 22 to 30: Build an audit-ready month close#
In the last third of the month, aim for a clean month-close packet, not just a pile of files. Reconcile invoice totals to received amounts and keep cross-border payment records easy to trace so you can answer source-of-funds questions without rebuilding history from memory.
This discipline reduces stress later because it turns vague recollection into a usable file trail. If status or source-of-funds questions come up, organized records make your timeline and amounts much easier to explain. For deeper filing context, review Canadian Taxes for Self-Employed Individuals and Non-Residents and map its guidance to records you already captured.
A workable month-close packet should let you follow the chain from billed work to money received without guesswork. That means the invoice amount, payout record, transfer confirmation, and final received amount all line up in one place. When the records are clean, you do not need to remember every detail. The record trail does the explaining for you.
That is the real goal of Days 22 to 30. Not perfect bookkeeping for its own sake, but a month of activity that still makes sense when you look back at it later.
Plan for Vancouver Costs With Decision Thresholds#
Do not extend your commitments in Vancouver based on a hopeful budget. Decide from your conservative case. If the downside case cannot absorb delays plus setup costs, keep the stay shorter and more flexible.
Cost planning often fails because people treat Vancouver as one monthly number instead of a pattern of linked expenses. The practical question is not whether one estimate looks acceptable in isolation. It is whether housing, transit, workspace, and daily spending still work together when income timing is slower, setup takes longer, or the first neighborhood choice does not hold up.
Build three budget cases before you extend#
Single-number cost estimates are weak planning input because they hide add-ons. A place can look affordable at first glance, then become expensive once housing, workspace fees, transport, and daily costs are included. Build three cases by category, not as one headline monthly total.
| Case | What to assume | Decision signal |
|---|---|---|
| Conservative | Higher setup friction, fewer discounts, more contingency spend | If this breaks your budget limit, do not extend |
| Expected | Normal month with stable routines and moderate convenience spend | Use for day-to-day planning only |
| Stretch | More convenience, higher housing quality, more paid flexibility | Use to test upside risk, not to justify commitment |
Keep the same categories across all three cases so the differences are obvious. At minimum, include housing, transportation, groceries, dining, coworking, health insurance, and visa-related costs relevant to your plan.
The value of these cases is comparison, not prediction. You are trying to see what must stay true for the move to remain comfortable. If the expected case looks fine but the conservative case breaks immediately, then you do not have much room for mistakes, delays, or mispriced housing. That is important information before you extend a stay or sign anything longer.
This is also the point where those broader planning ranges become useful without becoming decisive. Third-party estimates around $2,500-$4,000+ per month can help frame the city, but your actual decision should come from your category-level numbers and your own income timing, not from a generic headline.
Split fixed and controllable costs by stay length#
Once the three cases exist, split your costs into fixed and controllable. Fixed costs are recurring commitments you carry whether the month is easy or hard. Controllable costs are choices you can reduce quickly if the budget tightens.
Use the same split when comparing shorter and longer stay options. That makes the tradeoff much clearer. A shorter stay may look more expensive on a weekly basis but still be safer if it keeps fixed commitments low while you validate the city. A longer stay may improve some monthly math, but it also raises the cost of being wrong.
This split also tells you how to respond when spending drifts. If the problem is fixed costs, you may need a housing or stay-length decision. If the problem is controllable costs, a smaller behavior change may solve it. Without the split, every overspend feels the same and people often reach for the wrong fix first.
Paying more for a safer, walkable location can be worth it when it supports output and lowers stress, but only if your conservative case still holds after that choice. The whole point is to know which upgrades strengthen the plan and which ones quietly weaken it.
Set a relocation threshold you can defend#
Before you extend anything, write down the non-negotiables you are willing to defend:
- Maximum monthly burn you can sustain without relying on best-case income timing.
- Safety and neighborhood standards you will not compromise.
- Time-zone compatibility for your core work and client communication.
- Minimum connectivity standard for home and backup work locations.
Then run a weekly checkpoint: planned versus actual by category, what changed, and what action follows. The action matters as much as the numbers. If your conservative case cannot absorb delay plus setup pressure, pause expansion and continue a shorter validation phase.
A defendable threshold protects you from lifestyle drift. In a city like Vancouver, small upgrades can feel reasonable one by one because each one solves a real inconvenience. Better location. Easier commute. Nicer workspace. More flexible setup. None of those is irrational on its own. The problem is when they accumulate without a rule that tells you when to stop.
Write the threshold before the next decision, not after. That way you are comparing a real option against a rule you already chose instead of letting urgency or fatigue rewrite the rule for you in the moment.
Choose Neighborhood and Work Style for Reliability#
Pick for delivery reliability first, then lifestyle fit. In Vancouver, a coworking-first setup can be an easier way to create predictable call and deep-work windows, while cafes are usually better as a secondary option.
This section only matters after route, documents, and budget are under control. Neighborhood and work style should help a good plan hold up, not rescue a weak one. If you use them in that order, the decision gets much clearer: you are choosing the combination that supports repeatable work with acceptable cost and transit friction.
Start with a work mode you can verify#
The strongest default is the one you can test fastest under weekday pressure. Vancouver is often described as having many coworking spaces, and major-city public transport is often described as reliable in BC and across Canadian cities. That makes a coworking-first trial a sensible starting point before you bet your week on a cafe-heavy routine.
A simple way to compare the two common setups:
| Work mode | Strength | Limitation | Best use |
|---|---|---|---|
| Cafe-heavy routine | Flexible and social | Call privacy and noise can shift by hour | Light-focus tasks and short sessions |
| Coworking membership | More predictable for meetings | The recurring cost needs to earn its place | Core calls and deep work |
Cafes can still be useful, especially for writing or admin. But they are usually less consistent for repeatable meeting windows, and long stays are mostly about consistency. A good afternoon at a cafe tells you very little about whether you can run the same schedule there all week.
The sequence matters here too. Start with the work mode that gives you evidence fastest. If a coworking setup lets you confirm call quality, desk availability, and weekday focus windows, use that first. Once you know the baseline is stable, you can add flexibility. Doing it in the reverse order often creates more uncertainty, not more freedom.
And keep lifestyle proof in its place. A great visit to Granville Island or Grouse Mountain can confirm that you enjoy being in the city. It does not tell you whether your workweek will hold up under deadlines.
Use criteria that match local cost pressure#
Test neighborhood choice against the realities that drive your work, not vibe alone. BC, especially Vancouver, is described as expensive, with housing as the largest cost pressure, and one reported benchmark puts a one-bedroom apartment around $2,500 monthly. Treat that as a stress-test input, not as a guaranteed market number.
Use concrete checks:
- Door-to-desk commute tested at your real meeting hours.
- At least one backup workspace reachable by transit.
- Housing cost that still fits your conservative case after setup costs.
- Stable internet performance during high-stakes call windows.
- A routine you can repeat even in lower-energy weeks.
This set of criteria helps because it turns neighborhood choice into an operating decision instead of a mood decision. A place can feel appealing and still fail your weekday needs. Another place can feel less exciting but support stronger work output, lower transport friction, and a more durable budget. For a longer stay, that tradeoff matters a lot more than the first impression.
If you compare neighborhoods with the same standards every time, you are much less likely to talk yourself into an option that only works on your best days.
Run a keep-adjust-relocate checkpoint#
After an initial trial period, for example around day 14, make one explicit decision: keep, adjust, or relocate. Do not leave it vague. If output stayed steady with low recovery overhead, keep the setup. If one issue repeats, adjust it. If multiple issues stack and start affecting delivery or budget stability, relocate.
This is a practical checkpoint, not a formal rule. A multi-month rotation pattern is common for many nomads in Canada, so changing neighborhood or work style after a short validation period is a reasonable move when results support it.
The useful part is the decision framing. Make the call from observed friction, not from sunk cost. If the housing is acceptable but the work setup is weak, adjust the work setup first. If the workspace is fine but the commute is draining and the budget is slipping, the neighborhood may be the issue. Naming the actual problem keeps you from overcorrecting everything at once.
A checkpoint only helps if it produces action. By the second week, you should know enough to say what is working, what is tolerable, and what is quietly wearing you down.
Avoid the Mistakes That Derail Long Stays#
Long stays usually come apart through stacked small misses, not one dramatic failure. The four checks that matter most are source quality, execution buffer, organization, and decision cadence.
These mistakes are worth calling out because each one feels manageable in isolation. A weak document note does not look fatal. A rushed move day does not look fatal. A scattered receipt trail does not look fatal. A delayed housing decision does not look fatal. The problem is how quickly they combine once you are working in motion.
Mistake 1: Treating directories as final legal guidance#
Directories and community posts are useful for ideas, neighborhoods, and practical tips. They are not your final legal interpretation. If a claim affects visa or paperwork decisions, verify it with official guidance or qualified advice before you act.
This mistake usually starts with convenience. A directory offers one tidy summary, so it feels easier than reading route-specific detail. But when the summary uses broad label language, your plan can drift away from what you can actually support with current official text. Keep directories in the discovery phase, not the decision phase.
Mistake 2: Copying travel-first advice into long-stay operations#
Travel-first content can help with exploration, but long stays add practical friction that short-trip advice often ignores. Timezone shifts, unstable Wi-Fi, and cultural changes can disrupt delivery if your routine has no margin. One traveler lost 30 minutes repacking after a home-versus-airport scale mismatch and reached boarding with about a minute to spare. The useful lesson is not the travel story itself. It is the need for buffer.
A plan with no slack may still work once. It usually becomes stressful when repeated across housing changes, client calls, and city logistics. Long-stay operations need more than enthusiasm and a packing list. They need room for the normal things that go wrong.
Mistake 3: Letting organization drift#
Organization drift is rarely dramatic, but it creates steady friction. If you are managing bookings, work files, and personal admin records, keep one clear filing setup instead of spreading records across inboxes, chats, and screenshots. A short weekly reset is usually enough to keep files current and easy to retrieve.
The reason this matters is simple. Drift looks harmless while it is happening. A receipt stays in email. A booking update lives in chat. A revised file sits in downloads without replacing the old one. Then a basic question requires searching in four places. The fix is not glamorous, but it works: use one structure, keep it current, and stop tolerating "I'll sort it later" as the default.
Mistake 4: Delaying checkpoints until issues stack#
Without basic structure, mobile work can slide toward burnout or isolation. Delayed decisions are the multiplier because small housing or work-pattern issues compound when left unresolved. Set a fixed review cadence and make a clear call each round: keep, adjust, or relocate.
A checkpoint only works if it leads to a decision. If you notice the same problem every week and do nothing because moving feels inconvenient, the delay becomes the real issue. Fixed review points keep you from making expensive changes under pressure, and they also keep you from making no change at all.
Make Your Go or No-Go Decision and Commit to a Timeline#
The final decision should be specific and unemotional. Go only when your major unknowns are closed and your plan is written down. If the move still depends on guesswork, make it a no-go for now and close the gaps first. This is a structured transition, not an impulsive leap.
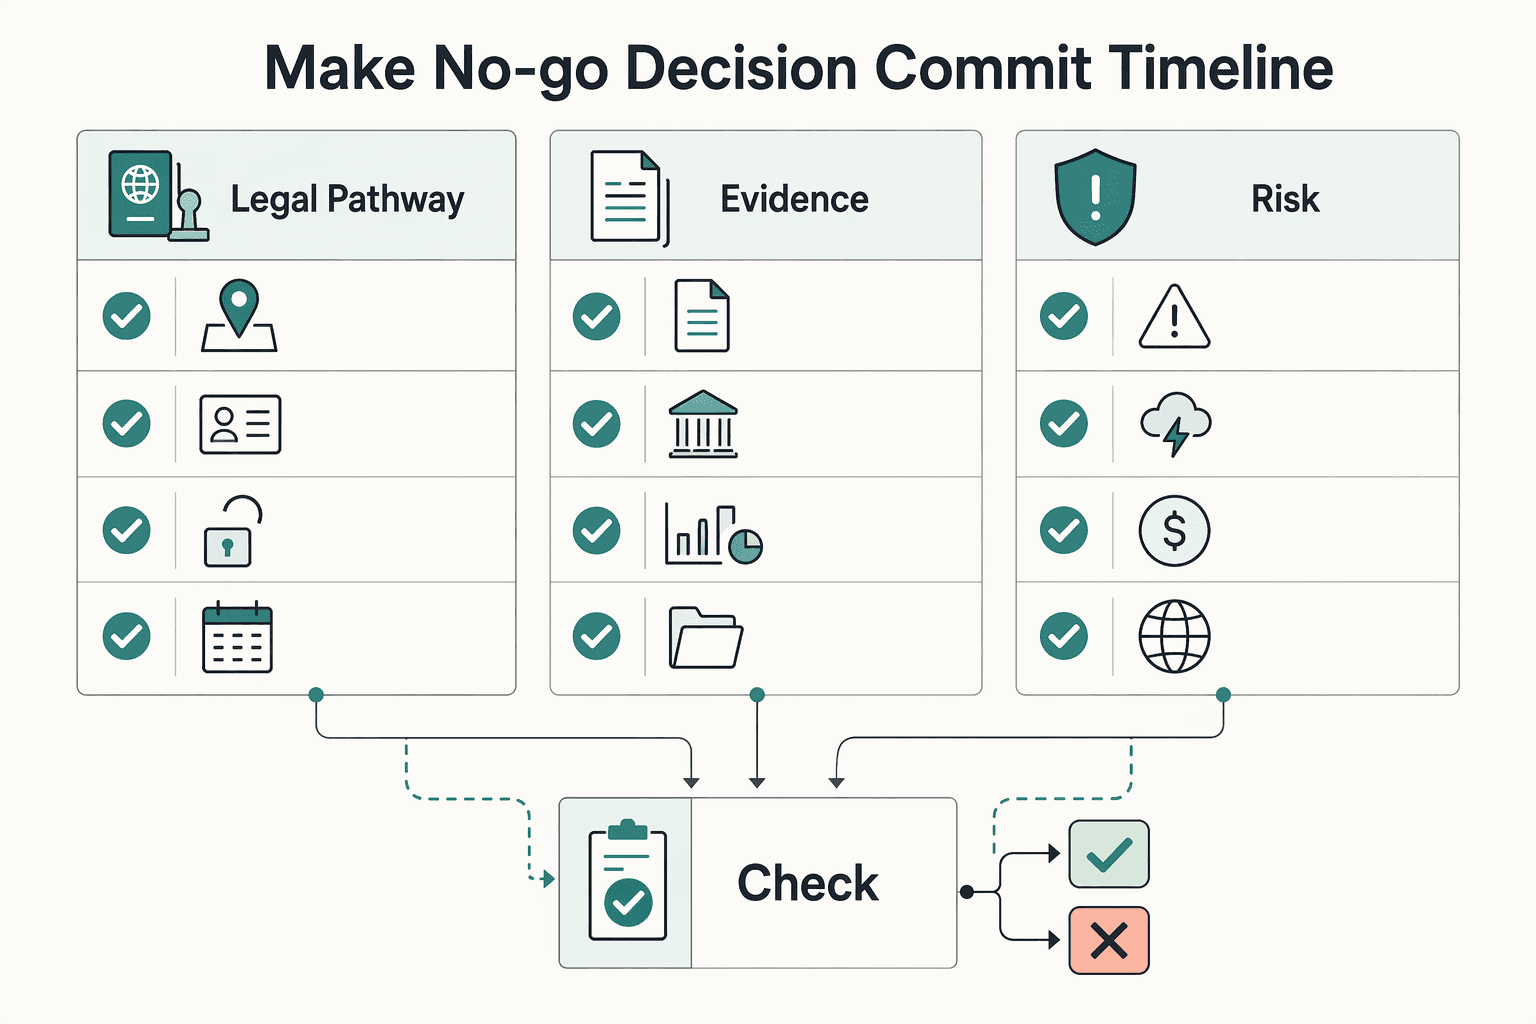
Before any irreversible booking, run one binary checkpoint:
- Legal pathway confidence: you can explain your route clearly and flag any assumptions.
- Document readiness: your checklist is complete, consistent, and easy to retrieve.
- Execution readiness: your working processes and communication strategies are documented.
- Risk readiness: your plan accounts for normal bumps and obstacles without forcing rushed decisions.
If any item is unresolved, delay commitment and close it first. If all four are green, lock travel dates and your week-one sequence in writing so execution stays controlled.
Treat green as evidence, not optimism. Legal confidence means you have current support for the route you are relying on. Document readiness means the files exist in usable form, not just somewhere in old email. Execution readiness means you know how you will work, bill, track, and communicate after arrival. Risk readiness means your budget and timeline can absorb normal friction without turning one issue into a forced move.
This is where the whole guide comes together. The route decision tells you whether the move is even possible in the form you want. The document packet lets you support that route. The booking order keeps early commitments reversible. The first-week plan proves whether your daily operations work in the city. The first-month finance process gives you a record trail you can actually explain later. By the time you reach this section, a real go decision should feel less exciting and more obvious, which is exactly what you want.
If you are still leaning on assumptions, use the pause well. Close the route gap. Tighten the document packet. Rework the conservative budget. Test a shorter stay instead of forcing a longer one. There is nothing lost in delaying a fragile plan. Most of the expensive mistakes in this process come from treating momentum as proof.
For the final planning stack, start with Canada's Digital Nomad Stream: How to Live and Work in Canada, then The 2025 Global Digital Nomad Visa Index: 50+ Countries Compared, then Canadian Taxes for Self-Employed Individuals and Non-Residents.
Before you lock your timeline, run a quick check in the tax residency tracker so your tax timeline and paperwork plan stay aligned.
Frequently Asked Questions
Can digital nomads legally live and work remotely from Vancouver, and how do I choose the correct pathway?
Canada is generally treated as pathway-based, so your work setup matters more than the label you use. Check where your employer or clients are based, who pays you, and whether your work could be seen as competing in the Canadian labor market. If your income is tied to Canadian sources, you are usually in authorization territory. If you are working remotely for non-Canadian payers, visitor entry may be possible under conditions, but never guaranteed.
What is the difference between a digital nomad visa label and Canada’s actual entry options?
Digital nomad visa is common shorthand, but one label can hide how decisions are actually made. Border and application reviews usually focus on trip purpose, self-support, intended stay length, and ties to home. If you want pathway context before booking, read our Canada digital nomad pathway guide.
Which documents should I prepare before flying to Vancouver for a longer stay?
Carry a digital and printed packet so you can answer questions without relying on airport Wi-Fi. Include proof of employment or business activity, such as contracts, an employer letter, or client agreements, plus accommodation details such as booking confirmations or an address. Keep names, dates, and addresses consistent across documents to reduce avoidable delays.
What should I complete in my first week to avoid avoidable delays?
There is no single verified day-by-day checklist that fits every case, so focus on practical checkpoints. Organize immigration and housing records into one clear folder structure with offline copies, then test your work setup from a primary and backup location. Internet figures in Vancouver vary across guides, so treat speed assumptions as something to validate early.
How expensive is Vancouver for remote workers, and which costs are usually underestimated?
Plan for a high-cost city and stress-test your numbers before arrival. One guide estimates about $3,134 per month, and sample one-bedroom rents range from about $1,600 to $2,200 CAD in Mount Pleasant and about $1,800 to $2,500 CAD in Gastown or Kitsilano. There is no single most underestimated monthly cost category to point to. Use these as planning anchors rather than guarantees.
How do I decide between a short exploratory stay and a full relocation attempt?
Choose a short exploratory stay if your pathway still depends on assumptions, your documents are incomplete, or your budget has little room for delays. Move to a full relocation attempt only when your records are consistent, your work and income evidence is ready, and your budget can absorb a conservative month. If one unresolved legal or financial question could force a quick exit, keep commitments reversible.
Try a related tool
Researched and edited by the Gruv editorial team. Gruv builds cross-border billing, payouts, and finance-operations software for global businesses.
Sources
Includes 4 external sources outside the trusted-domain allowlist.
Educational content only. Not legal, tax, or financial advice.
Related Posts

Canada Digital Nomad Visa Planning for Visitor Status and Work Permits
The phrase `canada digital nomad visa` is useful for search, but misleading if you treat it like a legal category. It is shorthand for existing Canadian status options, mainly visitor status and work permit rules, not a standalone visa stream with its own fixed process. That difference is not just technical. It changes how you should plan the trip, describe your purpose at entry, and organize your records before you leave.

The 2026 Global Digital Nomad Visa Index for 50+ Countries
Start with legal fit, not lifestyle filters. The practical order is simple: choose a route you can actually document, then decide where you want to live. That single change cuts a lot of wasted comparison work and stops you from falling in love with places that were never a real filing option.

Canada Tax Rules for Self-Employed Residents and Non-Residents
Your first tax decision is not which form to open. It is your residency position. If that call is wrong, everything after it can go off course, especially if you moved, worked across borders, or changed where you lived during the year.