
Quick Answer
Start by selecting either Work-from-Thailand Professional or Highly-Skilled Professional based on documents you can prove now, then verify requirements in BOI LTR channels before any payment or flight booking. For a thailand ltr visa plan, run three gates in order: authority check, submission-channel check, and full file consistency across names, passport details, and supporting records. Move to issuance only after endorsement, organize dependent paperwork early, and recheck live fees in official channels right before payment.
For a long stay in Thailand, the biggest avoidable risk is doing the right steps in the wrong order. Pick the LTR track first, build the evidence pack that matches it second, and verify live official checkpoints right before every submission or payment. That extra day of discipline usually saves far more time than it costs.
Set your source order early and stick to it. When blog posts, agency pages, and community threads disagree, treat the Board of Investment in Thailand, or BOI, and official LTR channels as your source of record. Consular guidance for this route points applicants back to BOI for visa requirements, so use BOI as the tiebreaker whenever details diverge.
Take the same cautious approach with benefits and representation claims. Official materials describe tax and non-tax benefits, but outcomes depend on your approved category and the rules in force at the time. BOI also warns about fraudulent entities claiming authorization for SMART Visa or LTR handling. If a payment request or authorization claim is unclear, stop before you send documents or money.
Before you pay, book, or upload anything, run three checks in order:
Authority check: confirm category requirements on BOI LTR pages on the same day you act.Channel check: confirm your submission channel is live, since maintenance downtime can happen.File consistency check: confirm names, passport details, and core records match across the full packet.
If one check fails, close that gap first. Submitting with a known mismatch creates correction loops once review starts. A short pause now is almost always faster than fixing an avoidable inconsistency under deadline pressure.
Handle fees with the same discipline. Public amounts and wording can vary across pages and channels, so verify current pricing in official channels right before payment and keep a timestamped record of what you relied on. If language is ambiguous, resolve it before money moves.
One habit makes the rest of the process easier: keep a single decision log with the date, channel, checkpoint result, owner, and next action. When a clarification request arrives, that log lets you answer with one consistent case narrative instead of reconstructing your decisions from memory. Keep the log lean. Each entry only needs checkpoint, result, decision, owner, and due date. Shared ownership sounds collaborative, but in practice it often means no one closes the mismatch before the next deadline.
This guide follows one practical thread from start to finish: choose the right track, build evidence in a useful order, and move only when each gate is clearly open. It also shows where TIESC fits and where coordination with the Immigration Bureau and Department of Employment can affect timing.
What the Thailand LTR visa actually is#
Treat this as its own long-stay route, not a relabeled version of another Thai visa path. Thailand's Long-Term Resident program has a separate legal basis, process, and checkpoint structure. It was launched under a Ministry of Interior order dated 2 June 2022, with rollout from 1 September 2022.
Start with terminology. LTR and SMART Visa are not interchangeable labels. If an adviser, checklist, or draft packet mixes them, stop and verify before you prepare or submit anything. Label confusion at intake often turns into evidence confusion during review, and that is harder to clean up once the process is moving.
For requirements, anchor yourself in BOI LTR channels. More than one public body can still be involved in practice, including the Immigration Bureau and the Department of Employment. TIESC is described as a service point integrating earlier OSOS functions, which is why a single case can touch immigration, visa issuance, and work permit steps in connected ways.
Prepare your documents with that multi-office setup in mind. Your name, passport details, dates, and status records need to tell the same story everywhere. If one office sees one version and another office sees something different, clarification requests become much more likely even when the underlying facts are valid.
Read benefit language as conditional, not automatic. Official messaging describes tax and non-tax benefits and a renewable structure up to 10 years. In practice, that means an initial five-year period with a possible five-year extension if qualifications still hold at renewal time.
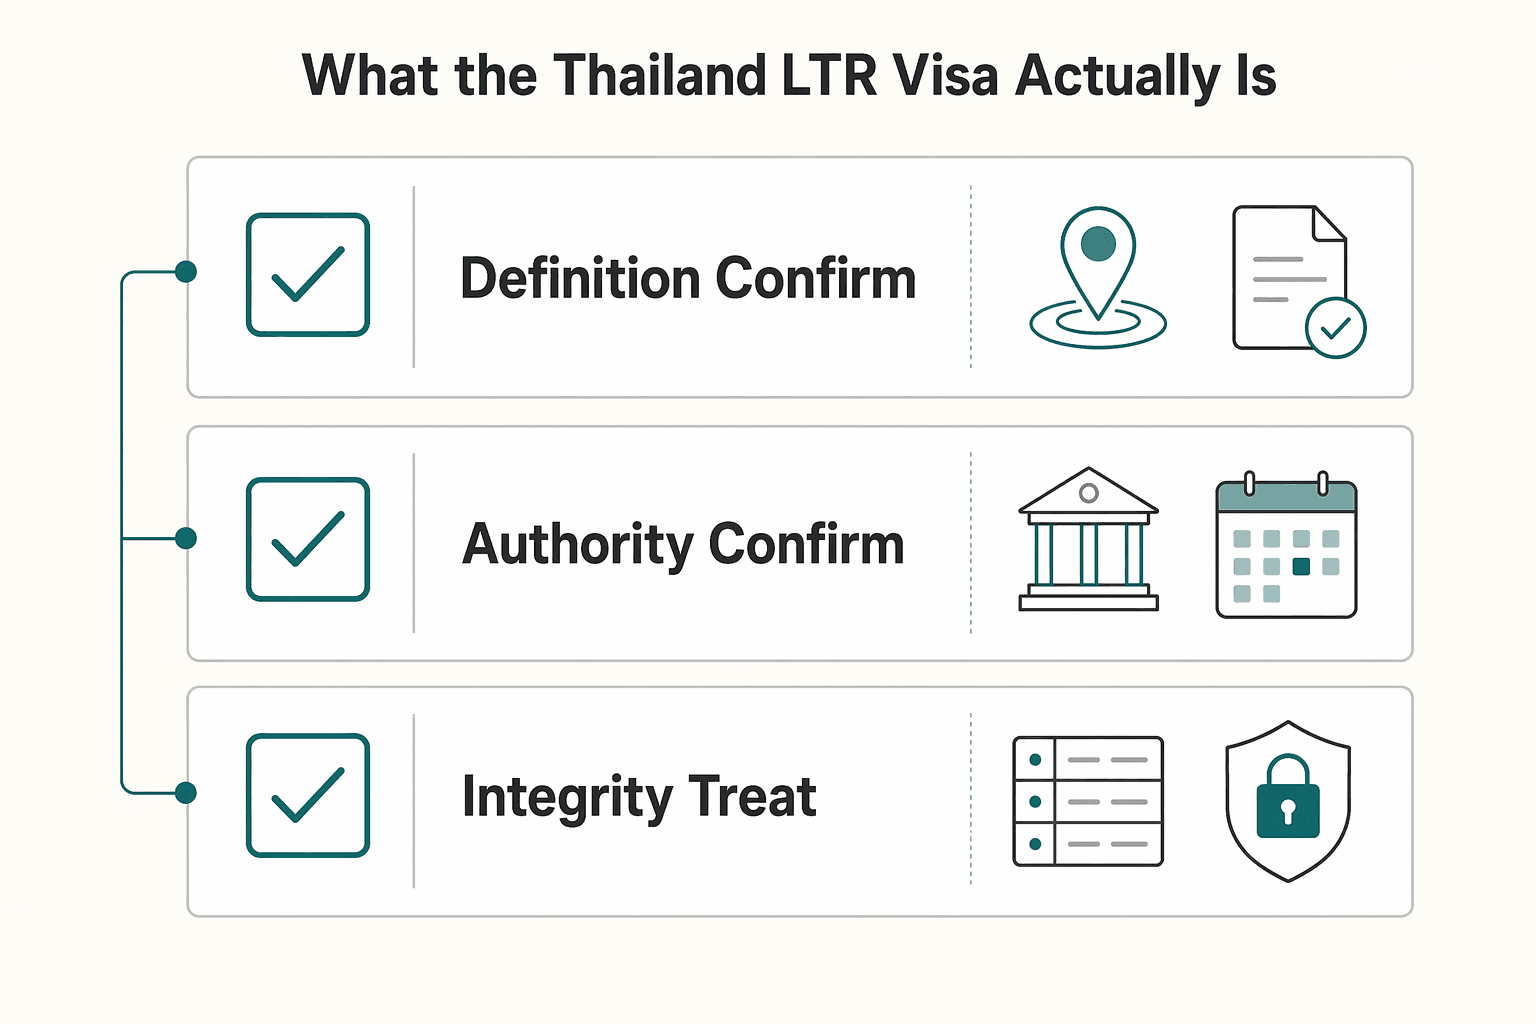
Before you choose a category, run a short validation pass:
Definition check: confirm your route is LTR, not SMART.Authority check: confirm current requirements through BOI first.Integrity check: treat private authorization claims as a red flag until verified through official channels.
Once those boundaries are clear, the next decision gets simpler. The route can be useful for the right profile, but approval is not automatic and the process is not a one-office handoff from start to finish.
If you also need city-level planning context, see Bangkok, Thailand: The Ultimate Digital Nomad Guide (2025).
Decide between Work-from-Thailand Professional and Highly-Skilled Professional#
Choose the stream your current documents can prove, not the one that sounds more impressive. If your case is remote work while living in Thailand, test Work-from-Thailand Professional first. If your case depends on advanced experience in Thai sectors targeted for growth, test Highly-Skilled Professional first.
Both streams sit under the same program, but they solve different problems. One is framed for remote professionals using Thailand as a base. The other is framed for specialists in targeted sectors. If your day-to-day work points one way but your records point another, resolve that conflict before you file.
The cleanest tiebreaker is the strength of your proof chain today. Compare what you can support now, not what you hope to support later. The program is presented as four main types plus a spouses-and-dependents category, so dragging out category selection usually creates edits across multiple checklists, forms, and owners.
Future evidence does not help until it is actually in hand. A track that looks attractive only if extra records arrive on time is usually less reliable than a track you can already support with complete, readable documents. Filing into the wrong stream for perceived upside often triggers requests that erase the time you thought you saved.
A useful pre-submission decision pass looks like this:
- Write one sentence describing your actual work pattern.
- Build a two-column sheet:
requirementandevidence you can provide now. - Mark each requirement as
ready,obtainable quickly, oruncertain. - Choose the stream with the clearest ready proof chain.
- If both still look plausible, recheck criteria through BOI LTR channels before submission.
One red flag deserves a hard stop: pressure to file fast while stream fit is still unclear. Speed only helps after category and evidence already match. Once you have a likely fit, the next discipline is to stop reopening every other track unless the facts actually change.
That matters because category choice is not just a label. It sets up your checklist, your timeline, and later decisions about dependents, fees, and issuance. Make the category decision once, on the strength of your current records, and the rest of the process becomes much easier to control.
If your planning also includes tax exposure choices, Tax Guide for Digital Nomads in Thailand can help frame questions before you file.
Confirm if you should ignore the other tracks#
In most cases, yes. Once one category is clearly supportable with your current evidence, stop comparison-shopping and build for that track. The program has four visa types, and each can be valid for the right profile, but category selection should follow records, not preference.
A disqualifier-first method keeps this practical. Start with how you earn and work today, then test which track your existing documents can support cleanly. If your strongest evidence supports one category, do not keep reopening the decision unless new facts materially change your profile.
Timing is another reason to stay focused. Guidance ties qualification results to complete documents, with notification stated within 20 working days after the file is complete. After BOI endorsement, there is also a 60-day window to apply for visa issuance. Late switching can break that sequence and force avoidable resets.
Category shopping feels flexible when you are still deciding, but it usually adds pressure at the worst point in the process. Each switch can trigger another review cycle and another cross-check across forms, which makes appointment planning less stable and increases the chance of conflicting versions across your file.
Before you move on, lock the choice with a simple rule:
- State your primary track in one line.
- State why your current evidence supports it.
- List only documents you can already produce or obtain quickly.
- Mark assumption-based items and remove them where possible.
- If assumptions still drive the file, pause and recheck category fit.
Revisit the choice only when a real input changes, such as new records that materially improve support for a different category. Do not reopen it because of general online chatter or anecdotal timelines from unrelated cases.
One practical exception is household complexity. Spouse and dependent requirements can vary by visa type and filing location, so verify current dependent-document requirements before final category lock. Even then, the main rule still holds: once the track is fixed, build the evidence pack around that decision instead of around the online form.
Build your document pack before you open applications#
Build the packet first. Starting the application before the evidence is review-ready is one of the easiest ways to create delay. Most preventable problems start with fragmented files, inconsistent identity details, or documents that exist but are not packaged clearly enough for review.
Assemble the packet in process order. Online qualification endorsement comes first through BOI channels. Visa issuance follows endorsement, either at TIESC in Bangkok or overseas at a Royal Thai Embassy or Consulate-General. Because TIESC coordinates across functions, one case can touch immigration, visa issuance, and work permit handling there.
Let that sequence shape your folders. Keep one current version of each core document. Separate ready from pending. If additional applicants are included, prepare those records in parallel and verify key details match across every related file. If third-party records are needed, request them early enough to absorb corrections before deadlines matter.
A strong packet is complete, legible, and easy to review. Use consistent naming, remove duplicate drafts, and make signed versions obvious. Small organization problems still create clarification requests because reviewers cannot infer intent from conflicting or ambiguous file sets.
Before first upload, run one line-by-line cross-check of names, passport numbers, and dates across core files. It is repetitive work, but it catches the small mismatches that commonly trigger first-round requests and unnecessary status churn.
Use this hard pre-submit check:
- Every required file is complete, readable, and signed where required.
- Names, passport details, and dates are consistent across the full set.
Readyfiles andpendingfiles are clearly separated.- Core evidence is complete before submission starts.
- Each missing item has an owner and deadline.
Then simulate a reviewer path from requirement to file to key field to consistency check. If any step requires interpretation, rename or reorder files until the path is obvious. This one pass often reveals issues that look minor from your side but slow review from theirs.
Treat timing as conditional, not promised. Qualification review is often around 20 working days once documents are complete, and it can take longer if additional documents are requested. Issuance after endorsement may be faster, sometimes 1 to 3 working days, but total duration still depends on case complexity and issuance location.
If you have a fixed move date, plan backward from the slowest likely stage, not the fastest headline number. That protects you when clarifications arrive late and still gives you room to respond without rushing low-quality fixes.
Keep document sharing and submission inside official channels only. If a request arrives through an unofficial path, verify it before you respond.
Before upload, run your evidence list through this visa cheatsheet to catch missing documents and timing gaps.
Map the application sequence from BOI to visa issuance#
From this point on, move by status, not by hope. Once qualification work is underway, sequence discipline matters more than speed. Do not start issuance actions before the previous gate is visibly complete.
After endorsement, enter the LTR Visa application system and complete Step 1 with updated information, any additional or corrected files, and your issuance location choice. Treat that location as final at this stage, because it cannot be changed after Step 1 information and documents are submitted.
The safest way to manage the rest is to use status-driven checkpoints before every next action:
| Checkpoint | Owner | Required output | Fail state to catch early |
|---|---|---|---|
| Qualification endorsement | BOI, relevant agencies, and you | Endorsement notice received | Starting issuance actions before endorsement is complete |
| Step 1 update and upload | You | Updated details, complete documents, issuance location selected | Missing files, mismatched details, or wrong location choice |
| Review stage | Issuance reviewers | Status: Document Review for Visa / WP Issuance | Assuming review is complete before status changes |
| Pre-approval stage | Issuance reviewers | Status: Visa/ WP Issuance Pre-approved | Booking or attending with unresolved fixes |
| Issuance appointment | You and the selected issuance point | Appointment completed and visa issued | Arriving with unresolved document or compliance issues |
One rule should carry you through every stage: act on confirmed status plus a clean packet, not on assumptions or side messages. If those two signals are not aligned, wait. If a message cannot be tied to visible status and complete files, treat it as pending clarification rather than permission to move ahead.
If you choose issuance at TIESC in Bangkok, follow upload format instructions exactly. Passport and Thai stamp pages must be scanned left and right per sheet and merged into one PDF. That can look like a small formatting detail, but it still delays scheduling if you get it wrong.
Before appointment, run a compliance pre-check for TM.6, TM.47, and 90-day reporting status where those records apply. A documented failure mode is missed reporting or missing records, which can require a police notice and a 2,000 Baht fine on appointment day. If your entry history changes how TM.6 handling applies to your case, confirm the current requirement before final submission.
Then do a pre-appointment dry run:
- Open every required file from the exact folder you will use.
- Confirm each file matches the declared details in the application.
- Confirm required formatting and merged files are correct.
- Confirm appointment records are easy to retrieve on desktop and mobile.
It is simple, but it is worth doing. It prevents last-minute errors that are hard to fix once appointment timing is locked and travel decisions depend on that slot.
Once the issuance path is clear, map the wider move around those same gates instead of around a hoped-for finish date.
For broader contingency planning, The 2025 Global Digital Nomad Visa Index: 50+ Countries Compared can help you compare alternatives.
Plan your move timeline from pre-check to arrival#
Relocation usually goes off track when travel commitments outrun visa status. Treat the move as a gated timeline, not as one long task list. Once flights, housing, or start dates are fixed before the visa gates are clear, your downside grows quickly.
A phased plan works best because it forces you to tie real-world commitments to real process signals:
| Phase | Primary owner | Exit condition | Common stall point |
|---|---|---|---|
| Category and pre-check | You | Category selected and core evidence ready | Category changes after document prep starts |
| Qualification and issuance prep | You and reviewing authorities | Required approvals received and issuance details submitted | Missing documents or unresolved corrections |
| Final procedural submission | You | Required channel steps completed where applicable | Treating channel progress as a substitute for required approvals |
| Pre-arrival compliance | You | Entry records completed before travel | Missing or inconsistent arrival declarations |
| Arrival readiness | You | Required confirmations ready to show if asked | Unable to produce the right confirmations on request |
Build a correction buffer between phases. Even small amendments can shift the first valid date for the next step, especially when multiple offices are involved. A short deliberate buffer is cheaper than moving money around after nonrefundable commitments are already booked.
Use each exit condition as a strict go or no-go trigger. If the condition is not met, do not advance just to preserve momentum. That discipline protects cash and keeps decision quality high when pressure rises.
Before final payment or submission, run this stop-and-verify gate:
- Passport validity is at least 6 months from planned entry.
- TDAC filing is scheduled within 72 hours before arrival.
- TDAC details match your identity and actual travel plan.
- TDAC QR confirmation is saved and easy to present at entry.
- Submission is through the official TDAC portal, not a third-party intake page.
- TDAC is treated as a required arrival record, not as visa approval.
This matters because TDAC is mandatory for foreign travelers regardless of visa status or stay duration. Missing it can delay border processing. TDAC replaced TM6 in 2024, and mismatches between TDAC declarations and actual travel details can lead to questioning, delays, or refusal.
Requirements can change with little notice, so verify official entry information again before departure, not only during early planning. Keep that final verification close to travel day so your checklist reflects current conditions rather than old screenshots.
Keep a travel-ready folder with your latest confirmations and identity records. It makes pre-departure checks faster and lowers the risk of presenting outdated files at arrival.
Handle dependents without delaying your own file#
Dependents can be handled cleanly, but only if you stop treating them as paperwork to bolt on at the end. Keep the primary case aligned to the selected track, then map spouse and dependent records under the dedicated spouses-and-dependents category.
Start with category alignment. You choose the primary stream first, and each stream has its own eligibility and document expectations. Because this route is more complex than many other Thai visa options, a mismatch between the selected stream and the supporting records often creates avoidable rework.
The structure itself is straightforward: four primary LTR types plus a separate category for accompanying spouses and dependents. Use that structure to build your checklist and assign ownership across household records before submission windows become tight.
| Filing choice | Best fit | Tradeoff |
|---|---|---|
| Combined submission | Primary and dependent documentation can be completed together | One issue can slow the broader packet |
| Staged submission | You want to stabilize the primary file first, then file dependents | More follow-up tracking after primary filing |
Both approaches can work when executed deliberately. Choose after confirming current process requirements for your case and location. Keep one household tracker with owner, status, and due date for every item so weak points surface early.
Also align chronology across files. Marriage, birth, identity, and status records should not conflict with the primary timeline narrative. If family circumstances involve special legal context, verify the exact spouse or dependent document path before final packaging.
As a practical rule, do not let dependent-file uncertainty contaminate a clean primary file. Resolve cross-household dependencies early, but keep ownership and deadlines explicit so one unresolved record does not silently block everything else.
Verify fees and benefits against official channels#
Fee confusion usually starts when separate products get mixed together. The safest habit is to verify fees and benefits in the same session as payment. Anything older, even from an official page, can be stale by the time you act.
The most common mistake is a program mix-up. Public pages can combine Long-Term Resident information with Thailand Privilege content. Thailand Privilege is a separate membership product, so its tier pricing and inclusions are not evidence for LTR fees or LTR benefits.
Use this distinction to stay grounded:
| What you can anchor on | What must be rechecked before action |
|---|---|
| Thailand Privilege and LTR are separate programs | Live fee amount shown in your payment path |
| PE and SE are Thailand Privilege sticker types | Operational notes and issuance instructions |
| Whether a page is clearly LTR-focused | Benefit wording, inclusions, and conditions |
Run a mismatch check before authorizing payment. If a page emphasizes membership tiers, uses ranges like THB 650,000 to THB 5,000,000, or compares PE and SE stay limits, treat it as Thailand Privilege material and keep it out of your LTR assumptions.
Payment-day verification should be short and strict:
- Confirm the page and channel are explicitly for the Long-Term Resident route.
- Reconfirm fee and benefit wording in official LTR channels in the same session.
- If official pages conflict, pause payment and resolve the discrepancy through official support channels.
- Save timestamped screenshots of the exact details you relied on.
Also keep a short payment memo with the channel, amount shown, date and time, and screenshot filenames. If wording shifts later, you still have a clear record of what informed your payment decision.
The operating rule here is simple: separate programs first, then verify live details right before action.
Avoid common failure modes and rework loops#
Most rework is self-inflicted. It usually starts when a packet keeps changing without a clear reason. The practical fix is to freeze your first coherent submission set and edit only when a specific gap has been identified.
The failure modes are predictable, which is good news because predictable problems are easier to control:
| Failure mode | What it looks like in practice | Control that reduces rework |
|---|---|---|
| Scope drift | Track choice changes after first upload | Freeze selected track and evidence list before upload, require written reason for change |
| Mixed-source confusion | Notes blend non-procedural documents with partial official text | Set source order and tag each note as action or context |
| Incomplete document chains | Files exist, but linked details conflict | Validate linked forms as one packet, not isolated uploads |
| Late related-record edits | Related data changes after packet finalization | Review related records in the same pass as the primary file |
Source hierarchy matters most when evidence is thin. A document turning up in an archive is not an endorsement signal, and non-procedural documents should not be treated as operational instructions. Keep context notes separate from action notes so everyone involved knows what is informational and what is binding.
Before each upload round, run this change gate:
- Write the exact
problem or gapyou are fixing. - Write the
consequence if unchanged. - If either line is vague, defer the edit and keep the prior approved packet.
- Record approver, replacement files, and timestamp.
- Recheck affected chains, then run one full packet consistency pass.
Keep changes narrow. If you are fixing one issue, avoid editing unrelated files in the same round. Narrow edits validate faster, make audit trails clearer, and reduce accidental drift when multiple people touch the same file set.
This adds a little administration, but it usually costs less than recovering from uncontrolled revisions near a deadline.
Prepare post-approval compliance tasks in Thailand#
Approval gets you through the main gate, but it does not end the admin work. Entry records and profile-linked obligations still need consistent handling after approval, and this is where simple habits matter more than elaborate planning.
A lightweight tracker is usually enough:
| Compliance area | Trigger point | What to keep ready |
|---|---|---|
| Immigration arrival record | Each entry to Thailand | TDAC confirmation and QR code |
| Entry consistency check | Arrival interview or document review | Travel details that match TDAC declaration |
| Work and status administration | Profile or document changes where approval paperwork requires updates | Current approval records and update confirmations |
| Case-specific forms | Instructions tied to your profile | Filed copies and timestamped receipts |
The highest-friction item is usually TDAC. Current guidance frames it as mandatory for foreign travelers, including long-term visa holders, and requires completion within 72 hours before arrival through the official Immigration Bureau website. Submit only through official channels and store the QR code in at least two places.
Do not treat TDAC as a visa substitute. It does not replace visa requirements or guarantee entry approval. If declarations and actual travel details conflict, questioning, delays, or refusal can follow.
For ongoing administration, stay case-specific. If your approval documents mention additional forms or agency steps, confirm applicability against your current instructions before filing. Avoid broad assumptions based on someone else's timeline.
Short recurring checks work better than occasional big cleanups. They keep records current and reduce stress when a checkpoint appears with little lead time. The goal is steady maintenance, not last-minute recovery.
A simple calendar is enough:
T-72 hours before each arrival: complete TDAC and save QR confirmation.Pre-departure final check: confirm TDAC entries match actual travel details.Any profile-change event: log the change date and verify whether an official update is required.Periodic record review: ensure approvals, filings, and receipts are complete and retrievable.
What to do next before you submit#
Right before submission, optimize for evidence quality, not the feeling of progress. A complete, internally consistent packet gives you more control than a rushed filing that starts the clock with known gaps.
Choose one category and write a short rationale that maps each requirement to a specific document in your folder. Keep the mapping concrete. If you cannot point to supporting evidence now, treat that requirement as unresolved and close it before filing.
Build a final packet that is complete and review-ready. Confirm critical identity records, including the passport biodata page, are present and consistent. Missing core items can trigger Document Request status and pull you into a correction cycle.
Do one last self-review from a reviewer perspective: can someone new to your case trace each requirement to one clear document without interpretation? If the answer is no, fix clarity before you submit.
Then test response readiness. Assume a follow-up request arrives within a day and confirm you can retrieve every supporting file, explain each requirement mapping, and produce updates without rebuilding the full packet. This is the real test of whether the file is ready.
Core checkpoints before submission#
- One category is selected and your rationale matches available evidence.
- Critical identity records, including the passport biodata page, are complete.
- Required documents are complete, current, and valid before submission.
- BOI requirements are rechecked on the day you submit.
Plan with ranges, not with one promised timeline. The initial stage is listed at 3 working days. Consideration is listed at 17 working days and may take longer if additional documents are requested. The same timeline also states 20 business days to endorsement results once information is complete and valid.
If BOI requests additional information during qualification endorsement or pre-approval, respond quickly. If requested documents are not provided within 30 days after each request, the application may be rejected.
Use one closing rule: do not submit to start the clock. Submit when your packet is complete, your checks are current, and you can respond to follow-up requests without delay.
If eligibility still looks borderline, compare practical alternatives with this digital nomad visa guide before you finalize.
Frequently Asked Questions
What is the Thailand LTR visa?
Thailand's LTR visa is a long-stay program for specific applicant groups. It is tied to a Ministry of Interior order dated 2 June 2022, with rollout announced from 1 September 2022. The program is presented with tax and non-tax benefits, which can vary by approved category.
Who qualifies for Thailand’s LTR visa categories?
Qualification is category-based: four main tracks plus a separate Spouses and Dependents track. Work-from-Thailand Professionals and Highly-Skilled Professionals are two of the professional tracks. Each track has different evidence requirements, so eligibility is assessed by category.
How long is the LTR visa valid in practice?
The headline is a renewable 10-year structure. In practice, the first permission is five years, with a possible five-year extension if you still qualify. Treat the second period as conditional, not automatic.
How do I apply for the LTR visa step by step?
First, choose the category that matches your evidence. Then contact the Board of Investment in Thailand (BOI) to confirm requirements before you submit. Follow the official LTR process path for current steps, and if a channel is temporarily unavailable, pause and reconfirm with BOI.
Can spouses and dependents apply with me?
Yes. Spouses and Dependents are defined as a separate LTR category linked to a primary holder. Keep family documentation aligned with the primary case.
What is the official LTR visa fee right now?
A consulate announcement lists a visa fee of 1,600 USD. Do not treat that as universally payable in every channel on every day. Reconfirm BOI guidance and the live issuance path before payment.
What should I do if BOI and third-party sites show different requirements?
Use BOI as your primary requirements checkpoint and treat third-party sites as secondary context. The official portal warns about fraudulent entities claiming authorization, so verify authorization before sharing documents or paying fees. Expect coordination with immigration and labor authorities as part of the broader process.
Try a related tool
Researched and edited by the Gruv editorial team. Gruv builds cross-border billing, payouts, and finance-operations software for global businesses.
Sources
Includes 4 external sources outside the trusted-domain allowlist.
- home-affairs.ec.europa.eu/document/download/15d26a45-e9b9-44e5-a4c7-cd...trusted
- lexnovapartners.com/ltr-visa-for-highly-skilled-professionalsexternal
- thaiconsulatela.thaiembassy.org/en/publicservice/long-term-resident-visa-ltr...external
- thaielite-express.com/thailand-ltr-visaexternal
- thaielite-express.com/where-can-i-get-the-thailand-ltr-visaexternal
Educational content only. Not legal, tax, or financial advice.
Related Posts

Bangkok Digital Nomad Guide for 2026 Long-Stay Moves
This guide is for remote professionals planning a long stay in Thailand. It puts legal and operational decisions first, then lifestyle choices.

The 2026 Global Digital Nomad Visa Index for 50+ Countries
Start with legal fit, not lifestyle filters. The practical order is simple: choose a route you can actually document, then decide where you want to live. That single change cuts a lot of wasted comparison work and stops you from falling in love with places that were never a real filing option.

Thailand Tax for Digital Nomads Without Residency Mistakes
The most expensive mistakes here happen before anyone opens a tax return. People pick a visa, assume the tax answer comes with it, then try to rebuild the year from scraps after the fact. By then, the damage is usually not one dramatic error. It is a pile of small gaps: an unverified day count, a transfer with no clear purpose note, invoices that do not line up cleanly with payments, and assumptions nobody wrote down when the facts were still fresh.