
Quick Answer
Match tool type to buyer stage: use a quick walkthrough for awareness, a guided tour for consideration, and deeper personalization for decision support. Start with one repeat buyer question and run the 30 plus 15 plus 15 checkpoint before adding complexity. If you cannot publish, add a clear CTA, and wire basic signals in that window, the setup is likely too heavy for early-stage use. Keep your first asset short, shareable, and tied to one next action.
The High-Trust Demo Playbook: A Strategic Framework for Winning Premium Clients#
If you are shopping for interactive product demo tools, do not start with a logo list. Start with the buying moment you need to support. This playbook helps you choose the right demo class for each stage of the sales process. The goal is simple: stop sending static proof and start giving buyers something they can use to make a confident decision.
The lens throughout is the Interactive Value Demonstration (IVD) framework, a three-stage process that moves a prospect from awareness to signed contract. That matters because the old vendor pattern often ends in price comparison, negotiation pressure, and ghosting. A stronger demo setup should also support buyer enablement, since many buyers want to learn on their own terms before they reply to sales.
| Tool class | Setup effort | Personalization depth | Analytics visibility | Handoff readiness | Fit for solo operators |
|---|---|---|---|---|---|
| Quick walkthrough | Can you capture a core flow in 30 mins, publish with a CTA in 15 mins, and wire signals in 15 mins? | What level of tailoring can you ship quickly? | Which basic view and click signals are available? | Can someone understand the story without a live call? | Is ongoing upkeep realistic for one person? |
| Guided product tour | What is required to keep the story clear without live narration? | How far can you tailor the experience for different buyer contexts? | Can you see step-level engagement and drop-off clearly? | Can buyers share it internally without extra explanation? | Is maintenance manageable if your team is small? |
| Enterprise personalization | What review workload is needed before launch? | How precisely can you adapt content to account context? | Can you tell who engaged and what they reviewed? | Does it support internal decision handoff in late-stage deals? | Will complexity stay manageable if resources are limited? |
- Quick walkthrough
Use this for the Competence Showcase. The real advantage is speed. If a tool cannot get a real story live within that 30 plus 15 plus 15 minute checkpoint, it may be too heavy for top-of-funnel use.
- Guided product tour
Use this for the middle stage, where buyers self-educate. Since 75% of B2B buyers are cited as preferring a sales experience without talking to a rep, this class should let prospects learn your method without you narrating every click.
- Enterprise personalization
Use this for late-stage decision support. Because 83% of software purchases are said to happen without sellers present, the asset has to survive internal handoff. If your buyer cannot forward it and make the case without you, that is a red flag.
The next section maps the three-stage framework. The sections after that show where a quick showcase, a guided tour, or a personalized proposal fits. Before you move on, score your current sales flow against the table and carry the missing gaps into the framework section.
The 3-Stage Interactive Value Demonstration Framework#
Use this framework as your system for choosing and using interactive demo tools across the buying journey, not as a mindset slogan. You are matching one stage at a time: awareness, consideration, then decision. That structure prevents you from forcing one demo format into every moment, even though interactive demo software spans different categories, including video demos, product tours, live demos, and POC/sandbox tools.
| Stage | Objective | Required output before you advance | Tool fit | Success signal |
|---|---|---|---|---|
| 1. Awareness | Earn enough trust for a deeper look | A short click-through or video-style demo a prospect can open without a call | Video demo or product tour category (verify embed/CTA behavior in your shortlisted platform) | You can track basic usage or distribution |
| 2. Consideration | Show how you work, not just what you sell | A guided walkthrough of the core path you want buyers to evaluate | Product tour or live demo category (verify step-level engagement and drop-off visibility) | Prospect completes the core path and asks more specific follow-up questions |
| 3. Decision | Help an internal champion carry your case | A tailored, shareable evaluation asset for internal review | POC/sandbox or personalization-heavy category (verify shareability and usage analytics) | The asset is forwarded, revisited, or reused during internal discussion |
- Stage 1: Awareness
Your job is to publish low-friction first proof. A click-through demo can be built from screenshots, video, or an interactive clone, but it should stand on its own. If understanding requires a live call, self-service buyers can drop out early.
- Stage 2: Consideration
Your job is to make your method visible through a guided path. This is where engagement visibility becomes practical, because it helps you follow up on what people actually viewed and where interest slowed. Before moving on, confirm the walkthrough reflects the decision-critical flow.
- Stage 3: Decision
Your job is to package a shareable, account-relevant asset that can survive internal handoff. Treat handoff quality as the gate: if the asset cannot be redistributed and understood without you in the room, it is not decision-ready.
The next three sections break each stage into execution steps and tool-fit checks so you can publish with fewer guesswork loops. For a step-by-step walkthrough, see The best tools for creating 'User Journey Maps'.
Stage 1: The 'Competence Showcase' - Your New First Impression#
Stage 1 should prove one thing fast: you are organized, credible, and easy to work with. If someone needs a live call just to understand your basics, this stage is too heavy. A short, shareable demo with a tracked next step is usually the right first move.
| Format | Assets | Show | Hide | Next action |
|---|---|---|---|---|
| The process primer | Your onboarding flow, client workspace, delivery board, or handoff structure | The core path only | Edge cases, admin noise, and client-specific details | One tracked CTA to a deeper walkthrough |
| The interactive case study | One finished engagement | Before state, decision logic, and outcome asset | Confidential comments, unused options, and large file dumps | Invite a guided walkthrough for their situation |
| The framework teaser | One realistic input and one useful output from your diagnostic or repeatable approach | The part that proves your thinking | Full IP, full branching logic, and anything that feels like free consulting | Request the Stage 2 walkthrough |
| Stage 1 tool fit | Setup speed | Branding control | Shareability | Analytics depth | Best use at this stage |
|---|---|---|---|---|---|
| Lightweight capture or product tour tools | Usually faster to publish because they rely on screen capture or simple guided tours | Varies by tool; current branding feature support pending vendor verification | Strong for email links and embedded website use; can also work as leave-behinds | Usually lighter, with core signals like views and shares; current analytics capability pending vendor verification | Quick onboarding flow, delivery workflow, or sample client artifact |
| Deeper guided-demo or live demo tools | More setup because they support more customization and narrative control | Often stronger customization; current branding feature support pending vendor verification | Shareable, but often a better fit when the buyer is ready for more guidance | Often deeper when connected to CRM, marketing automation, or digital analytics; current analytics capability pending vendor verification | Richer walkthrough when you need more context without moving into full sandbox/POC |
Supademo positions itself as a quick, shareable step-by-step option. Demostack positions itself around customizable demos without engineering help. The tradeoff is practical: faster publishing versus deeper tailoring. With over 20 platforms in the market, a common mistake is selecting for late-stage complexity before you can ship a clear first asset.
Build Stage 1 from assets you already have. You do not need a fake environment or a long narrative. You need one clear path that shows order, judgment, and the next action.
- The process primer
Show how work starts in 3 to 5 clean steps. Use assets you already have, like your onboarding flow, client workspace, delivery board, or handoff structure. Show: the core path only. Hide: edge cases, admin noise, and client-specific details. Next action: one tracked CTA to a deeper walkthrough.
- The interactive case study
Turn one finished engagement into a guided story. Use a start point, one key decision moment, and the final artifact, then explain why the decision mattered. Show: before state, decision logic, and outcome asset. Hide: confidential comments, unused options, and large file dumps. Next action: invite a guided walkthrough for their situation.
- The framework teaser
Reveal the front end of your method, not the full engine. Show one realistic input and one useful output from your diagnostic or repeatable approach. Show: the part that proves your thinking. Hide: full IP, full branching logic, and anything that feels like free consulting. Next action: request the Stage 2 walkthrough.
Consider Stage 1 complete when all three checks pass: your narrative is clear, the walkthrough is polished enough for email or web embed, and the handoff path is tracked, at minimum, views and shares. If integrations with CRM, marketing automation, or digital analytics are available and verified, your follow-up gets sharper. Related: How to Create a Pitch Deck for Your Agency.
Stage 2: The 'Process Walkthrough' - Building Unshakeable Trust#
Stage 2 should make your method visible enough that a qualified buyer can trust how you work, not just what you deliver. Build one guided walkthrough in a controlled demo environment before you move to personalized proposal content. If the walkthrough feels ad hoc or the environment breaks, trust drops fast.
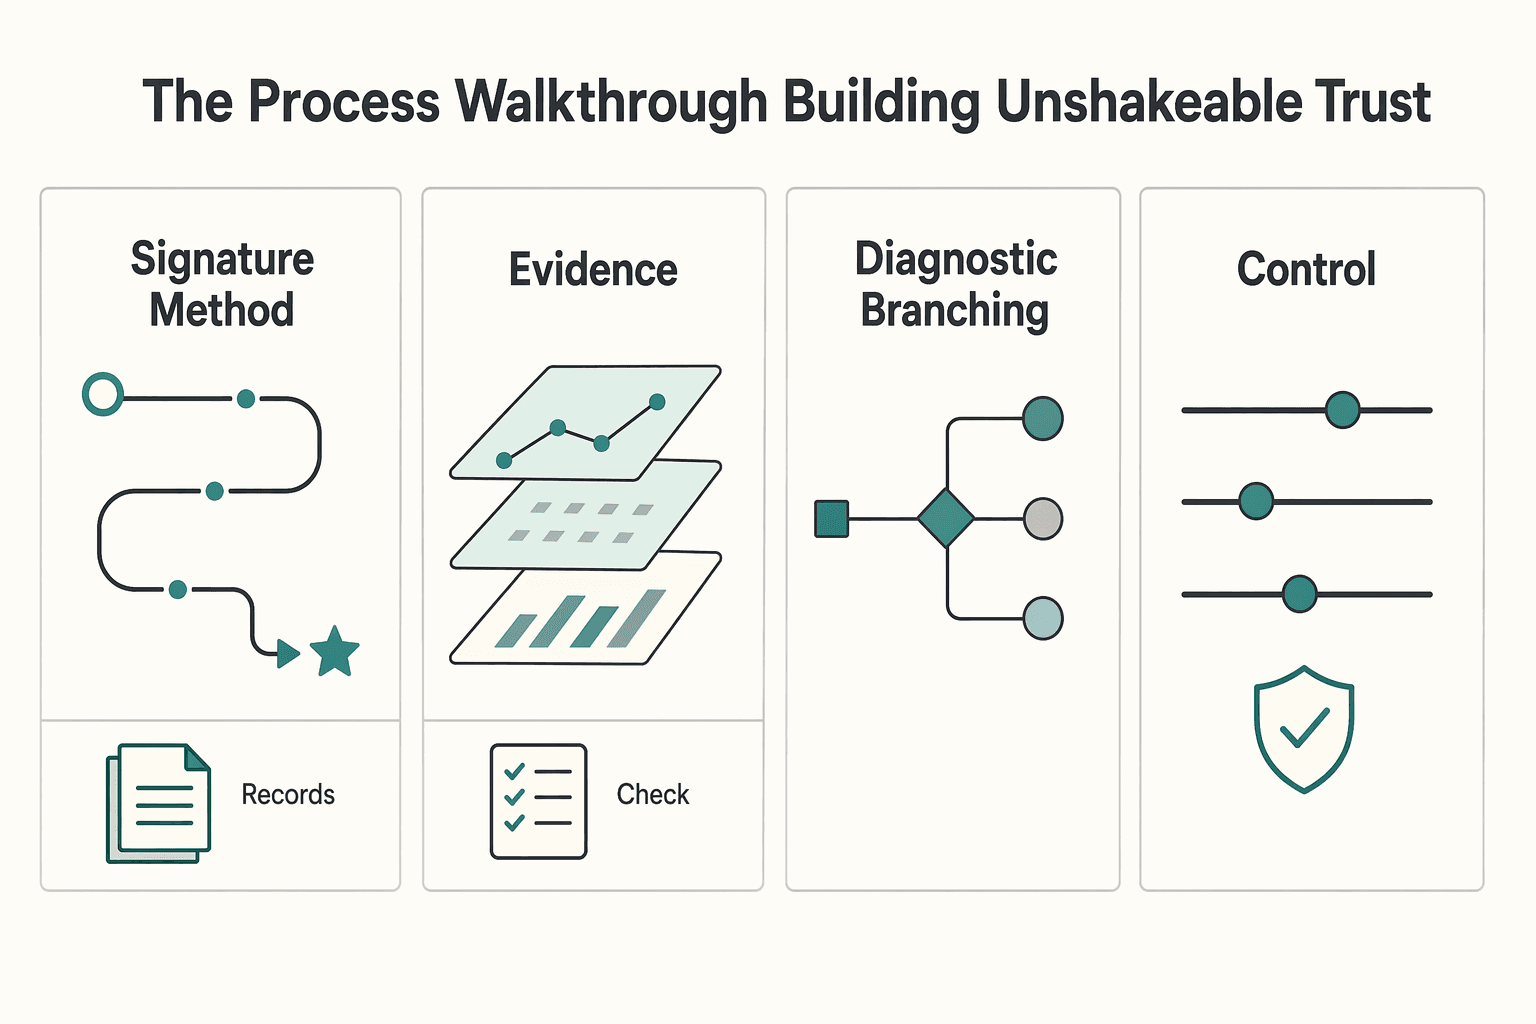
| Pattern | Input asset | Structure | Buyer takeaway |
|---|---|---|---|
| Signature method walkthrough | Your kickoff checklist, SOP, audit template, or project plan | Show client input, walk through your method sequence, then show the decision checkpoint that drives the next step | Your process is repeatable and your judgment is visible |
| Deliverable deconstruction | One sanitized client deliverable, for example a strategy deck, wireframe set, onboarding map, or report | Start with the summary, pause on one key decision point, then connect the recommendation to the evidence used | The value is your interpretation and decision logic, not just the final file |
| Diagnostic branching | Your intake questions, discovery notes, and common problem patterns | Ask a qualifying question, route to the relevant branch, and end each branch with the right next step | You diagnose before prescribing, so the process feels consultative and relevant |
| Stage 2 option | Narrative control | Branching support | Collaboration/commenting | Stakeholder tracking | Stage 2 fit |
|---|---|---|---|---|---|
| Walnut | Current narrative control capability pending vendor verification | Current branching support pending vendor verification | Current collaboration and commenting capability pending vendor verification | Current stakeholder tracking capability pending vendor verification | Guided process walkthroughs when you need a reusable narrative |
| Storylane | Current narrative control capability pending vendor verification | Current branching support pending vendor verification | Current collaboration and commenting capability pending vendor verification | Current stakeholder tracking capability pending vendor verification | Guided process walkthroughs you can reuse and adapt |
| Demostack | Current narrative control capability pending vendor verification | Current branching support pending vendor verification | Current collaboration and commenting capability pending vendor verification | Current stakeholder tracking capability pending vendor verification | More tailored walkthroughs when you need tighter story control |
| Dedicated sales demo environment | Current narrative control capability pending vendor verification | Current branching support pending vendor verification | Current collaboration and commenting capability pending vendor verification | Current stakeholder tracking capability pending vendor verification | Qualification calls where you need a controlled, problem-to-solution path |
Use one of these three build patterns so buyers can evaluate your reasoning, not just your polish:
- Signature method walkthrough
Input asset: your kickoff checklist, SOP, audit template, or project plan. Walkthrough structure: show client input, walk through your method sequence, then show the decision checkpoint that drives the next step. Expected buyer takeaway: your process is repeatable and your judgment is visible.
- Deliverable deconstruction
Input asset: one sanitized client deliverable, for example a strategy deck, wireframe set, onboarding map, or report. Walkthrough structure: start with the summary, pause on one key decision point, then connect the recommendation to the evidence used. Expected buyer takeaway: the value is your interpretation and decision logic, not just the final file.
- Diagnostic branching
Input asset: your intake questions, discovery notes, and common problem patterns. Walkthrough structure: ask a qualifying question, route to the relevant branch, and end each branch with the right next step. Expected buyer takeaway: you diagnose before prescribing, so the process feels consultative and relevant.
Keep operations simple: maintain one master template, duplicate it per prospect, and verify that the sample data reflects the buyer's actual problem area before sending.
Readiness checkpoint for Stage 3: You are ready when your walkthrough clearly links method to outcome and you have verified which engagement signals your setup captures for follow-up. If either is missing, refine Stage 2 first.
Stage 3: The 'Customized Solution' - Closing the High-Value Deal#
At Stage 3, your goal is simple: make the decision feel low risk and easy to approve. Do not rebuild a demo from scratch for every deal. Reuse your Stage 2 asset with three focused layers: a client context layer, a tailored scope narrative, and one clear decision-path CTA.
| Approach | Include | Check |
|---|---|---|
| Deep personalization through reusable components | The buyer's real problem framing, relevant role context, and one sanitized example that matches their environment | Treat cosmetic edits as optional, not sufficient; map each personalized element to scope, owner, timeline, or success criteria |
| Turn the proposal into a guided decision path | Problem recap, proposed approach, what is included, and what happens next; keep one CTA only | Keep your demo and commercial terms aligned so the interactive flow does not imply more than the statement of work includes |
| Use engagement signals to drive follow-up | Views, shares, and usage or distribution signals; if data is basic, use it for timing and stakeholder questions | First confirm what your tool actually tracks from vendor documentation or platform settings; if deeper activity data is confirmed, tailor follow-up to the sections that got attention |
Late-stage tool choice is mostly a fidelity-versus-maintenance decision. Interactive demo tools span 4 primary approaches with different realism levels, so pick the lightest format that still makes scope and outcomes feel concrete.
| Late-stage tool type | Personalization depth | Proposal workflow support | Stakeholder visibility | CRM or handoff compatibility |
|---|---|---|---|---|
| Guided tour builders | Good for swapping logos, text, hotspots, and guided paths in reusable scenes | Strong for linear proposal stories with one clear next step | Current stakeholder visibility pending vendor verification | Current CRM or handoff compatibility pending vendor verification |
| Customizable demo platforms | Usually stronger for deeper tailoring across screens, paths, and scenario variants | Better fit for interactive proposal flows that branch by use case or buyer role | Current stakeholder visibility pending vendor verification | Current CRM or handoff compatibility pending vendor verification |
| Sandbox or POC automation solutions | Highest realism when the buyer needs a pre-configured or cloned environment | Useful when approval depends on hands-on validation, not just a guided story | Current stakeholder visibility pending vendor verification | Current CRM or handoff compatibility pending vendor verification |
Personalize only what changes the decision. That keeps the proposal specific without creating a maintenance burden.
- Deep personalization through reusable components
Build from one stable base, then customize only deal-specific layers. Include the buyer's real problem framing, relevant role context, and one sanitized example that matches their environment. Use low-code/no-code edits, hotspots, or guides to make the experience specific without duplicating the entire demo. Treat cosmetic edits as optional, not sufficient. Each personalized element should map to a decision variable like scope, owner, timeline, or success criteria.
- Turn the proposal into a guided decision path
Run the narrative in a fixed order: problem recap, proposed approach, what is included, and what happens next. Keep one CTA only, such as approve scope or book kickoff. If your interactive flow implies more than your statement of work includes, you create avoidable friction. Keep your demo and commercial terms aligned, especially if you price by outcomes, as outlined in Value-Based Pricing: A Freelancer's Guide.
- Use engagement signals to drive follow-up
After sharing the proposal, follow up based on behavior, not guesswork. Views, shares, and usage/distribution signals can show what resonated and whether more stakeholders are involved. First confirm what your tool actually tracks from vendor documentation or platform settings. If data is basic, use it for timing and stakeholder questions. If deeper activity data is confirmed, tailor follow-up to the sections that got attention.
Use this close-stage checklist before sending:
- Personalized context is real, not decorative: the buyer's problem, role context, and example are accurate and sanitized.
- Scope and next step are explicit: inclusions, exclusions, and the single CTA are clear.
- Follow-up is signal-based: you know which engagement metrics you will watch, when you will reach out, and what question you will ask next.
The Psychology of Proof: Why This Method Works#
This method works because it gives prospects proof they can use to make a decision, not just polished work to review. In practice, they need to believe three things: you understand their problem, your process is trustworthy, and the next step is low risk.
| Format | Proof signals | Buyer questions answered | Typical objections handled |
|---|---|---|---|
| Static portfolio | Past screenshots, finished deliverables, written claims | "What have you made before?" | "Looks good, but how does this apply to us?" |
| Interactive walkthrough | Guided steps, clickable paths, tailored screens, visible sequence | "How would this work for us?" "What happens next?" | "I still cannot picture implementation." "I need to test this before I push internal buy-in." |
- Problem fit
Use an interactive walkthrough to show the product or process in action, so the buyer does not have to infer fit from static files. Buyers want to see it in action, test it before they build an internal case, and confirm it can solve their challenge. Before you send the demo, check that each step answers a real buyer concern from discovery. If it does not, remove it.
- Process trust
Static assets mostly show outcomes, but guided sequencing shows how you think. Progressive disclosure helps you reveal complexity without overwhelming the buyer, so they can follow your logic step by step. If your flow branches too early or too often, it starts to feel confusing instead of credible.
One HowdyGo analysis of over 200 B2B SaaS websites reported that 96% relied only on screenshots. If your proof stops at screenshots, the buyer has to do more interpretation on their own.
- Internal defendability
A strong walkthrough helps your internal champion explain your recommendation when you are not in the room. Keep the path short, keep one clear next step, and, when relevant, include an ROI calculator with personalized TCO inputs to address budget pushback. The goal is decision confidence: they can explain both what you recommend and why it is credible.
Treat demo-tool investment as an operating decision, not a guaranteed revenue lever. If your deals involve complex evaluation, multiple stakeholders, or repeated "show me how this works" requests, better interactive tooling can reduce friction and improve deal fit. If your sales cycle is simple and low touch, a lighter setup may be enough.
From Vendor to Indispensable Partner: Your Action Plan#
Start small: use one interactive proof asset in one real sales conversation, then iterate based on buyer behavior. That is the practical path from being treated like a vendor to being trusted as a partner.
-
Choose one use case. Pick one repeat buyer question, not your whole offer. Spend about 30 mins choosing the moment that most often slows decisions: your audit method, onboarding path, proposal logic, or a before-and-after case study. Build the asset that helps qualify fit before a call.
-
Build one competence showcase. Turn that moment into a short click-through walkthrough with one clear next step. Spend 15 mins publishing it with a relevant CTA. Keep every screen tied to a real buyer question you hear in discovery.
-
Run one guided walkthrough. Use it in your next prospect call and guide the buyer through it. This gives you a reusable flow when live demos get disrupted or when stakeholders miss the meeting and need a replay. Watch where the buyer pauses, because that usually marks scope or confidence gaps.
-
Capture feedback and wire signals. Spend another 15 mins connecting tracking, or at minimum logging completion, drop-off, and CTA clicks. Use those signals to decide whether qualification got clearer or the flow added noise.
| Task | Owner | Tool category | Proof asset | Success signal |
|---|---|---|---|---|
| Pick one repeat buyer question | You | Lightweight walkthrough tool | Single case-study flow | Clearer early qualification |
| Build the first demo | You | Interactive demo tool | Competence showcase | Fewer scope misunderstandings |
| Use it in one real call | You | Guided sales-demo platform | Guided walkthrough | Stronger decision confidence |
| Review engagement and revise | You | Tool with tracking support | Updated version | Better next-call qualification |
Your lowest-friction first step: take one existing case study, convert it into an interactive flow, and use it in your next real prospect conversation. Keep what already works, and test this method in your live pipeline before expanding it.
Frequently Asked Questions
How can you use interactive demos if you do not sell software?
You can demo your method, not just software features. Build a guided walkthrough of a sample audit, client portal, roadmap, proposal, or before-and-after deliverable so the buyer can see how you think and what happens next. Before you publish it, check that each click answers one real buyer question from discovery notes. If a screen is only there to look polished, cut it.
Are these tools worth it for a solo service business?
They can be worth it when you sell a higher-trust service: complex offers, multi-stakeholder approvals, repeated "show me how this works" calls, or premium pricing that needs stronger proof. Treat ROI claims as directional, not guaranteed. Vendor benchmarks cite outcomes like deals closing 19 days faster, 6% higher win rates, completion rates up to 67%, and conversion lifts up to 32%, but your real test is simpler: if one good walkthrough can replace repeated explanation across several deals, the spend is easier to justify.
What should you choose if you need something fast and simple?
Start with a lightweight walkthrough tool when your goal is speed, not deep product simulation. Supademo is positioned around quick demo creation and simplicity, and Storylane is positioned for lightweight guided walkthroughs. Move up only if your sales motion needs more. Navattic is aimed at realistic, modular demos that reduce live-demo load, while Demostack is positioned for sandbox demos and fuller product replication. With 20+ platforms in the market, pick by use case, not logo recognition.
What is a better alternative to a static portfolio for a service business?
Build a small library of guided proof assets instead of one flat "work" page. A strong starting set is one competence showcase, one process walkthrough, and one tailored proposal demo you can adapt by industry or offer. The failure mode is replacing screenshots with slightly fancier screenshots. If buyers still cannot click through a real sequence or understand your decision logic, you have not changed the outcome.
How should you think about pricing?
Use pricing categories, not assumptions. Current entry and advanced tiers must be verified from official vendor pricing pages or contract records before budgeting. When you compare options, budget for the tool itself plus the hidden cost of upkeep: who owns updates, how version tracking is handled, and whether controls like password protection, form gates, or one-on-one links are included at your plan level.
Can you embed demos on your website or in onboarding?
Often yes, but verify this on your shortlist before you buy. Teams do embed demos directly in onboarding to drive feature adoption, and the same logic can apply on portfolio, case study, and proposal pages. Use a practical checkpoint: test the embed, loading behavior, and any form gate or password flow on the actual page where prospects will see it.
How do you keep demos accurate and compliant over time?
Give one person clear ownership, even if that person is you, and store demos in one governed library with tags, version tracking, and access controls. Review a demo whenever the product, offer, pricing, claims, or sensitive screen content changes, not on an arbitrary calendar alone. If you show real workflows, prioritize tools with stronger library management and access restrictions. If frequent product changes are your biggest risk, put "product-change-triggered updates" on your evaluation checklist.
Try a related tool
Researched and edited by the Gruv editorial team. Gruv builds cross-border billing, payouts, and finance-operations software for global businesses.
Sources
Includes 6 external sources outside the trusted-domain allowlist.
- pmc.ncbi.nlm.nih.gov/articles/PMC12696944trusted
- tiffin.edu/wp-content/uploads/AI-Tools-with-Description...trusted
- chameleon.io/blog/best-interactive-demo-toolsexternal
- demostack.com/post/ai-sales-toolsexternal
- g2.com/categories/demo-automationexternal
- gartner.com/reviews/market/interactive-demonstration-app...external
- goconsensus.com/blog/best-sales-demo-software-for-automationexternal
- goconsensus.com/blog/best-buyer-enablement-toolsexternal
Educational content only. Not legal, tax, or financial advice.
Related Posts

Value-Based Pricing for Freelancers Under Real Payment Risk
Value-based pricing works when you and the client can name the business result before kickoff and agree on how progress will be judged. If that link is weak, use a tighter model first. This is not about defending one pricing philosophy over another. It is about avoiding surprises by keeping pricing, scope, delivery, and payment aligned from day one.

The Best Tools for Creating Professional Presentations
Use a 2025-2026 validation sweep each quarter: confirm one monthly software baseline ($15/month), one collaboration baseline ($30/month), and one premium workflow baseline ($60/month) before changing client-facing tool commitments.

How to Create an Agency Pitch Deck That Wins Decisions
Your **agency pitch deck** should help one buyer make one decision. If the meeting ends with compliments about the slides but no movement on scope, next steps, or stakeholder review, the deck missed its job.