
Quick Answer
The best microphone for voiceovers and podcasting depends on your room, workflow, and business stage, not on one universal winner. In a typical home or office, a dynamic mic is often the safer choice because it rejects more background noise, while a condenser can work well in a quiet, controlled room. Choose USB for simplicity or XLR for more control and upgrade flexibility.
Your Microphone Isn't a Gadget - It's a Capital Asset#
You are not buying a desk accessory. You are buying an operating asset that shapes how clients hear your judgment, how cleanly you deliver paid work, and how often you have to do the same work twice.
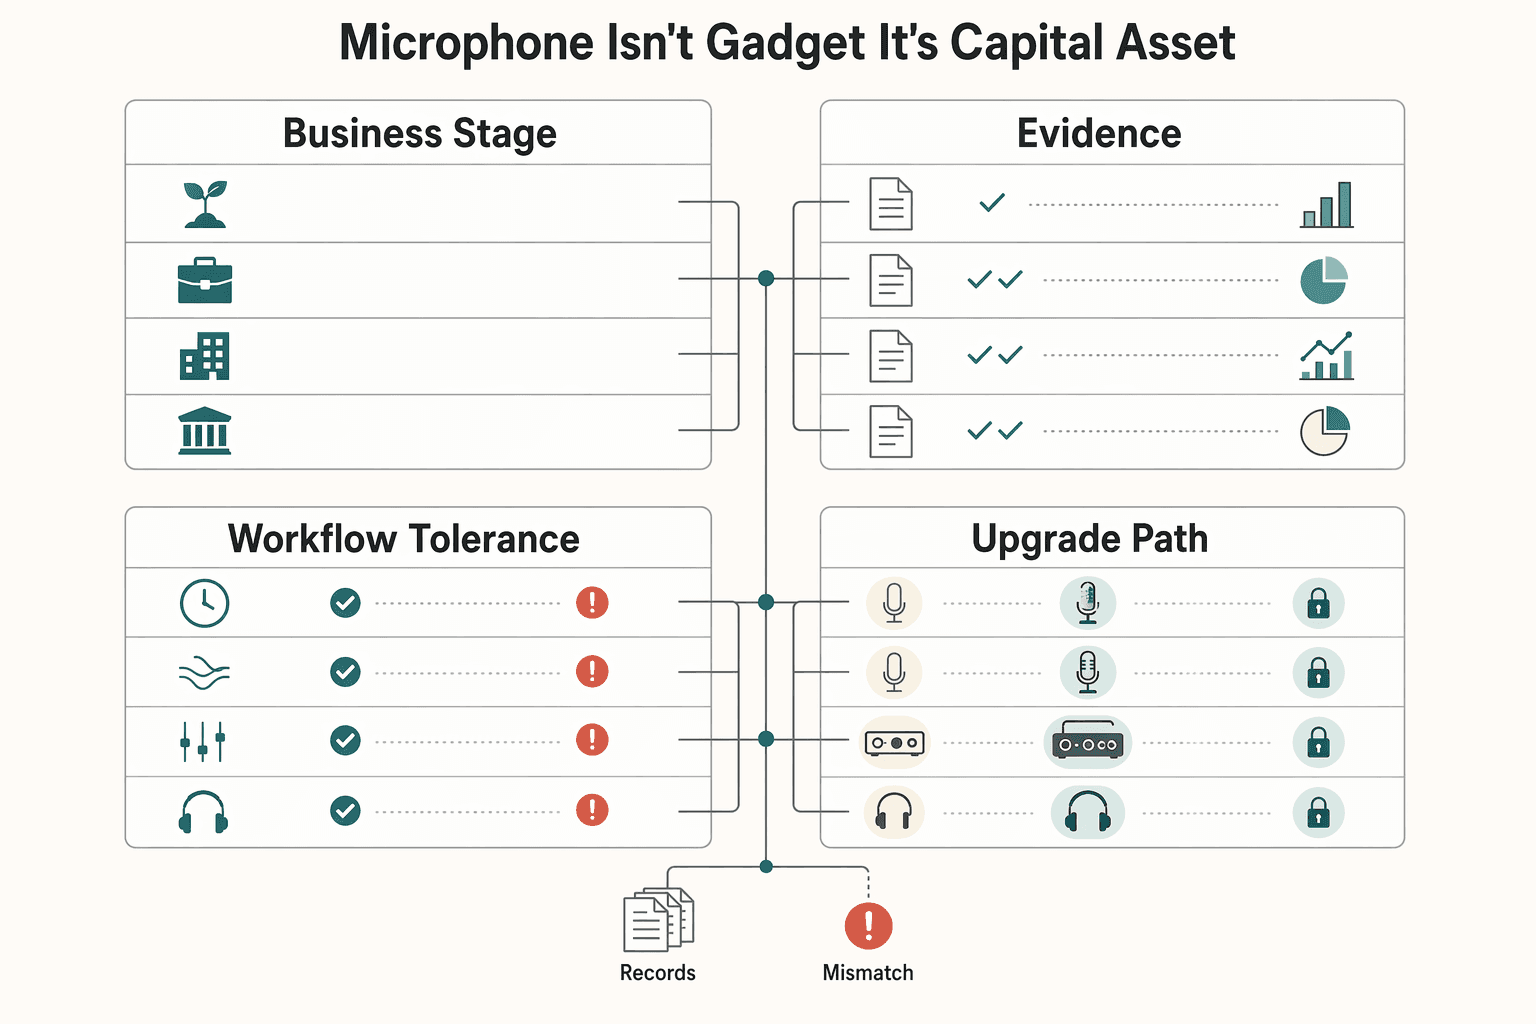
| Lens | What to match | Key differentiator |
|---|---|---|
| Business stage | Match the purchase to the job the mic needs to do. | Buy for the current revenue role, not the aspirational identity. |
| Recording environment | Your room matters as much as the mic category. | Test your room with a short spoken sample before you buy. |
| Workflow tolerance | Budget for the supporting hardware, including an audio interface and boom arm, not just the mic. | More components can mean more troubleshooting. |
| Upgrade path | Choose a path that will not force a full reset too soon. | Choose a path you can grow with, not just admire. |
That is why generic "best mic" lists are often the wrong place to start. Some try to crown one winner, while your real risks are more practical: avoidable retakes, missed opportunities, and credibility loss in buyer-facing moments. If you are searching for the best microphones for voiceovers, the useful question is not "Which model wins?" It is "Which setup reduces business risk for the way I work right now?"
Start with a tiered decision, not a brand debate, and use this lens before you compare any gear:
- Business stage
Match the purchase to the job the mic needs to do. A simpler setup can make sense when you are validating a new revenue stream, while a fuller XLR path can fit when audio quality is part of core delivery.
- Recording environment
Your room matters as much as the mic category. In a typical home or office, a dynamic mic is often the more practical choice because it rejects more background noise.
- Workflow tolerance
Some setups save frustration by staying simple. Others add control, but they also add setup complexity. With XLR, budget for the supporting hardware, including an audio interface and boom arm, not just the mic.
- Upgrade path
Think one step ahead. If your content, calls, and client delivery are getting more demanding, choose a path that will not force a full reset too soon. The right voiceover mic is one you can grow with, not just admire.
The rest of this guide turns those criteria into a buying decision so you can weigh return, friction, and risk before spending.
If you want a deeper dive, read Value-Based Pricing: A Freelancer's Guide.
For a step-by-step walkthrough, see The best tools for creating charts and graphs in Notion.
The Business Case for Audio Excellence#
Treat audio quality as risk control, not a promise of instant growth. The practical upside is simpler: people can follow you more easily, your delivery feels more deliberate, and you spend less time fixing preventable capture problems.
Immediate failure risk#
The immediate risk is clarity failure: your point is good, but noise or reflections make it harder to hear. Run a quick room-first check before buying gear: record one minute in your normal setup and listen for outside noise and room splash; if basic treatment (like curtains, foam, or panels) is not doing enough yet, a new mic alone is unlikely to fix the issue.
Brand drift risk#
The slower risk is consistency drift: uneven or overly roomy audio can make strong work feel less intentional. Use pickup pattern as a practical diagnostic: omni mics capture from all directions, while cardioid mics are front-focused with less side/rear pickup, so test both behaviors against your actual room and voice before trusting spec-sheet language. If your positioning depends on perceived expertise, this is the same business logic behind value-based pricing.
Workflow friction risk#
The operational risk is rework: avoidable capture issues force repeats, edits, or rerecords. Check the full chain, not just the mic body: USB can be a sensible starting path, but some users report more hiss or background noise, while XLR often gives more control with more setup complexity; confirm what fails in your own process before upgrading. If podcast delivery is part of your offer, the same reliability discipline applies in How to Launch a Podcast for Your Freelance Business.
| Area | Professional audio | Good-enough audio | How to validate in your workflow |
|---|---|---|---|
| Buyer trust | Clear, stable capture keeps attention on your message | Noise or inconsistency competes with what you are saying | Record two raw versions of the same script and choose the one that is easier to follow without editing |
| Production efficiency | Session flow stays predictable with fewer interruptions | Setup or noise issues repeatedly break momentum | Log one week of sessions and mark delays by cause: setup, retake, or cleanup |
| Rework burden | Fewer avoidable capture problems trigger another pass | More rerecords caused by hiss, reflections, or interference | Review recent raw files and label the true reason each retake happened |
These risks set up the next step: choose the right signal path and match the mic to the room you actually record in.
Your Foundational Strategic Choices#
Treat this as a risk-reduction framework, not a gear debate: choose your signal path first, then match mic type to your room. That order helps you avoid buying on hype and ending up with a setup you cannot run consistently.
1. Choose the signal path you can operate every session#
Start here because connection type drives setup complexity, cost, and upgrade headroom. A USB microphone is an all-in-one path (capsule, preamp, and converter in one unit). XLR is the long-standing analog standard, but it depends on the rest of the chain working together.
| Your operating need | Choose | Why it reduces risk | Tradeoff to accept |
|---|---|---|---|
| You need the fastest path to solo recording | USB | Plug into your computer, select it as the source, and record with fewer moving parts | Less flexibility for upgrades later |
| You want more control and modular upgrades over time | XLR | You can replace or upgrade mic, interface, and accessories separately | More setup friction and more troubleshooting points |
| You plan to record more than one voice on one computer | Usually XLR | Multi-USB recording on one computer can be technically challenging and unreliable | Higher total chain cost and more pre-session checks |
Pick the path you can repeat without surprises. USB is often practical when you are publishing solo or validating an offer. XLR usually makes more sense when audio is regular client-facing delivery and you want a modular setup. And avoid buying something just because it is labeled "industry standard": a $399 Shure SM7B will not fix a poor room or an incomplete chain.
Chain completeness checkpoint#
Before any mic upgrade, verify the whole capture path:
| Checkpoint | What to confirm |
|---|---|
| Path map | USB: mic-to-computer; XLR: mic, XLR cable, interface, and computer |
| Monitoring | Confirm live monitoring or immediate playback so issues are caught during, not after, the session |
| Placement | Lock a repeatable mic and pop-filter position, plus your speaking position |
| Test file | Record a short raw baseline clip and review for noise, room reflections, and level swings |
Common failure modes differ by path. In an all-in-one USB mic, one failed internal component can take out the whole unit. In XLR chains, failures are usually about identifying which component caused the issue.
2. Match mic type to the room you actually have#
After signal path, choose mic type based on room reality. Dynamic microphones are known for durability and handling high sound pressure levels, which can make them a lower-risk starting point when your space is less controlled and you need consistent takes.
Condensers can work well in genuinely quiet, controlled environments, where sensitivity helps capture detail. In reflective or noisy spaces, that same sensitivity can create more cleanup work and more variable results.
If room issues are the bottleneck, fix those first with A guide to setting up a 'Home Video Studio' on a budget. If this decision supports a recurring show, use How to Launch a Podcast for Your Freelance Business to align production workflow with your hardware choices.
Lock signal path and room fit first, then use the tier recommendations below to choose confidently instead of guessing.
This pairs well with our guide on Best Dictation Software for Writers Who Need Better ROI and Data Control.
Tier 1: The Starter Asset - Validating a Revenue Stream (Investment: <$200)#
Use Tier 1 to validate demand quickly with a setup you can run every session without surprises. You are not building a forever studio yet. You are aiming for dependable audio for client calls, pilot episodes, and early course modules.
At this stage, "good enough to ship" means clear voice, stable levels, and no obvious hum, hollow room tone, or distracting background noise. If listeners focus on your message instead of your audio, Tier 1 is working.
Starter options that fit the job now#
| Option | Setup load | Noise reality | Upgrade path |
|---|---|---|---|
| USB condenser | Fast, low-friction start | Works best in a quiet, controlled room | Limited modular upgrades |
| USB dynamic | Simple daily operation | Often the safer pick in typical home/office noise | Practical bridge while validating |
| XLR dynamic + interface | More steps and more troubleshooting points | Strong fit when consistency and noise rejection are the priority | Modular path as needs grow |
If speed is your top priority and your room is controlled, USB can be the practical Tier 1 choice. If your room is noisy, a dynamic path is usually lower risk.
Minimum viable signal chain#
Keep Tier 1 boring and repeatable.
| Element | Action | Check |
|---|---|---|
| Room test (before buying) | Record a short spoken sample in your real space | Confirm whether room noise/reflections are the bottleneck |
| Chain check (before committing) | Confirm the full signal chain you will use every session | Avoid avoidable failures from missing or weak links |
| Raw test | Run short raw recordings before paid or public work | Listen for hum, hollow reflections, and level jumps |
| Repeatability | Keep placement and speaking position consistent | Reduce retakes and session-to-session drift |
Tier 1 stops being enough when audio issues start costing time or trust. If you are re-recording paid work or fighting recurring inconsistency, move to Tier 2 as a full chain decision, not just a mic swap.
Related: The Best Meditation and Mindfulness Apps for Freelancers.
Tier 2: The Workhorse Asset - Eliminating Audio as a Business Risk ($400-$700)#
Tier 2 is where you optimize for dependable ongoing delivery, not one-off recordings. If paid work depends on your voice, treat your setup as operating infrastructure and prioritize a chain you can run consistently with minimal troubleshooting.
Buy one operating unit#
The common Tier 2 mistake is buying parts in isolation. Make decisions as one signal chain so session-to-session results stay consistent.
- Microphone
In a typical home or office, a dynamic mic is often the more practical starting point when background noise is the main risk.
- Audio interface
Your control point for input handling and monitoring.
- Placement hardware (boom arm or stand) plus pop control
Stable positioning helps keep tone and levels stable.
- XLR cabling plus monitoring headphones
Keep signal flow and monitoring in the same reliability plan.
Pick the chain that matches your bottleneck#
| Decision criteria | Dynamic-first XLR chain | Condenser-capable XLR chain |
|---|---|---|
| Room tolerance | Better fit when routine background noise is present | Better fit when the room is already controlled |
| Setup complexity | Often easier to keep consistent in imperfect conditions | Requires tighter room and technique consistency |
| Consistency under pressure | Strong option when dependable delivery is the priority | Works when your setup can stay locked and repeatable |
| Editing workload | Can lower cleanup pressure when room noise is the issue | Can expose more room issues if setup discipline slips |
If reliability is your risk, start dynamic-first. If your bottleneck is capture detail and your room is controlled, a condenser-capable chain can be the better fit.
Run it like production gear#
Before important takes, run a short raw test and confirm the full signal chain. Check levels with normal speech plus one louder line, monitor for obvious noise, and verify mic position, boom stability, and connections. Keep your mouth position consistent and use pop control so takes stay usable without extra cleanup.
| Pre-take check | What to do |
|---|---|
| Raw test | Run a short raw test before important takes |
| Signal chain | Confirm the full signal chain |
| Levels | Check levels with normal speech plus one louder line |
| Noise | Monitor for obvious noise |
| Position and stability | Verify mic position and boom stability |
| Connections | Verify connections |
| Mouth position | Keep your mouth position consistent |
| Pop control | Use pop control so takes stay usable without extra cleanup |
Modular upgrades only pay off when they match the actual bottleneck: upgrade the mic for capture quality, the interface for more control, or placement and routine for week-to-week consistency. We covered this in detail in The Best Tools for Creating SOPs and Process Documentation.
Tier 3: The 'Endgame' Asset - When Your Voice Is Your Brand ($1,000+)#
Move to Tier 3 only when voice quality is part of the product itself, not just a delivery channel. The decision here is still the same: choose based on your stage, your room, and your workflow tolerance, then validate with short raw tests before you commit.
The jump from Tier 2 is about consequence, not prestige. A higher-control chain can improve consistency, but more components can also mean more troubleshooting. Treat this as an operating decision, not a brand-first purchase.
| Tier 3 path | Best fit | Room demands | Main tradeoff | Required companion gear |
|---|---|---|---|---|
| Flagship condenser route | Client-facing formats where capture detail is a core part of delivery | Quieter, more controlled spaces | More revealing of room and technique issues | Full XLR chain, including interface and boom arm, plus stable placement and monitoring |
| Flagship broadcast-dynamic route | Typical home or office setups where background noise is the main risk | More tolerant of imperfect spaces | May reveal less detail than a condenser in a controlled room | Full XLR chain with dependable monitoring and repeatable mic position |
| Modular upgrade route | Existing XLR setup where one part of the chain is the clear bottleneck | Depends on what is limiting results | Less dramatic than replacing the mic first | Before/after short raw tests across the full chain |
Pass the readiness gate first#
Before upgrading, confirm the chain is actually ready:
| Check | What to confirm | Why it matters |
|---|---|---|
| Room behavior | Short spoken tests do not show persistent background noise or distracting reflections | If room issues dominate, the mic is not the main bottleneck |
| Interface and monitoring | You can reliably catch noise and level problems before publishing | Tier 3 chains rely on dependable control and monitoring |
| Workflow consistency | Distance, pop control, and gain are repeatable session to session | Better gear exposes inconsistency; it does not fix it |
| Mic limitation | Short raw comparisons show the mic is the limiting factor | Confirms whether an upgrade is justified |
Choose the path that fits your environment and workflow, then validate in your normal setup before rolling changes into client-facing work.
Related: How to Launch a Podcast for Your Freelance Business.
If you want a deeper dive, read The Best Antivirus and Malware Protection for Freelancers.
Conclusion: Make Your Next Investment with Confidence#
At this point, the right move is usually smaller and more practical than people expect. The best microphones for voiceovers are the ones that fit your room, your delivery needs, and the amount of setup friction you can reliably manage every week.
- Tier 1: Best if you are still validating demand and need a simple USB workflow that gets you recording fast without adding an interface.
- Tier 2: Best if audio is now a repeat business function and you want more control and steadier monitoring.
- Tier 3: Best if your voice is part of the product itself and small swings in tone, noise, or retake rate now affect how your work is perceived.
Use this as your final decision sequence:
- Pick the tier first. Match it to the work you actually do now, not the studio-fantasy version of next year.
- Confirm the full chain. That means mic, interface if required, stand or boom, pop control, headphones, cabling, and a space that behaves well. If you want more setup flexibility, a dual-output XLR + USB mic can be a useful bridge.
- Run one raw test in your real room. Record the same short script at your normal mic distance and listen back. For a first microphone, treat specs as secondary to real-world results; if you already use 24-bit recording successfully, keep that consistent rather than changing multiple variables at once.
- Lock a repeatable setup. Once the takes are clean, standardize placement, distance, and monitoring so each session starts from the same baseline.
One clear do-not-upgrade-yet cue is this: if your raw takes still change more with room noise, echo, or mic position than with the microphone itself, the bottleneck is probably your environment or consistency, not the gear. If your room also needs work, this companion guide on setting up a home video studio on a budget is a useful next step.
Want to confirm what fits your setup and business goals, and what's supported for your specific country/program? Talk to Gruv.
Frequently Asked Questions
How do you choose between a dynamic mic, a condenser, USB, and XLR?
Choose based on room first, then workflow. In a typical home office, a dynamic mic is often the safer first test because it is less likely to spotlight bad acoustics. In a quiet, controlled room, a condenser can capture more detail. USB is simpler direct-to-computer, while XLR fits a more modular chain with an interface.
Is a condenser automatically better for voiceover work?
No. A condenser's sensitivity is a tradeoff, not an automatic upgrade. If your raw takes already contain echoes, weird resonances, a boxy tone, HVAC noise, or traffic spill, a pricier condenser can make those problems easier to hear. In home studios, a flatter response and a room that behaves well usually matter more.
Is USB good enough for paid calls, podcasting, or course recording?
Yes, if you need reliable, low-friction capture and the results hold up in your real room. USB is often practical when simplicity is the main win and you are recording solo. Move to XLR when you need a more modular chain with an interface.
Do you really need an audio interface for XLR?
Yes. If you choose an XLR mic, plan on an interface as part of the setup. Treat the mic and interface as one decision, then validate the results in your room.
How should you think about total cost without fooling yourself?
Price the whole setup, not just the headline mic. For XLR, that usually includes the microphone, an interface, and basic accessories that keep placement consistent. Spending far more on the mic alone will not fix an untreated room.
Should you trust online mic shootout videos?
Use them to narrow a shortlist, not to make the final call. Platform audio is compressed and often processed, so it is weak evidence for subtle differences. A better check is a raw test in your room, at your normal mic distance, with your usual computer and headphones.
How do you know whether your current mic is actually the bottleneck?
Run a controlled before-and-after test before buying anything. Record the same short script across two normal sessions and keep the raw files. If the defects move around with time of day, mic distance, or room noise, the bottleneck is probably your setup or space, not the mic.
When should you stay in Tier 2 and when should you move to Tier 3?
Stay in Tier 2 while you are still improving training and recording space. Move to Tier 3 testing when your setup is already stable and the remaining limitation appears to be the mic. If room, placement, or monitoring still cause the bigger swings, improve those first.
Try a related tool
Researched and edited by the Gruv editorial team. Gruv builds cross-border billing, payouts, and finance-operations software for global businesses.
Sources
Includes 6 external sources outside the trusted-domain allowlist.
- pmc.ncbi.nlm.nih.gov/articles/PMC10129004trusted
- utah.gov/pmn/files/1191397.pdftrusted
- atlantavoiceoverstudio.com/best-microphones-for-voice-over-home-studio-...external
- closingcredits.com/blog/11-picking-out-a-microphone-for-voiceoverexternal
- englishvoice.tv/post/the-best-microphones-for-voiceoversexternal
- flexworkstudios.com/best-microphone-for-podcast-recordingexternal
- forbes.com/sites/geoffreymorrison/2021/04/24/rode-wirel...external
- gruv.ai/blog/the-best-microphones-for-voiceovers-and...external
Educational content only. Not legal, tax, or financial advice.
Related Posts

Value-Based Pricing for Freelancers Under Real Payment Risk
Value-based pricing works when you and the client can name the business result before kickoff and agree on how progress will be judged. If that link is weak, use a tighter model first. This is not about defending one pricing philosophy over another. It is about avoiding surprises by keeping pricing, scope, delivery, and payment aligned from day one.

How to Launch a Podcast for Your Freelance Business
Treat your podcast like a documented operating process that compounds your positioning over time. You're running a business of one, and the job is to build a machine you can run without chaos. Once you decide this is a business move rather than a weekend experiment, you need structure that protects your time and keeps shipping predictable.

Set Up a Home Video Studio on a Budget That Stays Reliable
Start with the job, not the gear. For most independent professionals, the target is straightforward: produce client-ready content with clear audio and repeatable framing, without rebuilding your setup every time you record.