
Quick Answer
Choose your trail by trip objective, then run a verification pass before you leave. For a tighter schedule, use a shorter-format option like Delicate Arch Trail and keep a firm turnaround plus one same-area fallback. For bigger commitments such as Half Dome cables, treat unresolved permit or access items as a no-go. In all cases, confirm current details on official park pages, save key info offline, and avoid plans that depend on live signal at the trailhead.
Your Time Off Demands a Strategic Framework, Not a Bucket List#
The right pick from the best hiking trails us national parks list is the one that fits the job you need it to do. Decide that first, and you can cut most of the noise before you compare routes. Here, "return on time invested" is just a planning lens: what you get back for the hours spent researching, driving, hiking, and recovering. "Jobs-to-be-Done" is a simple way to define what this hike needs to do on this trip.
With 63 national parks and a list already covering 26 hikes, browsing first and deciding later gets messy fast. Start with this quick filter:
- Creative reset
Choose this when you want novelty, big scenery, or a real change of pace. The differentiator is contrast: a trail that feels unlike your workweek.
- Focus and stress reset
Choose this when time or mental overload is the real constraint. The differentiator is lower friction: easier access, simpler terrain, and less planning drag.
- Resilience challenge
Choose this when you want a tougher day and are willing to pay for it in prep, effort, and tighter timing. The differentiator is commitment: more logistics and less room for error.
Before you trust any recommendation, verify the park page on an official .gov website and check for HTTPS. Make that your baseline evidence check. Then pressure-test the plan against a common failure mode on popular hikes: crowding. In practice, you can often find more solitude by going early, late, or outside peak season. Also check recency, because some third-party lists update over time and some hide important details behind paywalls.
| Objective | Trail profile | Planning effort | Risk controls | Expected payoff |
|---|---|---|---|---|
| Creative reset | Distinct scenery, moderate commitment | Medium | Verify current park info on .gov + HTTPS | Better odds of a trip that feels memorable, not interchangeable |
| Focus and stress reset | Accessible, simpler dayhike, novice-friendly if needed | Low | Favor less complex routes and off-peak timing | Less planning friction and a cleaner mental break |
| Resilience challenge | More demanding or "burlier" hike | High | Plan tighter timing and use early/late starts to manage crowds | A harder day that feels earned, not chaotic |
For more trip ideas, see The Best Digital Nomad Cities for Outdoor Enthusiasts.
The Core of Your Portfolio: Blue-Chip Investments (Guaranteed Full-Day Wins)#
If this is your anchor day, treat both routes as verification-first picks. Choose the one you can still execute cleanly after two checks on the official park page. Skip the boldest description; pick the plan that still works once access, timing, and group decisions get real.
| Checkpoint | Highline Trail | South Kaibab to Skeleton Point |
|---|---|---|
| Access confirmation | Save the official park page for offline reference. Confirm start/finish access details. | Verify current trailhead access on the official park page. |
| Reservation and shuttle rule | Current reservation window pending official verification. Current shuttle or access rule pending official verification. | Current reservation window pending official verification. Current shuttle or access rule pending official verification. |
| Offline prep | Save the official park page for offline reference. | Download navigation before departure. |
| Turnaround and fallback | Name one same-park fallback if access or timing breaks. | Write a firm turnaround time and fallback option. |
| Execution risks | Stale access assumptions, late starts, and no agreed turnaround decision. | Unclear access assumptions, weak turnaround discipline, and relying on live connectivity mid-day. |
Use the same pre-departure sequence for both:
- Night-before check on the official park page.
- Short second check before departure.
- One written plan with start window, turnaround rule, offline map, and fallback.
Highline Trail#
Choose Highline when you want your main day to reward planning discipline. It is a better fit if your group will confirm access details in advance instead of improvising at the trailhead.
Treat the effort profile as a full-day commitment and protect your margin early. The main execution risks are stale access assumptions, late starts, and no agreed turnaround decision.
Go/no-go checkpoint before departure:
- Save the official park page for offline reference.
- Confirm start/finish access details.
- Current reservation window pending official verification.
- Current shuttle or access rule pending official verification.
- Name one same-park fallback if access or timing breaks.
South Kaibab to Skeleton Point#
Choose South Kaibab to Skeleton Point when your group can follow a strict execution plan from start to finish. It fits best if everyone agrees to pace control, turnaround discipline, and offline prep before leaving coverage.
Treat the effort profile as a full-day commitment with no "decide later" gap in your plan. The main execution risks are unclear access assumptions, weak turnaround discipline, and relying on live connectivity mid-day.
Go/no-go checkpoint before departure:
- Verify current trailhead access on the official park page.
- Current reservation window pending official verification.
- Current shuttle or access rule pending official verification.
- Download navigation before departure.
- Write a firm turnaround time and fallback option.
| Field | Highline Trail | South Kaibab to Skeleton Point |
|---|---|---|
| Access model | Confirm start and finish access on the official park page. Current shuttle or access rule pending official verification. | Confirm current trailhead access method on the official park page. Current shuttle or access rule pending official verification. |
| Permit or reservation dependency | Current reservation window pending official verification. Do not rely on old posts or screenshots. | Current reservation window pending official verification. Do not assume no booking is needed from third-party summaries. |
| Water and exposure risk | Verify current official notices, then plan conservatively before departure. | Verify current official notices, then plan conservatively before departure. |
| Connectivity reality | Operate as if live data may fail. Download maps and save the official page. | Same rule: offline navigation first, communications sent before departure. |
| Fallback options | Keep one shorter same-park option ready if access or timing fails. | Keep one shorter canyon/rim option ready if timing or conditions do not fit the main plan. |
If you want a deeper dive, read The Best Travel Backpacks for Digital Nomads.
High-Yield Day Trades: Maximizing Scenery, Minimizing Downtime (Under 4 Hours)#
Choose this tier when you want strong scenery with a smaller planning footprint and a realistic path back to work the same day. Keep expectations tight: these hikes can fit a short-format plan, but your timing still depends on season, access rules, and whether you hold a firm turnaround.
Delicate Arch#
Pick Delicate Arch if you want the desert-icon experience and are willing to treat access checks as part of the hike. It fits best when landmark payoff matters more than a friction-free timeline.
Skip it for this trip if you need a guaranteed return by a fixed hour and cannot absorb access delays. Before you leave coverage, treat the current timed-entry rule and current shuttle or parking constraint as pending official verification until you have checked the official park page.
Emerald Lake#
Pick Emerald Lake if you want alpine contrast and a cleaner morning-out, afternoon-back plan. It fits best when mountain scenery helps you reset and stick to a paced schedule.
Do not treat it as automatic just because it is often framed as a short outing. Use the same discipline: verify access on the official park page, save it offline, and set a non-negotiable back-in-car time tied to your calendar.
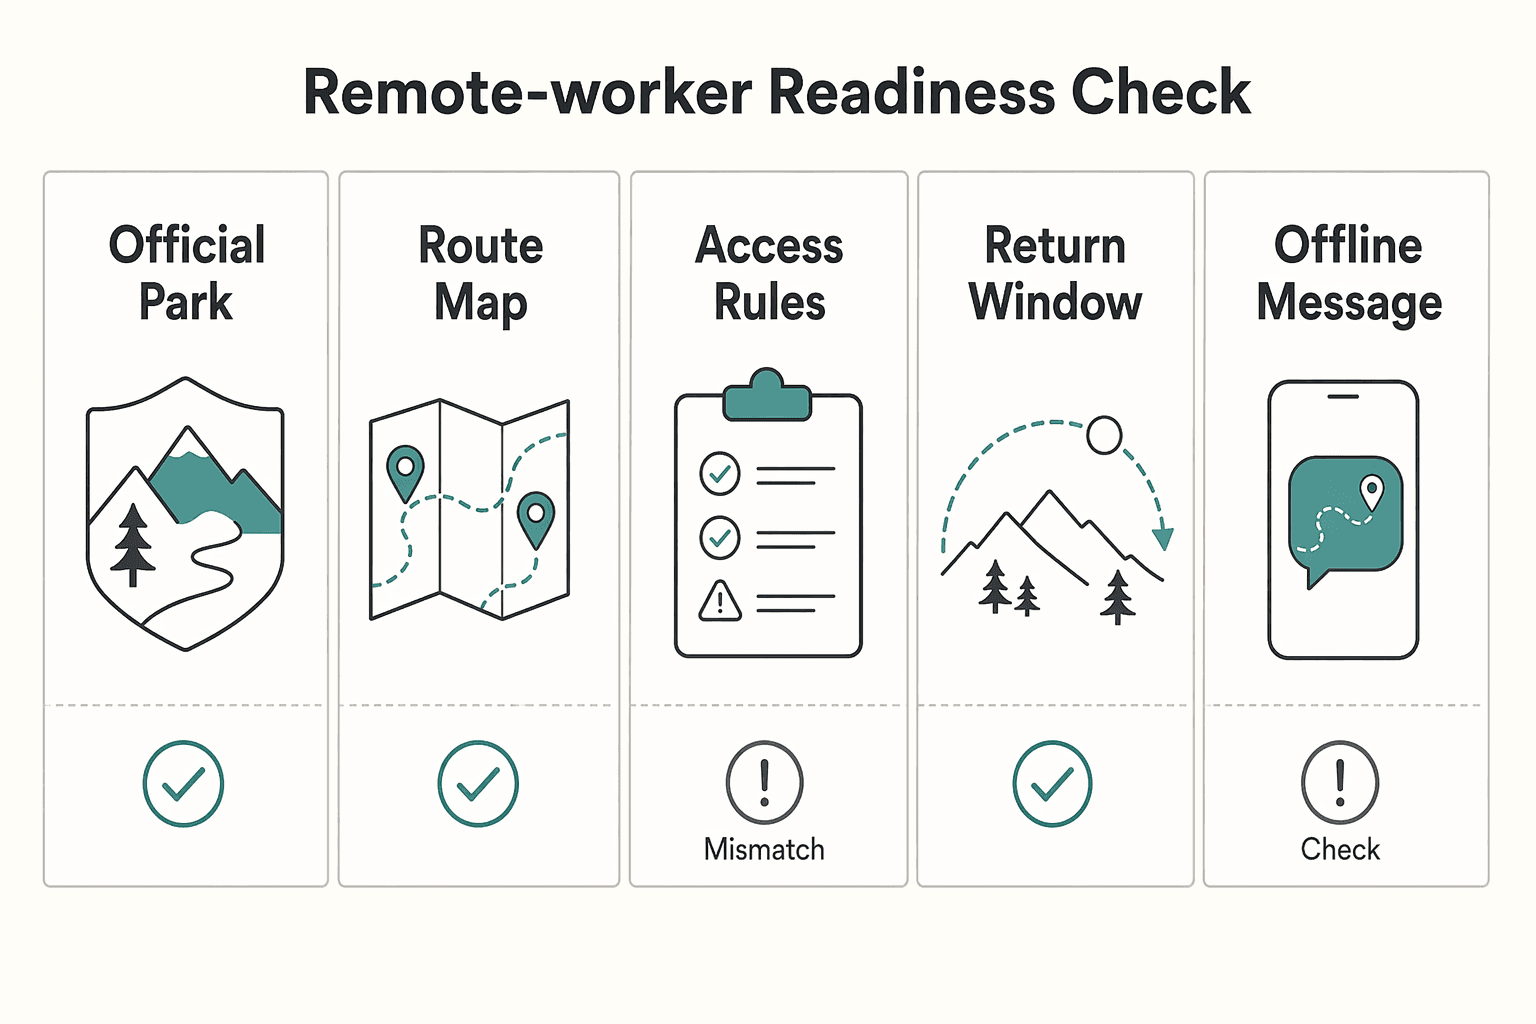
Remote-worker readiness check#
| Check | What to do |
|---|---|
| Official park page | Save the official park page offline and note when you checked it. |
| Route map | Download your route map before leaving coverage. |
| Access rules | Current timed-entry rule pending official verification. Current shuttle or parking constraint pending official verification. |
| Return window | Set a firm back-in-car time. |
| Offline message | Send one offline-window message to anyone expecting you online. |
| Field | Delicate Arch | Emerald Lake |
|---|---|---|
| Reservation dependency | Current timed-entry rule pending official verification. | Current timed-entry rule pending official verification. |
| Best start window | Set after verifying current official access guidance and your work commitments. | Set after verifying current official access guidance and your work commitments. |
| On-trail connectivity reality | Plan as if live signal is unreliable; rely on offline maps. | Plan as if live signal is unreliable; rely on offline maps. |
| Nearby work base | Choose only after checking your dates, drive time, and backup workspace. | Choose only after checking your dates, drive time, and backup workspace. |
| Fallback plan if access fails | Keep one lower-friction scenic stop ready. | Keep one lower-friction scenic stop ready. |
Stay in this day-trade tier when you need controlled upside and a predictable return window. Move to the next tier only when you can absorb more uncertainty and tighter execution risk.
You might also find this useful: How to Plan a Multi-Day Hiking Trip.
Executing Venture Expeditions: A CEO's Guide to High-Risk, High-Reward Treks#
For these two high-commitment hikes, make your go/no-go call from current HTTPS pages on official .gov sites, then lock a backup plan before you leave coverage.
Half Dome cables#
Choose Half Dome only if your objective is a marquee Yosemite day and you are comfortable letting permit status decide the trip.
- Core objective: One high-commitment Yosemite day with a clear go/no-go gate.
- Primary failure points: Stale permit assumptions, day-of access friction, and continuing after your own cutoff.
- Verification steps: Verify the current permit process and current access constraint on the official HTTPS
.govpage, then record the exact check time. Save screenshots offline before you lose signal. - Fallback plan: Pre-select a separate Yosemite day plan that does not depend on the same permit path. If the permit field is still blank the night before, call it a no-go.
The Narrows top-down#
Choose The Narrows top-down only if your objective is a deeper Zion commitment and you are ready to coordinate permit, conditions, and transport together.
- Core objective: A full-commitment Zion day with all dependencies confirmed in advance.
- Primary failure points: Assuming old conditions still apply, treating shuttle/outfitter setup as optional, and starting without written stop conditions.
- Verification steps: Verify the current permit process, current weather or flow closure trigger, and current shuttle or outfitter confirmation on official park or source records before relying on the plan. If any line is unresolved, it is a no-go.
- Fallback plan: Set a same-day alternate before final transport commitments, and keep your stop conditions, key contacts, and escalation plan saved offline.
| Expedition | Permit complexity | Logistics burden | Environmental hazard profile | Contingency options |
|---|---|---|---|---|
| Half Dome cables | High. Current permit rule pending official verification on an official .gov page | Moderate to high. Access dependencies can break timing | Conditions and route constraints can force a no-go | Strong if you pre-build a separate Yosemite day plan |
| The Narrows top-down | High. Current permit rule pending official verification on an official .gov page | High. Shuttle/outfitter coordination is part of execution | Conditions can change quickly, so verify current closure triggers | Narrower after transport lock-in, so set an alternate early |
| Both | Do not use commercial summaries as your live-rule source | Save confirmations offline and record check time | Use written stop conditions, not in-the-moment judgment | Keep one non-dependent backup plan ready |
If you use background material, keep its role clear. The NPS Park Reports Collection (Collection Number HFCA 1645 (Series VI.C)) is open to research use, but it is historical context, not same-day operating guidance, and some records may be delayed or redacted.
For a step-by-step walkthrough, see The Best National Parks for Digital Nomads in the US.
Conclusion: Take Command of Your Time Off#
The takeaway is simple: match the hike to the time and complexity you can actually support, then verify the live constraints before you lock in the trip. If your schedule is tight, choose the lower-complexity option. Save the logistics-heavy or multi-day plan for a window you can protect.
| Note field | What to capture | Article cue |
|---|---|---|
| Goal | reset / challenge / short scenic outing | Start with the job you want the day to do. |
| Hike type | few-hours day hike / full-day hike / multi-day trip | If your schedule is tight, choose the lower-complexity option. |
| Verify | current access details; trail alerts; seasonal access updates; transport/access constraints | Check the official park page before you commit. |
| Save | map; official page screenshots; backup trail | Save key park page details and a backup trail plan before you head out. |
| Post-trip review | what worked; what failed; what to change next time | Keep one short note on start time, crowd level, gear gaps, and whether your backup was actually usable. |
- Define the win
Start with the job you want the day to do. If you need scenery in a short window, bias toward hikes that fit "a few hours or less," like Ocean Path. If you want a stronger physical test, remember some marquee routes are "very challenging, even for experienced hikers," so your goal has to justify the extra prep.
- Choose the right hike type
Use the main comparison table as your shortcut. A lower-complexity day hike gives you fewer failure points, while a bigger backpacking or permit-linked plan asks for more admin and backup planning. Delicate Arch Trail is a good example of a compact but real effort: 3 miles round trip, with uphill travel through much of the first half, plus nearby Wolfe Ranch remains and a rock art panel.
- Confirm the access chain
Before you commit, check the official park page for current access details and constraints. The common failure mode is building a plan where one changed rule breaks the whole day. Save your map, key park page details, and a backup trail plan before you head out.
- Review the trip once you're back
Keep one short note on what held up and what did not: start time, crowd level, gear gaps, and whether your backup was actually usable. If crowds are a concern, an early start such as before 8am can help, but treat official park updates as the final check. Leave No Trace is part of the plan too, not an afterthought.
For your next planning window, copy this into your notes. We covered this in detail in The Best Trekking Poles for Hiking.
- Goal: reset, challenge, or short scenic outing
- Hike type: few-hours day hike, full-day hike, or multi-day trip
- Verify: current access details, trail alerts, seasonal access updates, and transport/access constraints
- Save: map, official page screenshots, and backup trail
- Post-trip review: what worked, what failed, and what to change next time
Frequently Asked Questions
What are the best "high-yield, low-cost" hikes for a tight schedule?
If you are fitting a hike around work, choose a short or moderate trail with a clear turnaround point and an easy same-area backup. The real risk is treating a quick hike as low-consequence when the actual blockers are same-day closures, heat, or water availability. Check the official park page that morning for current trail closures, today’s heat risk, and drinking water availability. Grand Canyon also tells hikers to avoid going into the canyon between 10 am and 4 pm during the heat of the day.
Which iconic hikes require permits?
For marquee trails, assume nothing until you confirm the live rule on the park’s official .gov page. The risk is using last season’s article for Half Dome cables, Angels Landing, or The Narrows top-down and discovering the real blocker is a changed access rule. Treat the permit rule as pending official verification until you check the official park page, then save that note and download an offline map before you lose signal.
What is the best national park for a "work-cation"?
There is no single best park if you still need dependable work hours. The risk is confusing park access with usable connectivity. Great Smoky Mountains says cell service is non-existent for the most part, so you should treat any trail day as offline unless you have verified otherwise for your exact base. Stay outside the park, confirm your lodging’s internet and backup power directly, and keep meeting-heavy days separate from hiking days.
How can I avoid crowds on popular trails?
Reduce dependency before you chase the perfect departure time. The risk is picking a popular route with one access road and no real backup. Mount Rainier notes that some closures can leave you with no alternate route. Check alerts the night before and again before departure, then keep one backup trail in a different park zone or off a different road.
Is there reliable cell service in US National Parks?
You should plan as if the answer is no unless the specific park page says otherwise. In Great Smoky Mountains, the park says service is non-existent for the most part, so do not depend on live maps, messaging, or a last-minute permit lookup from the trailhead. Download an offline map in the NPS app, carry a paper map if available, send your off-grid window to your team, and name one person who should escalate if you miss check-in.
What weather risk gets underestimated most often on day hikes?
Cold exposure is the one people dismiss too easily, especially when the forecast looks mild at lower elevation. Glacier warns that hypothermia can occur even above freezing, so a short hike is not a reason to skip a rainproof layer and warm hat. Pack both on every day hike and check elevation-driven weather differences before you leave the trailhead.
Try a related tool
Researched and edited by the Gruv editorial team. Gruv builds cross-border billing, payouts, and finance-operations software for global businesses.
Sources
- fs.usda.gov/sites/default/files/media_wysiwyg/ratg_final...trusted
- fs.usda.gov/rm/pubs/rmrs_p015_2.pdftrusted
- landerwy.gov/sites/g/files/vyhlif13931/files/media/commun...trusted
- nps.gov/articles/000/guide-to-the-nps-park-reports-c...trusted
- nps.gov/orgs/1453/upload/The-Heritage-of-America-s-T...trusted
- rosap.ntl.bts.gov/view/dot/85406/dot_85406_DS1.pdftrusted
- tpwd.texas.gov/publications/pwdpubs/media/pwd_bk_w7000_0788...trusted
- transit.dot.gov/sites/fta.dot.gov/files/docs/Fed_Lands_Fores...trusted
Educational content only. Not legal, tax, or financial advice.
Related Posts

The Best Travel Backpacks for Digital Nomads
Start by ruling out bad fits, not by chasing a universal winner. If a bag does not match how you move, how you work, or what you can comfortably carry, drop it early. That matters far more than one extra pocket or a slick product page.

Best Nomad Cities for Hiking Without Relocation Surprises
Treat this choice like an operating decision, not a travel mood. The right base is the one where your workweek and your trail routine can both hold without constant exceptions, catch-up days, or admin spillover.

How to Plan a Multi-Day Hiking Trip
If you want to plan a multi-day hiking trip with fewer avoidable mistakes, treat it like something you build on purpose, not something you improvise the night before. By the end, you should have a practical phase-by-phase plan and a checklist mindset you can use right away.