
Quick Answer
Start by locking your filing channel in writing, then build documents to that office’s current checklist. The south korea digital nomad visa is framed for remote foreign-income work, not Korean payroll or local profit-making activity. Keep one dated evidence sheet for route acceptance, save the exact income rule source, and reconcile names, dates, and payment records before submitting. If you are already in Korea on B-1, B-2, or C-3, treat status change as case-specific until the local office confirms it.
South Korea Workation Visa in Plain English#
Treat this visa as a gate, not a travel detail. The Digital Nomad (Workation) Visa, also called the F-1-D visa, is presented as a route for remote work tied to non-Korean employers or overseas business activity. Practical order matters: confirm fit, build evidence, then choose where to file.
The first boundary is work type. This status is not presented as permission for Korean payroll or local profit-making activity. If your plan relies on Korean clients paying for local services, it may conflict with that restriction, so confirm another path before spending on flights, insurance, or document legalization.
Baseline fit is specific, but still post-dependent. KPMG describes a minimum age of 18, employment by a foreign company, and annual income of more than 2x the previous year Korean GNI. It also notes a trial rollout from 1 January 2024 and a one-year stay with a possible one-year extension. Some sources discuss freelancers abroad as potentially eligible, so get written confirmation from your filing post before treating that as settled.
| Decision now | What to verify before spending money | Evidence to keep |
|---|---|---|
| Eligibility fit | Your work is clearly overseas and remote, not local Korean employment | A dated written reply or checklist from your chosen Korean embassy/consulate or immigration channel |
| Filing route | Whether you should file at a South Korean consular office abroad or in-country based on your current status (for example, short-term or visa-free/exempt contexts) | A short note showing your current status and accepted filing route |
| Packet readiness | Whether required documents are complete, including criminal record certificate apostille and insurance terms | A document index with issue dates, exact name spellings, and insurance wording showing KRW 100 million coverage for treatment and evacuation |
A common failure mode is arriving or filing with an incomplete packet. Use one pre-spend check: confirm the current post instructions, confirm your filing route is accepted for your status, and save one dated evidence sheet of the rules you followed.
If you are deciding between Seoul and Busan, keep that decision for after visa fit is confirmed.
If you want a deeper dive, read Seoul, South Korea: The Ultimate Digital Nomad Guide (2025).
What This Visa Covers and What It Does Not#
The Workation visa (F-1-D) is presented as a way to stay in Korea while earning from outside Korea through remote work. It is not presented as permission to take local Korean employment. If your plan includes paid local services in Korea, treat that as a red flag and get formal clarification first.
Use these definitions early so your documents and plans follow the same logic:
- Remote overseas work means paid work tied to a foreign employer or business activity abroad while you are in Korea.
- Local profit-making activity is described as paid activity in Korea that this status does not allow.
Work rights follow immigration status, not your job title.
| Scenario | Likely fit under F-1-D |
|---|---|
| Employed by a non-Korean company and paid from outside Korea | Generally aligned with the visa's stated purpose |
| Self-employed/freelance income from outside Korea | Described as possible in some guides; confirm with your filing post |
| Paid services for Korean clients in Korea | Not a safe assumption under this status |
| Entering with K-ETA and doing paid work | Not authorized for paid employment |
A one-year stay with a possible one-year extension, up to two years total, is the most common description. Treat possible as conditional. Extension is not automatic, and handling can differ by embassy or consulate. Some guidance traces this route to Jan 1, 2024, but your issuing post's latest instructions should drive your decision.
Decision rule: if any meaningful share of expected income comes from Korean clients paying for local services, get a written yes or no from your filing post before applying under F-1-D.
Related: The 2025 Global Digital Nomad Visa Index: 50+ Countries Compared.
Check Eligibility Before You Touch Paperwork#
Run a pass/fail screen before you request documents. If any core point is unclear, pause and get written confirmation from your Korean embassy or consulate before you spend more time or money.
| Check | Pass signal | Pause if |
|---|---|---|
| Work type | Planned work is online and tied to foreign income, not local paid work in Korea | Planned work includes local paid work in Korea |
| Passport validity | Passport validity supports your intended stay | Passport validity does not support your intended stay |
| Work setup evidence | Employment records or foreign-client self-employment records document your remote setup | Work setup cannot be documented clearly |
| Financial records | Financial records support the same income story as work documents | Records are missing, inconsistent, or based on older third-party guidance |
| Dependents | Your filing post confirms whether dependents are allowed and which family-relationship documents are required | Family inclusion is assumed without post confirmation |
For this path, you should be able to show income from outside Korea, a genuinely remote setup, and financial capacity for your stay. Identity and background checks are also common, but specifics can vary by post. If your post does not state an eligibility item clearly, treat it as open until confirmed.
Use this quick self-screen:
- Pass if planned work is online and tied to foreign income, not local paid work in Korea.
- Pass if your passport validity supports your intended stay.
- Pass if you can document your work setup, such as employment records or foreign-client self-employment records.
- Pass if financial records support the same income story as work documents.
- Fail and pause if any point is missing, inconsistent, or based on older third-party guidance.
Handle dependents as a separate eligibility check. Do not assume family inclusion is automatic. Ask your filing post whether dependents are allowed in your case and which family-relationship documents are required.
Before you buy insurance or book flights, send a short written query to your Korean embassy or consulate with your nationality, residence, remote-work setup, income source, and family plan. Save the dated reply and keep supporting files in one digital folder. A common failure pattern is filing with partial or inconsistent documents and trying to patch gaps later.
Verify the Income Rule the Right Way#
Treat income verification as a live-rule check, not a copied number from search results. Requirements can change and can vary by embassy or consulate, so confirm the exact requirement with official sources at your filing post before you lock your packet.
| Income note item | What to record |
|---|---|
| Rule source | The exact source used and the date you pulled it |
| Filing-year requirement | The income requirement you applied for your filing year |
| Currency conversion | The conversion assumptions you used if earnings are in another currency |
| Evidence mapping | Which employment or client documents, income proof, and bank statements support each income claim |
| Reconciliation note | A short note where amounts differ across records, plus clearer employer or client documentation and statements showing consistent inflow when proof is close to the required level |
Example amounts go stale quickly. Archived government pages can look current even when they are explicitly marked as out of date, including archive material released from January 20, 2021 to January 20, 2025. Use archived material for background only, not as your filing rule.
Before you submit, add a one-page income note so a reviewer can track your file quickly:
- Record the exact source used and the date you pulled it.
- Write the income requirement you applied for your filing year.
- If earnings are in another currency, log the conversion assumptions you used in your prep.
- Map each income claim to matching evidence: employment or client documents, income proof, and bank statements.
If your annual proof is close to the required level, strengthen before submission. Add clearer employer or client documentation, include statements that show consistent inflow, and attach a short reconciliation note where amounts differ across records.
Once income evidence is locked, choose your filing route based on timing and confirmed instructions.
Choose Your Application Path Without Guesswork#
Pick your path using confirmed instructions and timeline math, not convenience. In practice, most people are comparing filing through a Korean embassy or diplomatic mission abroad versus asking a local immigration office in South Korea whether an in-country status change is possible for their case.
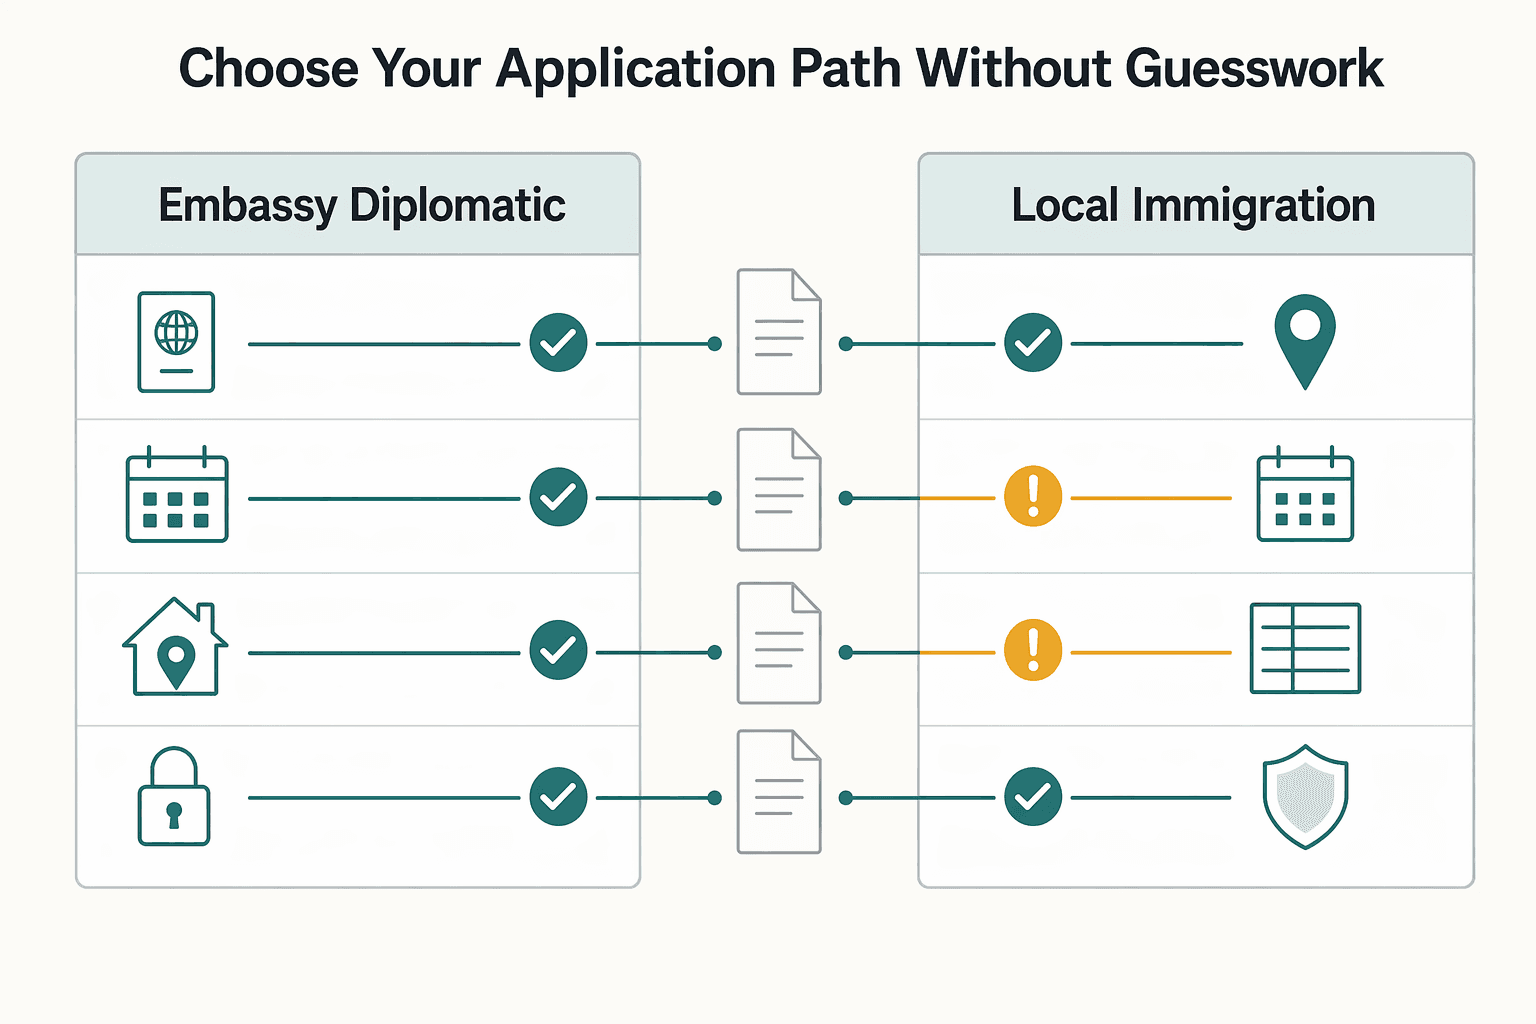
| Path | Verify before committing | Upside | Friction point |
|---|---|---|---|
| Embassy or diplomatic mission abroad (Republic of Korea) | Earliest appointment, current checklist version, and profile-specific document notes | Can clarify document requirements before arrival | Appointment availability can drive your travel timeline |
| Local immigration office in South Korea | Whether your current stay status can be considered for a change request, plus office-level document instructions | If accepted, it may reduce pre-travel coordination | Switch eligibility is case-specific and must be confirmed directly |
If you are in South Korea on visa-free or tourist entry, treat in-country switching as unconfirmed unless the office handling your case confirms it in writing.
A key timing check is simple: compare days left on your current status with appointment lead time and document prep time for each route. Public discussion often mentions 30-90 day tourist-entry windows, so delay can close options quickly.
Use this note before locking a path:
- Current status and end date in your passport record.
- Earliest appointment you can actually book for each route.
- Document list version and date saved as screenshot or PDF.
- Fallback route if your first office redirects your case.
There is also a practical tradeoff beyond filing logistics. Longer status is sometimes described as making daily setup easier, including access to standard one-year leases. Longer stays are also discussed as raising tax-residency and possible exit-tax exposure in some cases. Public guidance conflicts, so keep tax planning separate from visa assumptions and align your records with the Tax Guide for Foreign Workers in South Korea.
Decision rule: if timing is tight and your status window is short, choose the route with the clearest written instructions, confirmed appointment availability, and a document path you can complete before your stay ends.
Build a Document Packet That Survives First Review#
Build the packet as a verification log, not a fixed global checklist. For this visa, treat online lists as draft guidance until the office handling your case confirms each item.
The current research set does not give one reliable official checklist. One widely shared thread actually discusses F-5 permanent residence and a point-based multi-year path, which is a different process, and that same scrape shows a retrieval error. Other items are relocation or personal-experience posts, including an older 2021 article.
Use the worksheet below to track only what your filing office confirms.
| Document group | Items to verify with your filing office | What to record in your notes |
|---|---|---|
| Application materials | Any forms or supporting records the office names for your case | Whether required, accepted format, and recency requirement |
| Legalization and translation | Any legalization or translation steps the office explicitly requires | Which path applies and whether translation is needed |
| Insurance and coverage | Any coverage evidence the office asks you to provide | Exact wording expected and acceptable proof format |
| Dependents | Any relationship or identity records requested for dependents | When dependent documents are required |
Verification checkpoint: each line should show who confirmed it, when they confirmed it, and which instruction version you used. If any field is missing, that item is not submission-ready.
Decision rule: if a high-effort document is still unconfirmed, pause and get written confirmation first.
Follow a 30-Day Timeline to Reduce Delays#
Use this 30-day plan as an execution cadence, not an official government schedule. A common delay risk is doing steps out of order, so start high-effort steps only after your filing office confirms they apply to your case.
Track three checkpoints every week: document status, processing-time assumptions, and application cost. Treat each as a separate yes-or-no gate before you book fixed travel.
| Window | Priority | What to do |
|---|---|---|
| Days 1-7 | Route and long-lead tasks | Confirm your filing channel and current instructions in writing. Start long-lead requests only after confirmation, and gather supporting records in parallel. |
| Days 8-14 | Requirement lock-in | Finalize the requirements your office has confirmed for your case. Draft materials against that confirmed version to reduce rework. |
| Days 15-21 | Consistency audit | Reconcile names, dates, ID details, and employer information across all records. Fix mismatches now to reduce review delays. |
| Days 22-30 | Submission and traceability | Submit through your confirmed channel and keep a submission log with receipts, file copies, and communication notes. Follow-up is usually easier when records are complete. |
Build buffer time into each window. Expected and actual processing conditions can differ, so leave regular catch-up blocks each week for corrections and late replies.
Use this one-page checklist at the top of your folder:
- Filing route confirmed in writing with date and contact.
- Document list version saved with the date it was confirmed.
- Processing-time estimate noted before booking fixed travel.
- Cost tracker updated for each application-related step.
- Identity and detail match check completed across all records.
- Submission log ready with receipts and file names.
Decision rule: if any high-effort item is still unconfirmed by the midpoint, pause and close that gap before submission. If your window is tight, prioritize the path with clearer written instructions and keep the same 30-day structure with frequent check-ins.
Before you book appointments, run your facts through the Digital Nomad Visa Cheatsheet to pressure-test eligibility, document order, and timing.
Catch the Failure Modes That Cause Rework#
Preventable rework usually comes from incomplete documents, avoidable mistakes, or using instructions from the wrong post. At this stage, your goal is a file that can be checked quickly without back-and-forth.
| Failure point | What to verify before filing |
|---|---|
| Post instructions | Use your chosen post's latest document list and filing channel |
| Required items | Every required item is present and correctly prepared, and keep a full copy set |
| Wrong checklist | Do not reuse another city or country's checklist as-is; follow your own post's instructions |
| Banking proof format | Banking proof meets the format your post requests, including account details and balances where required |
| Recency rules | Check recency rules in your post's instructions, such as latest 3 months when that rule applies |
| Final detail check | Run a final pass for obvious form and document errors before filing |
Review is detail-sensitive. Even one mistake can trigger rework or refusal. Treat your chosen post's latest instructions as case-specific, including where and how to file, since channels can differ and may route through a visa application center unless your post says otherwise.
Use this pre-submission failure check:
- Confirm your chosen post's latest document list and filing channel before submission.
- Triple-check that every required item is present and correctly prepared, then keep a full copy set.
- Avoid reusing another city or country's checklist as-is; follow your own post's instructions.
- Verify banking proof meets the format your post requests, including account details and balances where required.
- Check recency rules in your post's instructions, such as latest 3 months when that rule applies.
- Run a final detail pass for obvious form and document errors before filing.
Understand Your Limits After Approval#
After approval, keep paid work clearly tied to overseas employers or clients. Anything that could look local should be treated as a verification issue before you sign or invoice.
Under the F-1-D Workation framing in the guides reviewed here, the supported lane is remote work for non-Korean clients or employers while you live in South Korea. Those same guides do not provide a precise legal definition of local profit-making activity, so gray areas need written clarification.
| Scenario | Allowed vs not allowed (practical read) |
|---|---|
| Keep your remote job for a non-Korean employer while living in South Korea | Generally aligned with the described visa purpose |
| Continue freelance work for overseas clients with clear contract records | Generally aligned when records clearly show overseas client relationships |
| Take a paid project for a Korea-based client | Red flag; may be interpreted as local profit-making, so verify first |
| Join a Korean company on local payroll | Not aligned with the described overseas-remote scope |
| Mix overseas contracts with occasional paid local assignments | High risk; get written clarification before proceeding |
Stay length also needs caution. Some accounts describe an initial one-year stay with one renewal for one further year, while others describe different extension windows by nationality, including up to six months for some and up to one year for others. Because these points conflict, do not make major commitments based on one online summary.
Before year one ends, confirm directly with the local immigration office handling your case:
- Your actual maximum extension period for your nationality and file type.
- The filing window, including earliest and latest submission dates.
- Evidence required to show your income source remains overseas.
- Whether new contract activity could be interpreted as local work.
- How to submit questions in writing and how responses are documented.
Plan post-arrival administration early. One guide says you have 90 days to obtain a Residence Card, with arrival often taking about 2 to 4 weeks after application. The broader setup can take about 1 to 1.5 months when steps are sequential. Use those as planning buffers, not guaranteed nationwide timelines.
Decision rule: if planned client activity could reasonably look local, pause and request written clarification from the local immigration office before signing or invoicing.
Handle Dependents and Household Admin Early#
Treat dependent paperwork as a verification process, not a fixed checklist. For this visa path, often described publicly as F-1-D Workation or Digital Nomad, confirm dependent requirements directly with the official consular page or office handling your case. Treat household documents as conditional until that office confirms them.
Set expectations early at home. Eligibility, required records, and submission routes can change over time. If your post requests family-relationship documentation, prepare it in the required format and keep written confirmations in your file.
| Situation | Best next move |
|---|---|
| One dependent document is delayed | Ask your post in writing whether to file principal first or wait for one complete family packet |
| Post instructions are unclear or conflict across sources | Pause and request written clarification before booking appointments or paying fees |
Build one case-specific household checklist from the written instructions you receive, and use it consistently across every family record and form.
Before you pay fees or book appointments, run one final verification pass with the official government authority or consular contact handling your case. This is the safest approach because requirements are described as changing regularly, and third-party trackers are general reference, not formal advice.
Plan Tax and Recordkeeping Before You Move#
Treat visa approval and tax filing as separate tracks before you move.
For U.S. filers, keep two lanes distinct: Form 8938 and FBAR (FinCEN Form 114). Form 8938 is attached to your annual return and follows that return due date, including extensions, and filing Form 8938 does not replace FBAR when FBAR rules apply.
| Item | What it covers | Pre-move checkpoint |
|---|---|---|
| Form 8938 | Reporting specified foreign financial assets when applicable thresholds are met | Confirm filing status and residency profile before applying thresholds; if you are not required to file an income tax return, Form 8938 is not required |
| FinCEN Form 114 (FBAR) | Reporting foreign accounts when single or aggregate maximum account values exceed $10,000 during the year | Track maximum account values across all foreign accounts, not just year-end balances |
Most friction comes from record quality, not form access. For FBAR, use the maximum account value during the year. Periodic statements can be used if they fairly reflect the annual maximum. Keep the statement showing the peak, your calculation note, and your currency conversion source. If Treasury rates are unavailable, use another verifiable exchange rate and document it. Round amounts to whole U.S. dollars.
Use this checklist before booking flights:
- Build one account inventory with institution, account type, owner, and country.
- Mark accounts for possible Form 8938 review.
- Save periodic statements supporting each account's maximum value.
- Log exchange rates used, with date and source.
- Keep a due-date calendar for return filing and extension decisions.
- Save FinCEN confirmations and Form 8938 draft support.
If data is incomplete, follow FinCEN's amount unknown process when you cannot determine whether aggregate maximum values exceeded the threshold and you are in the under-25-account filing path. Keep your workpapers, then escalate. This visa guide stays at planning checkpoints; for filing strategy, continue to the Tax Guide for Foreign Workers in South Korea with your records package and a qualified advisor.
Your Next Step Before You Apply#
Choose your filing path first, then build one consistent packet against that path's current instructions.
| Filing path | Best fit | Verify before you commit | Red flag |
|---|---|---|---|
| Korean embassy or consulate | You are applying through the standard route in your home country | Your post's current checklist and any post-specific requirements | Using another country's checklist |
| In-country switch (if available) | You are already in Korea on B-1, B-2, or C-3 and want to switch | Whether switching is accepted for your current status at your location | Treating switching as guaranteed |
After you choose a path, assemble one coherent file set: application form, passport and identity records, income and employment proof, bank statements, and health insurance evidence. Make sure your records tell one story across dates, employer or client details, and finances. For insurance, confirm the certificate clearly shows at least 100 million KRW coverage for medical treatment and repatriation.
Use one final pre-submit check:
- Confirm exact requirements with official sources for your issuing post and save a dated copy.
- Recheck consistency across your narrative, contracts, and financial records.
- Keep digital copies in one organized folder.
- Log what you submitted, where, and when, including receipts or confirmation emails.
This final check helps reduce avoidable delays from incomplete or inconsistent paperwork in a document-driven process. Requirements can vary by embassy or consulate and can change, so verify current thresholds and requirements one last time before filing.
After submission, move to relocation planning. Choose your city, Seoul or Busan, then plan around reported timing: apply for your Residence Card within 90 days, and expect roughly 2 to 4 weeks for card issuance after applying. Early setup tasks like ID, phone, and banking can still take up to about a month or more, so pair city planning with tax readiness and keep records ready for handoff through the Tax Guide for Foreign Workers in South Korea.
Once your visa packet is complete, use the Tax Residency Tracker to align relocation timing with your recordkeeping and filing plan.
Frequently Asked Questions
Who is eligible for South Korea’s digital nomad visa?
This visa is described for eligible foreign nationals who live in South Korea while working remotely for an overseas employer or client. It is commonly referred to as the F-1-D Workation visa. Some guidance also says spouses and dependent children can accompany the main applicant, but document requirements can vary by post.
How long can I stay on the Workation visa?
The most consistent guidance describes an initial one-year stay with one possible one-year renewal, for up to two years total. Some sources claim longer totals, but those claims are not consistent across references. Confirm allowed stay and renewal terms directly with your embassy before making long-term commitments.
Can I work for a Korean company on the F-1-D visa?
The guidance here says no local Korean hiring and no local profit-making activity. In practical terms, this status is framed around overseas remote work, not local employment. If your arrangement could be interpreted as local activity, get written clarification before proceeding.
What income is required, and how do I verify the current threshold?
Published thresholds differ by source, country context, and year, so do not rely on a copied figure. One cited rule is income at least double Korea’s previous-year GNI per capita, while other guides publish examples such as £57,500 or 100 million won for a specific year or context. The safer path is to confirm the current threshold with your embassy and keep that confirmation in writing.
Can I switch from B-1, B-2, or C-3 status while in Korea?
One source says switching in-country from B-1, B-2, or C-3 can be possible. That is not a guarantee in every case. Check your route directly with your embassy before relying on an in-country switch.
Which documents are usually required for a complete application?
Commonly cited items include a completed application form, recent bank statements, often the last three months, and a recent police certificate. Treat this as a baseline, not a final checklist. One source explicitly warns that additional country-specific documents may be required, so confirm the final list with your embassy.
What details are still unclear, such as fees, processing time, and embassy-by-embassy differences?
This guide does not present fees and submission handling as uniform across countries, and it does not establish a single processing timeline. A UK-specific route mentions postal submission through KVAC London with separate application and center service fees, but that should not be treated as a global standard. Use your embassy’s current instructions as the final authority.
Try a related tool
Researched and edited by the Gruv editorial team. Gruv builds cross-border billing, payouts, and finance-operations software for global businesses.
Sources
Includes 4 external sources outside the trusted-domain allowlist.
Educational content only. Not legal, tax, or financial advice.
Related Posts

Seoul Digital Nomad Guide 2026 for Your First 90 Days
The safest way to approach Seoul is to treat the first 90 days as a live test, not as proof that every long-stay decision is already made. A lot of relocation trouble starts when early excitement gets mistaken for certainty. Then deposits get wired, lease dates get fixed, and move-in plans get locked before legal stay, admin timing, or daily work fit have been tested in real life.

The 2026 Global Digital Nomad Visa Index for 50+ Countries
Start with legal fit, not lifestyle filters. The practical order is simple: choose a route you can actually document, then decide where you want to live. That single change cuts a lot of wasted comparison work and stops you from falling in love with places that were never a real filing option.

How Foreign Workers in South Korea Can Build a Defensible Tax Filing Plan
Use the first hour to narrow to a filing position you can defend later. Do not chase certainty you do not yet have. The safer move is to pick a working assumption, attach the records you already have, and mark the gaps before they turn into filing errors.