
Quick Answer
Start by opening an incident record with expected vs actual behavior, scope, business impact, and the first HH:MM UTC checkpoint, then tag severity as P1/P2/P3. Use Five Whys on evidence from your message thread, brief, SOW, and approval notes, and turn the finding into one concrete update in your checklist, template, SOP, or communication protocol.
What's a "Production Incident" When You're the Entire Company?#
Step 1 Reframe production around what you actually deliver#
For a solo business, "production" is any live service or workflow your client depends on. A simple rule works well: if live delivery behaves differently than expected, treat it as an incident candidate and start a record.
That helps you decide early instead of arguing later. Incidents can still happen even with careful design and testing, and small teams often repeat the same problems when they do not build a habit of learning from them. If you are unsure, log it first and reclassify later.
Step 2 Classify the event before you explain it away#
Before you explain it away, classify the event with evidence you can verify:
- Expected vs actual behavior
What was supposed to happen, and what happened instead?
- Scope
Is this affecting one user or many users?
- Business impact
What customer or business impact is visible right now?
- Timeline checkpoint
When was it first detected (recorded in HH:MM UTC)?
Use this quick test to separate ordinary friction from a clear incident:
| Scenario | Scope/impact hint | Immediate response |
|---|---|---|
| One user cannot complete one task (for example, download a CSV) | Lower scope, but still a behavior gap | Log it, capture impact, and monitor for spread |
| Many or all users are blocked from a core action (for example, login) | High scope and high impact | Declare incident, communicate status, and start timeline tracking |
| Symptoms are unclear or disputed | Unknown | Log as an incident candidate and gather facts before reclassifying |
Step 3 Assign severity and prepare the handoff#
Keep severity lightweight. A practical placeholder is P1/P2/P3. Exact thresholds are not universal, so define what each level means for your business.
Before you start the blameless review, capture a minimum record: incident ID (for example INC-XXXX), date (YYYY-MM-DD), severity, a one-line impact statement, and the first timeline checkpoint in HH:MM UTC showing when it was detected. If another person can read that record and understand what broke, who was affected, and when it started, the handoff is ready.
Do not stop at "what happened." A post-mortem is most useful when it helps you learn and prevent recurrence, not just close the ticket. For the next section, bring three things: what happened, the business impact, and where the process likely failed.
For a step-by-step walkthrough, see How to Conduct a Client Post-Mortem and Gather Feedback.
How to Conduct a "Blameless" Post-Mortem When You're the Only One to Blame#
Run this review as a systems debrief, not a self-trial. Your goal is a written record of what happened, why it happened, how you responded, and what you will change to prevent a repeat.
Step 1 Capture facts before interpretation. In your incident note, document four things: the event sequence, business impact, response, and prevention actions. Keep each entry observable so you can reconstruct the incident later without guessing.
Step 2 Use the Operator vs Systems Designer lens. Read the timeline twice: first as the Operator (what you did with the information available at the time), then as the Systems Designer (which process rules, templates, or checks allowed the failure). Rewrite any line that sounds like a character judgment into process language.
| Blame-based statement | System-based statement | Artifact to update |
|---|---|---|
| I was careless and forgot approval | Final approval was not a required pre-delivery check | Checklist |
| I handled the client badly | The response template did not confirm scope, owner, and next step | Communication protocol |
| I underquoted because I was weak on boundaries | The proposal template did not define revision limits or change approval | Template |
Step 3 Keep accountability without self-attack. Use three labels in your notes: contributing factors, root cause, and prevention owner. This is a practical structure, not a formal standard, but it helps you keep ownership clear while avoiding blame language.
Step 4 Document corrective changes in working artifacts. For each root cause, update one concrete artifact: a checklist, template, SOP, or communication protocol. If you do not capture a fix in an artifact, it is hard to repeat under pressure.
Once your problem statement is neutral and specific, move to the next section and run Five Whys.
The Five Whys: A Disciplined Method for Finding the Root Cause#
Use Five Whys to reach a workflow gap you can fix, not a personality verdict. If your answer is still "I was careless" or "the client was difficult," ask another why.
Step 1: Write the incident outcome as one observable sentence. In your post-mortem, start with one line describing what happened, not why it happened. Example: "The client said the final design missed the mark and disputed the last invoice." Then list the evidence you can point to: message thread, brief version, statement of work, delivery file, and approval notes.
Step 2: Run the why-chain with evidence-backed answers. Time-box this to about 30-60 minutes and write each why-answer in full sentences. Keep answers tied to documents, missing steps, or decision points.
- Why did the client dispute the invoice?
Because the delivered work did not match what they expected.
- Why did the work not match their expectation?
Because the brief allowed different interpretations.
- Why did the brief allow different interpretations?
Because the intake checklist did not require concrete examples, anti-examples, or a written definition of "done."
- Why did the intake checklist miss that?
Because the brief template was generic and did not force those fields.
- Why was the generic template still in use?
Because service-specific documents had not been updated after earlier feedback problems.
If an answer cannot be supported by a file, thread, clause, or checklist item, mark it as an assumption and rewrite it.
Step 3: Stop when you hit a controllable process gap, then log the fix. Five is a guideline, not a hard limit. Stop when the answer points to a workflow gap you can directly change. If it still points to a person, ask another why.
For this example, log fixes in the artifacts you actually use:
- Brief template: require examples, anti-examples, and a success definition.
- Intake checklist: block kickoff until those fields are complete.
- Statement of work: define revision limits, approval points, and acceptance criteria.
- Handoff SOP: require signoff before discovery moves to delivery.
| Incident symptom | Blame narrative | Root-cause finding | Concrete process change |
|---|---|---|---|
| Final invoice dispute after delivery mismatch | "The client was impossible." | Expectations were not defined tightly enough in intake artifacts. | Update brief template + intake checklist, then require kickoff alignment signoff. |
| Scope creep during revisions | "I should have pushed back harder." | Revision boundaries were not explicit in the statement of work. | Add revision limits and a change-request step to the statement of work. |
| Rework after handoff confusion | "I dropped the ball." | Handoff rules were undocumented, so assumptions carried forward. | Add a handoff SOP with required fields and a signoff checkpoint. |
Step 4: Guard against false root causes. Do not stop at why one or two. That usually leaves you with a surface explanation, and the same issue returns. If one chain is trying to explain multiple problems, split it into separate chains.
Once root cause is logged and artifacts are updated, move immediately to client communication and trust repair using that documented process evidence.
You might also find this useful: How to Create a Disaster Recovery Plan for a SaaS Business.
The Client Relationship Rescue: How to Write a Post-Mortem That Rebuilds Trust#
Use a two-step message flow to rebuild trust: send a short incident notice first, then a full post-mortem that shows impact, root cause, controls changed, and what happens next for this client. This is not a confession. It is evidence that you found a process gap and fixed it.
Before you write anything
Build an evidence pack first: message thread, approved brief, statement of work, version history, delivery dates, invoice record, and revised artifacts. If your explanation depends on memory, rewrite it. Your conclusions should come from multiple sources, not guesswork.
Step 1 Send the initial incident notice (fast, brief, clear). If the client is still affected, send a short notice through your normal project-risk channel, then confirm it in writing. Use the agreed window or internal threshold verified from the incident record, even if the full analysis is still in progress.
| Include now | Purpose |
|---|---|
| Current client impact | Shows you understand what changed for them |
| Immediate containment actions | Shows active control, not silence |
| Full post-mortem delivery window pending source-record verification | Sets a concrete next update |
Step 2 Write the full post-mortem in this order. Lead with business impact, then verified root cause, then process changes, then immediate next steps for this client. This structure is clearer and more credible than self-blame.
| Avoid this | Use this instead |
|---|---|
| "I dropped the ball on the deadline." | "The delivery delay affected your launch schedule. We traced it to estimates that did not account for revision rounds, and we updated milestone planning in the SOW." |
| "I misunderstood the brief." | "The deliverable did not align with the approved outcome because the intake checklist did not require examples, anti-examples, or a written success definition. That checklist now does." |
| "I got overwhelmed and missed the dependency." | "The incident exposed a gap in the delivery process. Work can no longer move forward without the required approval checkpoint." |
| "The invoice error was my mistake." | "The invoice discrepancy created extra work for your finance team. Billing now follows the same acceptance criteria and approval step used for delivery signoff." |
Step 3 Prove control with updated artifacts. Name exactly what changed: SOW terms, intake checklist, delivery workflow, and acceptance criteria. If helpful, add version dates, clause names, or a short excerpt. If a corrective action is not tied to a document, field, or checkpoint, it is still intent, not control.
Step 4 Close with follow-through commitments. Trust repair comes from consistency, not one polished message. End with a short checklist:
- Assign one owner per corrective action (even if that owner is you)
- Next update date and follow-up cadence pending incident-owner verification
- Confirm when each change was implemented
- Confirm when each change was used on a live milestone
- State what is different for this client right now
Your next update should report completed actions, not repeated promises.
Related: How to Create a Disaster Recovery Plan for Your Freelance Business.
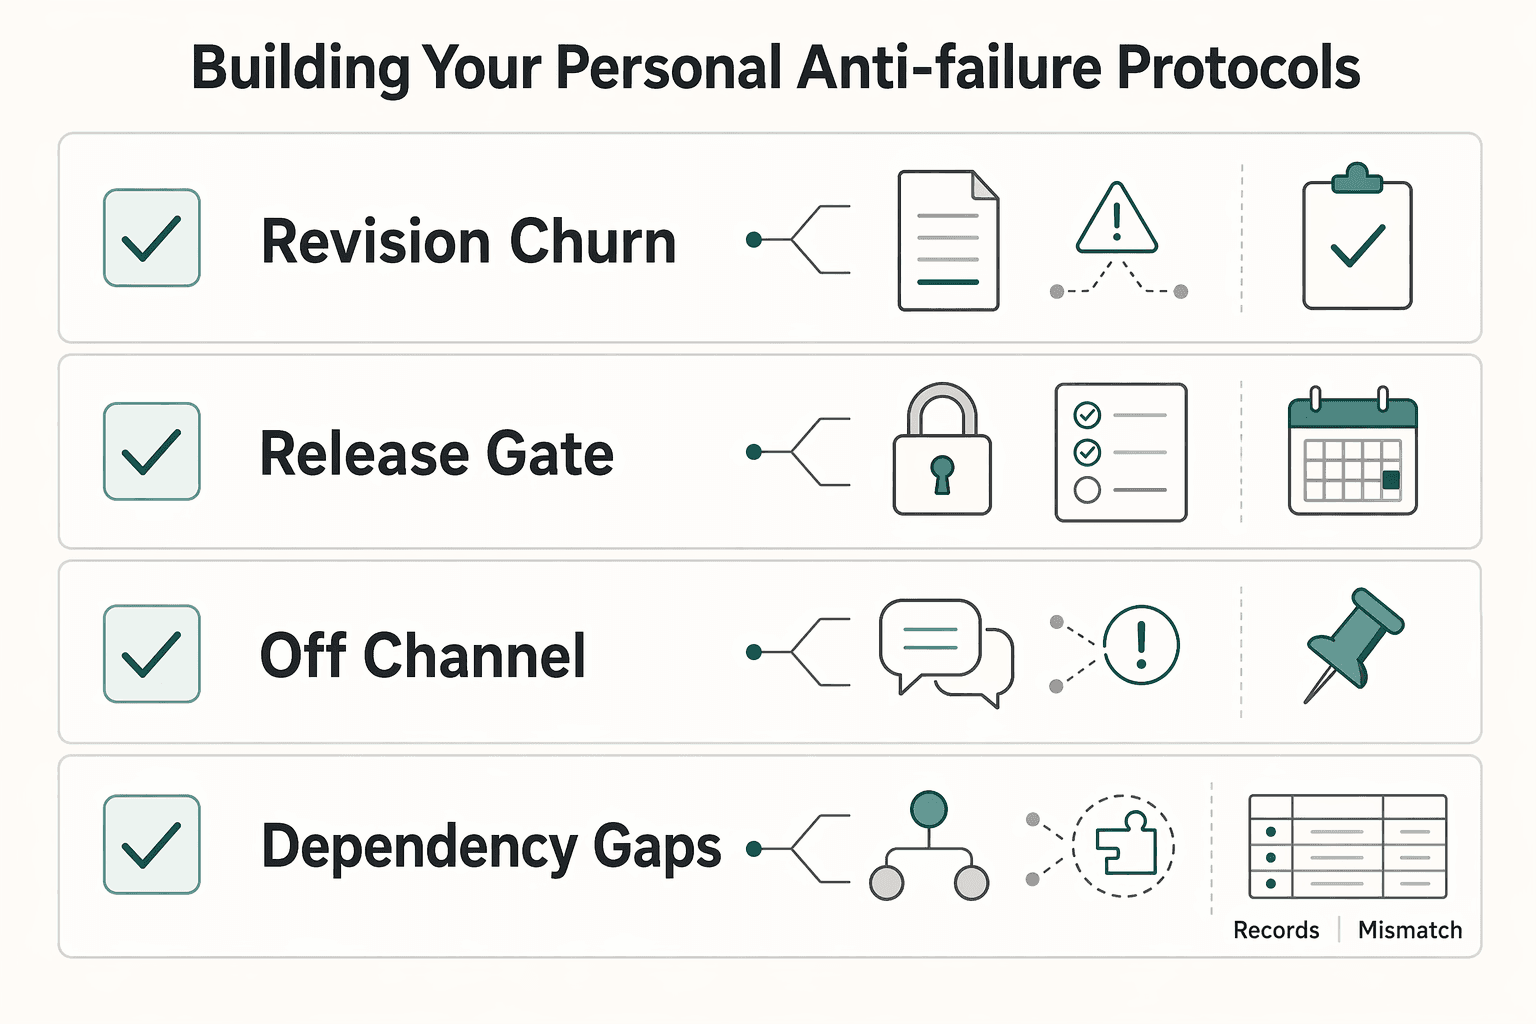
System Fortification: Building Your Personal "Anti-Failure" Protocols#
Turn post-mortem findings into controls you can run on the next project. If you cannot point to an updated SOW, an owned checklist, a pause trigger, and a dated review checkpoint, you have analysis, not prevention.
Before you start
Re-open the incident evidence pack before editing controls: post-mortem, message history, version record, approval trail, and the current contract/SOW template.
Step 1 Update contract and SOW controls at the failure entry point. Edit only the parts the incident exposed, then store the current template in the system you actually use to issue proposals and SOWs.
| Vulnerability exposed | Preventive clause intent | Storage and enforcement point |
|---|---|---|
| Revision churn | Define included revisions, what becomes extra work, and who approves changes | Master SOW template, proposal workflow, client approval record |
| Delayed client inputs or approvals | Define client responsibilities, current late-input threshold pending source-record verification, and what shifts if input is late | SOW template, kickoff summary, milestone tracker |
| Off-channel decisions | Require changes and approvals in one written channel | SOW terms, onboarding notes, project record |
| Dependency gaps | List required assets, access, or decisions before work starts or resumes | Intake form, SOW assumptions, kickoff checklist |
Verification point: from the template alone, you should be able to identify what the client must provide, what pauses work, and where decisions are recorded.
Step 2 Convert root causes into owned checklist controls. For each root cause, add one required checklist step at the stage where it would have prevented the incident (intake, kickoff, delivery, revision, or handoff). Assign an owner role, define where the checklist lives, and require a visible completion mark.
Write steps so they can be verified from records. Good: "Confirm written approval of scope summary in client record." Weak: "Make sure scope is clear."
Verification point: run the updated checklist on one live project; if completion cannot be verified from the record, rewrite the step.
Step 3 Define circuit-breaker triggers before pressure hits. Set pause rules in four parts: condition, owner, action, and log location. Before using the trigger, verify the required-approval threshold from the SOW, policy, or project source record.
Use pause triggers when missing input changes scope, cost, timing, or quality.
Verification point: each trigger should be executable without interpretation and leave a trace in your project record.
Step 4 Schedule follow-through review and verify adoption. Book a dated checkpoint tied to this incident and inspect live use of each control: updated SOW language issued, checklist completed, and triggers used or overridden.
If a control was skipped, treat the fix as incomplete and adjust placement, wording, or operational cost.
Quick rollout questions#
What if the client is already mid-project?#
Apply internal controls now. Apply contract/SOW updates at the next amendment, renewal, or new engagement, unless you and the client document a current-project change in writing.
How many new controls should you add after one incident?#
Add the smallest set that blocks the same failure path. Review usage first, then add more only if the current controls do not hold.
Operationalization checklist#
- Confirm the contract/SOW template is updated in the version you actually send.
- Confirm each checklist control has an owner, storage location, and visible completion mark.
- Confirm each pause trigger names condition, action, owner, and log location.
- Communicate relevant control changes to current clients when approvals, timing, or responsibilities are affected.
- Log a dated review checkpoint and verify controls are being used in live work.
Your Failures Are Your Most Valuable Business Intelligence#
Your incident is only useful when you turn it into a repeatable control, then confirm it works in live work. Treat each post-mortem as operating data: capture what worked, capture what failed, and carry both forward.
Step 1 Capture the signal. Write one plain-language sentence describing what you observed in project records (messages, approvals, versions, checkpoints, or near-miss notes). Be specific enough that someone else could spot the same signal again. For example: "Delivery slipped because feedback arrived in three different channels."
Step 2 Identify the process gap. Pinpoint where your workflow let that signal through: contract/SOW, onboarding, kickoff, delivery QA, or review handling. Aim for one clear gap and one first control to test. This takes time, but a few hours every quarter can be worth it if it stops repeat failures.
| Signal you saw | Process gap to check | First control to test |
|---|---|---|
| Scope dispute | Scope/revision terms were unclear in working documents | Tighten SOW scope and revision language in the template you actually send |
| Communication issue delayed delivery | No single decision/approval channel was set at kickoff | Add a kickoff control that sets one written channel for decisions and approvals |
| Near-miss found late | No recurring pre-delivery checkpoint | Add a delivery QA checkpoint with a visible completion mark |
Step 3 Implement the control in real artifacts. Put the change where work is actually run: contract template, onboarding workflow, kickoff checklist, or QA checklist. If it is not in those operating documents, it will not stick.
Step 4 Verify in the next project cycle. Run this loop on every project, including ongoing work, and review it on a monthly, quarterly, or annual cadence that matches your volume. Communication failures deserve close review because they can expand delays and costs if they persist. Practical rule: if the lesson is not visible in contracts, onboarding, or delivery QA records on the next cycle, you have insight, not improvement.
This pairs well with our guide on How to write a 'Creative Brief' for a design project.
Frequently Asked Questions
What if the client is already mid-project?
Apply internal controls now. Apply contract/SOW updates at the next amendment, renewal, or new engagement, unless you and the client document a current-project change in writing.
How many new controls should you add after one incident?
Add the smallest set that blocks the same failure path. Review usage first, then add more only if the current controls do not hold.
Try a related tool
Researched and edited by the Gruv editorial team. Gruv builds cross-border billing, payouts, and finance-operations software for global businesses.
Sources
- docs.lib.purdue.edu/cgi/viewcontent.cgitrusted
- ncbi.nlm.nih.gov/books/NBK620159trusted
- nyc.gov/assets/ocme/downloads/pdf/technical-manuals/...trusted
- occ.gov/publications-and-resources/publications/comp...trusted
- pmc.ncbi.nlm.nih.gov/articles/PMC8482743trusted
- pmc.ncbi.nlm.nih.gov/articles/PMC12575334trusted
- pubmedcentral.nih.gov/articlerender.fcgitrusted
- science.gov/topicpages/c/cardiomyopathy+bisoprolol+inter...trusted
Educational content only. Not legal, tax, or financial advice.
Related Posts

Canada Digital Nomad Visa Planning for Visitor Status and Work Permits
The phrase `canada digital nomad visa` is useful for search, but misleading if you treat it like a legal category. It is shorthand for existing Canadian status options, mainly visitor status and work permit rules, not a standalone visa stream with its own fixed process. That difference is not just technical. It changes how you should plan the trip, describe your purpose at entry, and organize your records before you leave.

How to Create a Disaster Recovery Plan for Your Freelance Business
Build this as a baseline to create a freelance disaster recovery plan you can run under pressure: clear recovery targets, a restore order, client-ready messages, and one restore proof record. This helps reduce improvisation during an outage.

How to Create a Disaster Recovery Plan for a SaaS Business
A usable **disaster recovery plan for saas** starts with one plain fact: your provider is responsible for restoring its service, and you are responsible for keeping your business running when that service is unavailable. For a business of one, that is not abstract. If a key app is down for hours or days, you need to know what stops, what can wait, and what you can do by hand.