
Quick Answer
Use Notion synced blocks by creating one approved original block on a trusted source page, copying synced versions only into approved templates or pages, and verifying that edits propagate before client-facing use. This keeps repeated content like pricing notes, standard terms, onboarding text, navigation, and SOP steps aligned while leaving client-specific details outside the shared block.
From Chaos to Control: How Notion Synced Blocks Create Your Business's "Single Source of Truth"#
If your core information lives in copied documents across different places, consistency breaks down fast. Notion's own wiki guidance points to the same pattern: when assets are scattered, work slows down and can turn into costly chaos.
Start with one approved page as the reliable home for the information you reuse most.
Step 1 Define your source of truth as one page you trust#
A single source of truth is one reliable hub for the current version of your core business content, not just the place you usually keep things.
For a solo business, that hub should hold the material you need to keep current, plus the context around it. Start with one source page that includes:
- current core assets (for example, images, style guides, and reusable copy)
- onboarding resources that help new collaborators contribute quickly
- project-specific and client-specific pages where needed
At the top, add two checkpoint fields: Owner and Last reviewed so accountability and freshness stay visible.
Step 2 Turn repeated content into controlled components#
Instead of treating every page as a fresh draft, treat repeated content as controlled components. Keep one approved version in your central hub, then reuse that version consistently across related pages.
Keep the controlled pieces narrow. A short pricing note, a service summary, or a recurring onboarding block is easier to maintain than a full mixed page. The practical setup is simple: one source page, a small set of approved reusable sections, and clear distribution points across your workspace.
The main failure mode is letting custom edits spread everywhere. If a client needs an exception, document it beside the standard version on the source page or label it clearly in the destination document. Otherwise, your standard quietly forks into several versions.
| Business artifact | Fragmented workflow | Central-hub workflow |
|---|---|---|
| Core assets | Older versions stay in circulation | One approved set stays current in the source hub |
| Onboarding resources | New contributors hunt across docs | Onboarding lives in one reliable place |
| Project/client context | Context is split across tools and threads | Project-specific and client-specific pages stay together |
Step 3 Verify where the truth is distributed#
Before you rely on this setup, audit your distribution points. Open the pages you or your team actually use and check whether repeated elements trace back to the same approved source page or whether someone pasted a one-off copy months ago.
That verification step matters because a single source of truth is not just a productivity trick. It is the operating condition that keeps your work consistent as your documents and projects grow.
For a broader workspace walkthrough, see A Guide to Notion for Freelance Business Management.
Why a Single Source of Truth is Non-Negotiable#
A single source of truth is non-negotiable because most costly mistakes start at handoffs, not at first draft. When pricing, scope, and standard terms are copied across documents from memory, small wording drifts turn into avoidable rework.
Step 1 Control the content that drifts first#
Start with the reusable fragments that cause the most downstream confusion: your master legal language, your pricing source, and your service scope source. If you cannot quickly point to one current version of each, the control is not real yet.
That is the practical role of synced blocks: keep one approved version of reusable content in circulation.
| Workflow handoff | Where errors usually start | What the shared source fixes | Practical business outcome |
|---|---|---|---|
| Offer to proposal | Rates are pulled from memory or an older proposal | One approved pricing source is reused in the proposal template | Fewer preventable pricing revisions |
| Proposal to contract | Standard terms are copied from a past client file | One master legal-language source keeps baseline wording aligned | Contracts start from the same baseline |
| Proposal to onboarding | Deliverables are rewritten by hand for kickoff docs | One service-scope source keeps purchased scope visible | Client expectations stay aligned from sale to kickoff |
| Onboarding to invoice | Package names or line items are renamed casually | One pricing and service-label source keeps naming consistent | Billing language matches earlier client documents |
Use this as an audit, not a theory exercise. Check one proposal template, one contract template, one onboarding page, and your invoice template. If any still depend on manual lookup for rates, scope, or standard terms, the control is incomplete. Keep Owner and Last reviewed on the source page so accountability is explicit.
Step 2 Keep your client-facing language steady#
Professionalism shows up as consistency across steps. If your proposal, onboarding page, and invoice all describe the same service with different names, clients have to translate your internal language for you.
The goal is not identical documents. It is identical wording for repeated elements that should not drift: service names, scope summaries, payment labels, and standard expectation-setting language. If you need a client-specific exception, mark it clearly as an exception instead of quietly editing the standard block in place.
Step 3 Reduce search friction before it steals attention#
Fragmented information creates drag before it creates visible errors. When updates, decisions, and final files live in different places, finding one answer turns into a digital scavenger hunt, and each search forces a context switch.
A central hub gives you one place to start, but it still requires setup discipline. Centralization breaks down when ownership is unclear or when you try to centralize everything at once. Start with the reusable fragments tied to client documents, then expand.
A simple check: you should be able to find your current rate, current scope description, and current standard terms block without digging through old pages. If you cannot, your source of truth exists in name only.
The next section gets into mechanics: how to build these reusable blocks cleanly, place them in the right documents, and keep them controlled over time. For a step-by-step walkthrough, see How to Create a Content Workflow in Notion for a Marketing Team.
Create, deploy, verify, and disconnect synced blocks#
Once you decide what must stay consistent, run synced blocks like an SOP: create one original, deploy only where needed, test propagation, then choose the right disconnect action when exceptions come up.
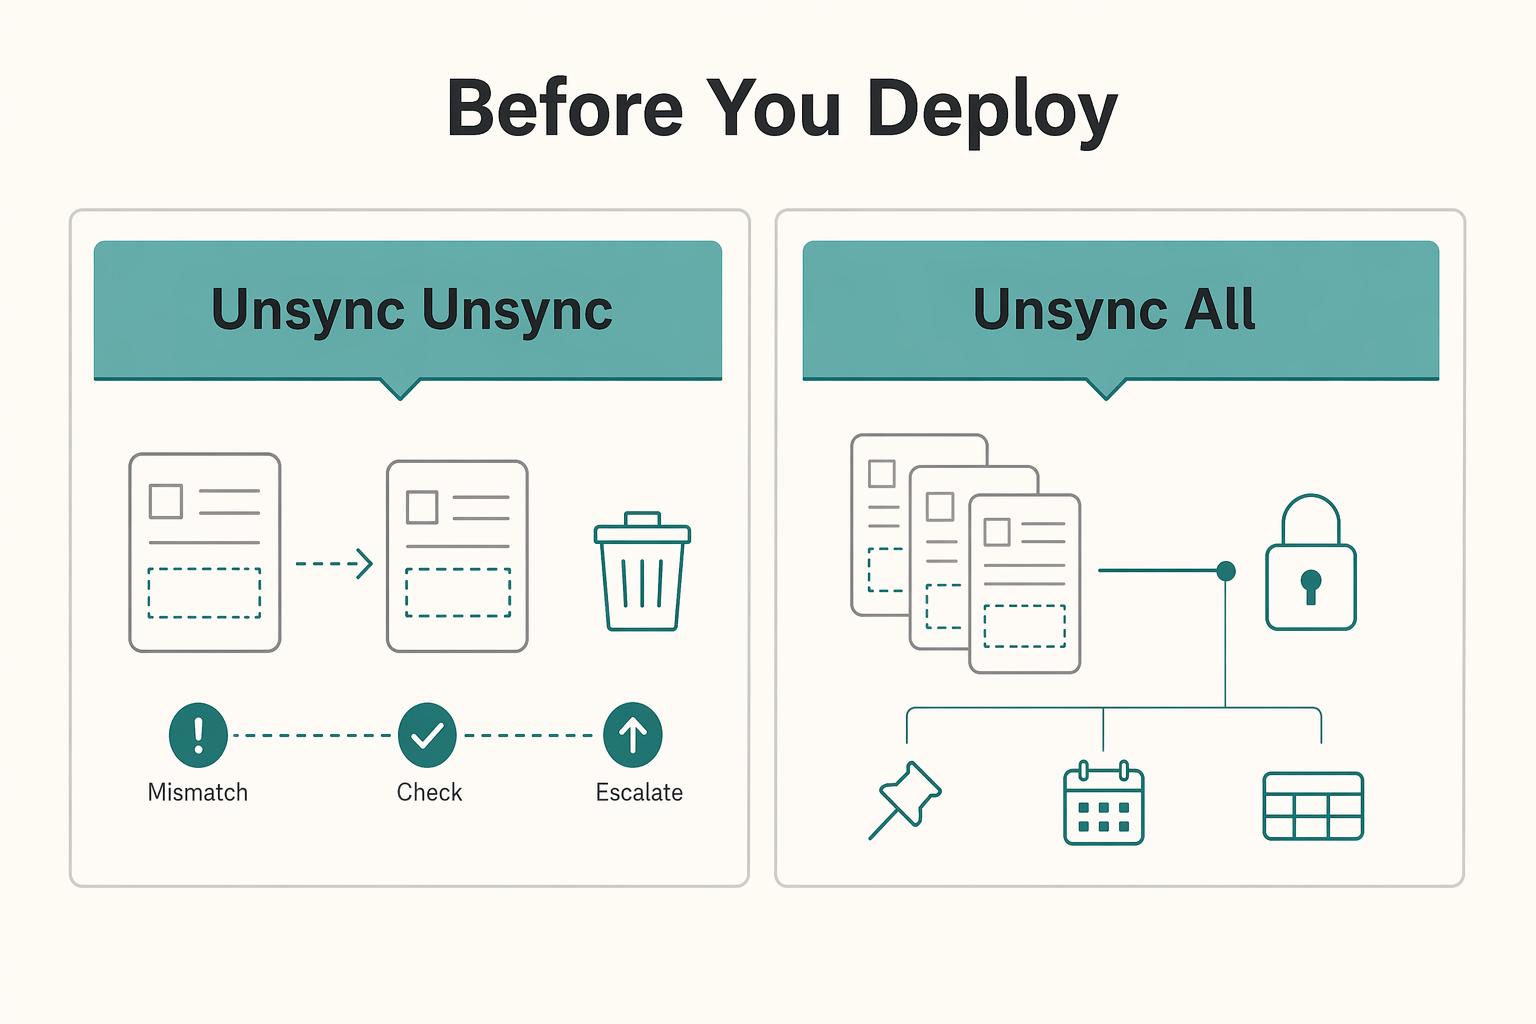
Before you deploy#
Set guardrails first so the system stays controllable:
- Name one owner for the source block.
- Add a clear nearby label that states what the block controls.
- Place it only in approved templates/pages until your verification loop is complete.
These are operating rules, not Notion requirements. They prevent accidental sprawl and unclear ownership later.
Step 1: Create the original block. Use Turn into → Synced block when the content already exists and you want to promote that wording into your shared source. If your workspace supports it, /sync can also be a quick way to start a new synced block container. Use this step when you are defining the one version you want reused everywhere.
Checkpoint: when you click into the block, you should see the editing border, and the source is identified with ORIGINAL.
Step 2: Deploy copies deliberately. From the synced block, use the copy icon (often described as "Copy and sync"), then paste only into the pages that need the same content. This works across pages, multiple spots on one page, and workspaces. Use this step when the content should stay identical across those destinations.
Access check before rollout:
- If someone cannot access the page with the original block, they cannot view synced block contents.
- If someone needs to edit synced content, they need edit access to the original block.
Step 3: Edit once, then verify before client-facing use. Make one small test edit in any instance. While editing, confirm you see Editing in ↙ # other pages, then open linked locations and verify the change propagated where expected. Use this verification loop every time you introduce a new synced block into proposals, contracts, onboarding pages, or SOP templates.
This catches the common failure: a block that looks synced but is no longer connected.
Step 4: Disconnect based on scope of change. Choose the action by intent: single exception or permanent system change.
| Action | Use it when | Common mistake to avoid |
|---|---|---|
Unsync (••• → Unsync on that copy) | You need one local exception and want all other copies to stay linked | Using this for a global update and creating a silent fork |
| Unsync all (from the original block menu) | You want to end the shared block system-wide | Using this for one local tweak and unintentionally breaking every copy |
One high-impact caution: if a synced block has more than 10 copies, Notion notes that Unsync all or deleting the original removes all copies. Pause and confirm your scope decision before cleanup.
Keep proposal language consistent while customizing each client draft#
Use this blueprint to keep proposal language consistent while still customizing each client draft. Structure your template around three parts: a reusable proposal core, a reusable legal block, and one repeatable template layout in your Clients or Projects database.
Step 1 Build the Master Proposal Core#
Create a controlled Master Proposal Core for reusable commercial content only. Keep it focused on the items below.
| Content item | In Master Proposal Core? | Note |
|---|---|---|
| Offer summary | Yes | Reusable commercial content only |
| Scope boundaries | Yes | Reusable commercial content only |
| Pricing structure | Yes | Reusable commercial content only |
| Timeline assumptions | Yes | Reusable commercial content only |
| Change-request terms | Yes | Reusable commercial content only |
| Goals | No | Keep client-specific details outside this core |
| Stakeholders | No | Keep client-specific details outside this core |
| Exact deliverables | No | Keep client-specific details outside this core |
Keep client-specific details outside this core - goals, stakeholders, and exact deliverables - so you can tailor each proposal without editing shared language. Before rollout, run a quick verification pass in your workspace to confirm your reusable sections appear where you expect.
Step 2 Create the Legal and Terms block#
Create a separate Legal & Terms block for standard legal text you do not want to rewrite by hand. When the review cadence is not confirmed yet, mark that status plainly in the owner note instead of leaving an instruction placeholder.
Keep a nearby provenance note for internal governance, such as where the approved text lives and which version you are using.
| Outcome area | Manual proposal drafting | Synced-template workflow |
|---|---|---|
| Speed | More repeated writing and rechecking | Faster reuse after setup, with review still required |
| Consistency | Higher risk of wording drift across drafts | More stable language when shared blocks are maintained carefully |
| Error prevention | Easier to miss outdated terms in scattered docs | Centralized updates can reduce misses when you verify each live draft |
Step 3 Assemble the template in your Clients or Projects database#
Build a New Client Proposal template in your Clients or Projects database with this order: editable client context first, reusable proposal core next, client-specific scope details after that, and legal terms near the end.
Launch checklist:
- Customize per client: goals, deliverables, dates, contacts, and deal-specific scope notes.
- Keep reusable content controlled: pricing logic, scope boundaries, and standard legal terms.
- Label reusable sections clearly so you can distinguish controlled text from local edits.
- Test one record end to end before broader rollout.
Set onboarding up so the next action is obvious#
Set onboarding up so the next action is obvious for both sides: use one reusable checklist structure, one reusable welcome hub, and one client-facing dashboard you verify before sharing.
Step 1 Build the Master Onboarding Checklist#
Create one checklist with three ownership lanes: Internal prep, Client actions, and Access handoff. Keep only repeatable steps in the reusable or synced portion, such as workspace setup, kickoff prep, intake request, communication channel confirmation, file-location sharing, and tool access handoff.
Keep client-specific details outside that reusable block: names, dates, stakeholders, and custom deliverables belong in local fields or page-specific text. Run one test client through the flow before rollout. If you need to rewrite shared checklist wording for a single client, the checklist is carrying too much custom detail, and that can create onboarding drop-off.
Step 2 Create a Reusable Welcome Hub#
Your Welcome & Resources content should answer practical questions quickly. Keep it operational with four reusable modules.
| Module | What it covers |
|---|---|
| Communication norms | Response windows, meeting rhythm, and where decisions are confirmed |
| Document hub | Links to briefs, files, notes, and recordings |
| Support path | Where to send requests, blockers, and approvals |
| Onboarding expectations | What you need from the client in the first phase |
If you publish this outside your workspace, use a public Notion page URL and generate responsive embed code through a no-code embedding workflow. Then verify that the live page shows the native blocks you expect, such as videos, databases, or calendars. When you edit the Notion source, those changes can appear on the live embedded page, so keep these modules clean and reusable.
Step 3 Separate Reusable Guidance from Client Data Views#
Use reusable blocks for instructions and expectations; use database views for live project data. For client sharing, treat linked-database filters as a visibility aid, not an automatic safety guarantee, and verify the shared page before sending.
| Component | Internal view | Client-safe view | Filter/check to apply | Expected client outcome |
|---|---|---|---|---|
| Checklist | Full list, including internal prep notes | Client-relevant tasks and due items | Remove internal-only notes from the shared view | Clear next actions |
| Welcome hub | Full source page with all reusable modules | Clean shared page or embed | Test the public page URL and live embed output | Faster self-serve answers |
| Dashboard | Master project database | Client-specific project view | Confirm only intended records appear before sharing | Fewer status-chase messages |
This setup keeps onboarding personal without rebuilding it every time. You might also find this useful: The Best Tools for Creating SOPs and Process Documentation.
Make SOPs easy to find and use where work happens#
Once onboarding is running, make your SOPs easy to find and use: keep one clear home base, then reuse those instructions where work happens.
Step 1 Build your SOP source in one home base#
Store master SOP pages in your Notion HQ, and use Resources as the main library for reusable procedures. A common base structure is Projects, Tasks, Notes, Resources, and Areas, with Resources holding the procedures and Projects/Tasks linking to execution.
Use consistent labels so your library is scannable in a database view:
- Verb-first SOP title
- Owner
- Last review note
If you can scan the Resources view and quickly tell what the SOP is for, who owns it, and where it applies, your structure is working.
| Approach | Maintenance effort | Error risk | Onboarding clarity | Day-to-day execution speed |
|---|---|---|---|---|
| Central SOP doc | Higher, because updates are buried in one long page | Higher, because teams may reuse outdated copied text | Lower, because people must search before acting | Slower, because guidance is separated from execution |
| Synced atomic SOP system | Lower, because each procedure is managed as a smaller reusable unit | Lower, because repeated instructions are standardized | Higher, because guidance appears where work starts | Faster, because instructions are already in context |
Step 2 Place SOPs where tasks are executed#
Break long SOPs into small, task-level procedures, then place those reusable blocks inside your operating pages, such as project templates, task templates, and dashboards. Keep each block tied to a real workflow moment: setup steps near project creation, handoff steps near delivery tasks, and closeout steps near wrap-up pages.
If you still rely on memory to run repeat work, your SOPs are still too far from the point of use.
Step 3 Run light governance so the library stays alive#
Keep governance simple:
| Governance action | Article detail |
|---|---|
| Assign ownership | Assign one owner per SOP |
| Trigger review | When a tool, handoff, or service changes |
| Add a one-line change note | Whenever you update the source procedure |
Quick self-check:
- Are your master procedures stored in Resources inside Notion HQ?
- Does each SOP show an owner and review note?
- Are templates using reusable SOP blocks instead of duplicate pasted text?
Conclusion: You Are the Architect of Your Business#
The point of a connected workspace is straightforward: stop running repeated business content through scattered copies. The payoff is not magic. It is clearer handoffs, simpler updates to shared text, and more consistent client-facing deliverables.
What clients and collaborators notice is concrete. Your proposal language can stay aligned with your contract language, onboarding instructions can stay consistent with the welcome page, and SOP steps can remain aligned across templates. That is what professionalism looks like in practice: consistent documents, aligned terms, and repeatable execution.
Step 1: Tighten your proposal and contract source text. Pick one master source for service descriptions, pricing language, and standard terms that repeat. Verify that every live proposal template references that same source, and treat frequent one-off edits in multiple places as a sign that your base text needs rewriting.
Step 2: Standardize your onboarding touchpoints. Reuse the same welcome message, kickoff instructions, and next-step checklist anywhere a new client will see them. Check one live client space after editing to confirm the wording is consistent where it matters most.
Step 3: Clean up your SOP library. Move recurring instructions into reusable blocks and keep page-specific notes outside them. If a process changes, update the source first rather than editing random copies across the workspace.
Step 4: Build a simple maintenance habit. When something looks off, first check for the visible Offline notice in Notion. If you are waiting on a product update, remember that updates roll out in stages and can take up to 24 hours to reach workspaces. If you consider resetting Notion, know that it clears local data and signs you out of all accounts.
Your job now is simple: keep one trusted source for repeated content, review it regularly, and maintain it before drift turns into confusion.
Frequently Asked Questions
How do you choose between a synced block and a linked database?
Choose a synced block when one block of content needs to stay identical in multiple places and update everywhere from one edit. The article does not define detailed linked database behavior, so verify current Notion documentation before relying on it.
What are the best business use cases for Notion synced blocks?
Use synced blocks for content that must stay identical across many pages, such as onboarding messaging, SOP or policy text, pricing notes, standard terms, and navigation. Do not use them for content that should change by client, proposal, or project stage. If you keep unsyncing copies for local edits, that content likely should be a regular block instead.
How do you create a global navigation menu in Notion?
Create the menu as normal blocks with links to the pages people need most, then convert that group into one synced block. Paste synced copies where you want the same menu to appear, and verify it by checking for the sync border and the page list that shows where else it exists.
Can you put a database inside a synced block?
The article does not support a detailed rule set for database behavior inside a synced block, so test that setup in your workspace before depending on it. If your goal is to reuse the same text, checklist, or navigation, use a synced block directly. If your goal is database display, confirm current database behavior first.
What happens if you delete the original synced block?
Deleting the original is not routine cleanup. Notion warns that if a synced block has more than 10 copies, using Unsync all or deleting the original will remove all copies. For high-copy blocks, duplicate critical content first or unsync only the one copy you want to change.
When should you use Unsync, and what changes after that?
Use Unsync when one copy needs to become local and independent. After that, edits to that block no longer affect the others, and future edits elsewhere will not update the unsynced copy. That makes Unsync useful for one-off custom pages, but not for standard text that should stay aligned.
Is there a limit to how many synced blocks you can have?
The article does not provide a full current cap on how many synced blocks you can have, so do not plan around assumed limits. The operational threshold it does support is that once a block has more than 10 copies, Unsync all or deleting the original can remove all copies. Confirm current limits in Notion before rollout.
Try a related tool
Researched and edited by the Gruv editorial team. Gruv builds cross-border billing, payouts, and finance-operations software for global businesses.
Sources
Includes 4 external sources outside the trusted-domain allowlist.
- dspace.mit.edu/bitstream/handle/1721.1/63112/Madden_Sync%20...trusted
- pmc.ncbi.nlm.nih.gov/articles/PMC10701638trusted
- pmc.ncbi.nlm.nih.gov/articles/PMC12677560trusted
- repository.law.umich.edu/cgi/viewcontent.cgitrusted
- arxiv.org/html/2603.05344v3external
- dti.domaintools.com/category/researchexternal
- eesel.ai/blog/notion-ai-connectors-setupexternal
- embednotionpages.com/blog-/notion-course-templateexternal
Educational content only. Not legal, tax, or financial advice.
Related Posts
Value-Based Pricing for Freelancers Under Real Payment Risk
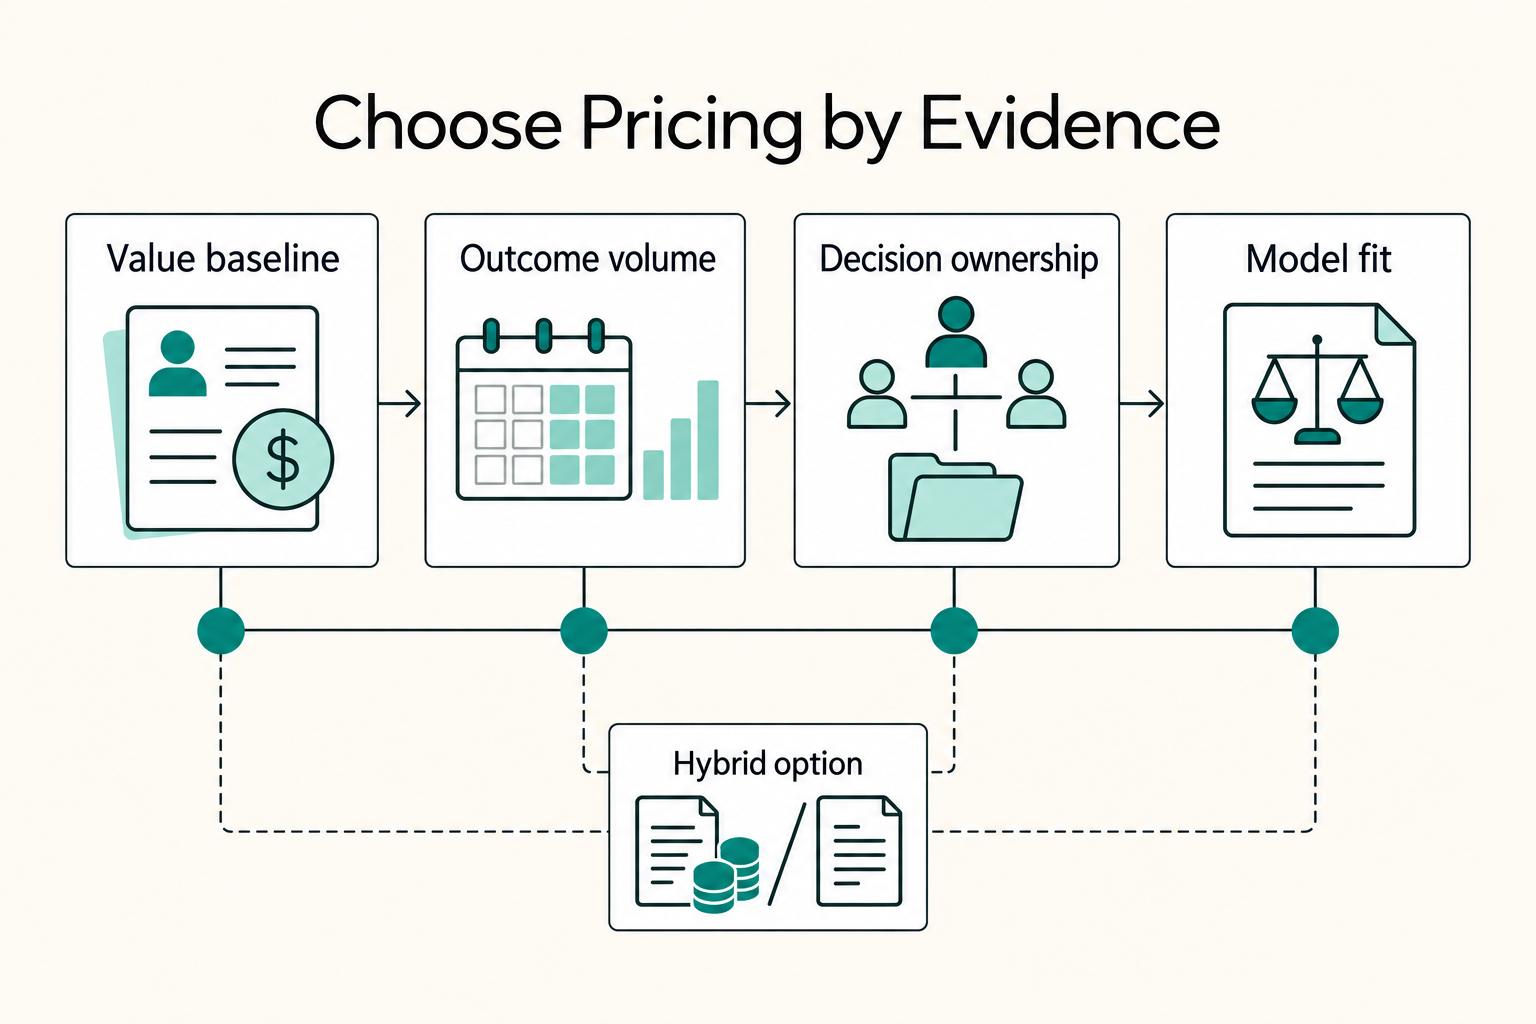
Value-based pricing works when you and the client can name the business result before kickoff and agree on how progress will be judged. If that link is weak, use a tighter model first. This is not about defending one pricing philosophy over another. It is about avoiding surprises by keeping pricing, scope, delivery, and payment aligned from day one.

A Guide to Notion for Freelance Business Management
If your workspace feels busy but fragile, you do not need more pages. You need one connected system. Treat your freelance business like a business-of-one and use Notion as the control layer that connects client decisions, delivery, and billing in one place.
The Best Tools for Creating SOPs and Process Documentation
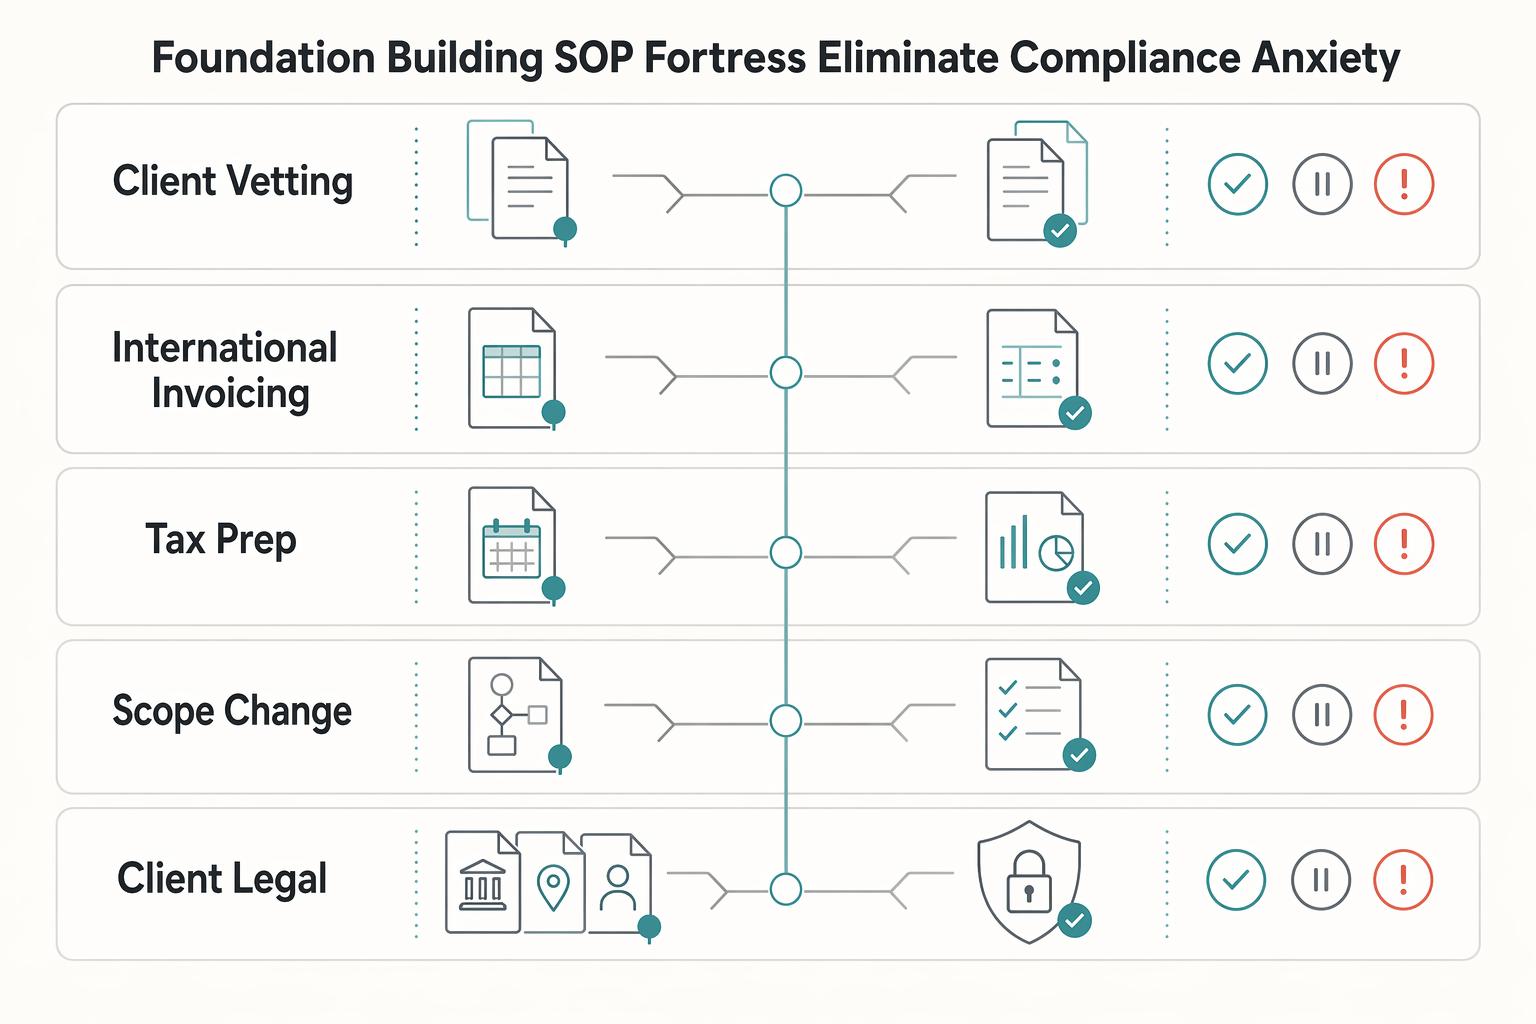
If compliance anxiety is the problem, do not start by documenting everything. Start with four SOPs that can help prevent expensive mistakes: client vetting, invoicing, tax close, and scope changes. If any of these still lives in your head, write it down now. In a January 2019 [simulated SOP study](https://www.researchgate.net/publication/330301419_Retention_of_a_standard_operating_procedure_under_the_influence_of_social_stress_and_refresher_training_in_a_simulated_process_control_task) (76 engineering students), stress impaired performance, while refresher training improved follow-up performance after a two-week retention interval.