
Quick Answer
Yes. Start with a native HubSpot deal workflow, and switch to the ClickUp API only when your proof run shows a specific gap like strict pre-create validation, custom routing, or controlled write-back. Keep one field contract across deal, contact, and company data, block creates when required values fail, and use the HubSpot deal ID as your idempotency anchor so replays do not create duplicates.
Why Automate Project Creation from HubSpot to ClickUp#
If your goal is a reliable sales-to-delivery handoff with fewer manual touches, start with the simplest path you can verify in your own account. Move to the API only when testing shows a real control gap, not because a generic software guide makes it sound more flexible.
That matters more than it seems. Some teams discover they have a handoff-definition problem before they have a tooling problem. If a native or built-in route in your account passes your trigger and field tests, keep it. If testing shows you need stricter validation, custom routing, or logic that path cannot handle cleanly, then an API build may be worth the extra maintenance.
Start with the simplest path you can verify#
Use a practical rule: simple handoff, start native. Proven control gap, move to code. That keeps you from building an unnecessary bridge before you know what the handoff needs to do. Use this quick check:
| Path | What to prove in your account | Extra upkeep to plan for | Who owns it |
|---|---|---|---|
| Native integration or built-in actions | Can it handle your real trigger, required fields, and destination without workarounds? | What retesting is needed when workflows or app connections change? | Who will monitor and reconnect if the handoff breaks? |
| API-led build | Which requirements still fail after native testing? | How will you handle mapping drift, request failures, and retries over time? | Who can safely ship and debug code-level changes? |
Treat this as a decision aid, not a product guarantee. The red flag is choosing based on marketing copy, a buyer's guide, or a category page. The material available here is listing-style content, including a generic "Related Topics" menu, which is not enough to validate a HubSpot-to-ClickUp handoff design.
Verify the basics before you design anything#
Before you map fields or write a single request, confirm three things in your environment:
| Check | What to verify | Evidence |
|---|---|---|
| Eligibility | Your ClickUp workspace is eligible for the route you want to use today | Workspace name |
| Visibility | The integration or app connection is visible where you expect it to be | Screenshot of integration visibility |
| Owner | One named person owns setup and support | Setup owner's name |
Product access can change, so verify current availability in-app. If the integration or app connection is not visible where you expect it to be, stop and resolve access before you design around it. And give setup and support to one named owner. That simple step prevents the common failure where nobody knows who can reconnect, retest, or fix a broken handoff.
Your checkpoint is simple: you should be able to answer, with evidence, "Can we access the route we plan to use, and who will maintain it?" A screenshot of integration visibility, the workspace name, and the setup owner's name is enough for now. If you cannot produce those three items, you are still in discovery, not build mode.
Define what "done" looks like#
You do not need every edge case solved up front. You do need a clear done state: the handoff has to be specific enough to test without arguing later about what success means. Use this short checklist:
- Trigger defined: what exact HubSpot event means "start delivery"
- Payload expectations defined: which deal, contact, or company values must be present, and which can be blank
- Destination defined: what ClickUp object should be created or updated, and where it should land
- Success signal defined: how you will know the handoff worked, such as a created item, a write-back, or a visible status change
If any line above is fuzzy, do not build yet. That is where duplicate records, partial records, and manual cleanup can start.
With that defined, the next decision is straightforward: is the native path enough, or do you need API-level control for a cleaner handoff?
Decide if native HubSpot integration is enough or if you need the ClickUp API#
Make this call with one real proof run, not assumptions: test the native route first, then move to API work only if you can point to a specific control gap in your own handoff.
Run one native proof with a real deal#
Use a normal deal, run the native path you plan to use, and review the created ClickUp record with the person who starts delivery. For your go/no-go check, confirm whether delivery can start from that created record without extra manual lookup work in CRM. If it can, stay native for now. If it cannot, document exactly what is missing, misplaced, or unclear.
Capture evidence as you test:
- source deal snapshot
- created ClickUp record snapshot
- delivery note:
usable as createdorblocked because ...
Verify field placement explicitly, including custom fields your team depends on. Record each required field outcome as works, fails, or needs workaround, and verify the current requirement from provider docs or in-account records before use.
Before you continue, record unresolved prerequisite checks in your setup note:
- HubSpot prerequisite: Confirm the current requirement with the provider.
- ClickUp prerequisite: Confirm the current requirement with the provider.
Classify what failed before you choose code#
A failed native proof does not automatically mean you need the API. First classify what failed:
| Operating decision | Stay native when your proof shows | Move to API planning when your proof shows | Evidence to keep |
|---|---|---|---|
| Mapping control | Values land in the right places for delivery use | You need stricter transforms, joins, or target placement than native proof can satisfy | Source-to-destination field map and screenshots |
| Validation depth | Typical minimum-data deals still produce usable records | You need explicit pre-create rejection rules for incomplete or inconsistent data | One accepted sample and one rejected sample |
| Failure handling visibility | Your team can detect and fix issues with current tooling | You need clearer rejection handling, retry control, or audit trail behavior | Failure log, owner, and retest result |
| Long-term ownership burden | One ops owner can maintain the setup without code support | You are ready to own auth, code edits, debugging, and retesting | Named owner and maintenance location |
Create a one-page decision artifact before build#
Do not proceed on memory alone. Write this short artifact first:
- Trigger definition: exact HubSpot event that starts delivery
- Required field list: minimum fields that must be present
- Rejection example: one realistic record that should be stopped
- Owner assignment: who owns setup, retests, and fixes
Route next steps from that artifact: if native proof is usable and your minimum requirements hold, continue with native setup. If documented gaps require tighter mapping or validation control, continue with API implementation in the next section.
If your delivery team works remotely, How to Manage a Software Project in ClickUp with a Remote Team covers how to run the work after the handoff.
Prepare access, permissions, and minimum technical prerequisites#
Pause here and run a preflight check before you design the build: confirm eligibility, approval authority, and production ownership first.
Verify platform eligibility and setup authority#
Do not assume account access or permissions. Verify each item in your live accounts, then record it exactly:
- ClickUp prerequisite: Confirm the current plan requirement directly in your ClickUp account.
- HubSpot prerequisite: Confirm the current permission requirement directly in your HubSpot account.
- Setup approver: Name the person who can approve integration setup.
Because the current material does not validate product-specific prerequisite details, treat any unverified requirement as unknown until you confirm it directly in-account.
Assign owners by outcome, not by tool#
Use named ownership for the outcomes that keep this handoff operational:
| Outcome | Named owner | Evidence to keep |
|---|---|---|
| Integration setup approved | Person who can authorize the connection | Approval note or ticket |
| HubSpot workflow changes maintained | Person who updates triggers, properties, and logic | Change log location |
| Production incidents triaged | Person who checks failed runs and coordinates fixes | Support channel and escalation path |
Keep this in the same decision artifact from the previous section so ownership is explicit before build work starts.
Confirm API readiness before writing code#
If you move to the API route, turn assumptions into a checklist and mark each item as verified or unknown:
- Auth model
- Token lifecycle
- Scope boundaries
- Sandbox vs production separation
- Per-token rate limits
Then compare the verified limit to your expected handoff volume and retry approach. If any item is still unknown, stop and resolve it before implementation.
Once this preflight is complete, define the handoff contract.
Define your data contract from deal to project before writing any code#
Before you write code, lock one clear contract that tells your system exactly how a HubSpot deal becomes a ClickUp project. If this contract is ambiguous, automation will just scale confusion.
Build one canonical mapping sheet (deal, contact, company kept separate)#
Use one shared sheet, but keep rows separated by source object: deal, contact, and company. For each row, define who owns it and how the value should be handled so two reviewers would make the same call.
| Source object | Source field | Destination field | Owner | Data type | Required | Fallback policy | Normalization rule | Validation checkpoint | Route |
|---|---|---|---|---|---|---|---|---|---|
| Deal | Confirm the current deal property in HubSpot | Confirm the current ClickUp project field in your workspace | Named owner pending assignment | text, date, number, select | Yes or No | default value, manual hold, or reject-and-return | trim spaces, date format, casing, lookup | sample record passes and lands correctly | native token or API-required |
| Contact | Confirm the current contact property in HubSpot | Confirm the current ClickUp project field in your workspace | Named owner pending assignment | text, email, phone, select | Yes or No | default value, manual hold, or reject-and-return | lowercase email, phone format, name cleanup | associated contact present and valid | native token or API-required |
| Company | Confirm the current company property in HubSpot | Confirm the current routing or client field in your source record | Named owner pending assignment | text, select, ID | Yes or No | default value, manual hold, or reject-and-return | standardize legal name, segment labels | allowed value matches route logic | native token or API-required |
Fill this sheet from your live properties, not connector listings or old notes. The available integration pages confirm paths exist, but they do not provide field-level contract rules you can rely on for build decisions.
Set required vs optional rules and one fallback behavior per row#
Your handoff should behave predictably when data is missing or invalid. Decide that now, row by row:
- Mark a field as required only when delivery cannot safely start without it.
- Use default value only when it cannot change routing, scope, or client identity.
- Use manual hold when a human check is safer than creating a partial project.
- Use reject-and-return when a bad value could place work in the wrong destination or context.
Mark deterministic rows as API-required and lock routing logic#
If a row needs strict placement, validation, or transformation, mark it API-required. Keep native handling for non-critical mappings where convenience is acceptable.
Then define unambiguous routing rules for Space, Folder, and List selection. Your signoff test is simple: give the same sample deal to one sales owner and one delivery owner. If they pick different destinations, your contract is not ready.
Keep the signed contract version in your decision artifact so you can trace whether future failures came from code or from contract design.
Related: How to Use Zapier to Connect Your Freelance Tech Stack.
Build the end-to-end automation sequence in the right order#
Use one fixed runbook for every handoff: trigger only true delivery-ready deals, normalize and validate the payload, create records only after dependencies are resolved, then write back to HubSpot last.
Step 1: Choose one true handoff trigger. Set one deal-based enrollment condition in your account that means "ready for delivery," not just "record was edited." HubSpot workflows run in sequence, so the trigger quality determines everything downstream.
Also set an exclusion condition for records that should never start this flow. Before launch, test one qualifying deal and one non-qualifying deal, then log deal ID, enrollment time, expected path, and actual result so you can confirm the trigger behavior is doing what you intended.
Step 2: Assemble and normalize the full payload before any create call. Build the payload first, even if the enrolled record is only the deal. Pull in the mapped deal, contact, and company values, then enforce one hard validation gate before creates:
- required fields present
- optional defaults applied
- unresolved gaps routed to reject or review
If a routing value, client identifier, or core delivery field is still unclear, stop and route it for review. If native workflow logic cannot enforce the validation or branching you need, move that part to your external logic layer instead of weakening the gate.
Step 3: Create records only when each dependency is already resolved. Use this dependency check, and replace labels with your verified object names.
| Create step | Must already exist | If dependency is missing |
|---|---|---|
| Destination container | Approved routing values from the mapping sheet | Stop and send to review |
| Primary delivery record | Destination container plus all required normalized fields | Mark failure or needs review |
| Secondary records or enrichment | Primary record ID plus optional data needed for add-ons | Skip only if truly optional, otherwise review |
| HubSpot write-back | Confirmed result from all required create steps | Do not mark success |
This prevents partial builds where later steps assume earlier steps succeeded. Save returned IDs from each successful create step for traceability.
Step 4: Write back to HubSpot last. Keep the status model minimal: Success, Failure, Needs review. Verify the HubSpot write-back fields in your portal before use: the status property and the created record reference property.
Write Success only after all required create steps finish and you have IDs to confirm the outcome. If anything required is unresolved, write Failure or Needs review.
For the full breakdown, read How Independent Professionals Build HubSpot Sales Cadences.
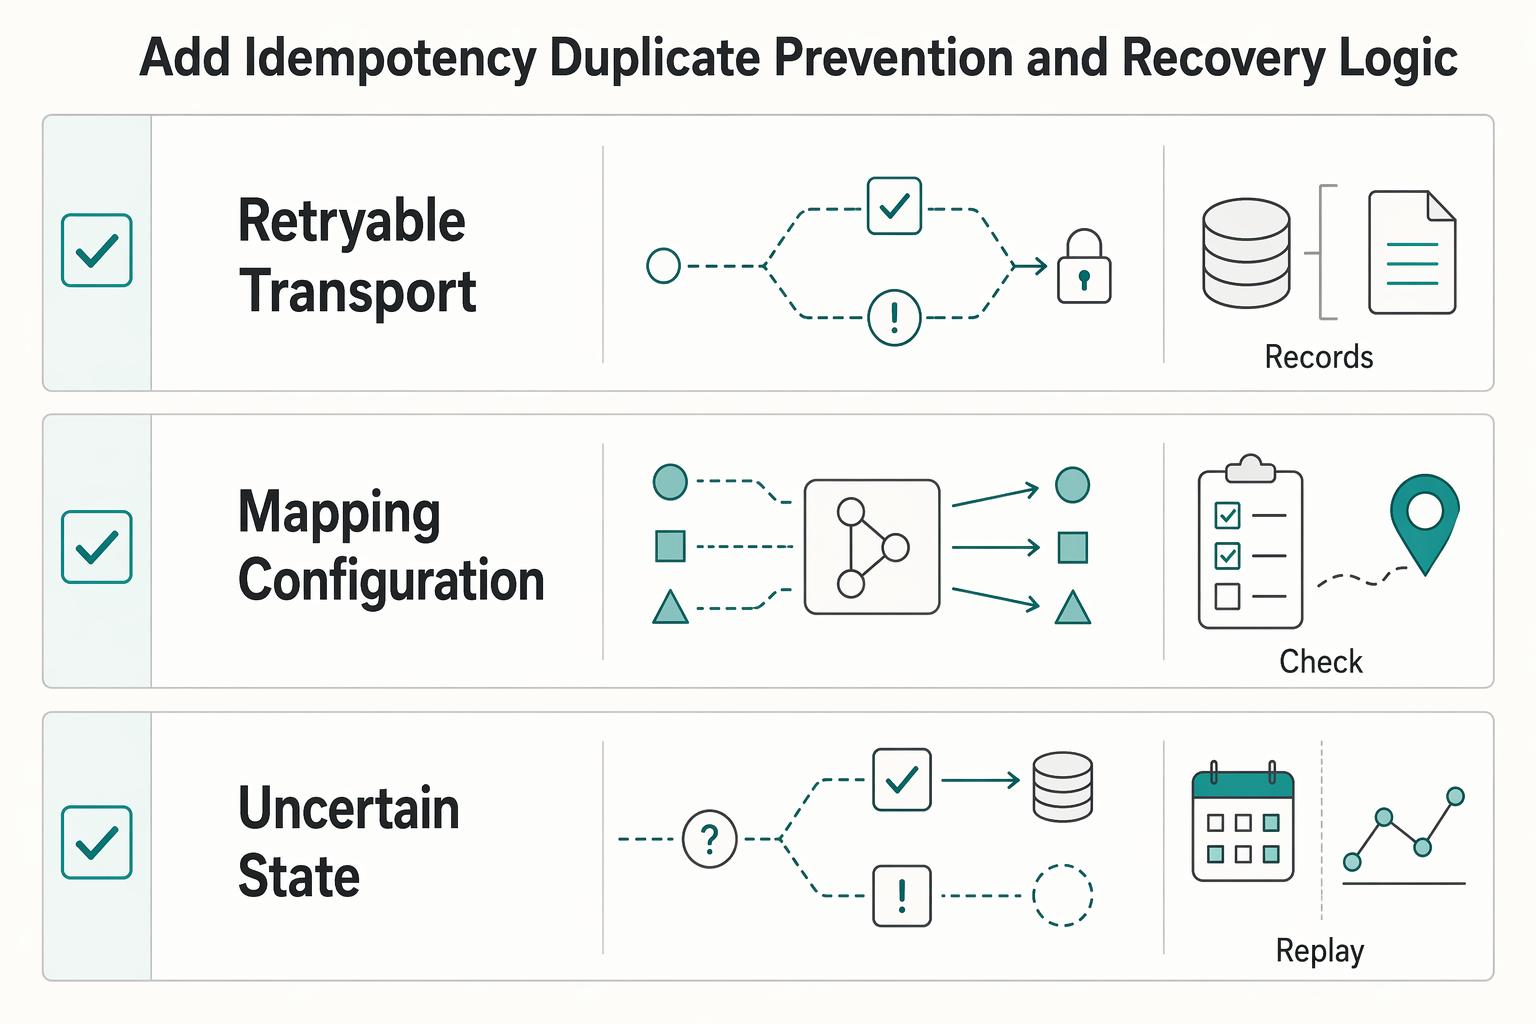
Add idempotency, duplicate prevention, and recovery logic#
Treat duplicate prevention as a create-time control. Before any create call, check durable state, decide whether the run is a replay, and make sure only one run can write.
Step 1: Pick one idempotency anchor and check it before each create. Use the HubSpot deal ID as your handoff anchor in your own state store. For each run, read that deal's state first: if you already have Success and a created ClickUp record ID, stop. If not, continue. Prove this works with a same-deal replay test: run the same deal again and confirm you still get one delivery object, one success state, and no second create.
Step 2: Add a final pre-create gate and enforce single-writer behavior. By default, HubSpot enrolls records the first time they meet triggers, but re-enrollment can be enabled, and re-enrolled records run actions again. HubSpot also notes a record cannot re-enroll while it is already enrolled. That still does not replace your own duplicate controls, so add one last gate immediately before create: confirm the handoff is still valid, confirm no existing Success, and require one run to claim write ownership before creating delivery objects. If another run arrives after that claim, exit and log the reason.
Step 3: Route failures by recovery path.
| Path | Detection signal | Immediate action | Retry policy | Escalation owner |
|---|---|---|---|---|
| Retryable transport failure | Timeout, temporary unavailability, 423 lock, or retryable 429/5xx | Keep the same anchor, log the attempt, then retry | Retry with the same deal ID; for 423, wait at least 2 seconds first. In HubSpot custom actions, 429 and 5xx are retryable | Your assigned API incident owner |
| Mapping or configuration failure | Missing required field, invalid routing value, or 403 permission/scope error | Stop and mark Needs review or Failure | Do not auto-retry until data or permissions are fixed | Your assigned data/setup owner |
| Uncertain state | You cannot confirm whether create succeeded | Freeze and verify in both systems before any retry | No blind retry | Your assigned manual-review owner |
Step 4: Keep a two-system audit trail for fast reconciliation. Use HubSpot enrollment history and path visibility to inspect what happened for a record, including enrollment date, time, and reason. Before launch, verify current HubSpot log retention and export options in your portal.
Log, at minimum, in both systems (or in mapped metadata you control): deal ID, run reference, handoff status, last attempt timestamp, destination container, created ClickUp object ID, and last response/error category. If you use ClickUp webhooks for confirmation, also log webhook ID, event name, resource ID, and history item ID together for dedupe tracking.
With these controls in place, run your full same-deal replay and recovery tests before launch.
Test with a practical acceptance matrix before going live#
Treat this as a release gate, not a checkbox. You only go live after enrollment behavior, destination placement, and HubSpot write-back all pass on controlled records. If any one fails, it is a no-go.
Validate enrollment logic first, then confirm real outcomes#
Use HubSpot Test criteria and Test to verify enrollment logic on the current workflow version before touching live records. Then run controlled real records to confirm ClickUp creation and HubSpot status write-back.
| Scenario | Precondition | Expected system behavior | Release decision |
|---|---|---|---|
| Complete data | Deal meets initial enrollment criteria and includes all required mapped values | Record enrolls, one ClickUp object is created in the intended destination, and HubSpot updates to your success status | Go only if all three checks pass |
| Partial data | Deal meets criteria; required values are present; optional values are missing | Create succeeds using your documented fallback behavior, with no blank critical fields | Go only if fallback matches your data contract |
| Malformed required data | Deal meets criteria, but a required mapped value is missing or invalid | No create call is sent, a clear failure/review state is written back, and no partial delivery record remains | No-go until validation and failure handling are clean |
| Replay or retrigger risk | Same deal is updated again after completion, with re-enrollment enabled or stage-based retrigger logic | Actions may run again, but your dedupe gate blocks a second create for the same deal | Go only if one business handoff still maps to one delivery record |
| Manual re-enrollment | Record is manually re-enrolled after prior completion | Actions run again, but duplicate creation is still blocked | Go only if replay is contained |
Run a tight edge-case sequence for replay and overlap#
Use one baseline deal and confirm the first handoff works. While that record is still active in the workflow, change the stage or retrigger property and confirm it does not re-enroll during the active run. After completion, change the retrigger field from not matching to matching, then manually re-enroll, and verify actions can run again while your idempotency and single-writer controls still prevent a second delivery create.
For each test, capture: HubSpot deal ID, workflow version tested, created ClickUp object ID, and final HubSpot handoff status. Reconcile HubSpot enrollment history and action logs against what exists in ClickUp.
Verify destination placement at the right object level#
Check placement by object type, not just "created successfully."
Task-level placement: if you create a task, confirm it landed in the intended List (/list/{list_id}/task).Hierarchy-level placement: if you create a Folder or folderless List, confirm the intended Space was targeted (/space/{space_id}/folderor/space/{space_id}/list).Field-level placement: confirm mapped values landed on the intended target object, and do not expect native HubSpot workflow mapping to populate ClickUp custom fields.
Pilot ownership and rollback path#
Assign explicit pilot roles before launch:
HubSpot monitor: watches in-flight records in enrollment history and action logs.ClickUp monitor: verifies object ID, container placement, and expected mapped values in the destination.
Flag a partial create when HubSpot shows the run completed but you cannot confirm the created ClickUp ID, or the object is in the wrong container. If rollback is needed, turn the workflow off to block new enrollments, review still-active records for manual unenrollment, clean up pilot-created objects, and reset handoff status values before expanding rollout.
For a step-by-step walkthrough, see How to Automate Lead Qualification with a HubSpot Workflow.
Common mistakes that break sales-to-delivery handoffs#
If your handoff is producing blanks, wrong placement, or duplicates, one of these four assumptions is usually the cause. Fix them before launch so one deal handoff still becomes one clean delivery record.
| Route | Control | Validation flexibility | Recovery handling |
|---|---|---|---|
| Native ClickUp integration | Limited to documented deal-based triggers and create actions | Lower, because HubSpot workflow mapping does not support ClickUp Custom Fields | More limited handling in workflow steps |
| HubSpot custom code + ClickUp API | Higher control over request shape and write-back logic | Higher, because you can validate payloads before create | Stronger branching for failure paths, including HTTP 429 handling |
- You might assume the native route is close enough to API control.
Do instead: choose your route before you build. Native automation supports deal-based triggers and can create a Space, Folder, List, task, or task from a template, but it does not support ClickUp Custom Field mapping in HubSpot workflows. If you need stricter validation and custom failure handling, use custom code actions with the ClickUp API (Operations Hub Professional or Enterprise).
- You might assume field ownership will sort itself out later.
Do instead: keep one shared mapping source of truth across deal, contact, and company properties, with explicit source property, ClickUp target, owner, and fallback behavior. Treat it as a release artifact, not a draft. For owner values, document fallback behavior explicitly: email first, then name.
- You might assume mapping limits are a launch-week cleanup task.
Do instead: run this pre-build checklist before writing automation logic:
- Confirm your ClickUp Workspace is Unlimited or higher for the HubSpot integration. * Confirm setup is owned by a Workspace owner or admin. * Confirm required mappings are not blocked by plan-gated capabilities. * Confirm third-party constraints (such as read-only or one-way field behavior) will not break your required sync direction.
- You might assume duplicate prevention can wait until after release.
Do instead: use dealId as your idempotency anchor from day one, test replay behavior, and block launch if one handoff can still create multiple delivery records. This is mandatory if webhooks are involved, because retries can continue for up to three days after a failure.
For pipeline setup upstream of this automation, see How to Use HubSpot for Sales Pipeline Management.
Final checklist you can copy and use#
If a missing value, wrong destination, or replayed handoff would create cleanup work, this is a no-go until you fix it.
Choose the path before you build#
Pick your path only after you test the real handoff requirements in your account.
| Decision point | Native path (go if true) | API-led path (go if true) |
|---|---|---|
| Trigger scope | Your required trigger and decision logic are supported in your live flow | You need logic your native flow cannot express cleanly |
| Mapping flexibility | Your required values land correctly without extra handling | You need stricter value handling, normalization, or validation control |
| Control needs | Basic create behavior is enough for your handoff | You need explicit failure handling before or after create |
Checkpoint: write one sentence naming the trigger and the exact ClickUp object you will create.
Verify access and accountability#
Confirm access before build: ClickUp automations use triggers and actions, and feature availability varies by plan and user role. Verify who can authorize, who can save changes, who owns support after launch, and who gives final launch approval.
Checkpoint: your setup owner can complete authorization in the target account, your support owner is named, and your launch approver is explicit.
Document the payload and control points#
Define your handoff contract before launch. You should mark each value as required or optional, define fallback behavior for blanks, choose one stable source identifier as your idempotency anchor, and separate retryable failures from non-retryable failures. Log source record ID, destination record ID, status, and last error text for every attempt.
Checkpoint: you can show the field map and explain exactly what happens when a required value is missing.
Test with real records, then release in stages#
Run a real-record test first, then expand in stages. If you configure multiple actions, verify sequence explicitly because ClickUp executes actions top to bottom.
| Release gate | Go only if true |
|---|---|
| Destination accuracy | The created item lands in the intended destination |
| Required-field completeness | Required values are present and readable in the destination |
| Duplicate prevention | Replaying the same source record does not create a duplicate |
| Rollback readiness | You can stop the flow and clean up incorrect creates quickly |
Related reading: How to Automate Pass-Through Expense Tracking from Clients in QuickBooks.
Want to confirm what's supported for your specific setup? Talk to Gruv
Frequently Asked Questions
Can HubSpot natively create ClickUp tasks from deals?
Yes, for straightforward deal-based handoffs. ClickUp’s HubSpot integration is deal-based and supports deal-triggered workflows from HubSpot to ClickUp, so this is often the lowest-friction option for basic handoffs. Before go-live, use HubSpot’s Test feature on one real deal and then check that record’s enrollment history to confirm the create action actually succeeded. If the test deal does not produce the right delivery object in the right place, stop there and fix the trigger or move to code.
Does the native integration support custom field mapping?
No, so do not plan around it. ClickUp is explicit that custom field mapping is not supported for HubSpot workflows. Native works for straightforward flows, but it is the wrong choice when exact field placement matters. Your verification step is a live test record, not a mapping sheet. Push one real deal through the intended trigger, open the created ClickUp item, and check every required value you care about before launch.
When should you use custom code plus the ClickUp API instead of native automation?
Use custom code plus the API when mapping control, validation, or data cleanup is critical. Native is fine for simple sales-to-delivery handoffs. Move to the API when one missing or malformed field can break project setup. This path also lets you extend behavior beyond standard actions, but HubSpot custom code actions require Operations Hub Professional or Enterprise. If you use the ClickUp API, authenticate every request with an Authorization token.
What setup do you need before connecting HubSpot and ClickUp?
Confirm access first: your ClickUp Workspace must be on the Unlimited Plan or higher, and the person doing setup must be a Workspace owner or admin. The connection is made in ClickUp Integration settings, and the authorization popup is where you choose the HubSpot account to connect. Do not build until you can verify four things: the integration is visible, you can complete authorization, the right HubSpot account is selected, and one named person owns support after launch. Most connection issues come down to access or account-selection mistakes.
Can you include deal, contact, and company data in one project creation flow?
Potentially, but do not assume the native route will handle that cleanly. The native integration is deal-based and does not support custom field mapping. If you need combined deal, contact, and company context with strict formatting, move to custom code and validate the final payload before the write. A practical check is to standardize values into consistent formats first, then inspect the exact outgoing payload. If one required field is blank, duplicated, or in the wrong format, fail the create and fix the logic before launch.
How do you prevent duplicate ClickUp records if the same handoff runs twice?
Use your own duplicate check from day one. A common pattern is to store a stable HubSpot identifier (often the deal ID) with the created ClickUp record reference, then check for an existing match before creating another delivery object. Make the proof explicit: replay the same test record and confirm behavior in workflow history. Do not assume duplicate prevention happens automatically, especially where enrollment logic or create actions could run more than once.
Try a related tool
Researched and edited by the Gruv editorial team. Gruv builds cross-border billing, payouts, and finance-operations software for global businesses.
Sources
Includes 8 external sources outside the trusted-domain allowlist.
- 326744.fs1.hubspotusercontent-na1.net/hubfs/326744/How%20to%20use%20ClickUp%202024...external
- activepieces.com/blog/hubspot-automation-workflowsexternal
- albato.com/connect/clickup-with-hubspotexternal
- avidlyapac.com/hubspot-clickup-integrationexternal
- community.hubspot.com/t5/APIs-Integrations/Hubspot-to-Clickup-Inte...external
- developer.clickup.com/docs/rate-limitsexternal
- developer.clickup.com/docs/webhooksexternal
- developers.hubspot.com/docs/api-reference/automation-actions-v4-v4/...external
Educational content only. Not legal, tax, or financial advice.
Related Posts
Value-Based Pricing for Freelancers Under Real Payment Risk
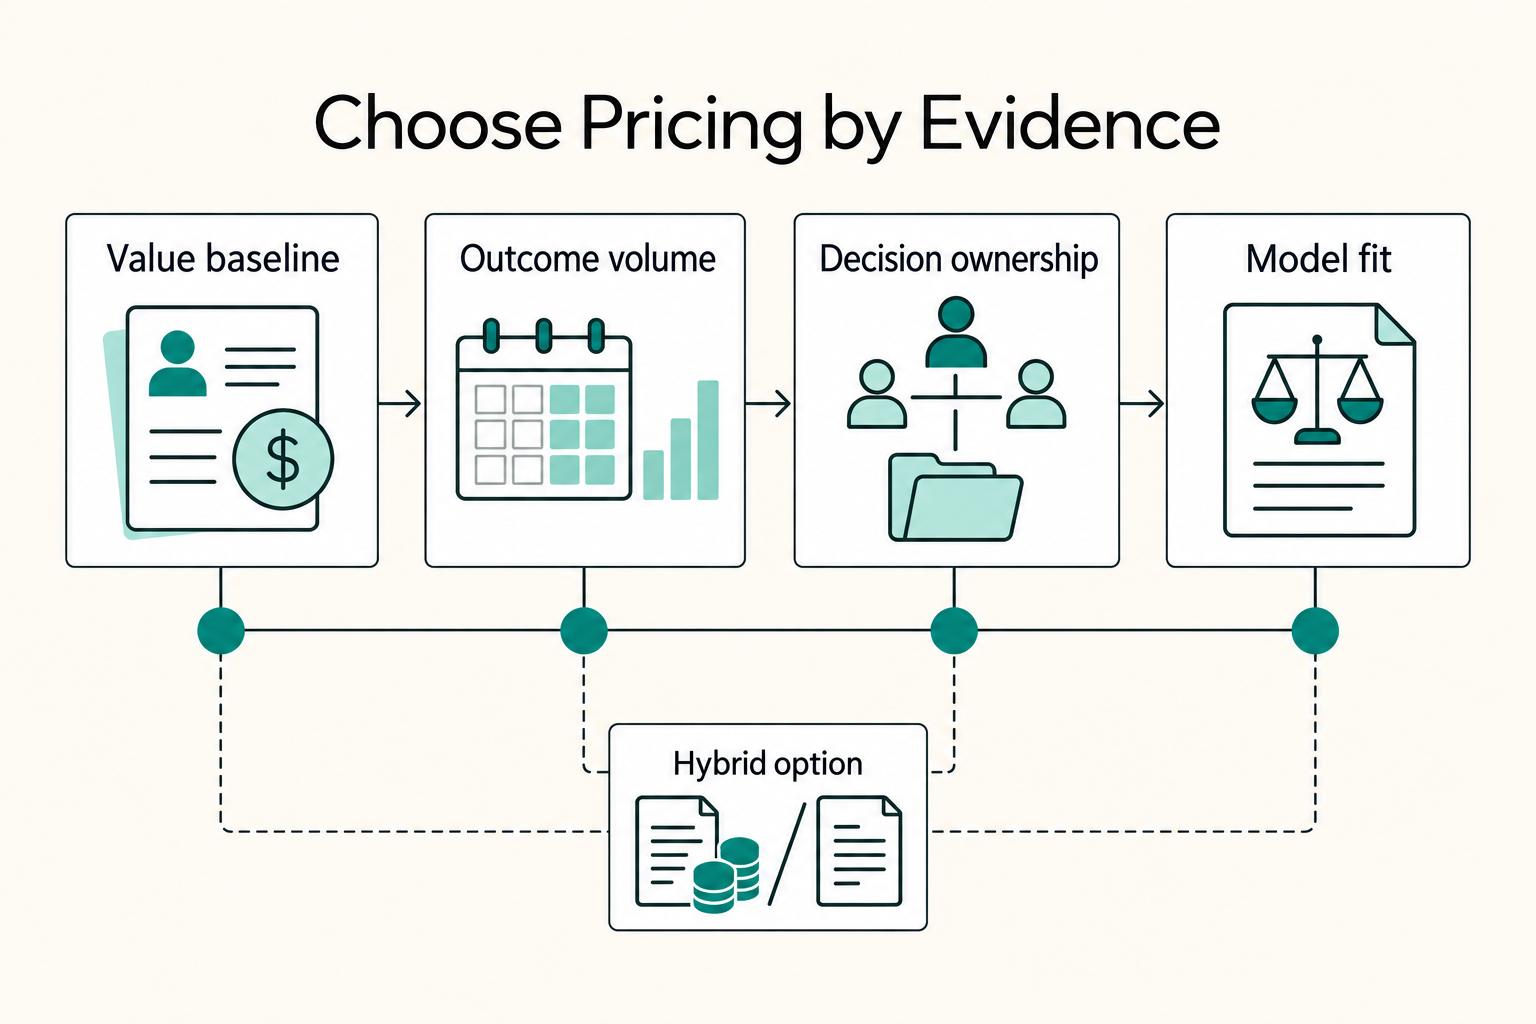
Value-based pricing works when you and the client can name the business result before kickoff and agree on how progress will be judged. If that link is weak, use a tighter model first. This is not about defending one pricing philosophy over another. It is about avoiding surprises by keeping pricing, scope, delivery, and payment aligned from day one.
Use Zapier to Run a Reliable Freelance Tech Stack
If your stack feels messy, the fix is usually not one more app. Zapier works best here as the connective layer in your business, so client work, paperwork, invoicing, and follow-up keep moving without you babysitting every handoff.
How to Manage a Software Project in ClickUp with a Remote Team
For a solo professional, ClickUp works best as the control center for the business, not just a to-do list. The shift from a basic task tracker to a reliable client system starts with one deliberate choice: build a repeatable structure for every new engagement before the work begins.