
Quick Answer
Start by running your move through four gates: destination risk, clinical preparation, coverage and payment planning, and medication/emergency readiness. To stay healthy while traveling for months, close each gate only when you have verifiable written outputs saved in one offline packet. Review CDC Travelers’ Health and Travel Advisory updates before commitments, leave your medical visit with documented actions, and keep prescriptions accessible in transit. Then use a clear symptom-escalation rule so decisions stay fast when you are tired or offline.
How to Stay Healthy During a Long Stay Abroad#
Use this sequence before workload, housing, and travel friction make health tasks harder to execute. If you are traveling for months, treat this as four pass-fail gates. A gate is closed only when you have a written output you can verify.
That order matters even more on long stays. The CDC notes that long-term travelers can face greater infection risk, sometimes without symptoms. Keep the process simple. Decide early, document clearly, then move into dates, bookings, and routines.
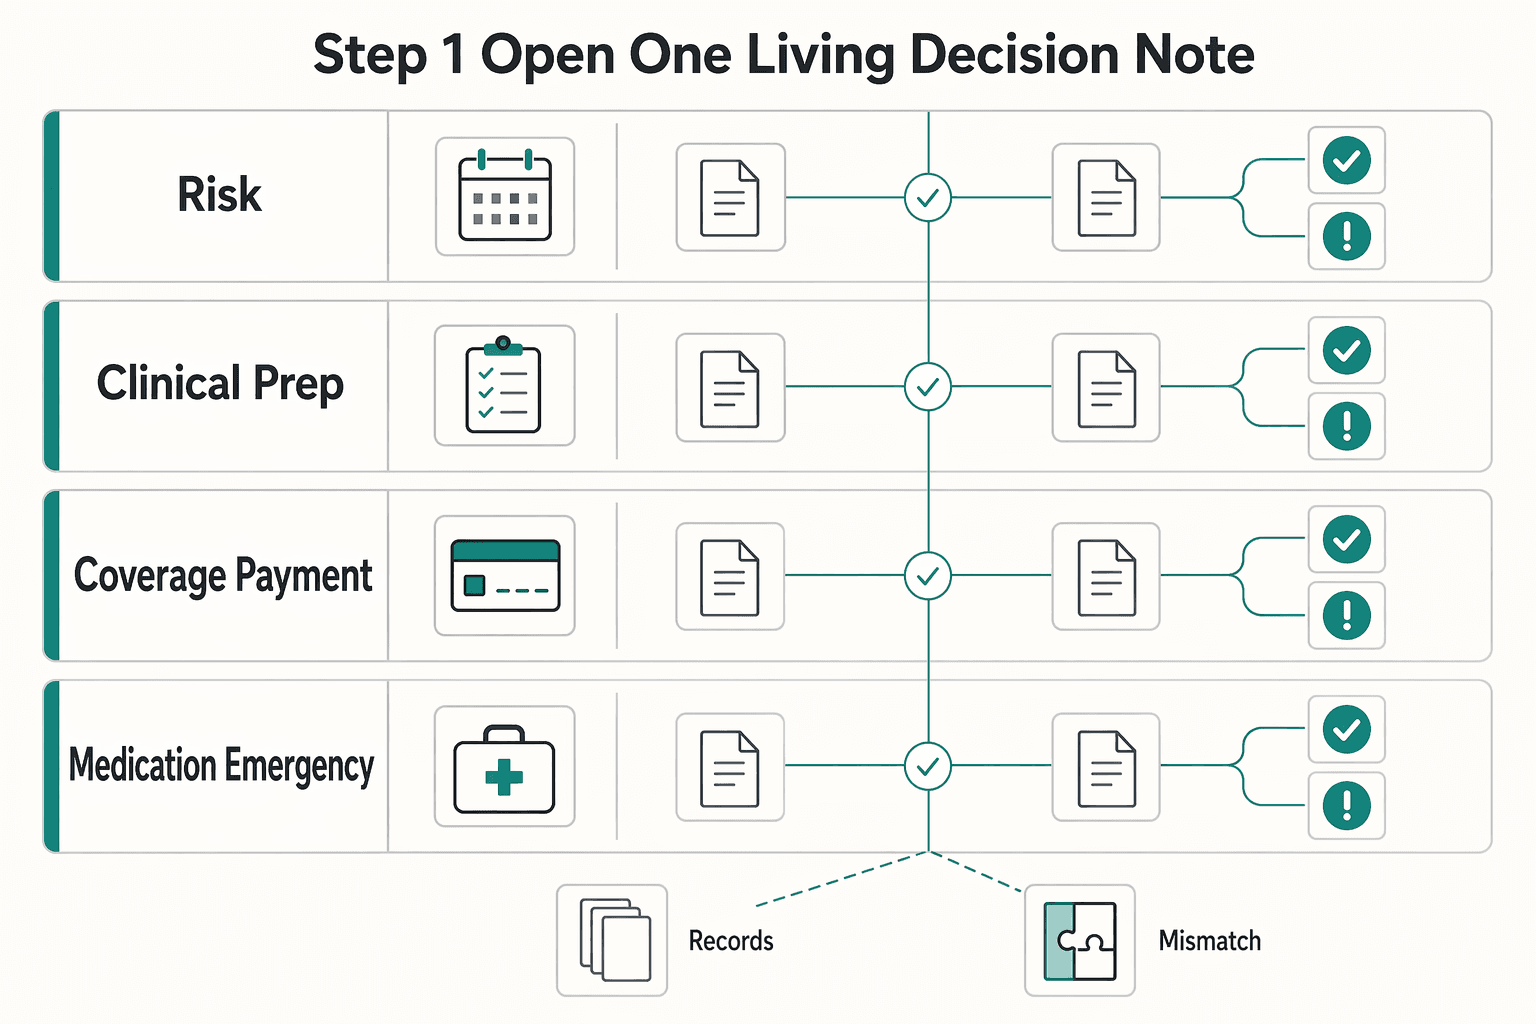
Step 1 Open one living decision note#
Start one note that stays with you from planning through arrival. For each gate, record the decision, date, supporting evidence, and recheck trigger. If a partner, clinician, or helper cannot read it and act quickly, it is not complete.
| Checkpoint | What complete looks like | Common miss | Fast recovery action |
|---|---|---|---|
| Risk | Dated written decision on destination or route risk and whether plans change | Reading updates without making a decision | Write one line: proceed, reroute, delay, or recheck |
| Clinical prep | Appointment booked plus documented vaccine, medication, and condition plan | Waiting until your calendar is full | Book the visit first, then plan dates around it |
| Coverage and payment | Written care and payment path, including evacuation terms and contacts | Assuming insurance or Medicare will handle it | Get written confirmation or plan for out-of-pocket care |
| Medication and emergency access | Offline file with medicines, records, contacts, and emergency steps | Keeping everything in cloud apps only | Export to your phone and print a backup set |
Step 2 Check destination risk before plans harden#
Treat risk review as a real planning gate, not background reading. For U.S. citizens, the State Department says checking the Travel Advisory is a first planning step. The output you need is a documented decision on whether risk changes your destination, route, timing, or emergency planning.
The common miss is reading and moving on. Write down what you decided and why, even if the answer is "no change." That step prevents last-minute rework after nonrefundable commitments.
Step 3 Book clinical prep 4 to 6 weeks before departure#
Book the pre-travel visit early enough to leave room for action. The CDC recommends a pre-travel visit at least 4 to 6 weeks before departure. Close this gate only when the appointment is booked and your prep list is clear, including immunization records and questions about medication supply if you will be away more than 30 days.
The real output is a clinical decision, not a calendar reminder. You should leave with written notes on vaccines or medicines discussed, your refill plan, and what changes if your dates shift.
Step 4 Write your coverage and payment path#
Do not rely on assumptions here. The U.S. government does not pay medical bills abroad, Medicare does not cover medical costs outside the United States, and many locations require payment or a deposit before treatment. Your written plan should state who pays first, how claims work, whether hospitals can be paid directly, and whether medical evacuation coverage is included.
Resolve the high-cost edge case now as well. CDC guidance describes medical evacuation insurance as emergency transport from remote areas to higher-level care. State Department guidance says air ambulance evacuation back to the U.S. can cost $20,000 to $200,000. If your route includes remote or low-capability settings, make that decision explicit in writing.
Step 5 Build an offline medication and emergency access file#
Close the final gate with a travel health kit and one offline file that still works without internet. Include your medication list and doses, immunization records, evidence that you checked medication legality with destination and layover embassies, insurer contacts, STEP confirmation for U.S. citizens, and State Department emergency numbers: 888-407-4747 and 202-501-4444.
Most failures here are format problems, not intent. The documents exist, but only in email or cloud portals. If you carry medically necessary liquids above 3.4 ounces (100 milliliters), declare them at TSA screening in the United States. Move to the next section only after all four gates are fully closed.
If routine is the hard part, How to Maintain a Healthy Routine While Traveling goes deeper on sleep, meals, and exercise while you're away.
What to prepare before you start planning dates#
As a planning rule, do not lock flights, housing, or start dates until three gates are closed and you have proof you can verify offline: destination risk, coverage clarity, and emergency-document readiness.
| Gate | What you verify | Proof to save offline | What triggers a recheck |
|---|---|---|---|
| Destination risk | You reviewed current official public-health and travel advisories relevant to your route, then made a written decision: proceed, reroute, delay, or no change | Dated decision note with the sources you checked and what changed, or did not change | Any new official update, route or stopover change, timing shift, or local-condition change that affects your plan |
| Coverage clarity | You can explain your care path, payment path, evacuation path, and claims file in plain steps | Policy details, insurer contacts, written insurer responses, claims instructions, and unresolved coverage conditions pending insurer verification | Renewal, destination or duration change, activity change, or any insurer reply that remains unclear |
| Emergency-document readiness | A trusted contact can run your plan without messaging you | One offline file plus one printed backup with meds, contacts, itinerary, policy details, and your direct traveler contact data | Any medication, insurance, address, or itinerary change, or a failed handoff test |
Step 1 Check risk and record a decision#
Start with current destination health and travel information from official advisories relevant to your route. Then write a dated decision that states whether this changes your location, route, timing, or emergency plan. Set one explicit recheck trigger now so risk review does not become passive reading while bookings keep moving.
Step 2 Turn coverage wording into actions#
Policy language is not useful until you can use it under stress. Write four plain-language steps: where you seek care first, how evacuation would be handled, who pays at the point of care, and what you must keep for claims.
| Line | Write | Pending note |
|---|---|---|
| Care path | Where you seek care first | Mark vague insurer answers unresolved and save the written response with the date |
| Evacuation path | How evacuation would be handled | Confirm the current coverage condition with the insurer before you rely on it |
| Payment path | Who pays at the point of care | Mark vague insurer answers unresolved and save the written response with the date |
| Claims file | What you must keep for claims | Confirm the current coverage condition with the insurer before you rely on it |
If an insurer answer is vague, mark it unresolved and save the written response with the date. Any unresolved policy term or coverage condition should stay pending until you verify it from official policy records or the insurer's written response.
Step 3 Build one offline file another person can execute#
Your file is ready only when a trusted contact can use it without follow-up questions. Keep your medication list and doses, itinerary, policy details, insurer contacts, emergency contacts, and your direct traveler contact details in one offline file and one printed copy.
This helps reduce risk from known contact-data gaps in air-travel systems. CDC plays a key role in air-travel contact tracing, but GAO reports no single complete passenger-information source and notes that booking contacts can be third-party details. For certain U.S.-bound flights, CDC required airlines to collect name, phone number, email, and physical address no more than 72 hours before departure, a requirement cited since November 2021.
Do a handoff test. If your phone is unavailable, can your contact still tell a clinician or insurer who you are, what you take, and who to call next?
Related: A Deep Dive into IR35 for Freelance Contractors in the UK.
Six weeks before departure lock medical appointments and immunizations#
This is where planning has to turn into clinical decisions. Use the 4-6 weeks before departure window so there is time for immunizations to respond, medication plans to be clarified, and any needed supplies or devices to be arranged before you go.
| Decision area | What to confirm in the visit | What to document before you leave |
|---|---|---|
| Route-specific risks | Your itinerary, trip duration, purpose, planned activities, and which health risks, vaccines, or medicines are relevant for that route | A dated route note with risks discussed and a clear action, no-action, or pending decision |
| Routine immunization status | Which routine vaccines are current, which need updates, and what can still be completed before departure | A plain-language status note and a copy of your official immunization record to carry |
| Chronic-condition travel risks | How your condition could flare in transit or abroad, how to manage minor problems, and how to seek care in-country | A plain-language care plan with flare response, care path, and escalation placeholders |
| Medication timing | How to take medicines before, during, and after travel, including schedule disruption | A dosing plan for transit days, clinician-verified missed-dose guidance (or pending verification), and enough supply for the trip plus extra for delays |
Step 1 Book a dedicated pre-travel consultation#
Make this a travel-focused appointment, not a generic quick check. Your clinician should review your health background alongside your itinerary, duration, purpose, and planned activities so the advice matches the trip you are actually taking.
Bring route details, stopovers, dates, work setup, and activity plans in writing. Output to save: one dated visit summary listing what was decided and what is still pending.
Step 2 Review routine immunizations against your timeline#
Ask for a direct status: current, update now, follow up later, or not applicable for this trip. Keep the decision tied to your departure timing, since some vaccines need lead time and some require more than one dose.
Leave with records you can actually use during travel. Output to save: a plain-language immunization status note plus digital and printed copies of your official immunization record.
Step 3 Turn route-specific advice into route-specific decisions#
Broad country-level advice may miss route-specific details. Include layovers, side trips, trip length, and activities so the risk review matches your actual exposure.
If you cannot explain the plan in plain language, it is not ready. Output to save: a one-page route risk note mapping each risk to an action, no-action, or a clinical trigger that still needs clinician verification.
Step 4 Build a plain-language chronic-condition and medication plan#
"Keep taking your meds" is not a usable plan. You need instructions for transit days, disrupted schedules, minor flare management, and where to seek care abroad.
Ask for missed-dose contingencies and escalation triggers in language a non-clinician can follow. Keep individualized thresholds pending until your clinician verifies them from medical records or written care instructions. Output to save: one condition sheet covering baseline schedule, transit-day plan, missed-dose contingencies, flare steps, and verified escalation notes.
Step 5 Leave with a handoff-ready offline note#
Keep a paper or electronic record of your medical history with you during travel. Your offline note should still work when you are without connectivity, fatigued, or unwell.
Before you leave, do a handoff check. Can a trusted person read the note and know what to do next? Output to save: one offline medical-history and travel-care note, plus one printed backup, that a helper can run without follow-up questions.
Related reading: Manage Finances While Traveling Long-Term Without Cashflow Gaps.
Two weeks before departure confirm coverage and refill windows#
Two weeks out, stop treating this as background admin. Lock it down in one offline file you can use under stress. The file should let you track medication continuity, route questions to the right contact, handle pay-first situations, and capture what to keep if you later submit a claim.
| Task | What to confirm | What to save offline | Failure trigger |
|---|---|---|---|
| Medication continuity | Current supply status and refill checkpoint to confirm with your pharmacy or prescriber | Medication list, dosing schedule, pharmacy contact, prescriber contact, updated refill note pending pharmacy or prescriber verification | Refill confirmation stalls, medication is out of stock, or travel dates shift |
| Coverage path | Which contact answers plan-benefit questions, based on your policy materials | Policy name, member ID, benefits contact, last verification date | You cannot tell who to contact for a coverage question |
| Assistance coordination | Which contact handles coordination support, if listed in your materials | Assistance contact, hours if listed, short "when to call" note | You are using coordination support as a coverage decision source |
| Out-of-pocket workflow | What to do if care requires payment before any later review | Primary payment method, backup payment method, current document checklist pending policy or insurer verification | You cannot explain what to keep after a visit |
Step 1 Confirm medication continuity now#
Call your pharmacy and prescriber now, then write down what is confirmed and what is still pending. Because requirements can differ across jurisdictions, do not assume one rule applies everywhere.
Build a mini contingency plan in the same note:
- If refill confirmation stalls: contact the pharmacy or prescriber and log who is waiting on what.
- If stock is unavailable: record the next contact step and expected follow-up time.
- If travel dates shift: recheck your medication timeline and update your note.
Step 2 Split coverage, coordination, and payment into separate lines#
Do not keep these as one vague "insurance" step. Create three labeled lines in your offline file: benefits questions, coordination questions, and pay-first workflow.
For each line, store one contact path and your last check date. If a step requires sharing sensitive data on a government site, use only an official, secure .gov website.
Step 3 Build your claim-ready packet and emergency contact sheet#
A usable packet beats a complete but scattered one. Save the documents you already have and leave placeholders where policy details still need confirmation. Keep everything in one offline packet with a visible update date.
Include emergency contacts and at least one offline phone checkpoint that is updated regularly. Guidance can vary by jurisdiction and current agency operations, so keep a last-checked date next to each contact.
Step 4 Run the arrival-day scenario test#
Test this before you fly with one question: "I wake up sick on day one abroad." You pass only if you can state, immediately and without searching apps or inboxes, your first contact, your likely next step for care, and your documentation steps.
If your refill and coverage plan depends on entry timing, run a quick check with the Digital Nomad Visa Cheatsheet before you lock bookings.
Build a carry-on health setup you can run without checked luggage#
Treat your carry-on as your day-one health plan. It should let you stay on schedule with medication, handle minor issues, and show key documents even if your checked bag is delayed.
Step 1 Pack one reachable pouch by first use#
Use one small pouch you can reach from security through arrival. Organize it by first use when you are tired or rushed, not by broad labels.
Put three groups inside:
- Daily continuity items: routine medication, glasses, and core medical supplies you use to stay on schedule
- First-response items: basic first-aid items matched to your health history and trip type
- Documentation items: offline medication and care sheet, prescription copies, and destination care contacts
Use a quick test with your actual bag packed. Can you reach routine medication and your care sheet without unpacking everything?
| Must stay in carry-on | Can go in checked bag | Why it matters on day one |
|---|---|---|
| Routine medicines, especially time-sensitive items | Backup quantities of noncritical items | Medication is allowed in checked or carry-on, but carry-on access is recommended when you may need immediate use |
| Medically necessary liquid medication | Extra first-aid restock items | Liquid medication can exceed 3.4 ounces in reasonable quantities for the flight when declared at screening, but it may still require additional screening |
| Glasses, core medical supplies, offline care sheet, prescription copies | Duplicates you can function without initially | These are the items that keep you operational if baggage is delayed or internet access fails |
Step 2 Confirm medication access and route legality#
Keep essential medication in your carry-on, not only in checked baggage. Pill and solid medication are allowed in unlimited quantities if screened.
| Check | Confirm | Note |
|---|---|---|
| TSA medication rules | Current TSA medication rules and whether AskTSA live help is needed | AskTSA live help: 8 am-6 pm ET |
| Airline carry-on policy | Current carry-on policy, including baggage limits | Confirm with your airline |
| Destination and layover medicine rules | Rules for each destination and layover | Verify with the relevant embassies or consulates |
| Narcotics or psychoactive medication | Original prescription container and whether personal-use quantity limits apply | Personal-use quantity limits often 30-day supply or less |
Run these checks before departure:
- Confirm current TSA medication rules and use AskTSA live help if needed (
8 am-6 pm ET). - Confirm your airline's current carry-on policy, including baggage limits.
- Confirm destination and layover medicine rules with the relevant embassies or consulates.
Do not treat a single database as final. INCB itself says it cannot confirm full accuracy for all country entries and recommends direct embassy or consulate confirmation.
If you carry narcotics or psychoactive medication, keep them in the original prescription container and verify whether personal-use quantity limits apply, often 30-day supply or less.
Step 3 Set up for screening before the checkpoint#
If you carry medically necessary liquids above 3.4 ounces, separate them so they are easy to present. Tell the TSA officer at the start of screening that you have medically necessary liquids.
Plan for extra checks. These items may require additional screening, including opening the container, so pack them in a way that stays organized after inspection. Even generally permitted medical items can still face additional screening outcomes at the checkpoint. Can you present and repack medical liquids quickly without emptying your full bag?
Step 4 Carry print + digital docs and run one scenario test#
Carry both printed and digital copies of critical health documents. Minimum set: prescription copies, offline medication and care sheet, and destination care contacts.
Verification prompt: if state medication-labeling rules apply on your route, did you check those rules directly rather than relying only on TSA guidance?
Final scenario checklist:
- Can you take your next scheduled dose with no internet?
- Can you handle a minor issue without buying supplies on arrival?
- Can you show prescription copies and care contacts if asked?
- Can you do all of that if checked baggage is delayed?
If any answer is no, repack and retest.
Travel day and long-haul protocol that protects sleep and circulation#
On travel day, simplicity helps consistency. If you already have a clinician-approved plan, follow it in a fixed order when you are tired or delayed: medication timing, familiar food and fluids, pre-decided circulation support, then sleep protection.
Before departure#
Write a one-screen plan on your phone or on paper before you leave home. Include only:
- Next medication times from your existing plan
- Your default food and hydration pattern
- The circulation support you already decided to use
- Your sleep fallback after arrival
If any step still requires a new airport decision, simplify it now.
This guide does not set a personal travel protocol, so treat the checklist below as an operational template to personalize with your clinician.
| Decision point | Default plan | If clot risk is higher for you | If delays disrupt your plan |
|---|---|---|---|
| Medication | Follow your written timing plan | Use only the clinician-approved plan you already have | Keep the same priority order and restart from the next due time on your written plan |
| Food and fluids | Use familiar options and steady intake | Avoid first-time products or supplements | Repeat the simplest familiar option instead of waiting for an ideal one |
| Circulation support | Use only your pre-decided approach | Follow only what your clinician already advised | Keep your original plan and do not add new tactics in transit |
| Sleep | Protect sleep conditions, but do not force sleep | Use only pre-tested options already agreed with your clinician | Switch to your fallback and protect the first real sleep window after arrival |
In transit#
Do not optimize in transit. Repeat the plan where possible: follow your existing medication schedule, keep intake familiar and consistent, and use only the circulation and sleep measures you already planned.
For background only, one source is the Journal of Clinical Medicine article Prevention of Venous Thromboembolism in 2020 and Beyond (2020 Aug 1; 9(8):2467; DOI 10.3390/jcm9082467). Use that as context, not as a personal protocol, and note that NLM indexing does not itself imply endorsement of article content.
After arrival#
Reset in sequence: medication first, then familiar intake, then your sleep fallback. Do not redesign the day when you are exhausted.
This section cannot set urgent-care versus emergency thresholds. If symptoms concern you, follow the red-flag instructions your clinician already gave you and local emergency guidance.
When delays break plans, complexity is often the failure point. Keep the sequence fixed and your decisions pre-made.
For a step-by-step walkthrough, see How to Eat Healthy While Traveling Long-Term.
Your first seven days abroad should focus on care access not optimization#
In your first week abroad, access matters more than optimization. Before you fine-tune sleep, workouts, or productivity, make sure you can reach care quickly, cover an upfront bill or deposit if asked, and share the right information if you are too unwell or stressed to explain it.
Step 1 Build one offline care file you can use under stress#
Create one short file that works offline on your phone. Keep copies separate from originals, and give a copy set to one trusted person.
Include:
- Emergency contacts, including one personal contact and, for U.S. citizens, the nearest U.S. embassy or consulate
- One local doctor option and one local hospital option from your current location
- Insurance contact path: insurance card and claim forms you carry
- A one-screen helper summary with the key details someone would need to help you quickly
Also save phone photos of your travel documents in the same offline folder.
| Care access tasks this week | Optimization tasks to defer |
|---|---|
| Save local doctor and hospital options offline | Rebuild your full workout plan |
| Save insurer contact path, card photo, and claim forms | Start a new supplement stack |
| Check the local U.S. embassy or consulate site for doctor or hospital lists | Fine-tune macros, fasting, or meal timing |
| Create a helper-ready medical summary | Force an "ideal" jet lag reset schedule |
| Confirm how you would pay an upfront deposit if required | Chase peak productivity in week one |
Plan for payment friction. In many locations, payment or a deposit may be required before treatment, and the U.S. government does not pay medical bills abroad. If your insurance is accepted abroad, carry your insurance card and claim forms.
Step 2 Verify advisory status, STEP contactability, and a same-day refresh trigger#
Check the latest Travel Advisory for your destination now, not just what you saw while planning. Advisory levels run from Level 1 to Level 4. Travel Advisories are updated when conditions change substantially, and conditions can change at any time.
| Signal | What it covers | Refresh action |
|---|---|---|
| Travel Advisory | Destination status; advisory levels run from Level 1 to Level 4 | If it changes, update your care file that day |
| STEP alert | Security, demonstrations, health, weather or disaster events, and Travel Advisory updates | If an alert arrives, update your care file that day |
| CDC Travel Health Notice | Health risks, including disruptions that can limit healthcare availability | If it affects local healthcare access, update your care file that day |
If you are a U.S. citizen, confirm your STEP enrollment is active and your contact details are correct. STEP alerts can include security, demonstrations, health, weather or disaster events, and Travel Advisory updates. Also check CDC Travel Health Notices for health risks, including disruptions that can limit healthcare availability.
Use one same-day refresh trigger. If the Travel Advisory changes, a STEP alert arrives, or a CDC notice affects local healthcare access, update your care file that day.
Step 3 Rehearse access before you rely on it#
Do not wait until you are sick to learn the file is incomplete. Run a quick three-part rehearsal from your lodging:
- Request help using your saved summary by text or call
- Open directions to your nonemergency care option
- Open emergency care details and your embassy or consulate contact path
If you are a U.S. citizen and need emergency assistance abroad, you can use Overseas Citizens Services: 1-888-407-4747 from the U.S. or Canada, or +1 202-501-4444 from overseas.
Pass-fail check: put your phone in airplane mode and complete the first move for each scenario. You pass if you can get the right contact, location, and insurance details without web access. You fail if any step depends on strong connectivity, memory, or hunting through message threads. Then fix the file before you optimize anything else.
Weeks two through four build routines you can sustain under work pressure#
By weeks two through four, the risk is usually overbuilding, not ignorance. Consistency beats intensity here. Keep your non-negotiables fixed first: medication timing, refill continuity, care access, and at least 7 hours of sleep. Flex everything else around that stack.
Step 1 Lock your priority stack before work spikes#
Protect the core before your schedule gets crowded. Keep medication use exactly as directed before, during, and after travel. If you cross time zones, take doses based on time since your last dose, not local clock time, and check with your clinician if timing needs to change.
Protect refill continuity early too. Some insurers may only cover a 30-day supply at a time, so do not assume your next refill will sort itself out automatically. Keep your care-access plan current as well, especially since many health plans may not cover care abroad.
| Keep unchanged | Scale back | Pause temporarily |
|---|---|---|
| Medication timing, refill plan, care contacts, minimum sleep floor | Full workouts into smaller activity chunks, meal-prep complexity, social plans on heavy work nights | Peak-performance training blocks, aggressive physique goals, new supplements or rigid food rules |
Step 2 Shrink optional habits instead of dropping them#
When work pressure rises, reduce scope before you stop. Keep the structure of your routine, but shorten sessions and use smaller activity blocks across the week. Some activity is better than none, and breaking movement into smaller chunks is a valid way to stay consistent.
If your baseline is 150 minutes of moderate activity, or 75 minutes vigorous, plus strength work 2 days per week, treat that as a guide. Scale session size to match your actual week-to-week load.
Step 3 Run one weekly continuity check and a three-line log#
A short weekly review helps catch problems before they turn into travel-day failures. Use the same day each week and check four things:
- Medication supply status and refill timing
- Upcoming flights or time-zone shifts that could affect dosing
- Whether reminders still show up where you actually look
- Whether escalation triggers and care contacts are still current
Then write a three-line operating log:
- What held
- What slipped
- What you will change next week
If the same item slips twice in a row, simplify it further. In this phase, the main risk is not effort. It is running routines built for easy weeks instead of real ones.
Use clear escalation rules when symptoms show up#
When symptoms show up, sort them by severity first. That keeps the next decision safer and faster.
Use a simple decision flow to choose the next step:
Mild and stable: start self-care now and monitor symptoms.Worsening: contact a clinician and arrange in-person care promptly.Severe: treat it as an emergency and get emergency care now.
| Symptom pattern | What you do now | What to prepare before you leave for care |
|---|---|---|
| Mild and stable | Hydrate and monitor symptoms. For mild diarrhea, start fluids right away. | Policy number, help-line route, short symptom note with start time and trend, current medication list |
| Worsening | If symptoms are getting worse, contact a clinician and seek in-person care promptly. | Offline policy details, payment method, claim instructions from your policy, symptom timeline |
| Severe | Go to emergency care immediately. Call local emergency services or call ahead to the nearest emergency facility. Do not delay for admin tasks. | Bring your phone and core documents only if immediately available |
If severe symptoms include trouble breathing, chest pressure, or possible heart-attack symptoms, treat this as emergency care first.
Keep your insurance and documentation checklist practical and offline. Include:
- Policy identifier and insurer name
- Insurance card and claim forms
- Urgent contact route, including any 24-hour help line if your insurer offers one
- Whether medical evacuation coverage is included
- Claim requirements listed in your own policy
- Same-day record of where you were seen, what care you received, and what you paid
This matters because travelers are usually responsible for paying medical costs out of pocket in many destinations, and some locations require a deposit before services. If care access is limited, confirm evacuation terms early. Air ambulance back to the United States can cost $20,000 to $200,000.
After each visit, write a short handoff note before the day ends:
- Symptom trend and recent changes
- Clinician guidance
- Follow-up trigger
- Documents saved
Then verify the plan in plain language with the next person involved in care, using read-back or check-back so your next decision stays consistent.
If you need care during your stay, How to Find a Doctor or Dentist Abroad covers how to find reputable local providers.
Common mistakes that derail healthy travel and how to recover fast#
Most delays come from a few fixable mistakes. The fastest recovery is usually the same: refresh stale information, plan meals ahead, and use simpler defaults.
| Common mistake | Why it causes delay | Fast recovery move |
|---|---|---|
| You assume your routine will hold without a plan | Travel can disrupt routine, and longer trips make habit drift more likely | Write a short note for your next day and set simple defaults |
| You keep using old health information for a new leg of the trip | Time-stamped guidance can age, so your plan can become stale | Recheck current official updates before onward travel, then update your travel note in one pass |
| You improvise every meal once your routine slips | Ad hoc choices make habit drift more likely on longer trips | Write a short meal itinerary now, with one reliable breakfast and snack |
| You ignore basic food handling when tired or rushed | Poorly cooked food or unwashed produce raises stomach-illness risk while traveling | Choose properly cooked food and well-washed produce, and skip uncertain options today |
Step 1 Write a quick travel context note now#
Travel can throw off routine, especially on longer trips. Write a short note on what has changed and the next choices you want to keep consistent. If someone else can read it in 30 seconds, it is ready.
Step 2 Reset stale information in one pass#
Before onward travel, recheck current official health information and update your notes in one pass. Prefer official source signals such as .gov and HTTPS when available, then record what you checked and what changed. This keeps you from mixing old and new guidance across trip legs.
Step 3 Rebuild consistency with a short meal plan#
When routines drift, the fix does not need to be elaborate. Recover with a simple meal itinerary so you are not making every decision while tired or busy. Plan for both consistency and flexibility: keep repeatable defaults and leave room for treats.
Step 4 Make food safety choices simple when your margin is low#
When you are jet-lagged, rushed, or already dealing with stomach issues, use conservative filters. Choose food that is properly cooked and produce that is well washed, and pass on anything uncertain. Simple rules like this reduce avoidable setbacks.
Copy and paste this 30-day relocation health checklist#
Keep execution simple: use one offline master file, attach proof to each completed task, and treat anything without proof as still open.
Before you start#
Create one offline note, doc, or folder with sections for destination, dates, core packing items, custom items, and travel documents. For every task, use one pattern: Do this -> Save this evidence.
Use a checklist you will actually maintain. A universal packing list can speed setup, but it is broad by design, so you may not need every item. Keep one practical rule: write the quantity needed for each item, then check items off as you pack.
If readability matters, use the printable format that works for you (for example, a larger-font 3-page version or a standard 2-page version). If useful, start from a version that includes a medical kit list.
| Workstream | Standard pass | Compressed pass | Save this evidence |
|---|---|---|---|
| Master file setup | Build full sections and assign owners | Build minimum sections and assign owners for open items | Offline file with last-updated date |
| Checklist selection | Choose your base checklist and optional add-ons | Choose only the base checklist and critical add-ons | Saved copy of selected checklist(s) |
| Quantity planning | Fill quantities for each item category | Fill quantities for critical categories first | Checklist with quantities entered |
| Packing execution | Pack by category and check off each item | Pack essentials first, then remaining items | Checked-off list and quick photo of packed essentials |
| Final verification | Review unchecked items and remove nonessential extras | Review unchecked essentials only | Final dated checklist review |
Step 1 Set up your offline master file and ownership. Do this: add destination, dates, your base checklist, and open tasks with one owner per task. Save this evidence: dated offline copy or screenshot of the completed file.
Step 2 Pick the checklist version you can actually maintain. Do this: choose one checklist format and remove items that do not fit your trip. Save this evidence: saved copy of your selected checklist version with removed items marked.
Step 3 Enter quantities before you pack. Do this: write the number needed for each item so your list is specific, not generic. Save this evidence: checklist with quantities filled in.
Step 4 Pack and check off in real time. Do this: check each item off as you place it in your bag. Save this evidence: checked-off list plus a quick photo or note of packed essentials.
Step 5 Keep custom items explicit. Do this: add any trip-specific items, including personal health items if needed, as custom checklist lines. Save this evidence: custom-item section with each line marked packed or pending.
Step 6 Run a two-minute readiness check. Do this: read your list out loud and confirm what is packed, what is pending, and what was intentionally skipped. Save this evidence: final dated checklist review showing complete, pending, and skipped items.
If you can show the file, show proof for each task, and explain your plan without guessing, this checklist is ready to use.
Before you close your relocation plan, pick only the items you will actually maintain from Gruv's tools directory.
Frequently Asked Questions
How do you stay healthy while traveling for months instead of just surviving the trip?
Run your health plan as a weekly checklist, not a one-time packing task. Before you lock dates or move to a new country, check CDC Travelers’ Health for destination vaccine or medicine needs and monitor Travel Advisories for changes. Keep one offline file with your medication list, insurance details, emergency contacts, and symptom escalation rules so you can act quickly when you are offline.
When should you book a doctor or travel clinic visit before leaving?
Book your visit 4 to 6 weeks before departure when possible. If your timeline is shorter, still go and ask your clinician to prioritize what matters most for this trip leg. Bring your immunization record and medication list, and leave with written instructions.
What needs to stay in your carry-on health setup?
Keep essential prescriptions with you during transit and bring enough medicine for your full trip plus a few extra days for delays. Carry a written list of medicine names, doses, timing, and what each one is for, plus your insurance card and claim forms if your policy works abroad. For liquids, check the standard TSA carry-on limit of 3.4 ounces (100 milliliters) per item before travel day.
How do you decide between self-care, urgent care, and emergency help?
Choose based on symptom severity and local access, not guesswork. If you have severe chest pain, severe shortness of breath, or fast or troubled breathing, seek emergency care immediately. If symptoms are not severe but persist or worsen, contact a clinician and use local urgent-care or same-day care options where available. | Situation | What to do next | What to confirm | |---|---|---| | Mild, stable symptoms | Start self-care and monitor closely | Recheck your escalation rule and symptom timeline | | Persistent or worsening symptoms, not life-threatening | Use urgent care or walk-in care where available | Clinic type, location, hours, and payment method | | Emergency warning signs | Go to emergency care now | Follow local emergency pathways; numbers are not universal |
What is the safest way to manage prescriptions across borders?
Check medicine rules with your destination embassy and any layover-country embassies before you fly. Some countries allow only a 30-day supply of certain medicines and may require a prescription or medical certificate, so carry the required documents with your medicine. Verify drug name, quantity, and paperwork wording before departure.
What if your insurance abroad is limited or confusing?
Plan for out-of-pocket payment unless your policy clearly states otherwise. Save your insurer assistance line, policy number, insurance card, and claim forms offline, and confirm whether your policy includes a 24-hour physician support center and medical evacuation coverage. If you rely on Medicare, plan as if it will not cover care outside the United States, and check evacuation terms carefully because air ambulance costs can run about $20,000 to $200,000.
What should you set up in your first week after arrival?
Map your care pathways before you need them: routine care, urgent care or same-day care, and emergency care. Enroll in STEP if eligible so you can receive embassy or consulate alerts and be easier to reach in an emergency. Save your local address, policy details, Travel Advisory notes, and key documents in one offline folder, then test that it opens without internet.
What should you do if you get sick but you are not sure it is serious?
Do not wait for certainty if symptoms persist. Review your symptom timeline, check whether symptoms are worsening, and contact a clinician if you are not improving. If you are unsure whether to wait, use your local urgent-care pathway earlier.
Try a related tool
Researched and edited by the Gruv editorial team. Gruv builds cross-border billing, payouts, and finance-operations software for global businesses.
Sources
- cdc.gov/yellow-book/hcp/travelers-with-additional-co...trusted
- gao.gov/assets/gao-22-105018.pdftrusted
- irs.gov/pub/irs-pdf/i990.pdftrusted
- pmc.ncbi.nlm.nih.gov/articles/PMC7465935trusted
- travel.state.gov/en/international-travel/planning/guidance/me...trusted
- travel.state.gov/en/international-travel/travel-advisories.htmltrusted
- tsa.gov/travel/security-screening/whatcanibring/medicaltrusted
- tsa.gov/travel/travel-tipstrusted
Educational content only. Not legal, tax, or financial advice.
Related Posts

Freelance Crypto Payments That Protect Cashflow and Reduce Disputes
Crypto payments make sense only when they improve how reliably you get paid after you plan conversion, compliance, and recordkeeping up front. They can reduce friction in some international setups where traditional platforms add fees, restrictions, or extra steps. They also move risk onto conversion timing, exchange-fee exposure, and documentation quality, so use a simple acceptance test before you agree:

IR35 for UK Freelancers: Records, Self Assessment, and Pre-Signing Checks
For UK freelancers dealing with IR35, start with one practical rule: keep each engagement and its tax admin documented in one place from day one. That habit can save you from rebuilding files later under pressure.

The Freelance Payment Penalty: A Modeled Audit of Platform Fees, FX Spreads, and Payout Delays
The money rarely disappears through a single, easy-to-spot fee. The real loss is stacked. A marketplace takes its commission, a processor adds a charge for international cards, a bank or payment company converts the currency at a spread, a platform holds the funds before release, and a wire sheds a little to intermediaries on the way in. Each layer looks defensible on its own, but the worker feels the combined result as a smaller deposit and a later payday.