
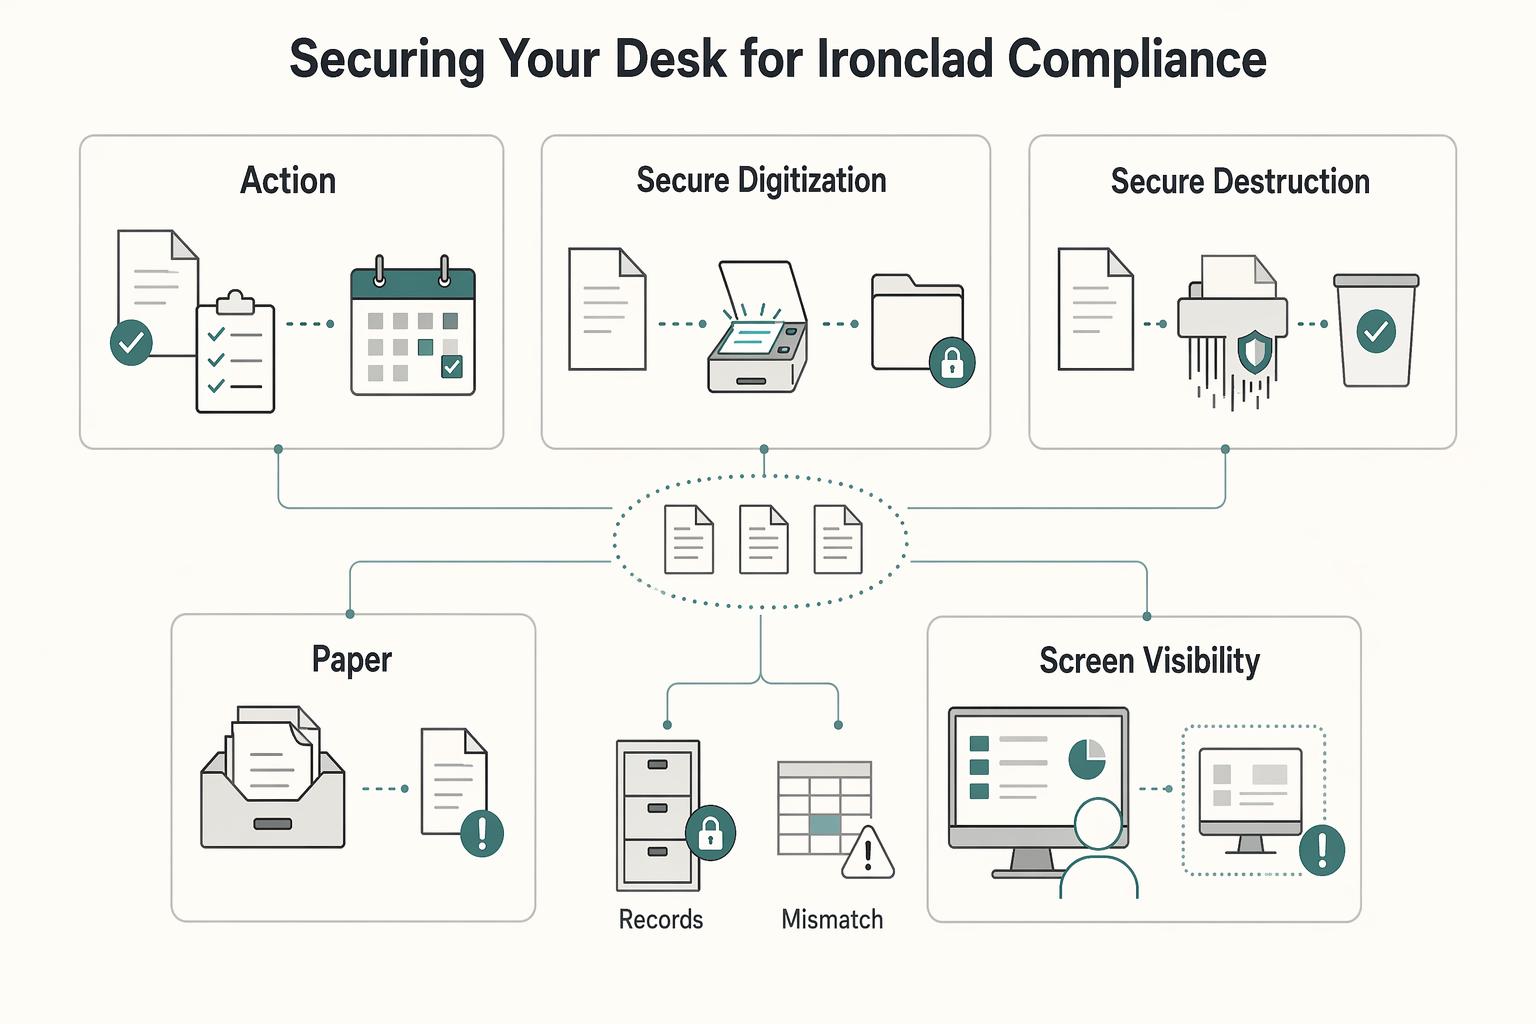
Quick Answer
Start by zoning the surface: Zone 1 for core inputs, Zone 2 for current support items, and Zone 3 for everything off-desk. Apply the One-Touch Rule to paper so each sheet is acted on, digitized, filed, or discarded instead of returning to a "later" pile. Route notes, email actions, and timed work through a single task manager, archive location, and calendar, then close with an end-of-day reset.
Reframe Your Desk as an Operating Surface#
Step 1: Reframe your desk as an operating surface, not a storage surface. Start there. Your desk either helps you move through work cleanly or forces extra decisions all day. The friction is usually ordinary, not dramatic. You stop to find a charger. You re-read the same note because it never got filed. You clear a patch of space before signing something, or tilt your camera on a client call so loose papers stay out of view.
That is why "tidy" is too small a goal. A better test is whether the desk keeps essentials within reach and everything else out of the way.
| Checkpoint | Reactive desk | Command-center desk |
|---|---|---|
| Workflow outcome | You switch tasks by moving piles first | You can start the next task without clearing space |
| Error risk | Items get handled, deferred, and re-checked | Fewer repeated decisions because each item has a place or next action |
| Visual load | Extra items stay in view and keep pulling attention | Essentials stay at your fingertips while extras move off the active surface |
Step 2: Verify the friction before you fix it. Clear everything out, then take inventory. That reset matters because most desk clutter survives by habit, not need. As a quick check, note what you actually touched in the last two workdays and what sat there anyway. If an item stays visible but unused, it is consuming attention without earning the space.
Step 3: Commit to handling rules, not a one-time cleanup. A simple starting rule is the One-Touch Rule: once you pick up an item, decide its fate immediately. If it takes less than two minutes, do it right away. If not, file it, digitize it, or remove it from the desk. That sets up the rest of this guide. You are not decorating a workspace. You are building an operating surface with handling rules and routines that still hold on busy days.
We covered this in detail in How to use a 'Decision Journal' for your freelance business.
Why a "Tidy Desk" Is a Low-Value Goal (And What to Aim for Instead)#
A tidy look is not the goal. Your desk should help you start work quickly, switch tasks with less friction, and keep sensitive information from being casually exposed. If you still spend time searching, shuffling, or rebuilding context, the setup is optimized for appearance, not execution.
Measure friction with a quick reset test#
Measure friction, not aesthetics. Watch for the same repeat issues: searching for essentials, slow task switches, and losing context after interruptions. A desk can look clean and still fail all three when daily tools do not have a designated home.
In practice, this is about cognitive ergonomics: fewer small decisions before real work starts. Keep everyday essentials in fixed, reachable spots so you can reach, act, and resume without extra handling.
Use a quick reset test: step away for ten minutes, then return to your next task. If you need to move items, hunt for tools, or re-read loose notes, your system is neat-looking but operationally weak.
| Vanity outcome | Operational outcome |
|---|---|
| Surface looks clean on camera | You can begin the next task without clearing space |
| Items are hidden in bins or drawers | Frequent-use tools have a designated home and are easy to retrieve |
| Paper is stacked to look tidy | Active and inactive paper are separated to reduce re-handling and mistakes |
| Nothing looks messy at a glance | Sensitive paper and on-screen information are less likely to be left exposed |
Use handling rules before storage accessories#
Use handling rules before storage accessories. Drawer organizers, baskets, and bins can help, but only after you decide what belongs on the desk every day. Otherwise, you just organize clutter into nicer containers.
Apply one rule: keep only today's working items accessible; return everything else to its assigned place. The usual failure pattern is keeping "just in case" items visible, which adds friction each time you restart.
If you want a baseline, track task start time, task-switch setup time, and reset time before a call. Use only benchmarks verified from current source records or your own measurement records before treating the numbers as targets.
Treat paper handling and screen visibility as risk controls#
Treat paper handling and screen visibility as routine risk controls, not neatness habits. Sensitive material left out is an exposure risk, and the same applies to visible on-screen information during calls.
Use a simple checkpoint before calls and at day end: leave out only what is actively in use, and clear the rest through your normal filing or disposal process. For online handling, apply the same standard and share sensitive information only on official, secure websites (typically .gov over HTTPS). Once this is your default, the next section's security controls become easier to implement.
For a step-by-step walkthrough, see How to Create a System for Naming and Organizing Your Digital Files.
The Foundation: Deconstruct and Rebuild Your Cockpit with Intent#
Start by rebuilding from zero, not by rearranging clutter. You will clear everything, audit each item by job-to-be-done, and return only what helps you work with less friction.
Before you start: set up three labeled piles: Keep at desk, Relocate, and Remove. Keep a separate folder for any paper you treat as sensitive so it does not stay loose while you sort.
Remove everything from the desk surface first#
Create a true Blank Slate. Remove everything from the desk surface and any nearby items that directly affect how you work, such as loose cables, bags, and paper stacks. Do not organize while clearing.
Use a pass/fail check:
- Pass: the desk is fully clear and ready to reset without moving leftover items.
- Fail: anything remains because it is "usually there."
Run a tool-role audit, one item at a time#
Run a Tool-Role Audit, one item at a time. Ask: "What specific role does this play in my normal work at this desk?"
Then decide:
- Keep at desk: active-use item you reach for often.
- Relocate: useful, but not needed in your first work block or better stored off-surface.
- Remove: broken, duplicated without a clear role, or kept from habit.
| Item type | Placement intent | Remove trigger |
|---|---|---|
| Core input tools (keyboard, mouse, headset, stylus) | Keep only your primary daily setup at desk; move backups to storage | No clear role beyond duplication |
| Capture tools (one notebook, one reliable pen) | Keep only what you actively use during current work | Dried out, unused, or habit-only clutter |
| Active paper (current checklist/file/draft) | Keep only what is in active use right now; move completed or inactive items out | Outdated or no longer needed |
| Power/connectivity (dock, charger, adapter) | Keep only items that reduce startup friction in each session | Redundant or tied to retired devices |
Place kept items by frequency, exposure risk, and setup friction#
Place kept items with three rules: frequency of use, exposure risk, and setup friction.
- High frequency: closer placement.
- Higher exposure risk: off-surface unless actively in use.
- High setup friction if removed: assign a fixed home near your main position.
Quick test: sit down and start a normal task. If you still need to hunt for tools, clear writing space, or reshuffle old paper, placement is not finished.
Add gear only when it matches your work pattern#
Add gear only when it matches your work pattern.
| Work pattern | Setup priorities |
|---|---|
| Call-heavy | Prioritize stable camera framing, fixed headset location, and cleaner cable paths |
| Travel-heavy | Prioritize fast pack/unpack, a consistent charging pouch, and quick reconnect at return |
| Deep-work-heavy | Protect open surface area for active notes and reference material |
Use upgrades like a monitor arm, vertical stand, or dock only if they solve a specific bottleneck in your workflow. Before setting ergonomic targets, verify the exact standard against current ergonomic guidance and your own measurements.
If portability is your main constraint, read The Best Gear for a Portable Home Office. To reduce interruption load during focused blocks, pair this setup with How to Use Your Phone's 'Focus Mode' to Minimize Distractions.
Engineer Your Workspace: The 3-Zone System for Peak Productivity#
Use a 3-zone desk layout based on frequency of use: keep constant-use tools in direct reach, current support items in extended reach, and everything else off the main surface. If an item makes you reach, twist, or context-switch more than its job requires, move it.
The rule is practical: the more often you use something, the closer it should live. In practice, Zone 1 is the area you can use while keeping a bent elbow, and the broader setup goal is neutral posture and task-appropriate viewing geometry. So fix posture issues first. A tidy desk at the wrong height can still create strain.
| Zone | Placement cue | What belongs | What does not belong | Move it when |
|---|---|---|---|---|
| Zone 1 | Direct reach while maintaining a bent elbow | Keyboard, mouse/trackpad, primary monitor, one notebook, one reliable pen | Reference stacks, spare gear, rarely used drinks, decor that steals work surface | You use it only occasionally, or you have to work around it |
| Zone 2 | Comfortable extended reach, without turning the desk into storage | Current project file, water, phone, secondary device, one active reference item | Archived paper, unopened mail, multiple notebooks, backlog piles, high-distraction screens in your sightline | It no longer supports the current task, or it starts crowding Zone 1 |
| Zone 3 | Off the main desk surface; accessed deliberately | Extra cables, backup devices, supply refills, archived paperwork, books not in current use | Anything you need every session to start work | Repeated retrieval slows your work, or it becomes part of daily execution |
Setup workflow (one normal work block)#
- Audit your current desk items. Keep only what clearly supports active work right now.
- Assign each item to a zone. Protect Zone 1 for execution, keep Zone 2 as temporary support, and push all nonactive items to Zone 3.
- Test during real work. Run a normal block and watch for friction: overreaching, visual clutter, phone-driven task switching, or reference creep into Zone 1.
- Adjust based on friction. Reassign items that repeatedly pull you out of neutral posture or force unnecessary movement.
Keep Zone 2 especially tight: phone placement and notification handling are attention controls, not just organization choices. Reachable is fine; constantly visible and buzzing is usually counterproductive.
Zoning is not only about neatness. It also prepares the next step: deciding what can stay visible and what should be put away when sensitive information is in play.
If you want a deeper dive, read The Best Ergonomic Gear for Your Remote Work Setup.
The Unspoken Liability: Securing Your Desk for Ironclad Compliance#
Your desk setup is part of your daily risk control: if paper lingers, screens are visible, or devices stay unlocked, exposure rises fast.
| Incoming paper outcome | When it applies | Required action |
|---|---|---|
| Action | If action is required | Complete it now or log the next step in your task system, then clear the page from your desk |
| Secure digitization | If it is a record | Scan and file it in your approved digital location |
| Secure destruction | If it is no longer needed and contains sensitive details | Destroy it securely |
Step 1. Run a strict Touch It Once workflow for every incoming paper item. Decide immediately: action, secure digitization, or secure destruction. If action is required, complete it now or log the next step in your task system, then clear the page from your desk. If it is a record, scan and file it in your approved digital location. If it is no longer needed and contains sensitive details, destroy it securely. End-of-day standard: no physical inbox left on the desk.
Step 2. Check visual exposure before calls and during shared-work periods. Before meetings, open camera preview and confirm the frame does not reveal notes, names, numbers, or other work details. In shared spaces, also check side angles, reflections, and what someone passing by could read on your screen. Keep material visible only while you are actively using it in the current work block; when the block ends, remove it from view.
| Risk point | Preventive action | Review cadence |
|---|---|---|
| Paper | Apply Touch It Once: act, scan, or securely destroy | On arrival |
| Screen visibility | Run a call-ready frame and sightline check | Before calls |
| Handwritten notes | Keep only the active page visible; store or destroy after use | End of task |
| Temporary printouts | Label as temporary and clear the same day | End of day |
| Device access | Lock whenever you step away | Every absence |
Step 3. Make storage and disposal rules operational. Only keep items in active view if they relate to the task you are doing now. If an item is not active, store it in locked or controlled storage based on your policy. For records handling, use the retention threshold from your current workplace policy or source records, and verify the exact requirement before applying it. For old drives or retired devices, do not assume deletion is enough; if you use a destruction provider, keep the HDD destruction certificate as your audit trail.
You might also find this useful: How to Conduct a 'Weekly Review' for Your Freelance Business.
Beyond the Physical: Integrating Your Cockpit into a Unified Business System#
Your desk system only works if your physical and digital workflows point to the same next action. After you secure the physical setup, make one system for capture, planning, and execution.
| System part | Primary role | Examples in the section |
|---|---|---|
| Task manager | Holds commitments | Notebook notes, loose paper actions, and practical emails |
| Archive location | Holds reference material and records | Supporting file; finished items returned to the archive location |
| Calendar | Protects execution time for time-specific work | Process inputs, do focused work, and review open items on a recurring cadence |
Use one capture path for every new input#
Use one capture path for every new input. Put notebook notes, loose paper actions, and practical emails into one task manager, store reference material in one archive location, and put time-specific work on one calendar.
In practice: convert each note into a task with a clear next action, attach or reference the supporting file, and schedule it on the calendar when timing matters. By shutdown, nothing should remain as an uncaptured commitment in paper notes or flagged email.
Keep your physical and digital desktops aligned#
Keep your physical and digital desktops aligned to the same active work. If your desk shows one priority but your computer shows unrelated files, you create avoidable friction before you begin.
Keep only current materials in view, then return finished items to your archive location. The practical result is clearer handoffs, fewer dropped follow-ups, and better visibility into what happens next.
| Comparison point | Fragmented setup | Unified system |
|---|---|---|
| Handoff speed | Slower to resume | Quicker to resume |
| Missed follow-ups | Easier to miss | Easier to track |
| Task visibility | Split across places | Visible in one flow |
Treat your calendar as the final source of truth#
Treat your calendar as the final source of truth for when work gets done. Your task manager holds commitments, your archive holds records, and your calendar protects execution time.
Block time to process inputs, do focused work, and review open items on a recurring cadence. If your task list keeps growing without calendar time assigned, your system is drifting.
Need the full breakdown? Read How to apply 'Atomic Habits' to your freelance business.
Conclusion: You Are the Pilot of Your Business - Build a Cockpit to Match#
Your desk should help you decide, act, and protect the work in front of you. If you still have to sift through irrelevant paper, hunt for a charger, or move a pile before you can begin, the problem is not appearance. It is operating friction.
Think of the desk as your cockpit, the control point where you direct the business. For an independent professional, that matters in three concrete ways. You protect focus by keeping only the current task and the tools that support it in view. You move faster because each item has a place and goes back there, so restarting after a call or interruption does not turn into a search. You reduce avoidable execution mistakes when active materials are handled deliberately instead of left loose on the surface.
Small work areas get messy quickly when tools and papers pile up. The failure mode is familiar: dropped items, loose documents, and repeated scanning of things that do not matter right now. That is why desk organization works best as a repeatable practice, not a one-time cleanup.
- Audit your current setup. Clear the surface and ask whether each item supports active work, current reference, or storage. Checkpoint: you can keep a clear writing area open without rearranging gear.
- Give every item a home. Keep daily-use tools within reach, keep current project material together, and move inactive items off the desk.
- Handle paper once. Decide whether to act, digitize, file, or shred. If the same loose sheets keep coming back, make a simple checklist for recurring tasks.
- Set a recurring reset cadence. At the end of a work block or day, return items to their places and leave the next action visible.
Once the desk is working, extend that discipline into your calendar with How to Manage Your Time Effectively as a Freelancer. Then tighten your workflow system with How to Build a Second Brain for Your Freelance Business. Want help tailoring this to your workflow? Talk to Gruv.
Frequently Asked Questions
How do I organize my desk for maximum productivity?
Start with placement, not storage. Use desk zones as a simple rule: separate areas for computer work, writing, and task organization. Keep active tools in immediate reach and keep only the current file or notebook nearby. Move everything else off the surface so you always have a clear working area big enough to write without rearranging gear. Your check is simple: you should be able to start the next task without first relocating a pile.
How do I deal with paper clutter on my desk?
Use a one-touch rule as a decision rule. When you pick up a document, decide its next action right away: do it, digitize and file it, store it in its assigned place, or discard it if it should not remain out. If the action takes less than two minutes, do it now. The failure mode is touching the same sheet over and over because it keeps returning to a "later" stack. | Common desk habit | Better operating habit | Practical outcome | |---|---|---| | Fill the whole surface with supplies | Keep a clear writing area open at all times | Faster task start | | Make a paper pile for "later" | Decide the next action when you touch the item | Fewer "later" piles | | Keep rarely used items on the desk | Store them in labeled containers off the surface | Cleaner tool access | | Let tools drift without assigned spots | Return items to assigned places after use | Less time searching | | Leave files scattered across desktop, downloads, and email | Keep reference material in one clearly labeled location | Better physical and digital alignment |
What are the essential desk organizers for a professional?
Pick tools that make work easier to start and easier to resume. A labeled container for rarely used supplies and a portable plastic file crate for frequently used files are useful because they keep items retrievable without taking over the desk. Generic accessories are secondary unless they protect your clear work area or make a high-use item easier to grab. If you have to dig through drawers or unmarked bins to find something basic, the organizer is adding friction, not removing it.
How can I maintain an organized desk long-term?
Use a brief end-of-day reset. Return tools to their assigned places and clear loose paper so you are not wasting time searching when you start again. If you regularly start the day by hunting for a note, charger, or current file, your reset habit is not complete yet.
How does desk organization connect to digital organization?
Your physical and digital spaces should point to the same active work. Keep reference files in one clearly labeled home instead of leaving them scattered across your desktop, downloads folder, and email attachments. A good checkpoint is this: if a paper note refers to a file, you should know exactly where that file lives without searching multiple places.
What if your workspace gets disrupted or you need to move temporarily?
Do not treat continuity as an afterthought. Put the files you use most often into portable plastic file crates. If the area is being renovated or disturbed, cover or relocate equipment and keep important files in a restricted area away from unauthorized access. If you need to keep working from a quieter spot, take the core files, your laptop, and your phone with you instead of trying to recreate your desk from memory.
Try a related tool
Researched and edited by the Gruv editorial team. Gruv builds cross-border billing, payouts, and finance-operations software for global businesses.
Sources
- access-board.gov/abatrusted
- ada.gov/law-and-regs/design-standards/1991-design-st...trusted
- cdn.toledo.oh.gov/uploads/documents/Plan-Commission/TMZC/TMZC-...trusted
- connect.ncdot.gov/resources/Specifications/2024StandardSpecifi...trusted
- dni.gov/files/Governance/IC-Tech-Specs-for-Const-and...trusted
- documents.dps.ny.gov/public/Common/ViewDoc.aspxtrusted
- dodcio.defense.gov/Portals/0/Documents/CMMC/AssessmentGuideL2.pdftrusted
- dot.ca.gov/-/media/dot-media/programs/design/documents/...trusted
Educational content only. Not legal, tax, or financial advice.
Related Posts
How to Manage Your Time Effectively as a Freelancer
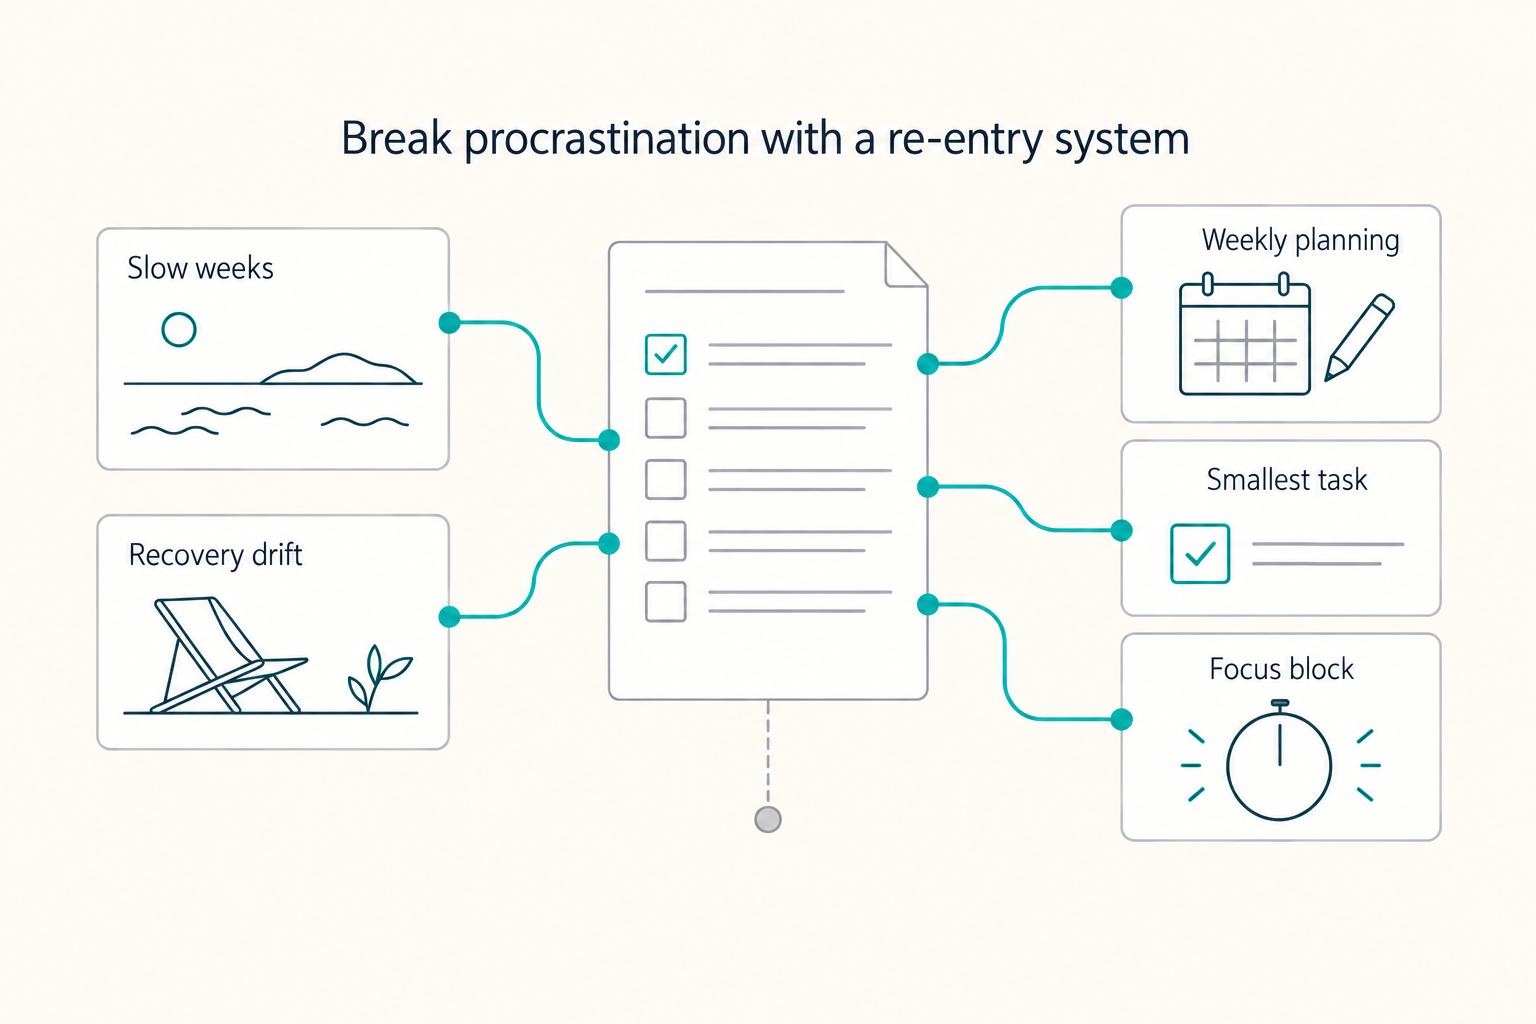
Most freelancers struggle not because they work too few hours, but because they misallocate the hours they have—treating time as an infinite resource rather than a finite business asset with a real cost per unit. The solution is a three-layer operating system: a Time Budget Framework that commits hours to four categories before any client work is booked, a Weekly Operating Template that assigns those categories to specific calendar windows, and a monthly Admin Audit Checklist that reconciles invoicing, bookkeeping, and compliance records. Multi-client orchestration requires a WIP limit, dedicated client windows, and a capacity decision rule run before accepting new engagements. Together, these systems replace reactive decision-making with a repeatable structure that keeps delivery quality consistent, records audit-ready, and the freelance practice operationally durable.
The Best Ergonomic Gear for Your Remote Work Setup
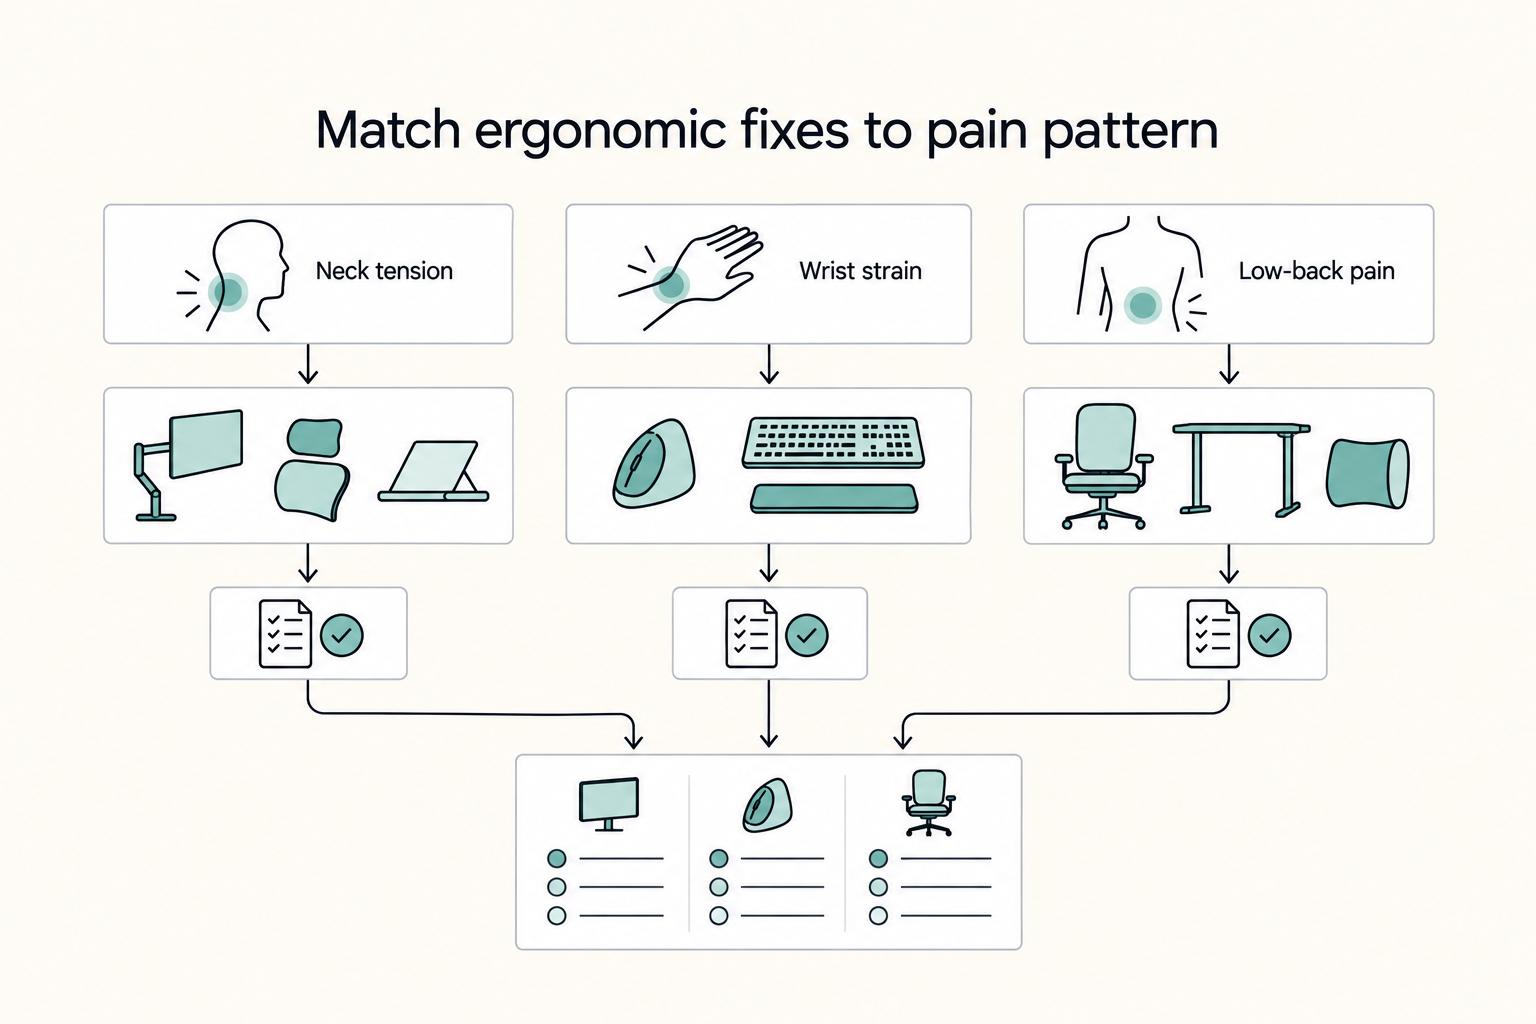
**Treat your ergonomic remote work setup as operating infrastructure, not a comfort splurge.** When posture breaks down, delivery quality and scheduling usually break down right after. Start by setting a baseline that protects your body and your business before you compare products.

The Best Gear for a Portable Home Office
Portable-office gear decisions are not directly tested in this guide, so use this as a practical framework rather than a proven standard.