
Quick Answer
Yes, a non-US business can open Stripe in many cases, but only when Stripe supports the target account country and your setup meets that country’s requirements. The safest path is to run a risk-first checklist: confirm support, align legal entity and tax records, validate a physical bank account and settlement currency, then run a controlled launch test before sending full client volume.
Stop Guessing and Build a Stripe Setup That Protects Cashflow#
Treat your Stripe setup as a system for cashflow, not a quick signup, so your first payouts are more predictable. If you run a small business, this is one of those setup decisions where "close enough" gets expensive later. If you are a nonresident operator, the pain usually shows up in a few places: payout delays, avoidable verification loops, and uncertainty about which path actually fits your business. If you guess early, you usually create rework later, especially when invoices are already waiting.
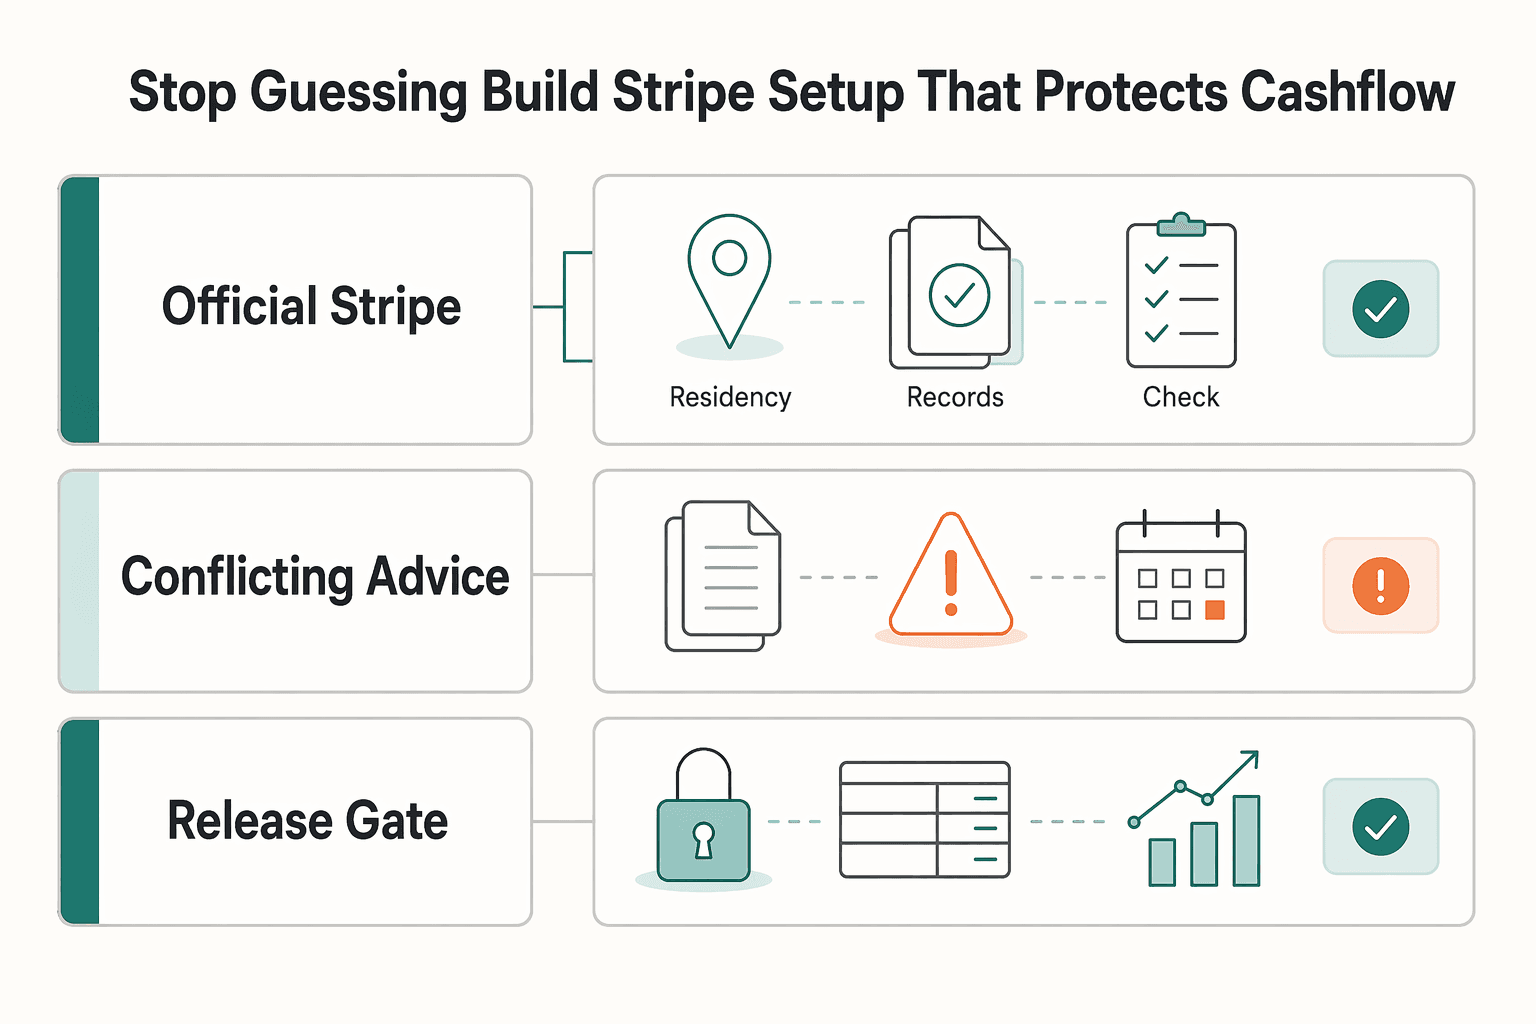
This guide gives you a practical decision framework and a reusable launch playbook you can run before the first invoice. The goal is simple: fewer avoidable payment delays, fewer compliance surprises, and a cleaner launch path for Stripe international operations. Whether you run a home-country entity or a US business, the point is operational control, not hacks.
| Decision input | How to use it |
|---|---|
| Official Stripe requirements | Treat this as your source of truth for country support, onboarding prerequisites, and account setup rules. |
| Forum and social advice | Use as secondary context for edge cases, never as policy. |
| Unknowns before approval | Flag and verify directly, including region feature differences, possible extra documentation requests, and timeline uncertainty. |
Use this framework before you apply, and keep it as your default checklist:
- Step 1: Confirm country support first. Stripe availability is country-gated, so this is your first decision point.
- Step 2: Align core onboarding artifacts. Match legal entity, tax ID, government-issued ID, working website, phone number, and physical bank account to the same country context.
- Step 3: Choose account country carefully. After activation, changing account country requires a new account, so a rushed choice can force a restart.
- Step 4: Capture assumptions in a launch checklist. Separate confirmed requirements from open questions so you apply with fewer surprises.
If you handle cross-border e-commerce, a common failure mode is simple: you rush setup, then discover your entity and banking country do not align. Payments and operations can slow down while you rebuild the account path. This guide is built to prevent that. If you are considering Stripe Atlas or a US LLC, use the same framework first, then pick structure based on fit, not trend.
If you want a deeper dive, read Value-Based Pricing: A Freelancer's Guide. Want a quick next step if you are evaluating Stripe for a non-US business? Try the free invoice generator.
Can You Use Stripe From Your Current Country Right Now?#
Check country support first, then follow the supported or unsupported path before you touch entity setup. Run this eligibility gate before you spend time on structure decisions. It keeps the setup path clean and helps you avoid rework.
Run the first gate in order#
- Step 1: Confirm Stripe support for your current country path. Include territory status, because some outlying territories linked to supported countries still do not qualify. Outcome: supported, unsupported, or unclear.
- Step 2: If supported, confirm you can meet the baseline requirements. Align a local legal entity, tax ID, physical location, phone number, government-issued ID, working website, and physical bank account to that same country context. Outcome: apply now or prep first.
- Step 3: If unsupported, stop direct application and switch to a supported-entity strategy path. For some businesses, that may mean evaluating formation options in a supported country instead of forcing an ineligible signup. Outcome: you protect time and avoid failed onboarding loops.
| Path status | Immediate action | Verification checkpoint |
|---|---|---|
| Supported country | Move to onboarding readiness | legal entity and tax ID alignment, compliant banking, ID readiness |
| Unsupported country or outlying territory | Move to alternate entity path | formation jurisdiction, banking compatibility, admin load |
| Unclear support status | Pause launch | confirm support and eligibility before application |
For cross-border workflows, do not assume feature parity across regions. A country can support payment processing while still limiting some features you expect. Confirm feature availability before you promise a checkout flow to clients.
Set expectations with knowns and unknowns#
Known: after you submit documents, allow about 3 to 5 business days for review. Stripe may request additional proof of business documents. Unknown until review: final approval outcome, exact timeline for your profile, and pricing outcomes for your account setup.
| Item | Status | Detail |
|---|---|---|
| Review timing | Known | Allow about 3 to 5 business days after document submission |
| Additional proof of business documents | Known | Stripe may request more documents after submission |
| Final approval outcome | Unknown until review | Not confirmed before review |
| Exact timeline for your profile | Unknown until review | Not confirmed before review |
| Pricing outcomes for your account setup | Unknown until review | Not confirmed before review |
A common pattern looks like this: a small remote studio sees country support and rushes the application, then discovers its bank setup does not match the account-country requirements. Invoices wait, cashflow tightens, and the team repeats onboarding work. Run this gate first, then continue.
What Should You Prepare Before You Start the Application?#
Prepare a complete, country-matched onboarding pack before you start your Stripe application, because one missing requirement can delay setup. Once you know whether you are on the supported or unsupported path, move from eligibility to execution. This is where the setup either stays clean or creates avoidable rework.
Build your preflight pack first#
Treat prep as a control step, not admin busywork. Stripe expects your documents and business details to line up in one country context. You want consistency across identity, entity, and banking records.
| Required area | What to prepare now | What you verify before submit |
|---|---|---|
| Identity | government-issued ID (commonly passport or driver's license) | Name and details match your application exactly |
| Business profile | legal entity, tax ID, physical location, phone number, working website | Entity country matches your target account country |
| Banking | physical bank account in a supported transfer currency | Account holder details match Stripe account details |
Use this sequence to keep the application clean:
- Step 1: Assemble identity documents. Collect your government-issued ID and confirm what your country path accepts. Commonly this is a passport or driver's license. If your residence country differs from your account country, prepare a valid passport first.
- Step 2: Align business details. Confirm your legal entity, tax ID, local contact details, and website all point to the same operating setup.
- Step 3: Validate banking early. Link a physical bank account that meets supported transfer currency rules for that country path. Do not treat a virtual account substitute as a workaround when Stripe requires a physical bank account.
- Step 4: Run a mismatch check. Compare legal owner and account details across entity records, bank records, and Stripe inputs before submission.
A common failure looks like this: a small creator team prepares tax and entity records but skips banking verification until the end. They discover the account format does not fit the country rules, then redo onboarding. Use this checklist first, then apply. If you want a stronger banking SOP, reuse this with The 'Profit First' Method Part 2: Setting Up Your Bank Accounts.
How Do You Complete the Supported Country Path Without Rework?#
Complete the supported-country path in sequence: confirm country support, align entity and tax records, validate banking, then test operations before going live. With your document pack ready, this is the execution plan. Order matters here because each later step depends on clean inputs from the prior one.
Execute the path in four controlled steps#
| Step | Action | Key check |
|---|---|---|
| 1 | Confirm support for your exact account country | Check that Stripe supports accounts in that country or region |
| 2 | Match legal entity and tax ID | Verify the legal entity country match first, then validate the tax ID |
| 3 | Link a compliant bank account for payouts | Use a physical bank account denominated in a supported transfer currency for the chosen country |
| 4 | Test and monitor before full launch | Run an end-to-end test in a safe test environment and monitor payouts in Dashboard, including expected deposit dates |
- Step 1: Confirm support for your exact account country. Start by checking that Stripe supports accounts in that country or region.
- Step 2: Match legal entity and tax ID to that same country. Verify your legal entity country match first, then validate the tax ID.
- Step 3: Link a compliant bank account for payouts. Connect a physical bank account denominated in a supported transfer currency for the country you chose.
- Step 4: Test and monitor before full launch. Run an end-to-end test flow in a safe test environment, then monitor payouts in Dashboard, including expected deposit dates, before you scale invoices.
| Exception check | When it can work | Control you must run |
|---|---|---|
| USD-denominated bank account in Canada | Stripe lists this as an exception path | Confirm your exact country setup still supports your payout method |
| EUR-denominated bank account in Europe | Stripe lists this as an exception path | Confirm country-specific payout support before relying on it |
If you sell across borders, keep one audit log for verification artifacts, test outcomes, and payout observations.
A common rework scenario is straightforward: a small studio links banking first and later discovers the entity country does not match the account country. The team halts launch, reworks onboarding, and delays client billing. Follow the sequence once, then reuse it as your SOP on every new Stripe account.
What If Stripe Is Not Supported in Your Country?#
If Stripe does not support your country, choose a compliant entity path first, then execute registration in the right order so you can pursue a viable payment processing route. At this point you have ruled out the supported-country path, so you are in entity strategy, not onboarding cleanup. This is where you protect cashflow by choosing structure based on fit, not urgency.
When direct Stripe onboarding in your country is unavailable, two common paths are below, and each has tradeoffs:
| Path | Best fit | Main tradeoff |
|---|---|---|
| Establish a legal entity in a supported market | You can register there and meet local requirements | More cross-border compliance and operating overhead |
| Form a US business as a nonresident | You want a U.S. setup for clients, banking, and platform access | More formation choices, state selection work, and ongoing admin |
Use this decision sequence to avoid rework later:
- Step 1: Decide your jurisdiction path. Confirm Stripe supports payment processing in the country where you plan to open the account, then choose whether you will register in a supported non-home market or form a U.S. entity.
- Step 2: Choose a structure that matches your operating model. Compare LLC, C corporation, partnership, and sole proprietorship by ownership plan, tax handling, and admin tolerance. For many nonresident founders, a US LLC or C corporation becomes the practical shortlist.
- Step 3: Select your state for business registration. Laws, taxes, and business requirements vary by state, so pick the state before you file anything else.
- Step 4: Complete EIN setup after formation. File for an Employer Identification Number (EIN) using IRS Form SS-4 so you can support tax workflows and business banking.
- Step 5: Pick your implementation channel. You can file directly or use Stripe Atlas when its scope fits. Atlas supports forming a Delaware LLC or Delaware C corporation. Treat it as one route, not a universal default.
A common mistake here is rushing into formation because a peer recommended one structure. Then you discover the admin load does not match your real workflow. The safer move feels slower at first, but it usually avoids expensive rework later. If you want a side-by-side view of formation tooling, review Stripe Atlas vs. Firstbase.io: A Comparison for US Company Formation.
Run a Risk First Go Live Checklist Before Sending Client Invoices#
Run a risk-first go-live checklist before client billing, so your first invoices turn into reliable payouts instead of preventable delays. You have picked your setup path and done the prep. Now set a control gate before money starts moving.
Treat go-live as a verification step, not a calendar milestone. Whether you operate in one country or across several, this checklist helps keep payment processing reliable when volume starts.
Use this go-live control list#
| Control | What to verify now | Why it protects cashflow |
|---|---|---|
| Entity and tax match | Legal entity details and verified tax ID match account records | Reduces verification friction before payouts start |
| Identity readiness | Government-issued ID and legal-entity documents are valid and unexpired | Prevents avoidable compliance holds |
| Banking and currency fit | Payout bank setup and settlement currency path are aligned | Reduces failed or returned payout risk |
| Ownership consistency | Legal owner name matches entity records, bank account holder details, and submitted ID | Prevents destination-detail mismatch issues |
| Monitoring and account security | Enable 2FA and track payment and payout status in Dashboard | Speeds response to failed payments or payout changes |
- Step 1: Confirm record consistency. Compare entity registration, tax ID, and identity submissions line by line before launch.
- Step 2: Confirm settlement behavior. Verify your payout currency path and confirm how conversion works if charge currency differs from settlement currency.
- Step 3: Track operational signals daily. Watch payment outcomes and payout states such as processing, posted, failed, returned, and canceled. Then review the payout timeline record for state changes.
- Step 4: Maintain an audit trail. Log verification responses, payout test outcomes, and every settings change in one place, and use the payout timeline as your state-change record.
- Step 5: Apply the safe default. If country rules or settlement assumptions look unclear, pause client invoicing and re-verify support and payout conditions first.
One common issue is simple: a small studio sends invoices right away, then spots a subtle bank-holder name mismatch, a common destination-detail error, and gets a returned payout. A clean trace log plus status monitoring lets the team fix details quickly, relaunch billing, and avoid repeated cashflow shocks. For a deeper bank-ops routine, pair this with The 'Profit First' Method Part 2: Setting Up Your Bank Accounts.
Common Mistakes That Trigger Delays and How to Recover Fast#
Fix delays by correcting jurisdiction, currency, and structure mismatches before you send more invoices. When the setup starts drifting, speed comes from isolating one root cause at a time and correcting it cleanly.
| Mistake | What breaks | Fast recovery move |
|---|---|---|
| Country mismatch between legal entity and bank setup | Verification friction and payout issues | Align entity jurisdiction and physical bank account location first, then resubmit details consistently |
| Assuming any account format works | Payout setup fails when currency does not match | Confirm your settlement currency and match bank account currency to settlement currency |
| Copying a popular structure blindly | Extra compliance burden or operational mismatch | Re-evaluate LLC vs C corporation based on your business needs |
| Treating forum posts as policy | You optimize for anecdotes, not requirements | Prioritize official Stripe requirements, then use community advice as secondary context |
| Going live without proof | First invoices expose preventable errors | Run tests, review outcomes, and scale payment links only after clean results |
Run the five-step recovery sequence#
| Step | Recovery action | What to verify |
|---|---|---|
| 1 | Pause expansion | Stop adding new client payment links until you clear the current blocker |
| 2 | Reconcile jurisdiction inputs | Confirm Stripe supports processing in that country, then match country details across your legal entity and physical bank account |
| 3 | Rebuild settlement mapping | Match each settlement currency to the correct bank account; multiple settlement currencies require separate supported bank accounts; verify exceptions only where explicitly allowed, such as Canada USD and Europe EUR |
| 4 | Recheck entity fit | Reassess the structure if you chose it because it looked popular; entity type should fit your business needs |
| 5 | Prove operations before scale | Test in a safe environment, then run a controlled live check and log outcomes |
- Step 1: Pause expansion. Stop adding new client payment links until you clear the current blocker.
- Step 2: Reconcile jurisdiction inputs. Confirm Stripe supports processing in that country, then match country details across your legal entity and physical bank account.
- Step 3: Rebuild settlement mapping. Match each settlement currency to the correct bank account. Multiple settlement currencies require separate supported bank accounts. Verify exception handling only where explicitly allowed, such as Canada accounts with USD-denominated bank accounts and Europe accounts with EUR-denominated bank accounts.
- Step 4: Recheck entity fit. If you chose a structure because it looked popular, reassess now. Entity type should fit your business needs. For deeper structure comparison, see Stripe Atlas vs. Firstbase.io: A Comparison for US Company Formation.
- Step 5: Prove operations before scale. Test in a safe environment, then run a controlled live check and log outcomes.
If you set up a US LLC but overlook settlement currency mapping, you can usually recover fast: pause invoices, remap currencies, and restart only after clean test results.
Build Your Repeatable Stripe Playbook and Use It on Every New Client#
Standardize one risk-screened SOP for every new client, and you will protect cashflow better than ad hoc fixes. You now have the decision gates, the prep pack, and the go-live controls. Turn them into a repeatable execution flow so each new client follows the same low-risk path.
- Step 1: Confirm country support first. Verify that Stripe supports payment processing in your target country before you do anything else. If coverage looks partial, confirm feature availability for your exact workflow.
- Step 2: Validate prerequisites as one packet. Confirm a country-matched legal entity, tax ID, physical location, phone number, working website, and government-issued ID (passport or driver's license). Link a physical bank account denominated in a supported transfer currency for that country, and do not substitute a virtual account for this path.
- Step 3: Choose the operating path that fits your reality. Pick the structure you can support operationally and from a compliance perspective. For cross-border ecommerce, apply currency exceptions only when they explicitly fit your case, such as Canada USD and Europe EUR patterns (most, not all, European countries).
- Step 4: Run an internal launch proof before full volume. Run a controlled internal payment and payout trace, and log each check in your SOP. Stripe supports charging in over 135 currencies, but regional feature differences can still affect day-to-day execution.
- Step 5: Escalate uncertainty early. If market coverage or setup fit remains unclear, contact Stripe sales or support before expanding client billing.
A solo operator can run this SOP in one pass, catch a bank-currency mismatch early, and launch without payout disruption.
Copy and paste launch checklist#
- Confirm Stripe country support
- Verify legal entity and tax ID match target country
- Prepare government-issued ID (passport or driver's license)
- Link physical bank account in supported transfer currency
- Validate Canada or Europe currency exception only when applicable
- Optionally run a controlled payment and payout trace before full rollout
Frequently Asked Questions
Can a non-US business use Stripe without forming a US company?
Yes, in many cases. First confirm Stripe supports payment processing in the country where you want to open the account, then meet that country's setup requirements. If you choose a US-account route for Stripe operations, registered businesses must be US-registered.
Do I need a physical bank account, or can I use a virtual account setup?
Stripe's requirement set can include a physical bank account in the account country. Do not assume one virtual format works everywhere, and do not assume all virtual options fail everywhere either. Verify what your specific country and onboarding flow accepts before you submit.
What documents are mandatory for opening in another country, including government-issued ID and tax ID?
Expect both personal and business verification. Common personal identity documents include a passport or driver's license. Business documents vary by country, but they generally need core identifiers such as business name, address, and a registration number or VAT number. Stripe can also ask for legal entity details, tax ID, physical location, phone number, working website, and bank account details.
Is forming a US business as a nonresident required when my country is unsupported?
Not always. It is one path, not a universal rule. If you use a US Stripe account route, registered businesses must be US-registered.
When do Canada and Europe bank currency exceptions apply?
Use these as narrow exceptions, not default assumptions. Stripe explicitly lists limited patterns, including accounts opened in Canada with USD-denominated bank accounts and accounts opened in Europe with EUR-denominated bank accounts. Confirm eligibility in your exact onboarding flow before launch.
How do I choose between an LLC, C corporation, and Sole proprietorship for this use case?
Pick the structure that fits your operating reality. A sole proprietorship can apply when you operate alone without a separate entity, while LLC and C corporation options are both presented in Stripe Atlas. If you are deciding between a US LLC and a C corp, this breakdown may help: Stripe Atlas vs. Firstbase.io: A Comparison for US Company Formation.
What is still unknown before I apply, and what should I verify directly with Stripe?
Treat exact requirements as account-specific and country-specific. Before you submit, verify your document list, business type fit, and bank setup details inside the live Stripe prompts for your target country.
Watch
How to Open Stripe for a Non-US Business
Try a related tool
Researched and edited by the Gruv editorial team. Gruv builds cross-border billing, payouts, and finance-operations software for global businesses.
Sources
Educational content only. Not legal, tax, or financial advice.
Related Posts

Value-Based Pricing for Freelancers Under Real Payment Risk
Value-based pricing works when you and the client can name the business result before kickoff and agree on how progress will be judged. If that link is weak, use a tighter model first. This is not about defending one pricing philosophy over another. It is about avoiding surprises by keeping pricing, scope, delivery, and payment aligned from day one.

The 'Profit First' Method Part 2: Setting Up Your Bank Accounts
Most freelancers who try Profit First open a few extra bank accounts and call it done. That's the wrong move.

Stripe Atlas vs Firstbase.io for US Formation Without Compliance Surprises
You can make this decision fast if you compare execution risk, not launch-day polish. Use one lens from start to finish and verify your assumptions before you pay.