
Quick Answer
Start by confirming your provider’s current instructions, then complete the required Proof of Life process exactly as written and keep evidence of submission. A Certificado de Fe de Vida is manageable when you run it as a recurring compliance task, not a one-off errand. Use the accepted channel, verify witness or authentication requirements before booking appointments, and save notices, receipts, and case references so you can resolve issues faster if payments are paused.
A proof of life certificate is a routine check with real consequences. Your pension provider is asking you to confirm that you are alive and still eligible for payment. If you miss the deadline or use the wrong process, payments can be paused.
Handle it like a recurring compliance task. Verify each provider's current rules, use the exact submission channel they accept, and keep proof of what you sent. Do that, and this becomes manageable instead of stressful.
It is essentially a control point on income you already earned. Once you understand why the provider is asking and how its process works, the job becomes a clear annual check instead of a paperwork scramble.
- The core definition: A Proof of Life, also called a Certificado de Fe de Vida, Certificate of Life, or Letter of Existence, is a formal verification requested by a pension institution to confirm a recipient is still alive and eligible for payments.
- The strategic purpose: This is an anti-fraud measure. For the institution, it helps prevent improper payments and protect the fund. For you, it is the check that keeps your entitlement active and confirms the money is going where it should.
- What this means for you: Treat this as a task you cannot ignore. If you do not return the certificate on time, pension payments can be suspended. That creates a cash flow problem you can usually avoid with earlier verification and better records.
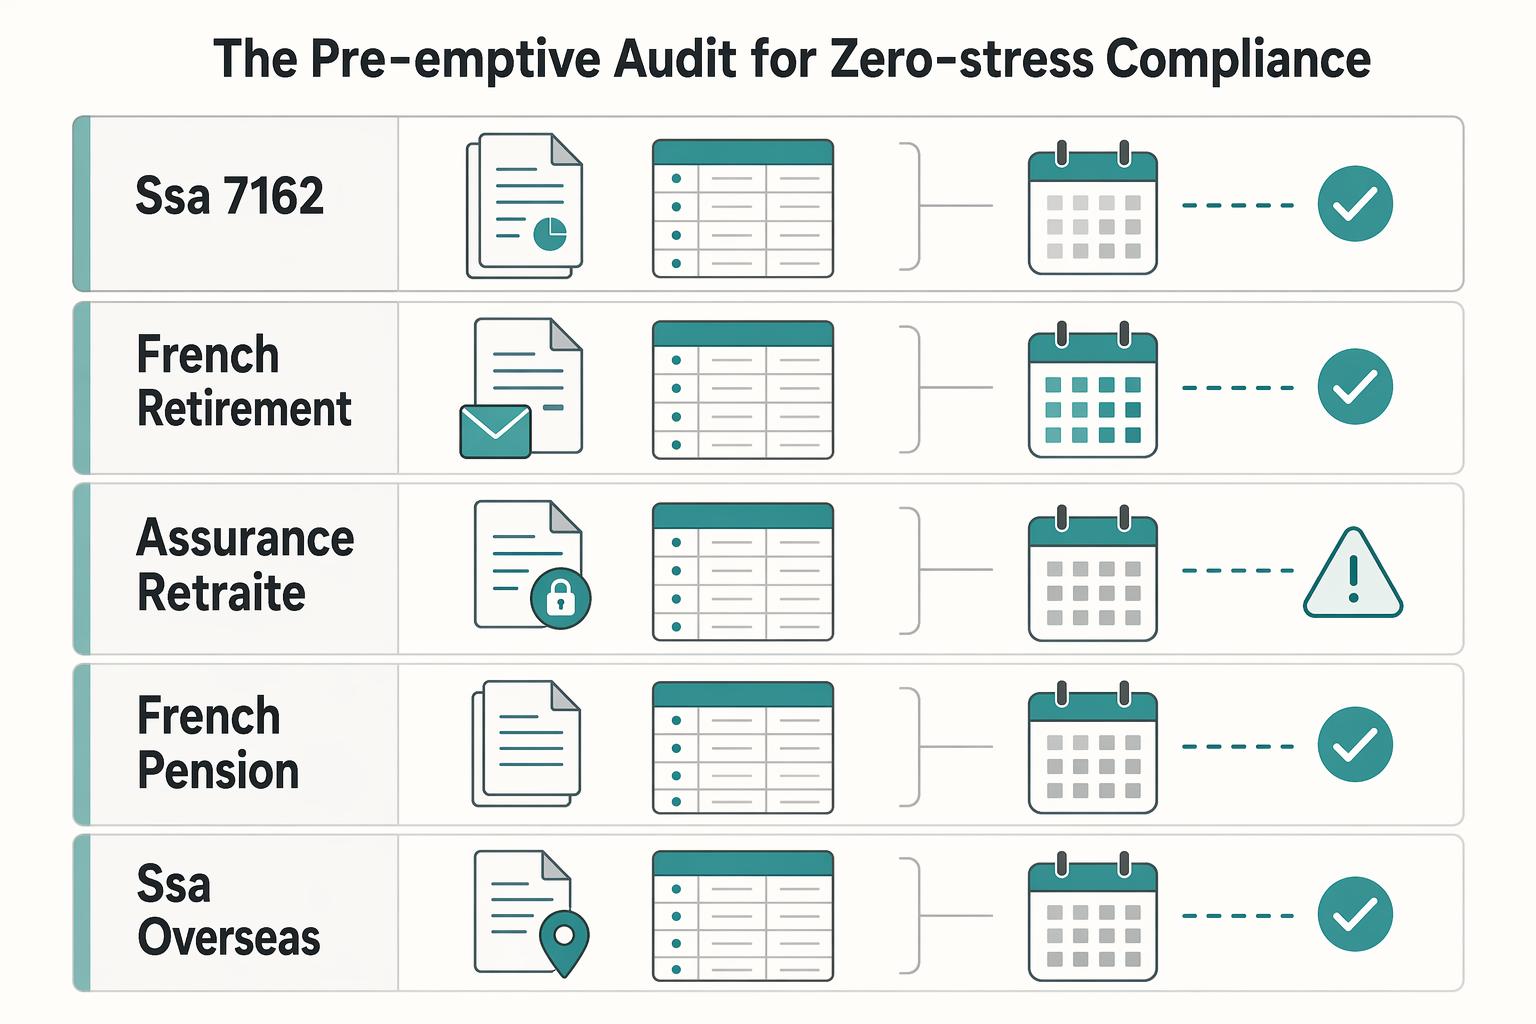
Step 1: The Pre-Emptive Audit for Zero-Stress Compliance#
Start with a provider-by-provider record before you book anything. A common early mistake is assuming every pension uses the same deadline, witness, or submission channel.
| Process | Window | Note |
|---|---|---|
| SSA-7162 FEQ process | 45-day timeframe | Foreign Enforcement Questionnaire process |
| French retirement-account flow | Within one month of the email notice | Return window is tied to the email notice |
| L'Assurance Retraite | Within 2 months | Pension payment is suspended if not submitted |
Your calendar should follow each pension authority's actual submission window, not a generic reminder you use everywhere. The examples above show why that matters. One SSA-7162 Foreign Enforcement Questionnaire process uses a 45-day timeframe, one French retirement-account flow requires return within one month of the email notice, and L'Assurance Retraite states the certificate must be submitted within 2 months or pension payment is suspended. For each pension, create a recurring reminder tied to the provider's current window; confirm the current lead time from the pension authority or official notice before setting the reminder.
| Pension provider | Submission method | Accepted witness types | Legalization requirement status | Digital option status | Escalation contact |
|---|---|---|---|---|---|
| French pension fund(s) | Paper or online retirement-account process; online may cover multiple funds at once | Competent local authority in your country of residence | Verify with fund before using notary route | May be available online | Provider portal or official pension contact channel |
| SSA overseas benefit using SSA-7162 FEQ | Return the current FEQ as instructed; some channels do not accept email or fax and require an original signature | Verify from the current form instructions | Verify before choosing local notarization | Not confirmed in cited FEQ notices | Contact listed on the notice or official embassy/social security channel |
| Pensioenfonds PGB | App-based life confirmation is available | App route may replace witness or stamp step; otherwise verify current rules | Verify if you must use paper or local certification | Yes, smartphone app | Fund contact channel |
When you request the form, treat it as a repeatable check, not a one-time email, and record four things every time:
- Channel used: portal message, registered email, phone call, or mail, based on the provider's current instructions.
- Confirmation captured: screenshot, sent-email copy, case number, or the agent's name and date.
- Response SLA: write down any published timing. One FEQ channel tells applicants to wait five business days for a response.
- Fallback if no response: switch to the next official channel, ask for a reissue, and log both attempts.
Pre-scout your verification route now so Step 2 is execution, not last-minute research. Choose digital if the provider explicitly offers an app or portal path. Choose a consulate if the pension authority or consular service specifically accepts an in-person certificate, especially where personal appearance is required. Choose a local notary or local authority only after you confirm the provider accepts that route and whether legalization or authentication depends on Hague Convention status.
Before you move on, assemble the evidence pack. Keep the current provider instruction page, your calendar entry, your request confirmation, any appointment booking, and the exact submission rule on signatures, originals, and accepted channels. A common failure mode is expensive and avoidable: sending the right form through the wrong channel.
For a step-by-step walkthrough, see How to Handle Tax on a Foreign Life Insurance Policy.
Step 2: Use an Approved Witness and Verify the Authentication Path#
If digital submission is not accepted, the goal is straightforward: use a witness the provider explicitly approves, then verify any required authentication path before you submit.
Follow the witness decision tree#
Use the current provider form and instructions as the source of truth, then run this sequence:
- Check the approved witness list first. If roles are listed, use one of those roles exactly. If not, pause and ask the provider which witness types are accepted and whether notarization, apostille, or legalization is required.
- Pick the lowest-friction accepted route. Choose the option the provider will accept without follow-up, not the office that sounds most formal.
- Use a fallback only if it is also explicitly accepted. If your first option is unavailable, confirm the fallback in writing before booking.
- Stop and reconfirm on ambiguity. Reconfirm when wording is vague, office title or seal details are unclear, or verbal guidance conflicts with written instructions.
| Witness option | Acceptance risk | Processing friction | Extra authentication likely | Best-use scenario |
|---|---|---|---|---|
| Role explicitly named on the current form | Lower | Moderate | Depends on provider and country pair | First choice when available |
| Local notary (only if explicitly accepted) | Medium | Low to moderate | More likely | When easy to schedule and provider confirmed notarized form acceptance |
| Other provider-listed authority/professional | Medium to higher | Moderate | Varies | Only when the exact role/title is clearly accepted |
Run the authentication check in order#
If notarization or formal certification is involved, check it in this order:
| Requirement or service | Published detail |
|---|---|
| Original notarized or certified recorded documents | Required; photocopies are not accepted |
| Certification source | Must come from the state that produced the document |
| Electronic apostilles | Not issued |
| Mail request | 10-20 business days by mail; return postage is required; tracked return is recommended |
| Walk-in expedite | $25.00; 6-document limit |
| Filings | $3 per document |
| Puerto Rico/U.S. territory requests | May require a notarial capacity certificate; $18 fee |
- Confirm what the receiving side requires: Apostille or Certificate of Authentication.
- Confirm treaty/legalization path: current requirement pending receiving authority, consular, or legal verification.
- Confirm the issuing authority where the document is produced.
- Add verified timing and submission method to your compliance calendar after confirming the current requirement from official, pension authority, or consular records.
Operational risk check from Arizona's published rules shows why the sequence matters: original notarized or certified recorded documents are required, photocopies are not accepted, certification must come from the state that produced the document, and electronic apostilles are not issued. For mailed requests, return postage is required and tracked return is recommended. Published timing is 10-20 business days by mail; walk-in expedite is $25.00 with a 6-document limit; filings are $3 per document; Puerto Rico/U.S. territory requests may require a notarial capacity certificate with an $18 fee.
Appointment failure-prevention checklist#
Before you leave the office, confirm each item:
- Form remained unsigned until the witnessing step (unless provider instructions explicitly allow pre-signing).
- ID details align with pension records (including name format).
- Required seal, stamp, signature, date, and title are present and legible.
- Fee and payment method were handled as required.
- You captured proof of completion and submission path (photos, receipt, tracking, office details).
In-person rejection-avoidance check#
Common in-person failures are missing witness fields, illegible stamps, missing dates, and name mismatches. Check the completed form line by line against the provider's instructions before you leave. Keep evidence for escalation: completed-form images, receipt, witness-office details, and tracking or submission records.
Related: Satisfying Economic Substance: A Practical Guide for Solo Entrepreneurs.
Step 3: The Digital-First Strategy to Bypass Bureaucracy#
Use digital first only when your provider explicitly supports it. The triage is simple: check the latest provider notice or portal, confirm the accepted digital method, then complete that method or move to Step 2.
Triage the digital route first#
Start with the current notice, portal, or instruction page, not last year's process. Some providers only require action after they send a letter or email, and at least one states that if no letter was received, no action is needed.
| Trigger | Action | Note |
|---|---|---|
| Provider sent a letter or email | Confirm whether you were asked to submit now and which channel is named | Some providers only require action after they send a letter or email |
| No letter was received and the provider says no action is needed | No action is needed | At least one provider states this if no letter was received |
| Instructions say app | Use the app | Match the channel exactly |
| Instructions say portal upload | Follow the upload rules | Match the channel exactly |
| No digital route is stated | Do not improvise with email; switch to Step 2 if digital remains unclear or unavailable | Move to Step 2 if digital is unclear, unavailable, or rejected after provider confirmation |
- Check the official trigger. Confirm whether you were asked to submit now and which channel is named.
- Match the channel exactly. If the instructions say app, use the app. If they say portal upload, follow the upload rules. If no digital route is stated, do not improvise with email.
- Decide fast. If digital is unclear, unavailable, or rejected after provider confirmation, switch to Step 2.
| Channel type | Setup effort | Verification friction | Common failure points | Best-fit use case |
|---|---|---|---|---|
| Provider app (ID + selfie/video) | Moderate | Medium | Camera issues, ID/face mismatch, incomplete final submit | Provider explicitly directs you to app-based proof of life |
| Provider portal upload | Low to moderate | Low | Wrong file type, file-size limit, too many files, unreadable scans | You already have documents ready and portal rules are clear |
| Provider-issued identity transaction/link | Moderate | Medium | Missed email, wrong sender, missing transaction details, incomplete identity check | Provider starts the process and gives a specific transaction flow |
| Paper form with official signature | Higher | Higher | Missing official signature or stamp, routing delays, document acceptance issues | Digital is not offered, not accepted, or fails after verification |
Run the biometric flow as a controlled sequence#
When digital proof of life uses liveness checks, run it like a controlled sequence:
- Capture ID exactly as requested. Scan the accepted ID document in the app or workflow.
- Complete face check. Take the required selfie, photo, or video in good light.
- Submit and verify completion. Confirm the final success screen, not just partial progress.
- Retain evidence immediately. Save the confirmation screen, email, timestamp, and reference number right away. Some systems do not allow report download after submission.
If you are using portal upload, check format and size limits before you upload. Example: one provider allows JPG, JPEG, or PDF, up to 20 documents, with an 8MB combined limit.
Use a short security checklist before submitting#
- Validate the channel: use the official provider domain or portal and the expected sender identity.
- Use secure connections: only submit personal data on fully encrypted sites.
- Prepare the device: charge it, update the app or browser if needed, and confirm camera or email access.
- Watch phishing signals: urgent pressure, unusual links, or attachment prompts; verify contact details independently rather than using message links or numbers.
Fallback path when digital fails#
If you hit an app outage, mismatch, or upload rejection:
- Capture proof: screenshot the error, save exact wording, timestamp, and transaction or reference number.
- Check message routing: review inbox and spam for the official provider sender and transaction details.
- Contact through verified channels: ask whether to retry digitally or move to paper.
- Move to Step 2 only after that verification.
Related: Japan Digital Nomad Visa 2026 Planning Runbook.
Step 4: The Contingency Plan for Inevitable Disruptions#
If a disruption happens, run incident response: document what happened, get written instructions tied to your account, and escalate through the provider's published route if first-line support does not resolve it.
| Disruption type | Impact on payment continuity | Likely root cause | Fastest recovery channel | Proof documents to retain |
|---|---|---|---|---|
| Missed deadline | High risk of interruption or review | No valid submission on file, or late action | Secure portal message or provider helpline | Overdue or suspension notice, prior submission attempt, case or reference number, call log |
| Form or notice not received | Medium to high risk if action is still required | Delivery failure, outdated contact details, missed portal communication | Portal inbox plus customer service confirmation | Portal screenshots, contact details on file, any late-arriving envelope or notice, case log |
| Submission rejected | High risk until corrected submission is accepted | Vague rejection reason, format mismatch, incomplete or unreadable submission | Rejection reply channel or official upload path | Rejection message, rejected file, corrected file, resubmission receipt, timestamp, case number |
- Missed deadline
Trigger: you receive an overdue or suspension-related notice. Immediate action: contact the provider and ask for the exact reinstatement step required now. Evidence to collect: notice, submission history, date or time of contact, case number, written follow-up. Escalation path: if no usable answer arrives within the response window published by the provider or confirmed in writing, request supervisor review through the published complaint or escalation route.
- Non-receipt
Trigger: the expected notice or form has not arrived. Immediate action: confirm whether action is required and which channel they want you to use. Evidence to collect: portal status screenshot, address or contact details on file, contact log, written instruction. Escalation path: if responses stay generic, request account-specific written instructions and escalation to the next support tier.
- Rejection
Trigger: your submission is rejected or marked incomplete. Immediate action: get the exact rejection code or written reason, fix only that defect, then reconfirm required witness or format rules before resubmitting. Evidence to collect: rejection notice, corrected file, submission receipt, timestamp, case number, confirmation message. Escalation path: if the rejection notice is unclear, request clarification in writing and keep the full audit trail before any resubmission.
Use this communication script each time you contact support: identify yourself and your account reference, state the disruption and your last completed step, ask what exact action is required next, ask whether payment status is currently affected, and request written confirmation. Log agent name, channel, date or time, case number, required next action, and the expected response window confirmed by the provider or source record.
You might also find this useful: What is the 'Government Pension Offset' and How Does it Affect Expats?.
Conclusion: Treat This as a Repeatable Compliance Task#
The simplest way to stay ahead of this is to treat it as a repeatable compliance task, not a last-minute document chase. Track the deadline in your latest notice, confirm the current submission requirements early, and keep a fallback ready in case the first submission fails or a payment is paused.
That discipline matters because paper-based IRS processes can still create delays. The National Taxpayer Advocate 2025 Annual Report to Congress flags "Outdated Paper Processes and Procurement Delays Harm Taxpayers," and it also notes that taxpayers living abroad face severe compliance burdens. You do not control that environment, but you do control whether you wait until the deadline notice becomes urgent.
The practical checkpoint is straightforward: get the provider's current instructions in writing, then keep proof that you followed them, such as the completed form copy, upload confirmation, mailing receipt, and any support reply or case reference. One avoidable failure mode is relying on last year's process instead of the latest instructions.
What to do next is straightforward. Put the deadline on your calendar and save the latest notice and instructions in one folder. Verify the accepted submission route before you act, and if something goes wrong, contact the provider the same day and ask for the next step in writing. That keeps your records clear and helps you respond faster if a payment is suspended.
We covered this in detail in A Guide to the 'Windfall Elimination Provision' for US Expats.
Frequently Asked Questions
Can I complete this online?
Possibly, but only if your pension provider allows it for your specific record. Confirm the accepted submission channel in your latest notice or account messages, then ask support to confirm the exact method they will accept and whether any paper follow-up is required. Do not rely on rules from a different context, such as U.S. retirement-plan spousal-consent remote witnessing guidance, because that does not automatically apply to foreign pension proof-of-life requirements.
Who can witness the form abroad?
Your pension provider must confirm which witness types are acceptable for your account. Witness requirements can vary by provider and by form, so get the criteria in writing before booking an appointment and confirm the exact details they require on the document. If anything is unclear, ask for written confirmation before signing.
What happens if I miss the deadline?
Contact your provider immediately and ask for the exact steps required to bring your account back into compliance. The required action may depend on provider rules and your account status, so request written instructions and keep copies of notices and responses. Do not assume a standard reinstatement process without provider confirmation.
Do I need an apostille?
Only if your provider or the governing requirement says you do. Whether notarization alone is enough, whether an apostille is needed, and which authority issues it can depend on the jurisdiction and provider acceptance rules. If someone references an informational legal page, verify against the linked official edition or the relevant government authority before paying fees.
Can a family member witness it?
Do not assume a relative or household member will be accepted. Witness-eligibility rules can be provider-specific, so ask your provider directly whether a family member is acceptable for your account and keep that confirmation in writing before signing.
Try a related tool
Researched and edited by the Gruv editorial team. Gruv builds cross-border billing, payouts, and finance-operations software for global businesses.
Sources
- azsos.gov/business/authenticationtrusted
- cisa.gov/secure-our-world/recognize-and-report-phishingtrusted
- do.usembassy.gov/routine-message-social-security-administrati...trusted
- federalregister.gov/documents/2022/12/29/2022-27978/exception-fo...trusted
- irs.gov/businesses/the-taxation-of-foreign-pension-a...trusted
- irs.gov/irm/part21/irm_21-003-004rtrusted
- uk.usembassy.gov/foreign-enforcement-questionnairetrusted
Educational content only. Not legal, tax, or financial advice.
Related Posts

Japan Digital Nomad Visa 2026: Six-Month Planning Runbook
Treat this as your operating model: identify the right mission first, commit to one route, and keep dated records before you make irreversible plans. That is what keeps the rest of your timeline, paperwork, and decisions coherent.
Economic Substance for Solopreneurs Who Need Defensible Records
If you run a one-person business through a Single-Member LLC or an offshore company, start with a simple question: which compliance and reporting obligations may apply now, and what is the smallest structure you can defend with records. Make that call before you change entities, move banking, or submit filings that lock in a story you cannot support later.

The Freelance Payment Penalty: A Modeled Audit of Platform Fees, FX Spreads, and Payout Delays
The money rarely disappears through a single, easy-to-spot fee. The real loss is stacked. A marketplace takes its commission, a processor adds a charge for international cards, a bank or payment company converts the currency at a spread, a platform holds the funds before release, and a wire sheds a little to intermediaries on the way in. Each layer looks defensible on its own, but the worker feels the combined result as a smaller deposit and a later payday.