
Quick Answer
Start with net pay and treat your first paycheck as a continuity check, not a spending signal. Review the pay stub, map deductions, and split incoming money into operating, emergency fund, and tax set-aside accounts before optional spending. For client income, lock payment terms in a retainer agreement, choose the right collection rail, and track statuses from sent to settled. Then run a weekly QuickBooks reconciliation so each paid invoice ties to one posted credit or payout record.
You got paid now build a system not just a budget#
Treat your first paycheck as a cashflow test, not a spending signal. If you want to handle it well, the real job is not deciding what to buy or save this week. It is making sure next month still works if a payment arrives late, a deposit is smaller than expected, or you cannot immediately explain where money came from.
Step 1. Shift the goal from spending to continuity#
For a new graduate doing client work, one paycheck often does not tell the whole story. You may have wages, freelance invoices, reimbursements, platform payouts, or some mix of them. A budget helps, but by itself it does not solve timing risk. What matters first is continuity: core bills stay covered, known obligations are visible, and one delayed payment does not throw everything off course.
That changes the question you ask when money comes in. Instead of asking, "How much can I spend?" ask, "How much of this is truly available after known obligations?" Then ask what needs to stay untouched until the next cycle clears. That is the question that keeps one good week from turning into a bad month.
Step 2. Know the order of checks before you touch the money#
Before you spend anything, verify where the money came from and whether it is actually settled. Start with a simple sequence: identify the source, confirm status, and flag anything unclear before you treat funds as fully available.
In practice, that means checking more than the amount. You need to know whether a deposit matches expected work, whether a payment is still pending, and whether your records support a follow-up if something goes wrong. The two records that matter early are the payment record and the written agreement behind the work.
Use this checkpoint before you spend: if you cannot point to the source, date, and purpose of each incoming payment, you are not ready to treat it as fully available.
Step 3. Build one repeatable checklist for every cycle#
Your first win should be a routine you can run on payday and on every client cycle without guessing. Keep it short enough that you will actually use it:
- Confirm the amount received and log the source.
- Save the core records tied to that payment.
- Mark anything unclear immediately: short payment, missing payment, duplicate deposit, or return.
- Review what must stay reserved before you make any discretionary move.
A common failure mode is acting on money before it is explained. People spend ahead of payments that have not fully cleared, assume a deposit is final when it is still in question, or mix inflows until nothing is easy to trace.
By the end of this guide, you should have a checklist you can run every pay cycle and every client cycle. It should still work when income is uneven and the stakes are higher than they look on day one.
Related: A Strategic Consultant's Guide to Structuring a Retainer Agreement.
Prepare your money stack before the first deposit lands#
Set up your money lanes before the first deposit so you know what is safe to use and what is not. Open the accounts first, then let income flow into that structure.
Step 1. Open and label the core accounts#
Create your core accounts before payday: one operating account, one emergency fund account, and one tax set-aside account. A single checking account trying to do every job usually makes spendable money harder to see. Label each account clearly so you can route incoming money without guessing.
If consistency is the hard part, automate even a small transfer to savings each cycle, such as $15, $20, or $30 per paycheck.
Step 2. Gather documents before onboarding starts#
Prepare your KYC basics (ID and required personal details) before you start payout or invoicing setup. If you are operating as an entity, prepare the KYB details your provider asks for, and keep your default invoice terms in a signed retainer agreement.
| Setup item | Applies when | Article note |
|---|---|---|
| KYC basics | Before payout or invoicing setup | ID and required personal details |
| KYB details | If you are operating as an entity | Prepare the details your provider asks for |
| Signed retainer agreement | When using default invoice terms | Keep default invoice terms in a signed retainer agreement |
| Account-type rule check | Before registration | On some platforms, an email already linked to a personal account cannot be upgraded to an entity account |
Also check account-type rules early. On some platforms, an email already linked to a personal account cannot be upgraded to an entity account, so confirm that before registration.
Step 3. Pick collection rails and confirm review gates#
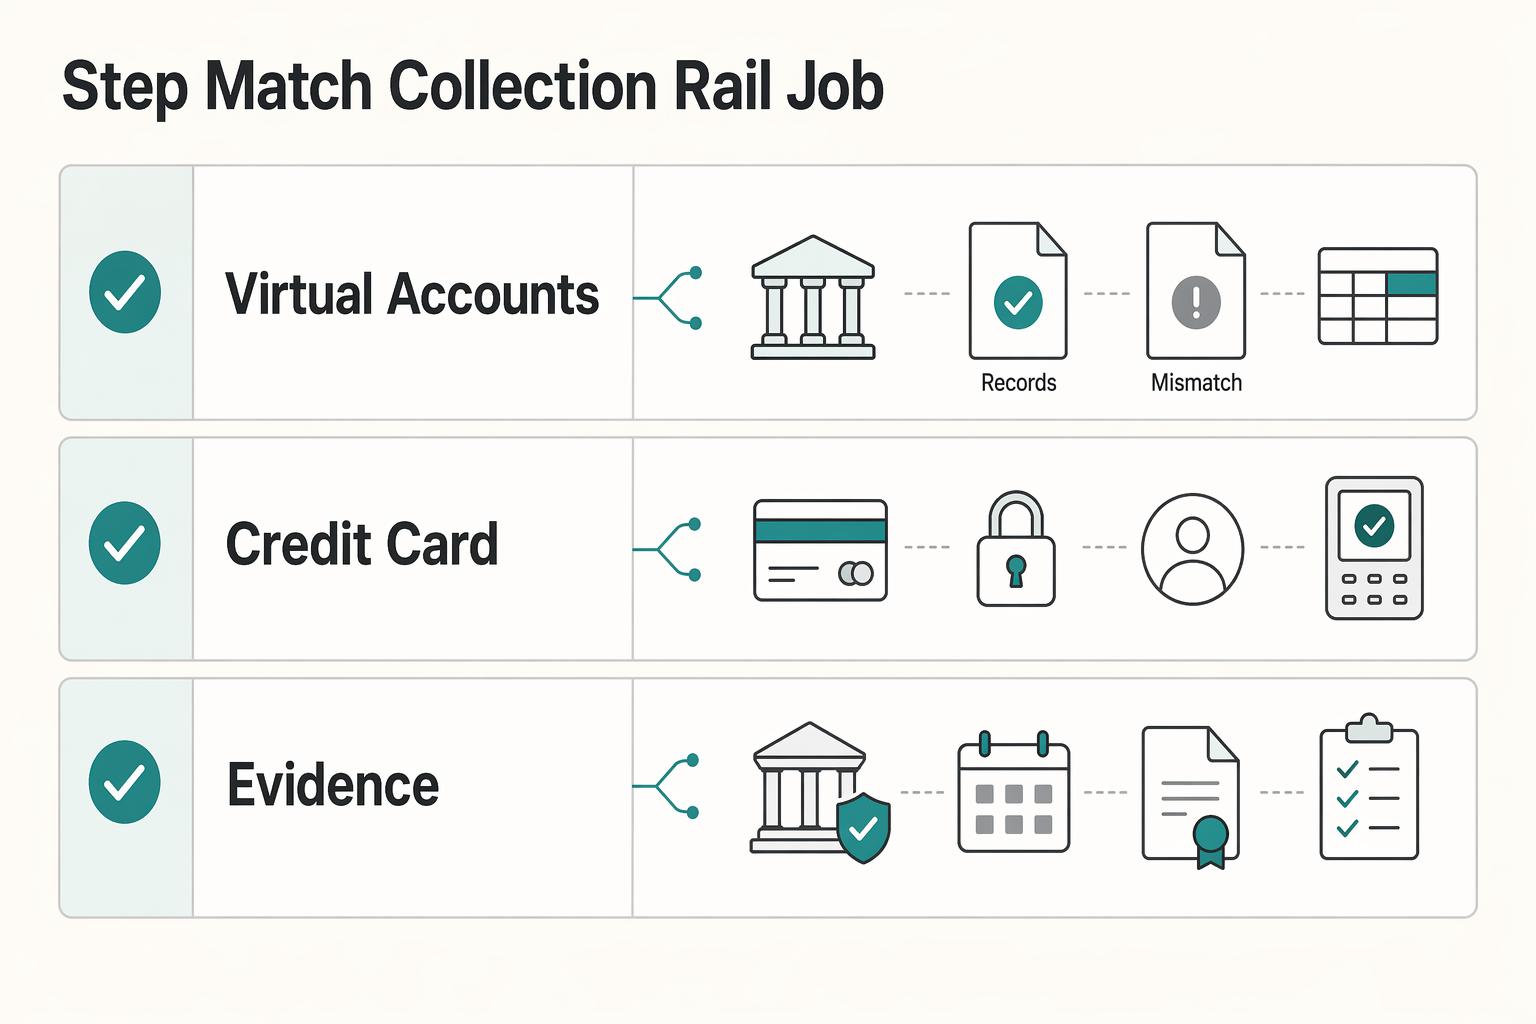
Choose your default collection rail before money starts moving: bank transfer to Virtual Accounts where supported, or credit card checkout when that fits the client flow better. Then confirm what verification or review steps can delay access to funds and what documentation you would need if a review is triggered.
Use one checkpoint before treating funds as available: you should know what can be paused, who reviews it, and what you will provide if asked.
Read your pay stub and define your real spending number#
Use net pay as your spending number. Do not change discretionary spending until you understand every deduction on your stub. Gross pay is what you earn before deductions; net pay is your take-home pay after deductions.
Step 1. Confirm gross pay vs. net pay#
Read the pay stub first, not just the account deposit. You want a clear line from gross pay, through deductions, to net pay so your budget is based on what is actually spendable.
Step 2. Label each deduction bucket#
Sort each line item so nothing is ambiguous:
| Deduction item | Bucket | Article detail |
|---|---|---|
| Federal income tax withholding | Taxes | Listed as a tax deduction |
| State income tax | Taxes | Where applicable |
| Social Security | FICA | 6.2% employee withholding |
| Medicare | FICA | 1.45% employee withholding |
| Additional Medicare | FICA | 0.9% on wages above $200,000 |
| Health insurance | Elected deductions | If active |
| 401(k) contributions | Elected deductions | If active |
In plain terms:
- Taxes: federal income tax withholding, and state income tax where applicable.
- FICA: Social Security and Medicare.
- Social Security: 6.2% employee withholding * Medicare: 1.45% employee withholding * Medicare surtax guidance: 0.9% on wages above $200,000
- Elected deductions (if active): items like health insurance and 401(k) contributions.
This is why a first paycheck can feel like "the money you got is a lot less than the money you thought you'd get."
Step 3. Freeze discretionary changes until your map is complete#
Set one rule: no new discretionary spending until deductions are understood and recurring obligations are mapped. List fixed commitments against net pay first, then make spending changes only after every deduction line is clear.
For a step-by-step walkthrough, see How to Write Your First Resume.
Split the first paycheck with rules that hold up under irregular income#
Split your net pay in a conservative order so one strong deposit does not create a fragile monthly plan. Start with the 50/30/20 rule as a baseline, then tighten the order when income is uneven: cover essentials first, then tax reserves and emergency savings, and treat wants as flexible.
Step 1. Start with a baseline, then budget from the lowest realistic month#
Use 50% / 30% / 20% as your starting structure for needs, wants, and savings, not as a fixed promise every month. If your income varies, build from your lowest-earning month or the lowest monthly income you can reasonably defend, not your best month.
For your first split, allocate in this order: fixed obligations, emergency savings, and tax set-asides if you are self-employed. Wants come after those are covered. Before optional spending, run one check: can your conservative income floor still cover fixed bills if the next payment is smaller or late?
Step 2. Change allocation order based on income reliability#
If income is predictable, you can accelerate savings or debt paydown. If income is uncertain, protect fixed costs and tax reserves first.
| Income pattern | Allocation order | Cashflow focus | Tighten wants when |
|---|---|---|---|
| Predictable paycheck | Needs → savings/debt goals → wants | Keep recurring bills and deductions covered | Net pay drops, hours change, or fixed bills rise |
| Paycheck plus client income | Needs → tax set-aside on client income → emergency savings → wants | Client timing can still create gaps | Client payments slip or side income becomes necessary for bills |
| Variable client income | Needs → tax reserve → emergency savings → wants | Uneven deposits with ongoing obligations | Your conservative income floor cannot cover upcoming fixed bills |
For self-employed work, keep tax reserves protected even in a thin month. Estimated tax is generally paid quarterly, so the reserve should be part of your default split, not an afterthought.
Step 3. Put a hard stop on founder or freelancer bonus transfers#
If you pay yourself from client revenue, use a firm personal rule: no extra owner draw until fixed obligations, emergency savings, and tax reserves are funded. This is a control rule for cashflow discipline, not a legal requirement.
In practice, do not treat a large invoice as fully spendable cash on arrival. Confirm that your core obligations and reserves are already funded, then decide whether to increase personal spending or speed up debt payoff.
Build a reliable get-paid setup for client work#
If client payments support your first-paycheck plan, reliability starts in the agreement before the invoice is sent. Make the payment path explicit, define what happens when payment stalls, and keep a clear trail from invoice to payout.
Step 1. Write payment terms into every retainer agreement#
Put payment terms in every retainer agreement. A retainer agreement is a contract where the client pays in advance for work delivered over time. This is where you set the due date, accepted payment rails, late-fee policy, and the trigger for pausing work.
Be specific about timing and rails. A late fee applies only when payment misses the deadline in the original agreement, so vague due-date language weakens follow-up. If you accept bank transfer, card, or another route, list those rails in the agreement and mirror them on the invoice so AP is not guessing.
Set a clear work-pause trigger. Typical triggers are nonpayment past the agreed deadline or a held or returned payment that is not corrected. If the amount is material or the client is in another jurisdiction, get legal review before relying on the clause.
Before kickoff, verify that the signed agreement, invoice template, and billing contact details all match on due date and accepted rails.
Step 2. Match the collection rail to the job#
After terms are set, choose the collection option that fits the problem instead of enabling everything by default.
| Collection option | Best fit | What it gives you | Main tradeoff |
|---|---|---|---|
| Virtual Accounts | Repeat clients paying by bank transfer | Better organization and matching because virtual accounts are sub-ledger accounts linked to one physical account | The client still needs to use the correct details and reference |
| Credit card | Smaller invoices or clients likely to pay at approval time | A simpler pay-now path when convenience matters most | Review processing cost and settlement timing before relying on it for fixed bills |
| Merchant of Record | Cases where tax and compliance handling are needed and supported | The legal seller handles calculation, collection, and remittance of sales tax, VAT, or GST, and may also handle KYC and AML duties | Fit depends on geography, provider support, and whether that added layer is necessary |
Use Virtual Accounts when bank-transfer reconciliation is the priority. Offer card when reducing payment friction is the priority. Consider a Merchant of Record when tax or compliance handling is part of the actual collection risk.
Step 3. Run a payment-status routine and trace every payout#
Use a consistent status routine. Your internal labels can be simple, such as sent, viewed, paid, held, and returned, and you can map them to your platform's formal invoice states such as draft, open, paid, uncollectible, and void.
Escalate as soon as a status stalls. If an invoice remains at an early state, confirm billing contact and delivery details. If it is near due and still unpaid, send a reminder that repeats the due date and rail from the agreement. If payment is held or returned, pause new work until details are corrected and the next attempt is confirmed in writing.
Where supported, keep payout reporting and audit trails on. Payout trace IDs can help resolve delayed or missing payouts, and payout reconciliation reporting supports transaction-to-payout matching as a settlement batch.
Keep one verification rule: every paid invoice should map to one settled bank credit or one payout record, and every exception should have evidence attached.
Related reading: How to Choose Your First International Market for Expansion.
Want a quick next step? Try the free invoice generator.
Set tax and compliance records from day one#
Set this up as soon as payouts start. Your goal is to keep the right tax form on file, keep payout records tied to invoices, and document compliance checks that could delay withdrawals.
Step 1. Confirm which tax form applies before a payer asks twice#
Decide your likely form path early: Form W-9 or Form W-8BEN. Form W-9 gives a correct TIN to payers that file IRS information returns, and Form W-8BEN is used by foreign individuals to document foreign status for U.S. withholding and reporting when requested by a payer or withholding agent.
If your status, entity type, or jurisdiction is not straightforward, do not rely on a one-line rule. Keep a copy of what you submitted, when you sent it, and which payer received it.
Step 2. Build one tax-doc folder that mirrors invoices and payouts#
Use one running folder for the year, organized by payer. This is the simplest way to support 1099 tracking and avoid year-end cleanup.
For each payer, keep:
- Legal name
- Invoice copies and numbers
- Payout or settlement confirmations
- Submitted W-9 or W-8BEN
- Notes on corrected details or re-requests
Your check is simple: every payout should map to an invoice and a saved document trail.
Step 3. Note cross-border and compliance items that may apply later#
Track cross-border obligations early, even if they apply later. FEIE is claimed through the Form 2555 filing workflow, and FBAR (FinCEN Report 114) applies when foreign accounts exceed an aggregate $10,000 at any time during the year.
For FBAR, keep the core dates and records clear: due April 15, automatic extension to October 15, and records generally kept for five years from the due date. Also document where your bank or payout provider may run KYC/AML reviews for withdrawals or payout actions in your specific program or market, since those checkpoints vary by provider.
Reconcile every payment so cashflow stays explainable#
Reconciliation keeps your cashflow explainable by proving that what you recorded matches what actually posted at the bank. For many new freelancers and small teams, a weekly QuickBooks routine is frequent enough to catch issues while invoice and payout context is still easy to verify.
Step 1. Match posted transactions in QuickBooks every week#
Review posted items, not pending ones, because QuickBooks pulls bank-feed activity after it is officially posted. In each weekly pass, check new credits, fees, reversals, and related payment records.
Use QuickBooks transaction matching whenever possible. Matching ties a downloaded bank item to an invoice or payment you already entered, which preserves invoice-level traceability. If a credit appears before you recorded the payment, record it first, then match. Do not clear items with a vague category just to empty the feed.
Step 2. Standardize imports if you collect on more than one rail#
If you collect through Wise plus other methods, keep one consistent import and mapping pattern in QuickBooks Banking Transactions. Wise currency-account activity can sync into QuickBooks, but consistency is still your job.
Use the same client naming format, invoice reference style, and fee treatment across rails. That keeps one client or payment type from splitting into multiple accounting patterns over time. For a deeper setup walkthrough, see How to Connect Wise to QuickBooks for Automatic Reconciliation.
Step 3. Queue exceptions instead of guessing#
When a transaction does not cleanly match, treat it as an exception and investigate it. As a default checkpoint, each settled payment should map to one client invoice and one clear ledger outcome; if a deposit covers multiple invoices, is partial, or includes a return, document that and queue it for review.
Assign an owner for first-pass review and an escalation contact for client or provider follow-up. Keep an evidence pack for each exception:
- client invoice and invoice number
- bank-feed item or deposit screenshot
- payout or settlement confirmation
- fee detail, remittance email, or return notice
Common failure modes are unmatched deposits and returned payments. If you receive a return reason like R01 (insufficient funds), treat the amount as unresolved cash until it is fully resolved. If an item is still unexplained by the next weekly review, escalate with the evidence pack rather than letting it age.
Common first paycheck mistakes and how to recover fast#
Most first-paycheck problems come from four setup errors, and each one is fixable before the next pay cycle.
| Mistake | Recovery | Article note |
|---|---|---|
| Planning from gross pay | Rebuild your budget from net pay | Compare gross pay, deductions, and take-home on the pay stub |
| Running everything through one account | Separate business and personal money and automate transfers after deposits land | Use an operating account, a tax set-aside account, and an emergency fund account |
| Vague payment terms | Update the retainer agreement before the next invoice cycle | Clearly state payment schedule, accepted payment methods, and retainer amount and timing |
| Waiting until filing season | Complete the form that fits the payer/payee context and validate 1099 records early | Form 1099-NEC copies can be due by January 31 |
Step 1. Reset your budget to net pay. Mistake: planning from gross pay. Recovery: rebuild your budget from net pay, because gross is before deductions and net is your take-home amount. Pull your latest pay stub, compare gross and net, and re-forecast fixed obligations from net only so your plan matches real cash.
Step 2. Separate accounts and automate the split. Mistake: running everything through one account. Recovery: separate business and personal money, then automate transfers after deposits land. Keep an operating account for receipts and bills, a tax set-aside account, and an emergency fund account so your operating balance reflects spendable cash only.
Step 3. Tighten the retainer agreement before the next invoice cycle. Mistake: vague payment terms. Recovery: update your retainer agreement to clearly state payment schedule, accepted payment methods, and retainer amount and timing, then use that same agreement on the next invoice cycle. The goal is simple: anyone reviewing the file can see when payment is due and how it must be made.
Step 4. Complete the right tax paperwork now and validate 1099 records early. Mistake: waiting until filing season. Recovery: complete the form that fits the payer/payee context, not both. Use Form W-9 when providing a correct TIN to a payer filing information returns, and submit Form W-8BEN when requested by a payer or withholding agent. If you pay independent contractors, you may need Form 1099-NEC reporting, and timing can tighten quickly because copies can be due by January 31.
Copy this first paycheck checklist and run it every cycle#
Use one repeatable checklist in one file every cycle so your decisions come from a record, not memory.
- Use one budget file and keep it consistent. Start with a free budget template and keep using the same tracker each cycle. It can live in Excel, Google Sheets, or Numbers.
- Set your baseline with a Financial Inventory Sheet. Capture your current financial picture in one place before you make changes for this cycle.
- Run the Monthly Template for the current cycle. Log what came in and what needs to go out in the same monthly view each time.
- Add a short note for anything unusual. If this cycle looks different, write one clear line about what changed so you can review it later without guessing.
- Close the cycle with a quick review. Check the same sections every time and carry forward any open items into the next monthly pass.
Frequently Asked Questions
How do I manage my first paycheck if I’m freelancing and income changes month to month?
Treat irregular income cautiously and avoid budgeting from your highest month. Start with fixed essentials, then build your emergency fund before expanding lifestyle spending. If the next payment is uncertain, hold optional spending until bills due before the next pay period are covered.
What is the difference between gross pay and net pay, and which number should I budget from?
Gross pay is your earnings before deductions. Net pay is what actually lands after deductions like income taxes and Social Security, so net is the number your budget has to live on. A quick check is to compare the gross pay, deductions, and take-home lines on your pay stub before you spend anything.
Should I build an emergency fund first or pay down debt first?
If your income is uneven, building a cash buffer can reduce the risk of payment timing gaps. The longer-term target often cited for emergency savings is three to six months of living expenses, but you can still make required debt payments while building that buffer.
How much should I save from my first paycheck if I expect irregular client payments?
There is no single fixed percentage that fits every case. Prioritize essential recurring expenses first, then add to emergency savings, and increase savings when income becomes more predictable. A common red flag is using one strong month to justify permanent spending.
What should I check on my pay stub before I spend anything?
Verify the pay period first so you know whether you are being paid weekly, bi-weekly, bi-monthly, or monthly. Then confirm gross pay, each deduction line, and the final net pay number. If a deduction looks unfamiliar or the take-home amount is lower than expected, pause discretionary spending until you understand the difference.
When do I need W-8 or W-9, and how does that affect 1099 reporting?
Requirements for W-8, W-9, and 1099 reporting depend on your specific payer and tax situation. This section’s grounding does not support one universal rule, so confirm what is required before payment and keep your records organized throughout the year.
What is the simplest weekly reconciliation routine with QuickBooks and Wise?
Keep a simple weekly reconciliation habit in your tools: record payments and fees consistently, and flag unmatched items for review before the next payout cycle.
Try a related tool
Researched and edited by the Gruv editorial team. Gruv builds cross-border billing, payouts, and finance-operations software for global businesses.
Sources
- apps.irs.gov/app/understandingTaxes/hows/tax_tutorials/mo...trusted
- bsaefiling.fincen.gov/resources/FinCENFBARHelp.pdftrusted
- consumer.gov/your-money/making-budgettrusted
- ecfr.gov/current/title-31/subtitle-B/chapter-X/part-1...trusted
- irs.gov/payments/tax-withholdingtrusted
- irs.gov/individuals/international-taxpayers/foreign-...trusted
- pon.harvard.edu/daily/batna/10-hardball-tactics-in-negotiationtrusted
- sba.gov/business-guide/launch-your-business/open-bus...trusted
Educational content only. Not legal, tax, or financial advice.
Related Posts
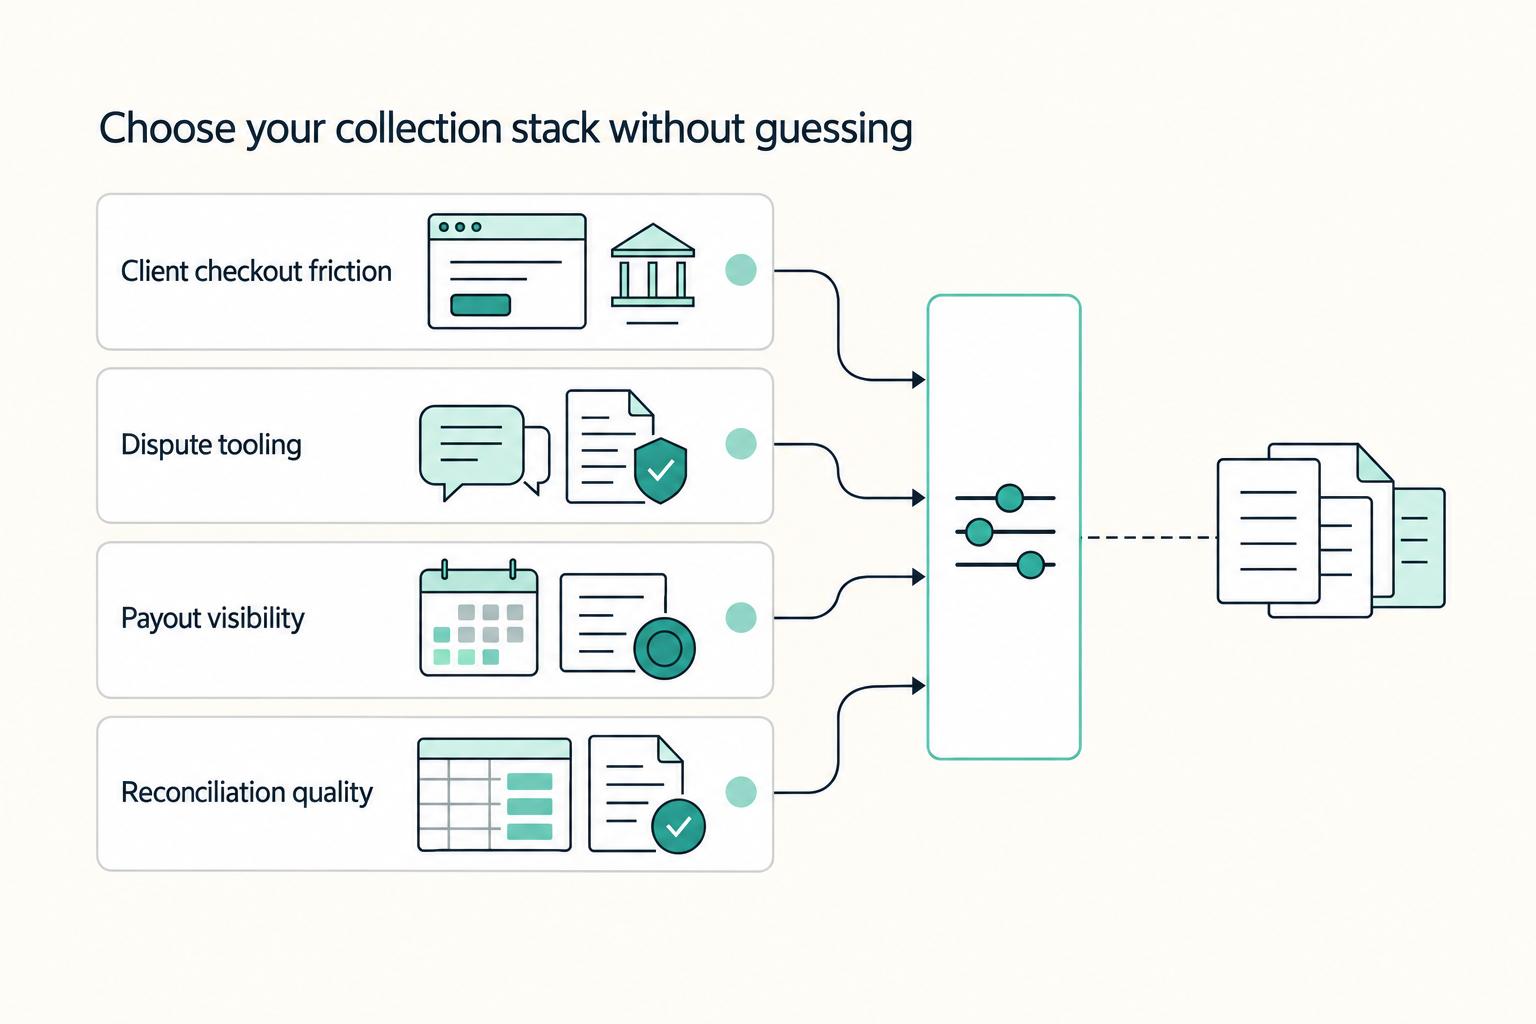
Should Your Freelance Business Accept Credit Cards?
Offer card payments, but stay in control of how money reaches you. The goal is not a smoother checkout screen. It is predictable cash you can use to run the business.
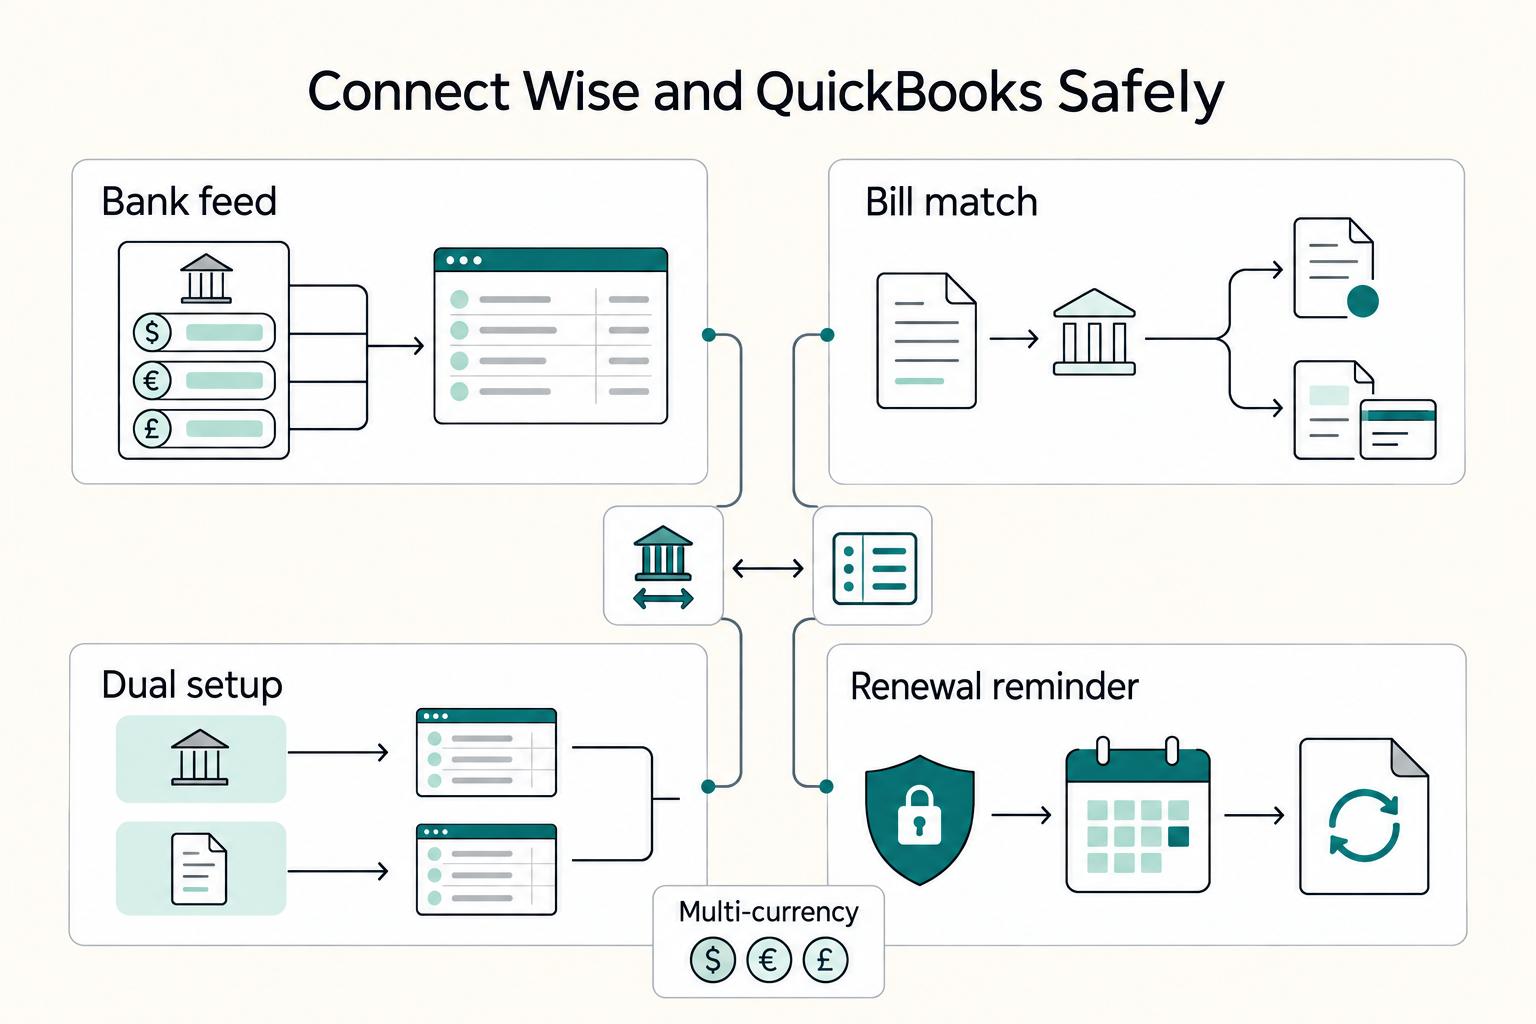
How to Connect Wise to QuickBooks for Automatic Reconciliation
**Use a risk-first Wise to QuickBooks setup to tighten transaction visibility and make reconciliation more predictable.**
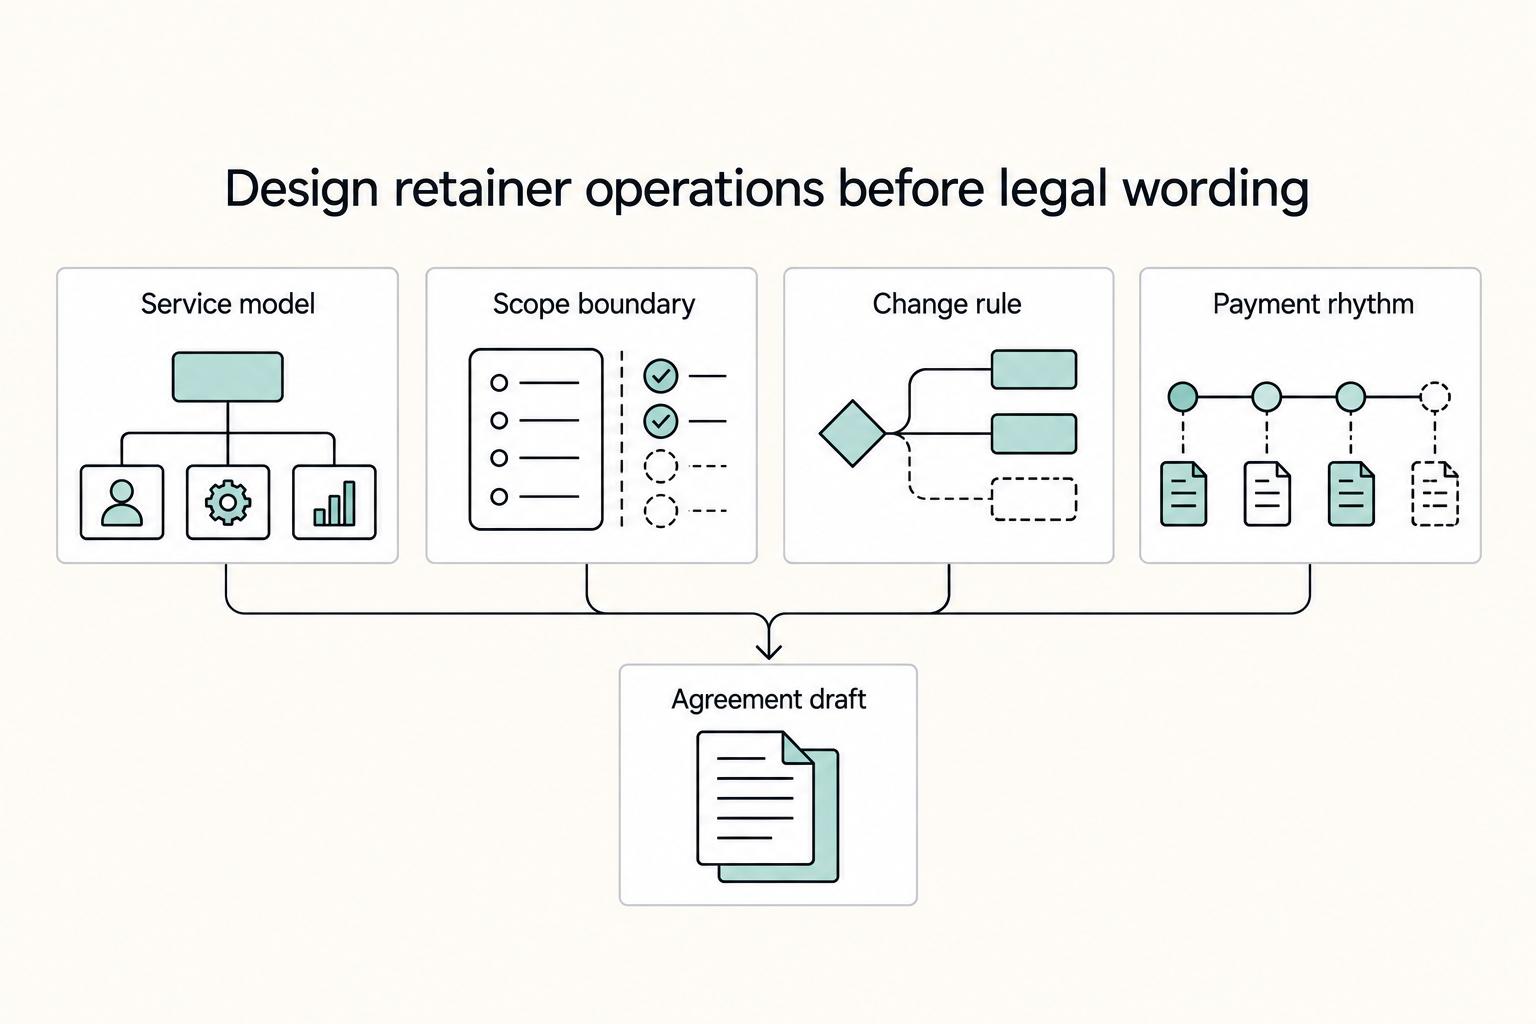
A Strategic Consultant's Guide to Structuring a Retainer Agreement
**Build your consulting retainer agreement to control scope, stabilize cash flow, and set expectations early.** Scope creep is what happens when work quietly expands beyond what the client approved. The drift can hit your calendar, your margin, and delivery quality. As the CEO of a business-of-one, your agreement is not paperwork. It is the system that protects your time and decisions.