
Quick Answer
Start with verify-before-buy: define address roles, get written acceptance from your Financial Institution and Payment Processor, and only then pay for services. For a us business address for non-residents, keep one canonical entity name and address wording across filings and onboarding, backed by a dated evidence file. Treat Form 5472 as an early checkpoint when it applies, since the article flags a possible $25,000 non-filing penalty as a risk signal.
Start Here and Avoid the Expensive Mistakes#
The cheapest path is to verify first, then buy. You want an address setup that survives filings, onboarding, and daily operations, not just a clean signup screen.
| Gate item | What to confirm | Grounded rule |
|---|---|---|
| Planned entity type | Confirm it before any payment | If it is still unclear, you are not ready to buy |
| Planned state | Confirm it before any payment | If it is still unclear, you are not ready to buy |
| Chosen address role for each form | Confirm it before any payment | If it is still unclear, you are not ready to buy |
| Financial Institution | Confirm written acceptance status before any payment | If it is still unclear, you are not ready to buy |
| Payment Processor | Confirm written acceptance status before any payment | If it is still unclear, you are not ready to buy |
Follow one sequence from day one: decide your address approach, confirm requirements in writing with each key counterparty, then implement in order using one consistent version of your entity name and address wording. Most of the expensive cleanup comes from skipping that sequence, not from a single bad form field.
Treat Form 5472 as an early checkpoint when it applies to your structure. A public source aimed at foreign owners of U.S. LLCs and corporations explicitly asks whether Form 5472 has been completed and mentions a possible $25,000 penalty for non-filing. Use that number as a risk signal, then document who is confirming your filing position and when.
One practical way to stay out of trouble is to keep a single evidence file from the start. Keep written replies, draft forms, approvals, and open questions together so you can see what is confirmed and what is still pending. If any critical party will not give a clear written answer, pause and resolve that before paying for address services.
Before any payment, run a quick gate review. Confirm your planned entity type, planned state, chosen address role for each form, and written acceptance status from your Financial Institution and Payment Processor. If any one of those is still unclear, you are not ready to buy. This single gate catches most expensive reversals.
Set a single owner for this gate review and date-stamp each decision. When ownership is vague, teams often assume someone else confirmed a requirement. That is how one unverified assumption becomes three rejected submissions. Clear ownership and dated records keep accountability simple when issues appear later.
Use plain language in your notes. If a reviewer cannot tell what was approved, by whom, and for which address role in under a minute, rewrite the note before moving forward. Clarity here is faster than explaining contradictions after onboarding has started.
Related: The 'Profit First' Method Part 2: Setting Up Your Bank Accounts.
Know the Three Address Types Before You Spend Money#
Address labels and entity decisions need to be made together. If you separate them late, you end up rewriting forms, reopening onboarding tickets, and explaining why your own records do not match.
Start by treating address labels as non-interchangeable until each institution confirms what it accepts in writing. Most avoidable mistakes start when one label is copied into every field because it looks close enough.
- Step 1: Separate labels by job before you buy.
Define filing contact, routine mail handling, and client-facing presence as separate jobs. Keep each form field aligned to its requested role instead of forcing one address label across all fields. If a field asks for one role and your document uses another, stop and resolve the mismatch before submission.
- Step 2: Confirm proof requirements before onboarding.
Proof of address and proof of identity are often separate checks. Ask each target Financial Institution for its exact proof-of-address document list and document-age window before you submit anything. One bank example accepts utility bills, credit card statements, lease agreements, or mortgage statements, but that list is not universal. Save the exact response text so your application package mirrors the requirement wording.
- Step 3: Pre-clear physical-address acceptance with your exact address string.
A physical address points to a tangible building, while a P.O. Box does not. One provider reports that some banks screen for registered-agent or mailbox patterns and may cross-check USPS data. If the reply is conditional, ask for a clear yes or no on account opening and save that response. Conditional language without a documented resolution path is a real red flag.
- Step 4: Build your mapping table before vendor payment.
Complete only the confirmed rows and mark unknowns as pending.
| Document or process | Accepted address type | Proof required | Status |
|---|---|---|---|
| State filing contact | Pending written confirmation | Pending | Pending |
| Financial institution onboarding | Pending written confirmation | Exact PoA list and age window | Pending |
| Payment processor onboarding | Pending written confirmation | Pending | Pending |
| Routine business mail | Chosen internally | N/A | Draft |
If the Financial Institution row is still missing confirmed proof requirements, delay purchase. One provider also claims accounts can be suspended or closed after 30 days when physical-address requirements are not met, so this checkpoint is worth the extra step.
Now connect those address decisions to entity and state choices before spending on any address service. If your entity or state changes after purchase, your address setup often needs to be rebuilt.
- Step 5: Define business intent before selecting entity type.
Write down how revenue comes in, whether you expect outside investors, and what your near-term growth path looks like. Entity choice affects tax outcomes, so treat it as a real operating decision, not filing admin. Keep this note short and practical, but specific enough that a third party can follow your logic.
- Step 6: Pick LLC vs C Corporation with explicit tradeoffs.
An LLC is commonly chosen for management flexibility, pass-through taxation, and liability protection in most cases. A C Corporation is often chosen for fundraising, share issuance, or rapid scaling. C Corporations can bring higher taxes and fees, so record why your choice fits your plan better. If your plan changes, revise the note before you update any address records.
| Decision area | What is supported now | What you still need to verify |
|---|---|---|
| LLC | Flexible management, pass-through taxation, liability protection in most cases | Expected tax treatment for your facts |
| C Corporation | Better fit for fundraising, share issuance, and fast growth plans | Total tax and fee impact in your first operating period |
| Delaware | Often preferred by startups seeking venture capital because of established business courts and corporate law | Your filing path details with the Secretary of State |
| Wyoming | Highlighted for low annual fees, privacy protection, and favorable tax rules | Whether those benefits match your compliance priorities |
| Washington | In your shortlist | State-specific filing friction and ongoing compliance details |
- Step 7: Compare states against real constraints, then pause if unclear.
Rules differ on filing fees, annual reports, and ongoing compliance duties. If Delaware, Wyoming, and Washington are still tied in your notes, wait to buy address services until your filing path is final. Buying early rarely saves time when your state assumptions are still moving.
- Step 8: Record rationale so future updates stay consistent.
Keep a dated memo of what you chose, what you rejected, and why. Store it next to your address mapping table so later filings and onboarding submissions follow the same logic. Treat this memo as a reference document you update when a material assumption changes.
At this stage, check formatting consistency. Keep one canonical version of legal name punctuation, suite formatting, and address line order. Small formatting differences can look harmless but still trigger manual review when records are compared side by side.
If you want a deeper dive, read Does My Freelance Website Need a Cookie Banner?.
Prepare the Minimum Evidence Pack Before You Apply#
Build one evidence pack before you submit any application. It keeps address use consistent, shows your decision trail, and prevents tax assumptions from getting mixed into onboarding statements.
- Step 1: Assemble a startup packet with decision-critical records.
Include a one-page formation-intent note, chosen state, planned use of the Business Mailing Address, and Registered Agent details. Date every file and make the current version easy to spot. If multiple drafts exist, archive older copies so no one uses stale inputs by accident.
- Step 2: Draft usage statements by counterparty.
Prepare one statement for your Payment Processor and one for your Financial Institution. Keep core facts identical across both statements, then adjust only the purpose wording for each review context. When facts differ between statements, reviewers usually ask follow-up questions that delay approval.
- Step 3: Keep personal and business records separate.
Store business onboarding records separately from personal records, including items that may later connect to Internal Revenue Service (IRS) filings. This reduces mismatch risk when annual filings are prepared. Separation also makes future audits and internal reviews less painful.
- Step 4: Add a tax-boundary note before filing.
State clearly that address setup does not replace reporting obligations that may involve Form 8938, FBAR (FinCEN Form 114), or FATCA. If Form 8938 applies, attach it to the annual return and file by that return due date, including extensions. Filing Form 8938 does not remove any separate FBAR requirement, and threshold assumptions still require fact-specific verification.
Once your evidence pack is stable, use it to score providers with the same criteria every time. This keeps comparisons cleaner and prevents sales language from driving legal or operational decisions.
| Criterion | What to verify before payment | Why it matters |
|---|---|---|
| Permitted use | Written confirmation for U.S. Business Address and Business Mailing Address uses | Agencies apply different acceptance rules |
| Document handling | How mail is received, flagged, and routed | Delays and mix-ups create avoidable friction |
| Escalation path | Clear owner and process for exception cases | Mismatch cases need explicit handling |
| Support responsiveness | Quality of response to one concrete scenario | Slow support increases execution risk |
| Change process | Contract language for change-of-address steps and timeline | You need a workable switch path if requirements change |
Do not accept broad claims like "works for most businesses" as proof. Many states require a physical street address, not a P.O. Box, for LLC or corporation registration. Registered Agent requirements can be stricter than general business-mailing rules, while a business address may still be virtual in other contexts.
Test exception handling before commitment. Ask who handles partial matches, what evidence is required, and how escalations are documented. If doola is on your shortlist, score it with the same criteria and mark each term as clear or vague. If price is close, favor the provider with clearer written terms and fewer unresolved acceptance questions.
A simple decision rule helps at this stage: no payment until your scorecard has no critical unknowns for permitted use, document handling, and address-change terms. Unknowns in those three areas create the most expensive rework later.
Add one operational check before final selection: ask each provider to answer one realistic scenario. For example, ask what happens if your Financial Institution requests an additional proof document after onboarding starts. The speed and precision of that answer often predict how painful escalation will be later.
You might also find this useful: How to Protect Yourself from Chargebacks as a Freelancer.
Pre-Clear Acceptance With Banks and Processors Before Final Purchase#
Final acceptance is decided during onboarding, not in sales chat. If bank acceptance is uncertain, choose the setup most likely to satisfy the bank first, then optimize presentation details after accounts are live.
| Checkpoint | Action | Grounded note |
|---|---|---|
| Same scenario to both counterparties | Share entity type, formation state, and exact address type; ask for a written yes or no and state which address role they are evaluating | Use identical wording so differences in response are easier to compare |
| Conditional language | Ask what specific document clears the condition and who gives final approval | A conditional answer without a named decision point should be treated as unresolved |
| Financial Institution position | Prioritize it when responses conflict | Resolving bank requirements first usually reduces downstream friction with processors |
| Entity and state | Choose structure and formation state before buying address services | A stable state decision prevents serial edits later |
| Registered Agent | For an LLC, appoint the Registered Agent with a physical address in the formation state | Lock that record before any downstream submission |
| Business Mailing Address formatting | After entity and agent records are settled, finalize one canonical version | Use one canonical version across forms and profiles |
| Handoff verification | Track timestamps, submitted forms, and status for each Secretary of State and counterparty step | Do not move to the next dependency until the current step is received, approved, or action-needed with saved proof |
Banks run Customer Identification Program checks with risk-based procedures, and those procedures vary by account type and opening method. In some structures, payment onboarding may also be treated as an account context, so Financial Institution and Payment Processor outcomes may not match.
- Step 1: Send one exact scenario to both counterparties.
Share the same facts with each party: entity type, formation state, and exact address type. Ask for a written yes or no on onboarding acceptance and state which address role they are evaluating. Use identical wording for both messages so differences in response are easier to compare.
- Step 2: Convert conditional language into a binary result.
If you receive "typically accepted" or "case-by-case" language, ask what specific document clears the condition and who gives final approval. Early positive signals can still fail in deeper verification. A conditional answer without a named decision point should be treated as unresolved.
- Step 3: Use the Financial Institution as the tie-breaker.
If responses conflict, prioritize the Financial Institution position and delay presentation-focused upgrades until banking is live. This can slow branding work, but it lowers rework risk. In practice, resolving bank requirements first usually reduces downstream friction with processors.
- Step 4: Keep written evidence together before purchase.
Before payment, save written decisions from both parties, escalation contacts, and follow-up document requests in one dated record set. A single file trail helps when a later reviewer asks how the initial acceptance decision was made.
After acceptance is pre-cleared, execute setup in dependency order so records stay aligned from filing to onboarding.
- Step 5: Confirm entity and state first.
Choose structure and formation state before buying address services. No state is universally best for every non-resident case, and operating in another state can trigger foreign qualification, separate Registered Agent requirements, and ongoing costs in both states. A stable state decision prevents serial edits later.
- Step 6: Appoint the Registered Agent next.
For an LLC, the Registered Agent must have a physical address in the formation state. Lock that record before any downstream submission. If the legal name on the appointment does not match your onboarding records, fix it immediately.
- Step 7: Secure your business address and standardize formatting.
After entity and agent records are settled, finalize Business Mailing Address formatting and use one canonical version across forms and profiles. Keep this canonical string in your evidence file for copy-and-paste use.
- Step 8: Submit in sequence and verify each handoff.
Track timestamps, submitted forms, and status for each Secretary of State and counterparty step. Do not move to the next dependency until the current step is marked received, approved, or action-needed with saved proof. This stop-and-verify habit prevents parallel changes from breaking consistency.
A common failure mode is relying on a sales reply and then stalling in compliance review. Another is assuming one checklist fits every institution. Institution-specific interpretation is normal. That is why written confirmations and staged handoffs matter.
Add one practical gate before each handoff: confirm that entity name, address string, and document role are identical across your current draft package. This one-minute check catches many preventable inconsistencies.
Before you lock in a provider, align your address decisions with the payment flow you will actually run; this helps avoid rework when compliance checks start. Review Gruv docs for compliance-gated money movement workflows.
Handle Rejections Fast With a Defined Recovery Path#
When a rejection lands, restore record consistency before you send anything new. Treat recovery as a reset: capture what failed, align records, verify, then resubmit in order.
- Step 1: Pause new submissions and log the trigger.
Stop new onboarding or profile edits after rejection. Record date, channel, rejected field, and account owner in one tracker. Freezing new submissions prevents conflicting edits while the root issue is still unclear.
- Step 2: Escalate in writing for exact requirements.
Ask for a clear written next step that names the required document, field, or format for re-review. Keep response threads, attachment requests, and timestamps in one evidence file. If the answer is vague, ask a follow-up before making any edits.
- Step 3: Synchronize legal and onboarding records.
Reconcile entity name and address fields across your Registered Agent record, U.S. Business Address, Business Mailing Address, and filing drafts. Update every affected destination together instead of making partial fixes. Partial fixes are the fastest way to trigger a second rejection.
- Step 4: Run a verification loop before resubmission.
Use a four-part check sequence: payment or filing verification, source update, duplicate-source check, and address check. This catches repeat-failure patterns before the next submission. Do not skip this loop even when timelines feel tight.
- Step 5: Keep discussion permission separate from transaction permission.
In some regulatory contexts, preparatory legal or technical discussions may be allowed while specific transactions remain prohibited. GL 46B is a clear example: some discussions and inspections are authorized, while certain digital-currency-denominated payments and blocked-vessel transactions are not.
If two different counterparties reject your file, pause expansion work and fix consistency first. In practice, that prevents a second wave of mismatches caused by parallel edits across teams.
Another practical safeguard is to keep one short resubmission brief in your evidence file. Include the rejection reason, corrected fields, and the date each correction was applied. This reduces back-and-forth because reviewers can see exactly what changed.
When the corrected file is accepted, update your mapping table and checklist immediately. If you wait, old assumptions tend to survive in templates and cause the next submission to repeat the same failure.
Compare Real Cost and Risk Before You Commit Long Term#
Choose the option you can run and exit cleanly, not the one with the lowest first invoice. A Virtual Office Address can reduce overhead versus a physical lease and support market testing, but only when terms are explicit.
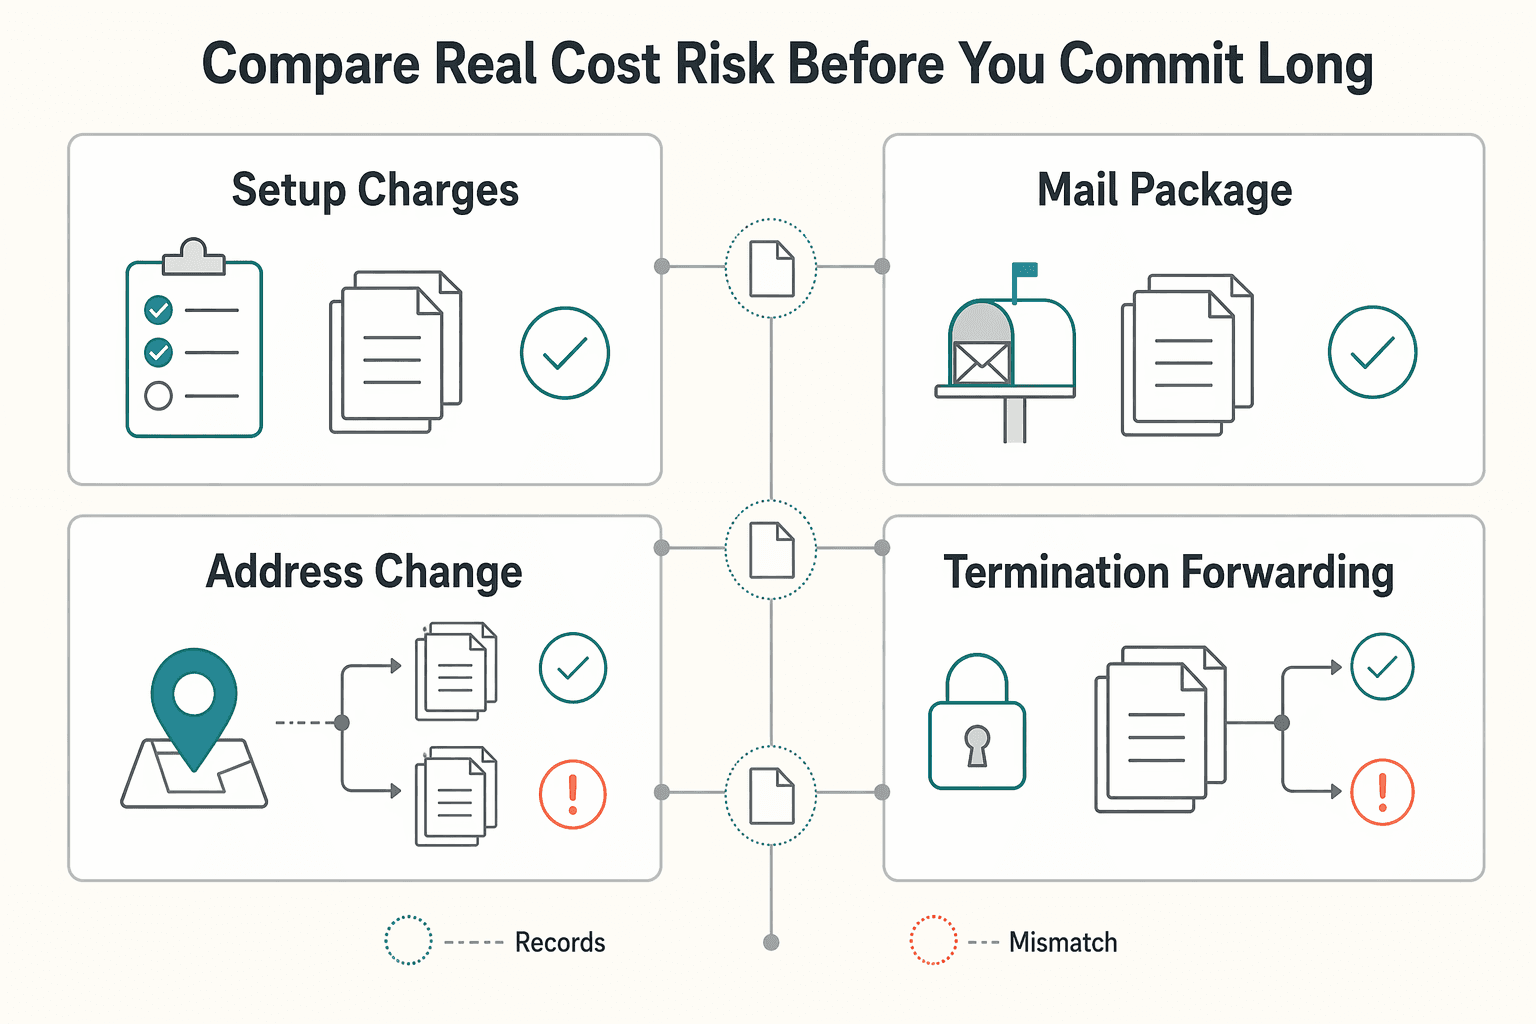
| Cost area | What to confirm | Why it matters |
|---|---|---|
| Setup charges and recurring fees | Evaluate lifecycle cost in one view | Teaser pricing cannot hide risk |
| Mail and package handling charges | Confirm the plan explicitly includes mail and package reception | A lower monthly fee can create higher operational risk later if scope is vague |
| Address-change fees | Review cancellation and portability terms and keep a basic switch plan ready | You can move your Business Mailing Address without losing continuity |
| Termination and forwarding costs | Review before choosing longer billing cycles | Choose the option you can run and exit cleanly |
Review lifecycle cost in one view so teaser pricing cannot hide risk:
- Setup charges and recurring fees.
- Mail and package handling charges.
- Address-change fees.
- Termination and forwarding costs.
Before you score price, confirm scope in writing. The plan should provide a physical street address, not a P.O. Box, and explicitly include mail and package reception. If either point is vague, a lower monthly fee can create higher operational risk later.
Review cancellation and portability terms before choosing longer billing cycles. Keep a basic switch plan ready so you can move your Business Mailing Address without losing continuity.
Use closure obligations as a stress test. In Indiana, dissolution begins with Articles of Dissolution, and tax closure still requires INTIME or Form BC-100, with IT-966 required after dissolution approval. Missing closure steps can keep estimated-tax billing active, and closing with DOR alone does not end obligations with other state agencies.
Cost discipline should continue after onboarding. Address reliability at scale comes from disciplined updates, not one-off edits.
Drift is the main risk: one record gets updated while dependent records stay stale. Use a quarterly review cadence so each cycle ends with one reconciled address record and dated proof of fixes.
- Step 1: Run one consistency check across all address touchpoints.
Compare legal entity name, U.S. Business Address, and Business Mailing Address across filings, platform profiles, and signed agreements. Keep owner and status in one sheet, and do not close the cycle until every mismatch is corrected.
- Step 2: Keep IRS filing assumptions in the same review cycle.
Maintain a current tax note covering Form 1040-NR status and whether Schedule SE (Form 1040) applies to your facts. IRS defines self-employment tax as Social Security and Medicare taxes, and business-specific situations may require extra guidance.
- Step 3: Require traceable approvals before payout or account-impacting edits.
For cross-border operations, route address changes through a documented request-and-approval path, then apply updates in one controlled pass across affected records. In Gruv processes, use policy-gated updates and keep records audit-ready where supported.
- Step 4: Archive evidence by quarter and by change event.
Store approvals, tickets, filed forms, contract amendments, and proof of accepted profile updates together. This makes future reviews faster and reduces memory-based errors.
A useful tradeoff call is simple: if a lower-cost provider requires more manual cleanup each quarter, total cost may exceed the provider with clearer terms and cleaner support.
To make that tradeoff visible, keep a short quarterly log with time spent on corrections, unresolved support items, and delayed submissions linked to address issues. You do not need complex analytics. A basic log is enough to show whether your low-cost option is still the low-cost option in real operations.
Make the Right Address Decision Once and Keep It Working#
Keep one documented version of your setup and check every submission against it. That habit prevents most repeat errors over time.
Use this final copy-paste checklist:
- Chosen entity type (Limited Liability Company (LLC) or Corporation) and state (Delaware, Wyoming, Washington) documented.
- Address roles mapped: Registered Agent, Business Mailing Address, Virtual Mailbox, Virtual Office Address.
- Written acceptance checks completed with target Financial Institution and Payment Processor.
- Contracts reviewed for portability, cancellation, and change process for your U.S. Business Address.
- Recordkeeping process in place for Secretary of State updates and Internal Revenue Service (IRS) consistency.
- If mailing an international Form 1040, confirm IRS year scope first, then decide whether you are enclosing a payment before selecting the mailing address.
- For the international Form 1040 table scoped to calendar year 2025: no payment goes to Austin, TX 73301-0215, and payment goes to P.O. Box 1303, Charlotte, NC 28201-1303.
- If using private delivery, treat it as context-specific: some IRS-designated services can meet timely mailing rules, but private delivery may delay payment processing for Form 1040-V.
After this checklist is complete, set your first quarterly review date immediately and keep it in the same file as your latest accepted address records. That turns one good setup decision into a repeatable practice.
Do one final readiness pass before you start new applications: confirm all checklist boxes reflect current facts, not last quarter assumptions. If anything has changed, update your notes first, then submit. This order is what protects you from expensive rework over time.
If your setup spans multiple countries or has edge-case onboarding requirements, pressure-test the plan before you commit long term. Talk with Gruv about your operational flow and coverage.
Frequently Asked Questions
Can a non-resident get a U.S. business address without living in the United States?
There is no universal yes-or-no rule. Treat it as institution-specific and get written confirmation from each filing office or provider before committing. Keep those confirmations with your onboarding records. If acceptance criteria shift later, those records give you a baseline for revalidation.
Is a Registered Agent address the same as a Virtual Mailbox or Virtual Office Address?
Do not treat these as interchangeable by default. Use the exact address type each counterparty requests and record what was accepted. If one counterparty changes its requirement, update your mapping table before any new submission.
What is the minimum setup order for a Limited Liability Company (LLC) and business address?
No single legally required order is supported here. A practical sequence is to confirm entity and state, confirm accepted address type by counterparty, and then submit in that order. Before each submission, verify that entity name and address fields match your latest accepted record. This keeps dependency changes from cascading into multiple corrections.
Which state is usually considered first for non-residents: Delaware, Wyoming, or Washington?
This evidence does not support one default best-first state. Choose based on filing and compliance constraints, then record why you chose it. That written rationale keeps later applications consistent. If constraints change, revise the note before changing address records.
Can I use a Business Mailing Address for bank onboarding with a Financial Institution?
Acceptance is not guaranteed. Ask the institution for a written decision tied to your exact address type and account use case before applying. Save that response in your onboarding file. A dated acceptance record is useful if a later reviewer asks for clarification.
Will a Payment Processor accept a virtual address for account approval?
There is no blanket acceptance rule supported here. Confirm directly with each processor and keep the response in writing. If California-source payments are involved and you are claiming a withholding exemption, use a complete, signed Form 590 because an incomplete certificate is invalid. Keep processor and bank responses together so conflicts are visible early.
What should I do first if my address is rejected after onboarding starts?
Get the rejection reason and the exact address type they will accept in writing first. Then pause new submissions until records are consistent across active applications. If California tax reporting is in scope, keep that track separate: nonresidents are taxed on California-source income, and filing Form 540NR is a concrete checkpoint. Resume submissions only after your verification loop is complete.
Try a related tool
Researched and edited by the Gruv editorial team. Gruv builds cross-border billing, payouts, and finance-operations software for global businesses.
Sources
Educational content only. Not legal, tax, or financial advice.
Related Posts

Does My Freelance Website Need a Cookie Banner?
Treat this like any risk-sensitive web deliverable: make one clear decision, wire the site to that decision, and keep proof it works. If your site uses nonessential tracking for analytics, advertising, or personalization, ask first and track second. If it uses only strictly necessary functionality, a short notice and a clear privacy policy may be enough, but only after you verify what actually loads in a clean session.

The 'Profit First' Method Part 2: Setting Up Your Bank Accounts
Most freelancers who try Profit First open a few extra bank accounts and call it done. That's the wrong move.

How to Protect Yourself from Chargebacks as a Freelancer
**Chargeback prep can reduce avoidable losses, but it cannot guarantee a win.** The real goal is narrower and more useful: build a repeatable sequence you can follow before, during, and after a dispute so cash flow is less fragile and decisions are less reactive.