
Quick Answer
To get Global Entry, first build a verified record pack for your passport, residency, address, employment, and travel history, then submit a precise application through the Trusted Traveler Programs portal and complete the required in-person interview after conditional approval. The fee is $120 and non-refundable, so accuracy matters. If you already have qualifying international travel, Enrollment on Arrival may let you complete the interview without prescheduling an Enrollment Center appointment.
Phase 1: The Pre-Approval Dossier (Your Strategic Foundation)#
If you want Global Entry, start before you open the Trusted Traveler Programs portal. Build a clean pre-submit dossier first, then use it to complete the application in one pass. The form asks for travel history, employment history, previous addresses, and passport details, and CBP can find you ineligible for false or incomplete information.
Before you start#
You are not collecting paperwork for its own sake. You are building one source document you can copy from without guessing, which matters because the application fee is $120 and non-refundable, even if you are denied.
| Record | What to gather | How to verify |
|---|---|---|
| Passport(s) | Valid passport, plus any other valid passports if you have more than one | Your name should match your travel documents character for character |
| Proof of residency | Current proof of residency | Utility bill, mortgage statement, rental payment statement, or driver's license if the address is current |
| Address history | Address history | Pull dates from lease files, utility statements, mortgage records, and old mail |
| Employment history | Employment history | Pull work dates from tax returns, HR portals, pay records, or other official records if needed |
| Travel history | Travel history | The I-94 site can help with U.S. arrival and departure history for the past 10 years, but treat it as an assistive tool, not a complete legal record |
| Name variations | Any name variations shown in official records | Note them so your entries match your documents exactly |
Step 1: Assemble the record pack. Pull together the documents that anchor the facts you will enter:
- valid passport, plus any other valid passports if you have more than one
- current proof of residency such as a utility bill, mortgage statement, rental payment statement, or driver's license if the address is current
- address history
- employment history
- travel history
- if your official records show name variations, note them so your entries match your documents exactly
Verification point: your name should match your travel documents character for character. CBP's general travel guidance is explicit here: ensure all travel documents match that name precisely.
Step 2: Build the accuracy workflow. Do not rely on memory for dates. Pull address dates from lease files, utility statements, mortgage records, and old mail. Pull work dates from tax returns, HR portals, pay records, or other official records if needed. For travel history, the I-94 site can help with U.S. arrival and departure history for the past 10 years, but treat it as an assistive tool, not a complete legal record.
The common failure mode is small mismatch drift: a move-in month is off by one, an employer name is entered casually instead of as recorded, or a passport name drops a middle name or suffix. Before you submit, do one final line-by-line cross-check against your passport and residency documents.
Audit disclosure risk before you apply#
Step 3: Pre-write factual explanations for any red flags. CBP lists several risk categories that can affect eligibility, including criminal convictions or pending charges, customs, immigration, or agriculture violations in any country, and inadmissibility issues under immigration regulations. Some applications, especially those involving criminal history, may require manual adjudication and take longer.
| Risk category | What to prepare |
|---|---|
| Criminal convictions or pending charges | Prepare dates, jurisdiction, disposition, and current status |
| Customs violations in any country | Prepare dates, jurisdiction, disposition, and current status |
| Immigration violations in any country | Prepare dates, jurisdiction, disposition, and current status |
| Agriculture violations in any country | Prepare dates, jurisdiction, disposition, and current status |
| Inadmissibility issues under immigration regulations | Prepare dates, jurisdiction, disposition, and current status |
Your job is not to argue your case inside the form. It is to be accurate and ready. Prepare a short note for yourself with dates, jurisdiction, disposition, and current status for anything that may come up. Omission is usually riskier than disclosure because incomplete or false information is itself a stated ineligibility trigger.
Decide how you will pay the fee#
Step 4: Check for a statement credit before opening your TTP account. If you want the fee reimbursed, verify that first. Some cards reimburse Global Entry or TSA PreCheck fees, but the amount, cadence, and posting rules vary by issuer and card.
| Benefit type | Example cadence | What to verify in issuer terms |
|---|---|---|
| Global Entry fee credit | Up to $120 every 4 years | Eligible card, current benefit language, whether the credit applies automatically |
| TSA PreCheck fee credit | Up to $85 every 4.5 years | Whether the card covers TSA PreCheck instead of Global Entry |
| First eligible transaction rule | Varies by issuer | Whether only the first qualifying charge gets reimbursed |
One useful example: some issuers state the credit applies to the first eligible transaction, so if you are coordinating family applications, payment order matters. Verify the current eligibility details before you rely on them.
Phase 2: The Flawless Execution Sprint (Submitting a Bulletproof Application)#
Treat this phase as precision data entry: your goal is to submit the Trusted Traveler Programs application in one clean pass, using verified records instead of memory. Because GES is a consolidated enrollment and vetting system for trusted traveler programs, consistency across identity and history details matters.
- Run a prep screen before you log in.
Keep your dossier, passport, government ID, and any prior-name notes open in front of you. Complete the form in one focused sitting when possible so you are copying from records, not reconstructing as you go.
- Lock identity details before you enter anything else.
Match your name exactly to your passport, then confirm that the same identity details are consistent with your ID and account profile. If you find a mismatch before submission, pause, reconcile your source records, and continue only when you know which value you will use consistently.
- Enter history from your dossier in a fixed sequence you control.
Use a repeatable order from your own records, for example identity, address, employment, travel, to reduce date drift. Keep entries concise and factual.
Do: - enter exact names, dates, and places from your records - use brief factual context only where an explanation field is provided
Don't: - add narrative in fields that are clearly data-only - "clean up" names or dates to what looks familiar if documents differ
- Reconstruct travel history with the strongest records you have, then close gaps.
If details are incomplete, rebuild from your available evidence, for example passport stamps, prior itineraries, and account history, then verify uncertain entries before you submit. Use one rule: add the best-supported entry and verify before final submit.
- Do a final line-by-line verification pass.
Before submitting, compare each entered value against your primary records one field at a time. This last check is where you catch small errors that are easy to miss in live entry.
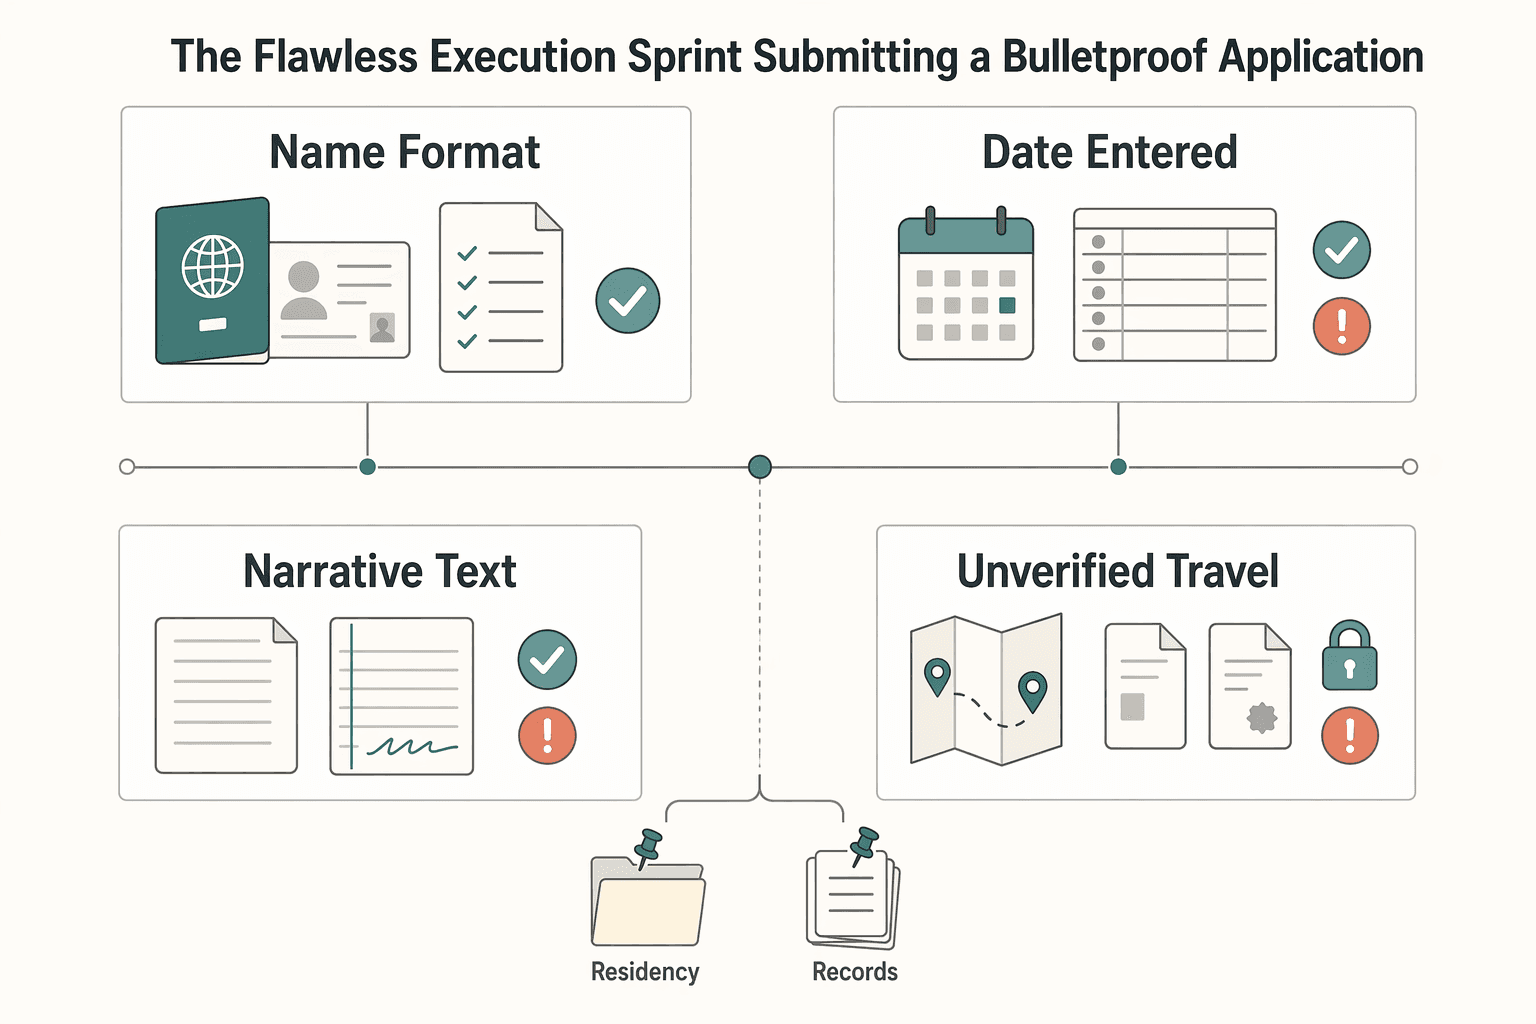
| Common input error | Likely consequence | Prevention check |
|---|---|---|
| Name format differs across passport, ID, and profile | Identity inconsistency in a centralized vetting record | Match to passport exactly, then confirm profile alignment before submit |
| Date entered from memory | Gaps or overlaps in history fields | Copy dates directly from your dossier |
| Narrative text in data-only fields | Ambiguous or hard-to-verify entry | Keep data fields strictly factual; use explanation boxes only when provided |
| Unverified travel entry | Incomplete or inconsistent travel history | Apply the "best-supported entry, then verify" rule before final submit |
The standard here is clean, internally consistent input, not speed.
If you want a deeper dive, read The 2025 Global Digital Nomad Visa Index: 50+ Countries Compared.
Phase 3: The Fast-Track Strategy (Conquering the Interview Bottleneck)#
After conditional approval, pick your interview path immediately: use Enrollment on Arrival (EoA) if you have a qualifying international return to the U.S.; otherwise book an Enrollment Center interview in TTP now and treat other tools as backup.
Decide your path first, then execute#
For first-time Global Entry enrollment, the interview is in person. Your TTP account will direct you to schedule an Enrollment Center interview, and CBP also allows no-prescheduled-appointment completion through EoA, and at select airports through Enrollment on Departure.
| Interview path | Availability | Effort | Typical friction points | Best-fit traveler |
|---|---|---|---|---|
| Enrollment on Arrival | Participating arrival locations only | Low if you already have international travel | Location-specific availability, airport handoff confusion, missing documents | You are returning to the U.S. soon |
| Enrollment Center interview | Standard TTP scheduling route | Moderate to high | Appointment timing can range from weeks to months | You do not have qualifying travel soon |
| Enrollment on Departure | Select airports only | Moderate | Limited locations, must align with departure airport and timing | You are departing soon from a participating airport |
Verify the current location and eligibility details before you rely on a specific path.
Practical tiebreaker: if your travel timing is uncertain, book the Enrollment Center interview first. You can still switch to EoA or EoD later if a qualifying trip lines up.
Path 1: Enrollment on Arrival (arrival-day sequence)#
EoA removes the need to preschedule an Enrollment Center interview, but only at participating locations.
Before landing
- Bring your valid passport.
- If you use multiple passports, bring all of them.
- Bring residency evidence (for example, driver's license); this is not required for minors.
- Bring your permanent resident card if applicable.
At inspection
- In the international terminal, follow signage to CBP officers.
- The interview is completed during admissibility inspection, so follow that location's officer handoff process.
After inspection
- Confirm whether the interview was completed before you leave.
- If the location cannot complete EoA for your case, or a requested disability support is not readily available, completion may be deferred; then go back to TTP and schedule an Enrollment Center interview.
Path 2: Enrollment Center (with optional scanner support)#
If EoA is not realistic, schedule in TTP as soon as conditional approval appears. Each applicant must schedule a separate interview.
CBP has announced monthly appointment-slot releases on the first Monday of each month by 9 a.m. local time. Also check more than one center: Enrollment Centers are in airports and non-airport locations.
Third-party scanner tools are optional support, not required. If you use one:
- track multiple workable locations so cancellation alerts are usable
- treat scanner services as private businesses, not government-endorsed tools; they do not guarantee an appointment
- keep account security tight: never share your Login.gov password or one-time codes, and use MFA (ideally with two methods enabled)
Ready-to-present packet (for either path)#
Bring:
| Item | When to bring |
|---|---|
| Passport | Either path |
| Additional passports | If you use them |
| Government-issued photo ID | Either path |
| Conditional approval notice | Either path |
| Residency evidence | When applicable |
| Permanent resident card | When applicable |
Do a final match check before the interview:
- name, date of birth, and passport number match your submitted application
- address details are consistent with your residency document
Use short rehearsal prompts so answers stay factual and consistent:
- "What travel history did I submit?"
- "What employment history did I submit?"
- "Can I restate those details exactly, without adding new versions?"
Related: 183-Day Rule Explained: Stop the Tax Myths Before They Cost You.
Resource Optimization: Securing Your Global Entry Fee Credit#
If reimbursement matters to you, make the fee-credit check your first step before you submit the application.
Verify the benefit before you pay#
Do not rely on old summaries. Confirm the current terms for your exact card and account in official issuer materials before you rely on them.
| What to verify | Why it matters | Where to verify |
|---|---|---|
| Card/account eligibility | Benefits can vary by product version and account status | Current issuer terms and secure account materials |
| Covered charge details | You need the exact wording to avoid assumption-based mistakes | Current issuer terms |
| Benefit reset cadence | You need this for future renewal planning | Current issuer terms |
| Required enrollment or setup steps | Missing prerequisites can block expected credits | Current issuer terms |
Execute and document in order#
- Pay the application charge with the exact verified card.
- Save your payment receipt.
- Save the exact benefit language you relied on.
- Confirm the charge appears on the intended account.
- Track your statement for the posted credit window in your terms.
- Set a reminder for the next verified eligibility date.
If the credit does not post, troubleshoot before escalation#
Work this checklist first, then contact issuer support with your receipt, statement evidence, and the exact benefit text:
- confirm the intended card was used
- confirm whether the benefit was already used
- confirm whether any required enrollment/setup step was completed
- ask how the transaction was categorized for benefit processing
If this step involved opening a new card, monitor your records. The FTC says credit report information should be accurate and complete, and you can check reports from Experian, Equifax, and TransUnion at AnnualCreditReport.com, including once a week for free.
We covered this in detail in How to Get Permits for Popular Hikes Without Last-Minute Surprises.
Conclusion: Reclaim Your Momentum#
If you want Global Entry without creating your own delays, keep the process simple: prepare your records, submit the application accurately, then finish the interview through the path that fits your travel calendar. The payoff is practical: less border uncertainty, smoother re-entry planning, and TSA PreCheck benefits included once you are approved.
- Prepare your records.
Before you touch the application, make sure your TTP account details are consistent with your passport and travel documents. This is also the point to verify that every family member has their own TTP account, since CBP requires a separate account regardless of age.
- Submit accurately.
Slow down and enter the same identity details you will use for travel bookings. After approval, TSA PreCheck is not automatic in practice. You still need to use your PASS ID as your Known Traveler Number and make sure the name on your airline reservation matches your enrollment record, or the PreCheck indicator may not appear.
- Complete the interview efficiently.
Once you have conditional approval, your TTP account will tell you to schedule the required interview. If you already have an international trip coming up, check whether Enrollment on Arrival makes more sense than waiting for an Enrollment Center appointment. If you use EoA, bring the required documents, including a valid passport and the residency evidence CBP asks for.
Do this now: confirm your account details, watch for conditional approval in your TTP account, and choose your interview path based on actual upcoming travel. Timing is not fully in your control. CBP says 80% of applications are approved within 2 weeks, but some take up to 12 months or longer, so accuracy and complete documents are the parts you can control.
For a step-by-step walkthrough, see How to Get an EU Pet Passport.
Frequently Asked Questions
What is the practical difference between Global Entry and TSA PreCheck?
Global Entry is for faster U.S. arrival processing after international trips and it includes TSA PreCheck. TSA PreCheck is mainly for faster airport security screening before U.S. departures. You cannot switch or upgrade between the programs later, so apply for Global Entry as a new applicant if you want both benefits.
How long does approval usually take?
Approval timing varies widely. CBP says most applications are reviewed within 2 weeks, while some take 12 months or longer depending on criminal history. Interview availability can also affect the timeline, although some conditionally approved applicants may be able to use Enrollment on Arrival instead of scheduling an Enrollment Center interview.
What should you do if your application is denied?
Start with the denial notice and your TTP account, then check CBP's Denial Inquiries page for the current contact path. Verify the current reconsideration requirements before sending anything because the route and timing can change. Do not send a vague inquiry that fails to address the reason listed in the denial notice.
Do your spouse and children need their own memberships?
Yes. Each family member needs a separate login account and a separate application. If your child is under 18, legal guardian information must be provided, and minors under 18 are no cost when enrolling with an adult. It is not handled as a household plan.
What if you already have TSA PreCheck and now want Global Entry?
You still need to apply from scratch for Global Entry. Follow the Global Entry application process as a new applicant and keep your Known Traveler Number records straight. Do not assume your existing TSA PreCheck enrollment data will transfer automatically.
How do you update your account after a new passport or name change?
After a new passport, log into your TTP profile and verify the current update path for your membership type before your next trip. If your name changed, or you have a new visa or work visa petition, some updates must be done in person at an enrollment center. Bring matching identity documents and verify the current requirement before you go.
Try a related tool
Researched and edited by the Gruv editorial team. Gruv builds cross-border billing, payouts, and finance-operations software for global businesses.
Sources
- cbp.gov/travel/trusted-traveler-programs/global-entr...trusted
- cbp.gov/travel/trusted-traveler-programs/global-entr...trusted
- consumer.ftc.gov/articles/disputing-errors-your-credit-reports-0trusted
- dhs.gov/xlibrary/assets/privacy/privacy_pia_ges.pdftrusted
- federalregister.gov/documents/2025/10/27/2025-19655/collection-o...trusted
- i94.cbp.dhs.govtrusted
- login.gov/help/create-account/authentication-methodstrusted
- tsa.gov/travel/frequently-asked-questions/how-can-i-...trusted
Educational content only. Not legal, tax, or financial advice.
Related Posts

The 2026 Global Digital Nomad Visa Index for 50+ Countries
Start with legal fit, not lifestyle filters. The practical order is simple: choose a route you can actually document, then decide where you want to live. That single change cuts a lot of wasted comparison work and stops you from falling in love with places that were never a real filing option.

183-Day Rule Tax Myths That Trigger Residency Filing Mistakes
If you are a mobile freelancer or consultant, start here: the "183 day rule tax" idea is not a single universal test. It is a shortcut phrase people use for different residency rules that do not ask the same question. If you mix federal and non-federal residency logic, you can create filing risk even when your travel calendar looks clean.

Digital Nomad Pre-Travel Checklist for Long-Stay Moves
Set your departure dates first. Long-term travel planning breaks down when timing stays vague. Vague timing usually turns into rushed paperwork, rushed bookings, or unresolved home obligations.