
Quick Answer
Create a business email by using a domain you control, choosing an email provider that supports custom domains, creating your main mailbox, and updating DNS so mail routes correctly. For most freelancers, the practical default is a custom domain plus a hosted provider, then SPF, DKIM, and DMARC as risk goes up. Finish by testing send and reply, then use the new address consistently across client-facing tools.
Your email address isn't branding-it's your business identity layer (and you can set it up today)#
A business email is not a logo choice. It is the identity layer most clients, vendors, and software tools treat as the real you.
If you work solo, that matters more than it seems. Your inbox is where proposals get answered, invoices get approved, contracts get routed, and account resets land. It is also the address tied to calendars, storage, payment tools, and client portals. Once you look at it that way, the right question is not "does this look polished?" It is "do I control the identity my business depends on?"
If you are still using a personal inbox, you are not late. You are just missing a few fundamentals that make the business easier to run. The big ones are simple: a consistent sender identity, a clean split between personal and client work, and a domain you control. Using your own domain gives you more control over how you present yourself and what happens if you change providers later.
That is the logic behind the rest of this guide. Start with the smallest setup that gives you control now. Then make sure it actually works before you build anything else on top of it.
Quick decision framework (safe defaults)#
If you want the low-friction default, make three choices and move on.
Step 1: Choose your identity anchor. Pick a custom domain you can live with for a long time, usually yourname.com or yourstudio.com. That domain becomes the stable base for every professional address you use.
Step 2: Choose your email system. Use a provider that supports custom domains and handles the boring parts reliably. Reliability, admin controls, and simple billing matter more than feature shopping.
Step 3: Choose a client-facing address. Start with a role-based address like hello@, billing@, or contact@, then add a named mailbox if you want one. That keeps the front door stable even if your setup changes.
| Setup | What it signals | Operational reality |
|---|---|---|
Personal inbox (example: [email protected]) | Individual, informal | Harder to separate client work, identity tied to a consumer account |
Professional email + custom domain (example: [email protected]) | Business, consistent | You control the domain, and it is easier to standardize accounts and communication |
What "done" looks like (so you can verify it)#
A setup is only done when it works end to end.
You should be able to send from your domain, receive replies at the same address, and use that address consistently across proposals, onboarding, invoices, and tool logins. If mail only forwards elsewhere, or if you still use a personal account for important threads, you are not done yet.
Run one simple check. Send a message from your new address to a second inbox you control, then reply back. Confirm both directions work, the display name looks right, and the reply lands where you expect. After that, standardize how you use it. Put the new address on anything client-facing and stop splitting your business identity across multiple inboxes.
If you want the presentation side to match the operational side, align the address, display name, and signature with the rest of your public positioning in How to Manage Your Personal Brand as a Freelancer.
Do freelancers need a business email address-right now?#
Yes, but you do not need to overbuild it.
This is mainly a control decision. The right move is to adopt the smallest setup that gives you a stable sender identity now, then add protection and structure as your risk goes up. In practice, most freelancers wait too long because they imagine a full IT project. It usually is not. It is a series of small decisions that prevent bigger headaches later.
Step 1: Pick your tier (Good, Better, Best) using safe defaults#
Think in tiers so you can decide quickly and move.
| Tier | Choose this when... | What you set up | What "done" looks like |
|---|---|---|---|
| Good (lean start) | You need the fastest path today and you do not handle sensitive client data yet | A mainstream email provider, a professional display name, and MFA | You can log in with multi-factor authentication, and your sender name matches how you sell yourself |
| Better (default for serious work) | You work with real clients, want credibility, and want control | Custom domain + an email provider such as Google Workspace + basic DNS setup | You can send and receive at [email protected], and your domain routes mail to your provider through the right MX records |
| Best (B2B / higher-stakes) | You invoice meaningful amounts, handle client data, or you want fraud resistance and delegation | Custom domain + SPF + DKIM + DMARC + role-based inboxes | Your domain authenticates mail and publishes a DMARC policy to reduce abuse |
The useful default for most working freelancers is Better. It gives you a real business identity without dragging you into unnecessary complexity. Good is acceptable if you are moving quickly and still proving demand. Best becomes worth it when money, client data, or delegation make failure more expensive.
Step 2: Promote yourself to "Better" or "Best" if any trigger shows up#
Some signals mean it is time to stop improvising.
If you invoice meaningful amounts or send payment links, spoofing risk stops being theoretical. If you sell into organizations that do legitimacy checks, your domain becomes part of how they decide whether your email is real. And if you care about continuity, a domain you control matters because it can stay stable even when your tools or support setup change.
A common failure mode is thinking, "I'll fix this after I land a few more clients." In reality, the moment you start handling money, contracts, or onboarding, your email setup is already part of the client experience. That is usually the point where a personal inbox starts costing more than it saves.
Step 3: Do a cost reality check (so you do not hesitate on the wrong thing).
The cost structure is straightforward. You usually pay for two separate things: the domain registration and the mailbox service.
That matters because "free business email" often means something narrower than it sounds. In some cases you get forwarding, not a real mailbox with its own account. Forwarding can be fine for very simple cases, but it gets messy fast if you need clear routing, search, filters, or shared responsibility for billing and contracts.
So the decision is usually this: start Good today if you need speed, move to Better as soon as client work becomes real, and keep Best ready for the moment risk and complexity justify it. That is more useful than trying to guess a perfect setup upfront.
What should your freelance email address be? A naming system that won't backfire#
Naming is where people either keep things clean for years or create avoidable cleanup for themselves.
The safest approach is to make the domain stable and the mailbox names boring. That may sound unglamorous, but boring is good here. Renaming email later breaks continuity, confuses clients, and leaves old threads scattered across old addresses.
Step 1: Choose your "anchor identity" (the layer you keep stable)#
Your domain is the part you want to keep stable.
A custom email domain means you use your own domain in the address instead of a generic one. That gives you continuity even if you change providers or tighten your offer later. Once that domain is in place, make one clear decision:
- If you sell as a person: use your real name, or a close variant, in the domain and display name.
- If you sell as a brand: use the brand in the domain and keep the display name consistent with the brand and the actual human replying.
This is one place where clarity beats cleverness every time. A client should understand who is writing to them without decoding a handle or wondering whether the address is temporary.
If you want that identity to feel consistent beyond email, connect it to the rest of your public presence in How to Manage Your Personal Brand as a Freelancer.
Step 2: Use safe address patterns (so you can extend later)#
The best setups use both named addresses and role-based ones.
A person-based address gives clients a direct line. A role-based address gives you stable routing for business functions that should survive changes in tools, assistants, or who happens to be monitoring the inbox that week.
| Use case | Best pattern | Example | Why it works |
|---|---|---|---|
| You want direct, personal replies | Person-based | [email protected] or [email protected] | Simple, clear, feels human |
| You want clean admin routing | Role-based | [email protected] | Keeps money threads separate from delivery threads |
| You sign agreements or collect documents | Role-based | [email protected] | Gives you a consistent place for agreement-related threads |
| You want a front door for inquiries | Role-based | [email protected] | Stays stable even if you change who monitors it |
A practical default is to create one named mailbox and a few role-based aliases that route into it. That keeps the setup lean without losing structure. Then add labels or folders so billing, contracts, onboarding, and delivery threads do not disappear into one mixed inbox.
A few patterns are usually not worth it:
- Random numbers, underscores, or novelty handles. They often read informal and are easy to mistype.
noreply@for solo work. It discourages replies and creates extra back-and-forth when a client just needs to answer the email in front of them.
Before you move on, verify what clients actually see. Send a test from a non-work address, confirm the display name looks right, and make sure replies land in the right place.
What to prepare before you touch DNS? Prereqs that prevent broken email#
Most painful email setups do not fail because DNS is impossible. They fail because the basics were not ready before DNS changed.
So before you touch records, lock down access, confirm who controls the domain, and decide where business communication is supposed to live. That way, when you start making changes, you are not also hunting for passwords, guessing who owns the registrar account, or realizing midstream that sensitive documents are still bouncing around as attachments.
Before You Start (Prerequisites)#
Step 1: Lock down admin access (so you cannot get hijacked mid-setup). Turn on multi-factor authentication wherever it is available, especially on your email provider and your registrar or domain host account. Those are the two accounts you most want protected before you move anything.
Just as important, generate and store backup or recovery codes somewhere safe. If your phone disappears or your second factor breaks, recovery codes are what keep a routine setup from turning into an account lockout.
Step 2: Create the right admin identity (so you keep control as you scale). Do not use your day-to-day mailbox as your only admin identity. Keep a separate admin login for configuration and billing, then use a standard user account for normal client work.
This looks slightly fussy on day one, but it pays off later. A compromised daily inbox is bad enough. A compromised admin account can affect the whole domain.
Step 3: De-risk the domain itself (so you do not lose your email identity). Your domain is the anchor for your email identity, so treat it like a critical asset, not a one-time purchase. Turn on auto-renew and make sure the payment method stays current.
Losing the domain can break mail delivery and force you into cleanup across invoices, client threads, and tool logins. That is a painful problem to have when the fix was a billing check you could have handled in two minutes.
Step 4: Decide system boundaries (so your inbox stays operational). Make one simple decision now: which kinds of work belong in email, and which belong somewhere else?
A clean default is:
- Email for ongoing communication
- Shared drive for working files and reference docs
- Contract tool for signatures and executed agreements
Then create a small folder or label structure before messages pile up. Billing, Contracts, Onboarding, and Delivery are enough to start. The point is not taxonomy for its own sake. The point is being able to find the thread you need when a client asks a question three months from now.
Step 5: Confirm you can actually edit DNS (the last preflight check). Log into the account that manages your DNS and make sure you can reach the DNS panel without guesswork. You are going to need that access to verify the domain and update MX records, which are the records that route incoming mail to the right mail servers.
If you cannot find DNS settings quickly, stop there and fix access first. That is a much smaller problem than changing half a setup and discovering the one account you need is unavailable.
Create your freelance business email with your own domain: the step-by-step playbook#
Once the prep work is done, the actual build is straightforward. You choose the host, create the mailboxes you want, point the domain at the host, and set the defaults you will rely on every day.
The important part is sequencing. Make one change at a time and verify it before you move on. That is what keeps a simple setup from turning into a day of guesswork.
Step 1: Get the domain (or confirm you control it)#
Buy the domain from a registrar you can reliably access, or confirm the one you already own is in an account you control and can edit.
Before you go further, check three things:
- The domain status is active.
- Auto-renew is turned on.
- You can find and edit the DNS panel without help.
If any of those is unclear, fix it now. The setup gets easier once you stop wondering whether somebody else still controls the domain.
Step 2: Pick the host (choose the ecosystem you already live in)#
Choose the provider that matches how you already work. The best host is usually not the one with the longest feature list. It is the one that creates fewer moving parts for you.
| Provider | Choose it if... | What to confirm before you pay |
|---|---|---|
| Google Workspace | You run your work in Google Drive and Meet and you want straightforward admin | Plan details, storage, number of addresses you can create, custom domain support, support channels |
| Microsoft 365 | You live in Office and Teams and you prefer Outlook-native workflows | Plan details, storage, custom domain connection steps, support channels |
| Another hosted email provider | You want email on your domain without changing your whole workflow | Custom domain support, mailbox management options, support channels |
The practical question is not which provider is objectively best. It is which environment you will actually keep organized. If you already spend all day in Google or Microsoft tools, staying inside that network usually makes administration easier.
Step 3: Create your first mailbox and durable addresses#
Create the primary identity first, usually [email protected].
Then decide which supporting addresses should exist from day one. The usual durable ones are [email protected], [email protected], and, if you sign agreements or collect paperwork, [email protected].
At this step, make one operational decision and write it down: which addresses are aliases that feed one inbox, and which are separate mailboxes with their own owners? That distinction matters later when you are troubleshooting missed mail or handing work off.
A simple check helps here:
- You know who monitors each address.
- You know whether replies land in one inbox or several.
- You know what counts as a timely response for each one.
That last point sounds small, but it is part of making the setup durable. billing@ is not useful if nobody notices payment questions for three days.
Step 4: Point the domain to your email host (MX records)#
This is the moment when the domain starts delivering mail to the right place.
Add the exact MX records your provider gives you in the DNS panel for your domain. Those records tell the internet where incoming mail for your domain should go. If you are switching providers, clean out old MX records so you are not leaving conflicting routes in place.
Then wait. DNS changes can take time to propagate, and this is where people often create confusion by making more edits before the first change has settled.
Use a short verification sequence:
- Confirm the provider shows the domain as connected.
- Send a test message from an outside address to your new business address.
- Wait for inbound delivery to work before you start troubleshooting anything else.
If receiving is broken, fix that first. There is no point tuning signatures or spam placement while mail is not even landing correctly.
Step 5: Set professional defaults you will not regret later#
Once mail flows, clean up the details clients actually experience every day.
Set your sender name, signature, timezone, and a reusable out-of-office message. Make sure the sender name matches your website and invoices. Keep the signature simple and identifying, not overloaded. Name, role, business name, and site are usually enough.
This is also a good point to set any basic routing you already know you need, such as sending billing@ mail into a billing label or folder. You are not trying to create a full operations machine here. You are just preventing future friction.
If you want the branding side to feel coherent too, match the address format and signature style to the rest of your positioning in How to Manage Your Personal Brand as a Freelancer.
Are your emails authenticated (SPF/DKIM/DMARC), or are you one spoof away from invoice fraud?#
Getting mail delivered is only half the job. The next job is proving that mail from your domain is actually from your domain.
That is what SPF, DKIM, and DMARC are for. They help receiving inboxes verify your sending identity, which matters for trust, deliverability, and reducing the chance that someone impersonates you in a payment or contract thread.
Step 1: Understand the three controls (plain English, operator-level)#
You do not need to become an email security specialist. You just need to understand what each control is doing.
- SPF is a DNS rule that lists which servers are allowed to send mail for your domain.
- DKIM adds a signature to outgoing messages so receiving servers can verify message integrity.
- DMARC sits on top of SPF and DKIM and tells receiving servers what to do when authentication fails. It also depends on alignment with the visible "From" domain.
That alignment point is where people get tripped up. It is not enough for some service somewhere to authenticate. The authenticated sender needs to line up with the domain the client actually sees in the From field.
Step 2: Implement in the safe order (and verify each checkpoint)#
The safest order is simple: SPF first, DKIM second, DMARC last.
- Publish SPF first. Add your provider's SPF TXT value and make sure every service that sends as your domain is accounted for. If you use your mailbox provider plus another tool for invoicing or scheduling, those services need to be accounted for too.
Check: Confirm the SPF record is published and covers the services that send mail as your domain.
- Enable DKIM next. Turn DKIM on in your email host, then publish the DKIM DNS record or records exactly as provided.
Check: Use your host's status page and a DNS lookup to make sure the record exists and matches.
- Add DMARC in monitoring mode. Start with
p=none. That lets you observe what is happening without blocking legitimate mail while you inventory every sender.
Check: Review the reports and look for tools you forgot about. Those often show up here first.
| DMARC policy | What it does | When to use it |
|---|---|---|
p=none | Monitor and report, but deliver all email | First move. Inventory legitimate senders |
p=quarantine | Send failing email to spam | After you verify all real senders authenticate |
p=reject | Block failing email entirely | When you are confident you found every sender |
The key is not to rush enforcement. A common failure mode is tightening DMARC before you have accounted for every tool that sends on your behalf.
Step 3: Run a real-world deliverability test (prove "done").
Once the records are in place, test outside your own environment.
Send one message to a Gmail address you control and one to an Outlook or Hotmail address you control. Open the message details and inspect the authentication results in the headers. What you want to see is simple: spf=pass, dkim=pass, and dmarc=pass.
If one of those fails, fix the sender before you tighten policy. Do not paper over an authentication problem with nicer copy or repeated resend attempts. This is a technical fix first.
How do you keep client info secure and your records audit-ready without building an IT department?#
You do not need a complex setup to be responsible here. What you need is a tight default: protect access, keep important threads centralized, and stop sending more sensitive material through email than necessary.
That combination goes a long way. Authentication protects how the outside world sees your domain. The next layer is making sure your own access and records are not fragile on the inside.
Step 1: Lock the account down like you mean it#
Start with access control. Everything else assumes only the right people are getting in.
Require multi-factor authentication on every privileged account first, especially anything related to your email host and domain control. Then store recovery codes in a place you can reach without relying on the same device used for MFA. Recovery only helps if it survives the same failure that locked you out in the first place.
Also, keep admin access separate from daily work. Use one identity for administration and another for normal sending, calendar, and client communication. The benefit is simple: if a daily mailbox gets phished, it is less likely to hand over your whole domain.
A fast verification pass here is enough:
- Every privileged account has MFA enabled.
- Recovery codes are stored intentionally.
- You are not using the admin identity for routine client work.
Step 2: Build a simple "audit-ready" message flow (and minimize sensitive data)#
After access is protected, focus on where critical threads live.
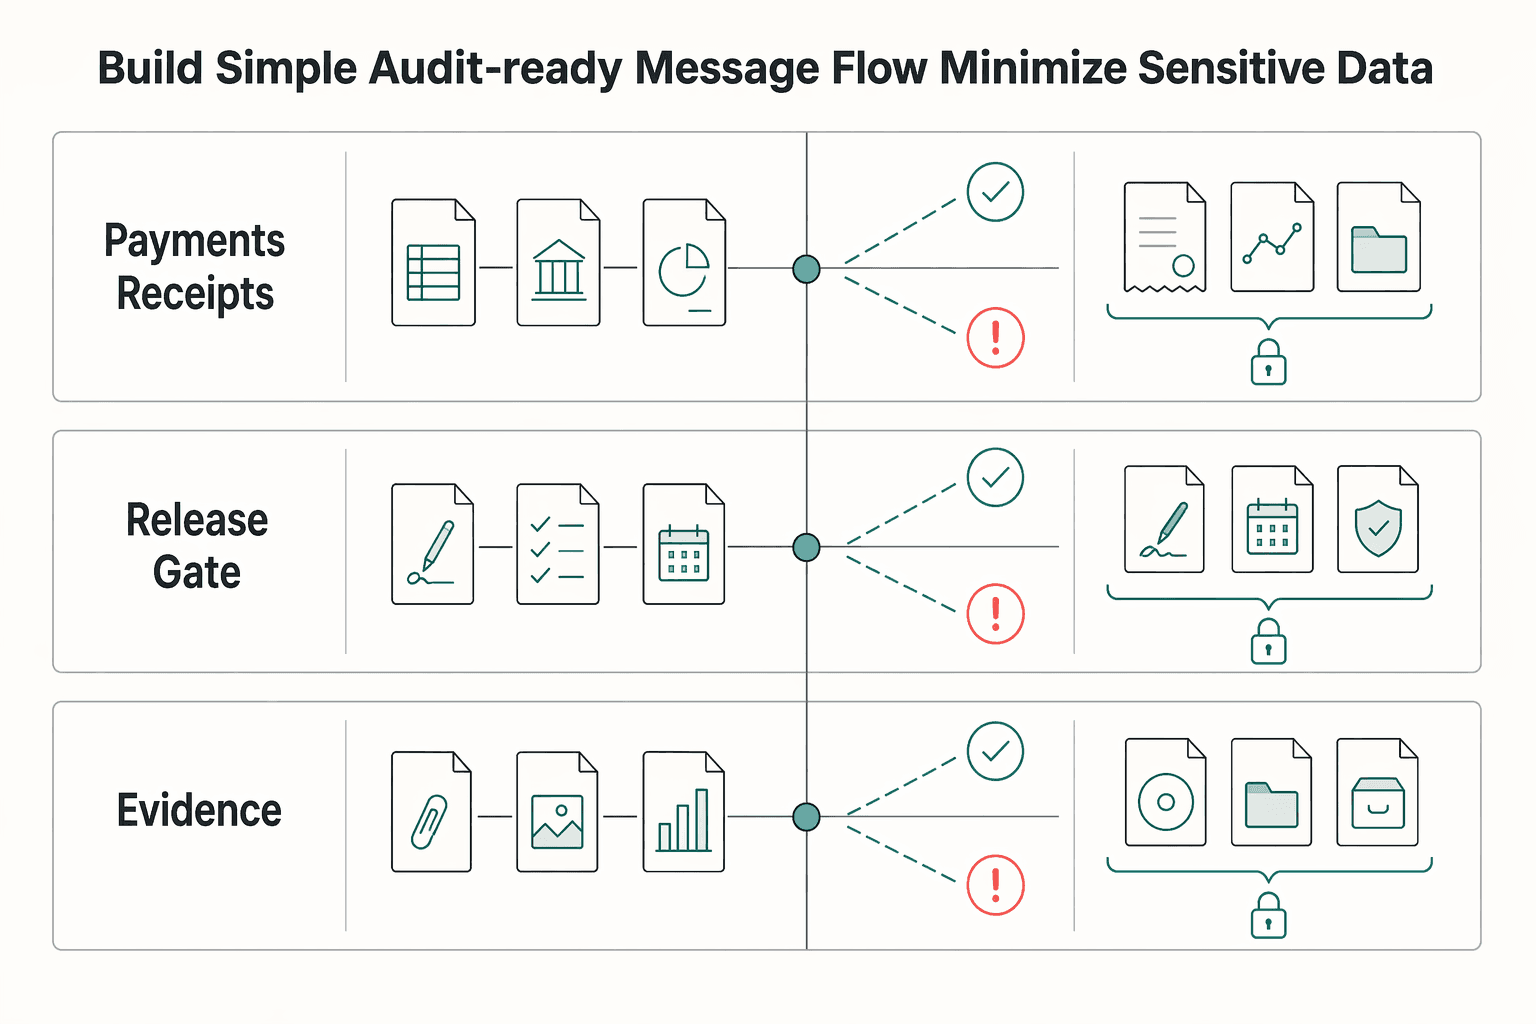
Use role-based addresses for business functions that should stay centralized. [email protected] and [email protected] are useful because they preserve continuity even if your support setup changes. If your platform supports a shared mailbox, that can also work when more than one person needs visibility.
Then set up a folder or label structure that mirrors your real pipeline. Keep it small enough to use consistently. Leads, Proposals, Active Clients, Billing, and Contracts are plenty for most solo businesses.
| Need | Best default | Why it reduces risk |
|---|---|---|
| Payments and receipts | billing@ role-based inbox | Keeps confirmations searchable and centralized |
| Contracts and approvals | contracts@ role-based inbox | Preserves the decision trail |
| Sensitive documents | Portal or secure file-sharing | More control than attachments |
The last piece is data minimization. Email is fine for routine communication, but it is not the best default for sensitive documents. Use a document exchange portal or secure file-sharing when you can, and if you must email something sensitive, keep the scope tight and confirm the recipient through a second channel.
Finally, decide retention and export before you need them. Know what you keep for billing and contracts, what gets archived when projects end, and how you will export data if you need a backup or a provider change later. That turns "audit-ready" from a vague idea into a habit.
The failure modes: common mistakes, quick fixes, and how to recover fast#
Most email disasters are ordinary mistakes made in the wrong order. That is good news because ordinary mistakes are recoverable.
The fastest way out is to separate delivery issues, authentication issues, and access issues instead of trying to fix everything at once. Work the problem in that order, and you avoid turning a temporary problem into a bigger one.
Step 1: If "I changed MX records and now nothing works," restore mail delivery first#
When MX records change, there is often a window where different systems still see different answers. That is why a setup can look half-broken for a while even when the new records are correct. Propagation can take 24 to 48 hours, and sometimes longer.
So slow down and do the basic checks in sequence:
- Compare your MX values with the exact values published by your provider.
- Make sure you are not mixing old mail hosts with the new one.
- Test receiving from a non-domain address before you test anything else.
Receiving is the first checkpoint because it confirms routing. If inbound mail is not reaching the right place, every other troubleshooting step is noise.
A common failure mode here is editing records repeatedly because nothing seems to happen fast enough. That usually makes diagnosis harder. Make the change, verify the values, and give propagation time to do its work.
Step 2: If "My emails go to spam," fix authentication before you rewrite your copy#
Spam placement is often an authentication problem before it is a messaging problem.
If mail from your domain is not properly authenticated, receiving systems have less reason to trust it. So the recovery sequence is technical:
- Publish a correct SPF record.
- Configure DKIM.
- Add DMARC.
- If multiple services send as your domain, make sure all legitimate senders are accounted for.
Only after those pieces are correct does it make sense to look at anything else. In practice, people often waste time rewriting signatures or body copy when the domain itself is still failing basic checks.
Step 3: If "I lost access / got locked out," use the recovery options, not guesswork. If you lose your second factor or get locked out, use your recovery codes first. If that is not available, use the provider's account recovery flow. The important thing is to use the mechanisms designed for recovery, not to keep trying random sign-in attempts and hope one works.
Once you are back in, treat it like a post-incident review. Check your MFA setup, update recovery options, and make sure the recovery path is still available if you lose a device again.
Step 4: If "I used my personal Gmail for everything and need to look real overnight," make the switch in a controlled order. You do not need to change every account in one sitting. Buy the domain, set up the new address, and then update the surfaces that affect trust and payments first.
A safe order is:
- Update first: website contact forms, proposals, invoices, and your email signature
- Update next: billing portals, contract tools, banks, and payment processors
- Update last: newsletters, product logins, and low-risk subscriptions
That order matters because it moves the visible, high-stakes parts of your business first without forcing a chaotic all-at-once migration.
| Failure mode | Fastest safe fix | What to verify before moving on |
|---|---|---|
| MX change broke mail | Match provider MX records exactly and allow propagation time | You can receive inbound mail reliably |
| Spam placement | Configure SPF, DKIM, DMARC | Your domain authenticates mail consistently |
| Lockout | Use recovery codes or account recovery flow, then review recovery options | You can sign in again and still have a recovery path |
| "Need to look legit" | Set up a professional address on your domain, then update critical touchpoints | The new address appears everywhere clients pay or reply |
If you want the operational cleanup to also improve how you present yourself, align the address format and signature with your broader positioning in How to Manage Your Personal Brand as a Freelancer.
Related: The 'Portfolio Approach' to Payments: A Strategy for High-Earning Freelancers.
Your "set it once, correctly" checklist (copy/paste)#
If you want the short version, this is it. The goal is to set the foundation once, verify it, and stop revisiting the same avoidable problems.
Think of this as a deployment checklist for your email identity. Keep it boring, repeatable, and recoverable.
Step-by-step checklist (safe defaults)#
Step 1: Pick your setup level and commit to it. Use the smallest level that matches your real risk, not your aspirational future.
| Level | What you're doing | When it's enough |
|---|---|---|
| Good | Gmail or Outlook plus MFA | Early stage, low volume, you still want basic protection |
| Better | Custom domain with Google Workspace or Microsoft 365 | You want a real professional email identity and portability |
| Best | Custom domain plus SPF/DKIM/DMARC plus role-based inboxes | You invoice, send contracts, and want fewer spoofing and operational risks |
Step 2: Buy or confirm your custom domain. Turn on auto-renew. Make sure the domain is active, billing is current, and you can access the DNS panel without hunting for credentials. If the domain slips, the whole identity layer slips with it.
Step 3: Turn on MFA everywhere and store recovery codes. Enable MFA on your registrar account and your email provider. Save recovery codes in a secure place you can reach if the normal second factor is unavailable.
Step 4: Choose your email host and create the core addresses. Pick the provider that fits how you already work. Create [email protected] first, then add the durable role-based addresses you actually need, such as hello@, billing@, and contracts@. Decide whether they are aliases or separate mailboxes and note who is responsible for each one.
Step 5: Set MX records and verify inbound delivery. Use the exact MX values from your provider. Then send a test from an outside address and confirm the message arrives. Do not move on until receiving works.
Step 6: Publish SPF, enable DKIM, and add DMARC. Start with SPF, then DKIM, then DMARC in monitoring mode. Make sure every service that sends mail as your domain is accounted for. If a sender is missing, you will usually find out here.
Step 7: Run real-world tests and read the headers. Send test messages to Gmail and Outlook or Hotmail. Open the message details and confirm the authentication results show passes for SPF, DKIM, and DMARC.
Step 8: Finalize the operating defaults. Set the sender name, signature, timezone, out-of-office message, and your first labels or folders. Keep the structure simple enough that you will actually use it.
Step 9: Separate admin access from daily work. Keep one admin-only identity for configuration and billing, and use a standard mailbox for normal client communication. That reduces the blast radius if your everyday inbox gets compromised.
Step 10: Decide your retention and export habit. Know what you keep for billing and contracts, what gets archived at project close, and how you would export your data if you needed to switch providers or preserve records.
If you can check every box above, the setup is strong enough to stop being a project and start being infrastructure.
Frequently Asked Questions
Do freelancers need a business email address?
Yes. A business address on your own domain helps separate client work from personal life, gives you more control over your sender identity, and makes it easier to standardize proposals, invoices, and logins. The practical issue is control, since clients, vendors, and tools may all rely on that address.
Is Gmail professional enough for freelancing?
A free @gmail.com address can work when you are getting started, especially if speed matters more than polish. The tradeoff is less control and less separation. A solid middle ground is to use Google Workspace on your own domain if you want the Gmail experience with a more stable business identity.
How do I create a business email with my own domain?
Use a domain you control, choose an email host, create the mailbox you want, and connect the domain through DNS so inbound mail routes to that provider. Then update MX records, configure SPF, DKIM, and DMARC, and send test messages to confirm delivery and replies. Verify each step before moving to the next one.
What is the best provider for freelancers: Google Workspace or Microsoft 365?
There is no universal winner. Google Workspace is usually the simpler choice if your work already lives in Google tools, while Microsoft 365 is the more natural fit if you live in Outlook, Office, and Teams. Another hosted provider can also work if it supports custom domains and the admin basics you need.
How much does a freelance business email cost?
It depends on the provider and plan. The simplest way to think about it is as two separate costs: the domain itself and the mailbox service. Compare like with like, because a domain-only purchase or a forwarding-only offer is not the same as a paid mailbox.
Can I get a free business email address?
Sometimes, but you need to verify what free actually includes. Some offers give you forwarding rather than a real mailbox on your domain. If the offer sounds free, check whether you are getting an actual mailbox with its own storage, sending identity, and management options.
What are SPF, DKIM, and DMARC, and do I need them?
SPF, DKIM, and DMARC are standard ways to authenticate email from your domain. SPF authorizes senders, DKIM signs outgoing mail, and DMARC tells receiving servers what to do when authentication fails and helps you monitor abuse. They do not guarantee inbox placement, but they help reduce spoofing and improve trust in mail from your domain.
Try a related tool
Researched and edited by the Gruv editorial team. Gruv builds cross-border billing, payouts, and finance-operations software for global businesses.
Sources
Includes 3 external sources outside the trusted-domain allowlist.
- cisa.gov/audiences/small-and-medium-businesses/secure...trusted
- csrc.nist.gov/glossary/term/Multi_Factor_Authenticationtrusted
- oig.doc.gov/wp-content/OIGPublications/Fraud-Alert_Procu...trusted
- awai.com/2019/02/choosing-a-professional-email-addressexternal
- awai.com/2019/02/choosing-a-professional-email-addressexternal
- facebook.com/groups/copywritersandcontentwriters/posts/20...external
Educational content only. Not legal, tax, or financial advice.
Related Posts

Georgia 1% Tax for Entrepreneurs Without Filing Surprises
Treat Georgia's 1% tax path as a compliance question first and a rate discussion second. The goal is a setup you can defend under review, not a shortcut that fails at filing time.

How to Manage Your Personal Brand as a Freelancer
Your brand is not a mood board. Think of it as the experience people have of your work: the promise you make, the proof you can show, and the way you present yourself across client touchpoints. Get that clear first, and your fit is easier to read from profile to proposal.

Build a Freelancer Payment Portfolio That Protects Cashflow
A strong showcase portfolio can win work, but it serves a different purpose than your payment process. Common portfolio formats include PDF samples and public profiles on platforms like LinkedIn or Behance. Those assets build trust and show fit.