
Quick Answer
Create fillable PDF forms for client onboarding by giving every field a clear job, aligning intake, contract, and invoice data, and testing the form before you send it. Keep only fields you will reuse, make critical items required, prefer structured inputs where possible, and in Acrobat use Prepare Form to add, customize, and verify fields before distribution.
Beyond Fillable: Why Your Documents Are Your First Line of Defense#
Fillable forms give you convenience. Fields designed to do a job give you control. That is the difference between a document that merely collects text and one that reduces vague starts, billing back-and-forth, and cleanup when key client details are missing.
Step 1. Assign a job to every field. Each field should exist for one of three reasons: risk prevention, decision clarity, or automation readiness. A scope field helps prevent fuzzy deliverables. A billing contact field helps your invoice reach the right person with the right details. A decision-maker field helps keep onboarding from stalling by clarifying who can approve what. If a field does not support one of those jobs, cut it.
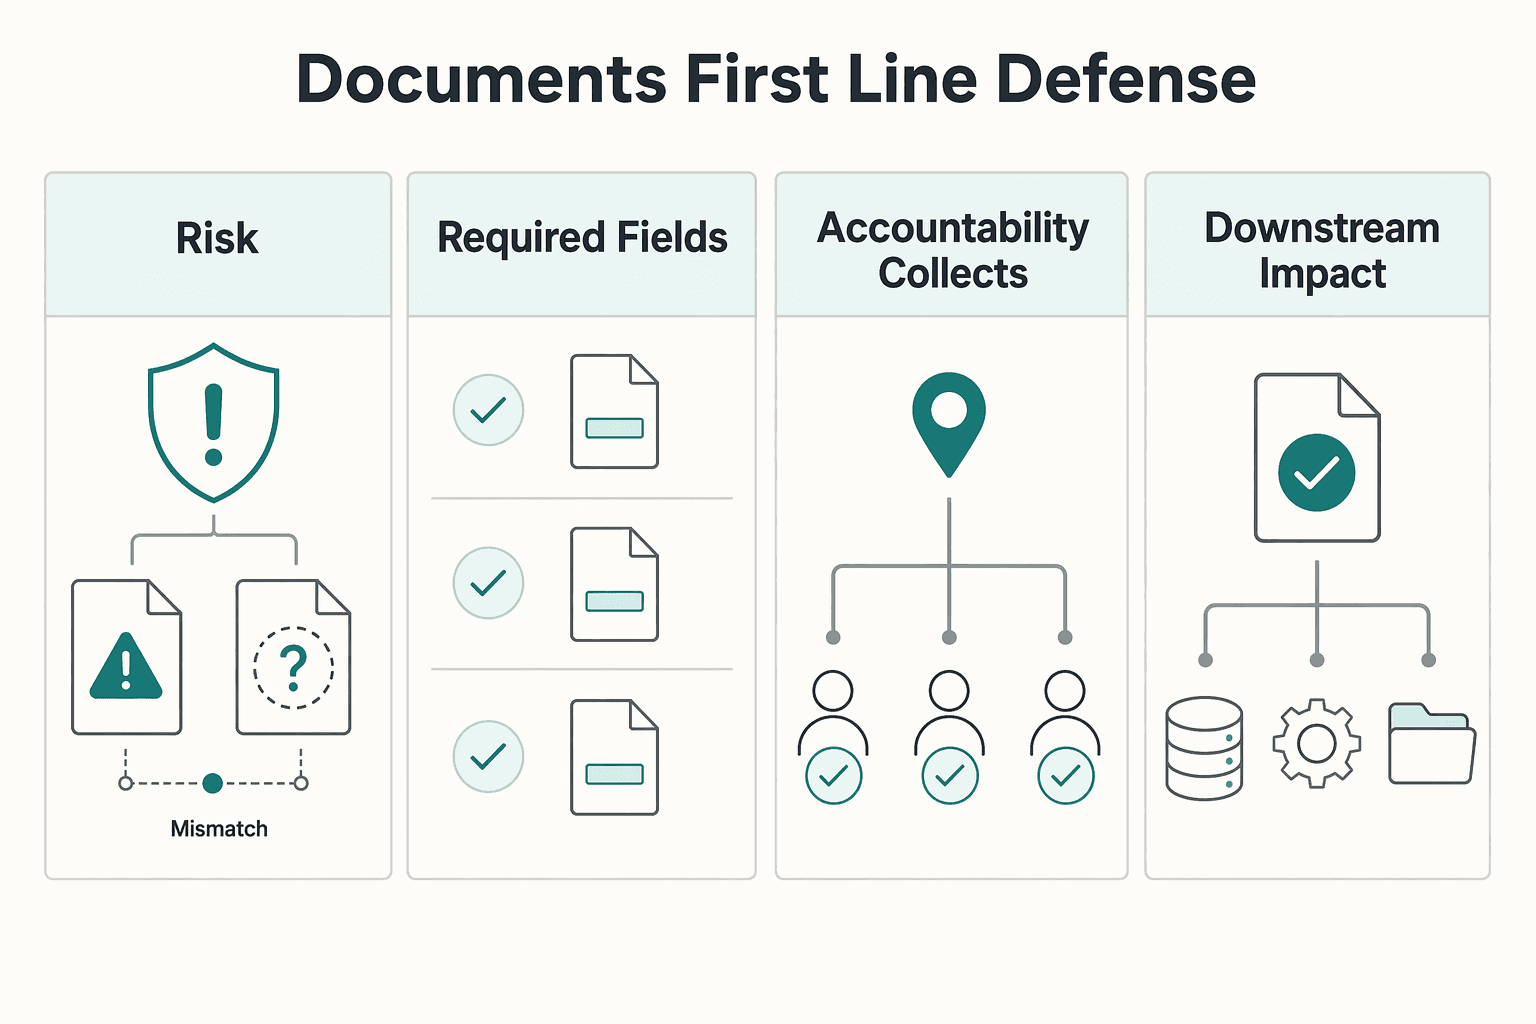
| Practical area | Basic fillable form | Operationally engineered form |
|---|---|---|
| Field design | Adds boxes wherever text appears | Adds fields only where they drive an action or reduce a risk |
| Required fields | Few or none marked required | Critical items required before submission |
| Accountability | Collects information | Identifies owner, approver, billing contact, and next step |
| Downstream impact | Manual follow-up and rework | Clearer contract drafting, invoicing, and project kickoff |
Step 2. Treat contract, invoice, and intake as one chain. Your contract sets scope and boundaries. Your invoice carries the billing details needed to route payment correctly. Your intake form gathers project scope, budget parameters, decision-maker contacts, and timeline expectations before work starts. When those three documents line up, you are working from complete inputs instead of assumptions. The next three sections show how to build each one on purpose.
Step 3. Verify the form before you send it. In Adobe Acrobat, the checkpoint is simple: open the file, add form fields, let Prepare Form auto-detect what it can, then manually customize the fields that actually matter. Group related questions logically. Rushing this step is how you end up with confusing forms people abandon halfway through. For intake, keep completion time under 15 minutes when possible to support completion rates. For a step-by-step walkthrough, see How to Create a System for Naming and Organizing Your Digital Files.
Pillar 1: The Protective Contract & Service Agreement#
Your contract is your boundary-setting system before work starts. Use it to define what is included, what is excluded, how payment works, and how out-of-scope work becomes a paid change.
Step 1. Draft scope as a checklist, not a single broad paragraph#
Do not rely on one generic "services" line. Complete these three fields in plain language before you send for signature:
- Project Scope: State the project purpose clearly enough that someone outside the project can understand the objective.
- Deliverables Included: List each output separately.
- Explicitly Out of Scope: Name common assumptions you are not including.
Add one change-request handoff sentence: if requested work falls outside listed scope or deliverables, you issue a written amendment with updated fee and timeline before that work begins.
Quick QA check: compare this section against your intake answers so optional items are either clearly included or clearly excluded.
Step 2. Replace vague payment language with usable clauses#
Keep payment terms direct. If any threshold is still unverified, mark it as pending signed agreement verification and resolve it before release.
| Clause area | Vague wording | Clearer wording to send |
|---|---|---|
| Payment timing | "Payment due promptly." | "Client will pay on this schedule: milestone dates or due dates pending signed agreement verification." |
| Invoice trigger | "Invoice sent when work is done." | "Invoices are issued at these points: invoice trigger events pending signed agreement verification." |
| Payment method | "Pay by standard methods." | "Accepted payment methods are pending invoice setup verification. Payment instructions are listed on each invoice." |
| Late payment | "Late payments may incur a fee." | "If payment is overdue, the applicable threshold is pending signed agreement verification." |
Before you send it, resolve any pending terms and confirm these terms match your proposal and invoice setup.
Step 3. Separate draft editing from final signature workflow#
Finish drafting first, then move to your signing/finalization workflow and store records where you can retrieve them later.
If you are working in a platform that supports both draft modes, use the mode required by the form:
- Some workflows allow offline drafting in Microsoft Word and online editor drafting.
- Offline drafting may be the default recommendation, but some forms require the Online Editor.
- In offline drafts, required inputs may appear as gray fields with chevrons.
- Do not delete chevrons during drafting; they are removed automatically when the document is finalized.
- After offline edits, import the draft back into the project for finalization when your workflow supports it.
Step 4. Run a pre-send QA pass#
Before onboarding starts, run one short release check:
- Verify required fields are complete (party names, scope fields, payment fields, signature fields).
- Check cross-document consistency (client legal name, project title, pricing terms, billing contact).
- Confirm signature readiness (correct recipients, correct sequence if needed, retrievable final record).
- Test the form flow before distribution.
If your tool marks required fields (for example, gray required inputs), use that as your final visual check before release.
We covered this in detail in How to Create a 'Data Room' for a Due Diligence Process.
Pillar 2: The Compliant, High-Velocity Invoice#
Your invoice should do two things at once: get you paid quickly and hold up as a clean compliance record. Before you send it, make sure it includes every required field accounting needs to approve without a clarification loop.
Step 1. Build an invoice minimum data set before you send anything#
If a missing field repeatedly blocks approval, make it mandatory in your template. Use this minimum data set as your pre-send checklist:
- Your legal entity details: legal business name, business address, and your invoicing tax identifier where applicable.
- Client legal entity details: registered business name and registered billing address (not internal nicknames).
- Tax identifiers where relevant: client tax ID, VAT ID, or tax-form requirement pending issuing-authority verification based on the transaction.
- Billing contact ownership: the person or team that owns invoice approval, plus the AP billing email.
- Invoice controls: invoice number, issue date, due date, currency, line items, subtotal, tax line, total due, and payment instructions.
- Contract match fields: required PO/reference number and project/engagement label that matches the agreement.
A common failure is sending the invoice to your day-to-day contact when AP requires a different inbox, portal, or reference. Capture billing ownership early and reuse it every time.
Step 2. Decide the tax path before you finalize the template#
Do not finalize tax treatment from summaries alone; verify it against primary requirements before issuing the invoice.
Use a simple path:
- Is this domestic or cross-border?
- Is this B2B or another scenario?
- Document the tax fields and wording for that path, with variable requirements pending issuing-authority verification.
For EU clients, request the VAT ID early and verify it if your treatment depends on it. If validation fails, pause and resolve tax handling before you send the invoice.
Step 3. Compare your template against an approval-ready version#
A payment-ready template is complete, readable, and easy for AP to code without interpretation.
| Template type | Field completeness | Tax handling | Approval readiness |
|---|---|---|---|
| Weak invoice template | Brand name only, missing legal names, billing owner, or reference fields | Vague/free-text tax line | Triggers follow-up on ownership, routing, and coding |
| Better but still risky | Legal names and totals present; client tax fields optional; billing ownership unclear | Tax amount included, but jurisdiction handling not verified | May pass simple cases, stalls on cross-border or procurement-heavy clients |
| Compliant, payment-ready template | Required legal entity data, relevant tax identifiers, billing ownership, invoice controls, contract match fields | Tax path verified before send; pending fields resolved | AP can approve, book, and pay without clarification |
Standardized formatting helps here. If totals, dates, and labels are hard to scan, payment slows down.
Step 4. Run a pre-send validation pass. Before you send any invoice, run a short QA check:
- Recalculate line items, subtotal, tax, and total.
- Confirm consistency with the contract: legal names, scope label, price, milestone trigger, due date, and PO/reference fields.
- Check approval readability: grand total, due date, payment method, and billing destination should be obvious at a glance.
If AP asks the same question repeatedly, fix the template itself, not just that one invoice. For pricing structure context, see Value-Based Pricing: A Freelancer's Guide.
Pillar 3: The Seamless Client Intake Form#
Your intake form should be your single source of truth for onboarding data. When you collect core details once in a structured format, you reduce re-entry mistakes across your contract, invoice setup, and project handoff.
Step 1. Capture only fields you will reuse downstream#
Build the form as an operating record, not a casual questionnaire. Mark blocking fields as required, and use structured inputs (dropdowns, checkboxes, radio buttons) where possible so answers are easier to reuse than open text.
| Intake field | Required | Data owner in your process | Validation intent |
|---|---|---|---|
| Legal business name and billing address | Yes | Assign who verifies before document prep | Prevent informal or incomplete entity details from being reused in formal documents |
| Primary project contact name and email | Yes | Assign who confirms before kickoff | Keep the day-to-day contact clear before onboarding starts |
| Billing / accounts payable contact | Conditional (required if billing goes to a different contact) | Assign who confirms before first invoice setup | Prevent invoice routing delays and approval loops |
| Service request or project summary | Yes | Assign who normalizes wording for internal use | Keep contract label, invoice label, and project naming aligned |
| Workspace access email(s) | Optional | Assign who confirms before invites | Reduce avoidable access/setup delays |
| Preferred communication channel and timezone | Yes | You define options; client selects | Set communication defaults early and reduce handoff confusion |
If you are building a fillable PDF in Acrobat, use Tools > Prepare Form. You can start from an existing file or a scanned document, then mark blocking fields as required before distribution.
Step 2. Map each intake field to one destination#
Only collect data you can route to a clear next step. Even with manual copy-and-paste, this map reduces avoidable errors.
- Legal business name and billing address -> contract draft fields and invoice setup fields
- Billing contact -> invoice destination and approval-routing notes
- Project contact and access email -> project workspace invite list
- Communication channel and timezone -> onboarding message and scheduling defaults
- Project summary -> scope draft and engagement label
Before rollout, submit one test response and trace each field into your actual workflow. Use Acrobat's distribute step if relevant to collect responses centrally, then verify the same values flow into each downstream touchpoint without retyping.
Step 3. Set working norms inside the form#
Set boundaries in intake so expectations are clear before work starts.
- Official communication channel: channel pending client communication-policy confirmation
- Standard response expectation: response window pending signed agreement verification
- Primary working timezone: timezone pending client confirmation
- Exception or escalation path: escalation contact or process pending onboarding-team confirmation
If your needs are simple, a basic form tool with required fields may be enough. If you need a reusable PDF version of an existing document, Acrobat can fit that workflow, but one source flags a tradeoff of about $15-20+ monthly and a steeper learning curve for simple forms. Related: How to Create a Client Welcome Packet That Wows.
Choosing Your Tool: A Strategic Framework#
Choose your stack by workflow role and risk, not by brand. Pick one tool path for form capture, one for PDF editing, and one for signature execution based on what can fail in each document type.
Step 1. Match the tool category to the document job#
| Tool category | Best-fit use case | Data handling model | Audit trail strength | Field logic depth | Integration fit | Handoff friction | Main tradeoff |
|---|---|---|---|---|---|---|---|
| Browser form builder | Intake questionnaires and quick client data capture | Responses are typically processed or stored in the vendor cloud | Verify submission history and record export options | Often supports required fields and conditional logic; verify your exact needs | Usually easier when the rest of your workflow is online | Low for clients, but may require a second step for PDF/contract output | Faster completion, but third-party data handling |
| Desktop PDF editor | Existing PDF reuse, strict layout control, scanned-document conversion | Can be edited locally before sharing | Verify document-history controls in your process | Strong for fixed field placement and layout precision | Often needs separate send/sign steps | Medium when recipients must handle PDF files directly | Better layout control, more file management |
| E-signature tool | Contracts and approvals where signer evidence is required | Document routing usually runs through the signature service | Verify evidence capture and exportability before rollout | Typically centered on signature fields, not deep intake logic | Useful when you need send-sign-complete flow in one system | Usually low for signers | Strong signing workflow, but document prep may still happen elsewhere |
Step 2. Check the implementation details that break first#
Run one end-to-end setup test before you standardize. In Acrobat, confirm your build path in Tools > Prepare Form, then validate against current Adobe desktop documentation/release notes if your interface looks different from older tutorials.
For browser editing, confirm you are adding real form fields, not just annotations. In Lumin's documented flow, you sign in, go to Fill & Sign, then open Form Builder and add a text field.
Also check upload limits and data notices before rollout. pdfFiller states uploaded documents may be analyzed by AI, and it lists limits of 100 MB for PDF and 25 MB for DOC, DOCX, RTF, PPT, PPTX, JPEG, PNG, JFIF, XLS, XLSX, or TXT.
Step 3. Verify the signature layer as evidence, not design#
If the file will be signed, treat signing as a separate control point. Before launch, verify these capabilities in your selected signing workflow:
- Identity evidence: requirement pending signing-workflow verification
- Signer consent capture: requirement pending signing-workflow verification
- Tamper-evident logs: requirement pending signing-workflow verification
- Exportable records for storage with the final document: requirement pending signing-workflow verification
Quick tool stack by document:
- Intake form: start with a browser form builder when completion speed matters; use Acrobat when you must preserve an existing PDF format.
- Contract: prepare the document in your editor, then send it through a dedicated signature step (for example, Request signatures or equivalent).
- Invoice: generate from your invoicing source, export PDF for delivery/records, and add signatures only if your approval process requires them; keep the signature requirement pending approval-process verification.
This pairs well with our guide on How to Create a Brand Style Guide for a Client.
Conclusion: Your Documents, Your Fortress#
The practical goal is simple: use your documents to control scope, payment, and onboarding. You are not polishing paperwork for its own sake. You are building three outcomes you can verify in day-to-day work: clear scope, invoices that are easier for accounting to process, and complete client data before delivery starts.
- Step 1. Lock the contract to the actual agreement.
Your contract should produce one checkable result: a signed record that matches the work, payment terms, and boundaries you discussed. Before you send it, confirm you are using the current template, that all required fields are present, and, if signature evidence matters, that you explicitly enabled Request e-signature in the send flow and saved the completion record with the final file.
- Step 2. Make the invoice easy for accounting to approve.
The operational test is not whether the invoice looks good. It is whether the client can process it without avoidable follow-up for missing legal details, tax fields, or corrected totals. A single bad formula or missing jurisdiction-specific field can create back-and-forth, so keep the invoice, supporting client details, and any tax or jurisdiction requirement still pending primary-source verification together.
- Step 3. Collect intake data once, not twice.
Your intake form should leave you with complete information, not a follow-up email chain. Test the form yourself, make only truly necessary fields required, and verify the handoff into your folder or onboarding steps. If you use a vendor template, check scope and plan limits first. For example, Factorial states fillable PDFs are only available on Enterprise plans, and its official document templates are limited to Spain Modelo 145 and US Form W-4.
- Step 4. Operate this on a regular cadence.
Review your templates, field requirements, and automation handoffs on a schedule that fits your workflow (for many teams, weekly works). Check that the source PDF or DOCX is current, required fields still match what you need, and any signer-standard, court-rule, or tax-form requirement still pending verification has been reviewed before use.
That is how you create fillable PDF forms that do more than collect text. They help you work with fewer avoidable surprises and more confidence in what happens next.
You might also find this useful: How to Create a Client Portal in Notion.
Frequently Asked Questions
How should you handle contract signing?
Do not assume a specific e-signature tool is legally required. Verify the current legal standard for your jurisdiction and contract type, then keep the signed file and any completion record together.
How should you handle invoice totals and tax math?
Use calculation fields only after testing them on a real invoice. Test decimal pricing, one discount, and one tax line before sending. One wrong formula can break deposits, discounts, or tax totals and create payment disputes.
How should you handle sensitive client intake data?
Confirm where the data goes and who can access it before choosing the tool. Web forms can be easier for clients, while desktop editing can provide tighter document control with more manual handling. Verify the vendor's data handling and keep only the fields you need.
How should you handle tax forms in onboarding?
For non-EU tax forms, including W-8 or W-9 handling, treat the requirement as pending issuing-authority verification. Use the current form and instructions from the issuing authority before adding it to the onboarding workflow.
What should you verify on EU invoices and VAT setup?
Start with your VAT route before editing the invoice template. If you use the cross-border SME scheme, file one prior notification in your Member State of establishment and stay within the EUR 100 000 Union turnover ceiling. Wait until your MSEST grants and confirms the EX number before treating selected supplies as VAT exempt, and keep records of the prior notification, EX number confirmation, and the quarterly turnover report. SMEs applying the SME scheme are allowed to issue simplified invoices, and the registration process should not take longer than 35 working days unless additional anti-evasion investigations are needed.
Should you use OSS for EU work?
Use OSS only if it fits your transaction type after verification. Register in one Member State of identification, and remember OSS returns are additional obligations rather than a replacement for your domestic VAT return. OSS returns are quarterly in the Union and non-Union schemes and monthly in the import scheme. If your cross-border VAT position is unusually complex, check whether a VAT Cross-border Ruling request is available in the participating EU country where you are VAT-registered and follow that country's national VAT-ruling conditions.
Try a related tool
Researched and edited by the Gruv editorial team. Gruv builds cross-border billing, payouts, and finance-operations software for global businesses.
Sources
- cdc.gov/mmwr/volumes/73/rr/rr7306a1.htmtrusted
- courts.wa.gov/formstrusted
- dodcio.defense.gov/Portals/0/Documents/CMMC/AG_Level2_MasterV2....trusted
- govinfo.gov/content/pkg/FR-1995-11-07/pdf/FR-1995-11-07.pdftrusted
- gsa.gov/sell-to-government/step-1-learn-about-govern...trusted
- irs.gov/irb/2026-01_IRBtrusted
- media.cadc.uscourts.gov/opinions/docs/2025/08/25-5091-2130273.pdftrusted
- memphis.edu/currproc/docs/acalog-manual-7.pdftrusted
Educational content only. Not legal, tax, or financial advice.
Related Posts

Value-Based Pricing for Freelancers Under Real Payment Risk
Value-based pricing works when you and the client can name the business result before kickoff and agree on how progress will be judged. If that link is weak, use a tighter model first. This is not about defending one pricing philosophy over another. It is about avoiding surprises by keeping pricing, scope, delivery, and payment aligned from day one.

How to Create a Freelance Client Welcome Packet That Actually Protects You
**A welcome packet is one of the first repeatable documents that shows a client you run this like a real business, and it starts doing that work before the kickoff call even happens.**

The Freelance Payment Penalty: A Modeled Audit of Platform Fees, FX Spreads, and Payout Delays
The money rarely disappears through a single, easy-to-spot fee. The real loss is stacked. A marketplace takes its commission, a processor adds a charge for international cards, a bank or payment company converts the currency at a spread, a platform holds the funds before release, and a wire sheds a little to intermediaries on the way in. Each layer looks defensible on its own, but the worker feels the combined result as a smaller deposit and a later payday.