
Quick Answer
Start by mapping access before layout: decide which Notion databases are ever client-facing, assign one owner per shared page, and mark each document as client-facing or internal. Then build a hub plus your Clients, Projects, and Tasks structure, publish filtered linked views, and keep drafts outside the client area. Test with a guest account before sending links, and do not rely on filtered views alone for protection. Keep it stable with a weekly review, a SOW reconciliation note, and one exception log.
Build a Notion client portal that feels premium to clients and safe for your business#
Start with control rules before you design anything. A polished portal helps, but the real win is client confidence without giving up operator control. The main risks are simple: permission drift, unclear ownership, and internal material leaking into a shared view.
That matters because native Notion does not offer row-level permissions for database entries. If you use a global database model with 1 database per item type, a common baseline is 3 databases: Clients, Projects, and Tasks. That structure is efficient internally, but a linked view from those databases can expose records you never meant to share. Before you build pages, decide which databases can ever be client-facing, which stay internal, and who owns updates on every shared page.
Set the minimum professional baseline#
Start with the smallest setup that keeps the portal clear and limits exposure. A good portal does not need every feature on day one. It needs clean navigation, named ownership, and one source of truth for current status and client decisions.
| Set now | Define per workflow |
|---|---|
| Which databases are exposed to clients | How much detail each service area needs |
| A visibility flag for records or pages that can be shared | Status labels, approval steps, and reporting format |
| Role-based visibility rules in plain language, including what is enforced manually in Notion vs a portal layer | Who comments, approves, or edits by client type |
| One source-of-truth page and one update owner per portal | How often you publish updates |
Your first checkpoint is simple. Open the portal as if you were the client and verify that they can see only approved pages and records, and only the fields you intend to expose. A common failure mode is assuming a filtered linked view is enough protection. It is not a substitute for explicit sharing decisions and live testing. Before you build the first page, prepare your access map, your visibility flag, and your page ownership list.
You might also find this useful: A guide to using Notion 'Databases' for freelance project management.
What should you prepare before building your portal?#
Before you open Notion, prepare five inputs: one access model, one owner per shared area, and one pre-share verification pass.
| Step | Owner | Verify |
|---|---|---|
| Set your operating baseline | workflow owner | each task links to one project, each project links to one client, and each shared item has one named owner |
| Map visibility before page building | client account owner | every document is marked client-facing or internal |
| Turn contract edge cases into operating notes | contract owner | each item is tagged client summary or internal only |
| Define data and liability boundaries | data/process owner | sensitive data location, access roles, and portal exclusions are explicitly listed |
| Run the share-readiness gate before building | portal owner | role-based access is set, each shared page has one owner, and guest testing passes |
Step 1. Set your operating baseline. Choose your base structure first. If you use the common 3-database setup (Clients, Projects, Tasks), lock that in before building views. Add a Person property in the client database up front so access can be assigned correctly. Owner: workflow owner. Verify: each task links to one project, each project links to one client, and each shared item has one named owner.
Step 2. Map visibility before page building. Decide what clients should see and what stays internal before you create shared pages.
| Client-facing pages | Internal workspace | Why it matters |
|---|---|---|
| Final SOW, approved timeline, current deliverables | Draft SOWs, negotiation notes, scope debates | Avoids draft language being treated as approved |
| Decision log, next steps, contact path | Private commentary, staffing notes, risk notes | Gives clients clarity without exposing internal judgment |
| Approved files, onboarding instructions, live status | QA checklists, handoff prep, blocker notes | Keeps the portal useful while protecting working notes |
Owner: client account owner. Verify: every document is marked client-facing or internal.
Step 3. Turn contract edge cases into operating notes. For SOW, NDA, governing law, and force majeure, write a one-line plain-language note explaining the delivery and communication impact. Keep full legal text in signed documents, not portal pages. Owner: contract owner. Verify: each item is tagged client summary or internal only. If local legal detail is needed, verify the current requirement from the signed contract, policy, client, or source records before using it in the portal.
Step 4. Define data and liability boundaries. Decide whether the portal will show only project status or also personal data. If personal data is involved, confirm whether a DPA is needed in your document set. Treat indemnification similarly: brief portal context only, full terms in the signed agreement. Owner: data/process owner. Verify: sensitive data location, access roles, and portal exclusions are explicitly listed. If local legal detail is needed, verify the current requirement from the signed agreement, policy, client, or source records before adding it to the portal.
Step 5. Run the share-readiness gate before building. Treat sharing as a separate checkpoint. Test with a guest account, open each linked view, and confirm clients can access only approved pages and records. Owner: portal owner. Verify: role-based access is set, each shared page has one owner, and guest testing passes.
Once this gate is green, move to the next decision: template for speed or custom build for tighter control.
If you want a deeper dive, read How to Create Fillable PDF Forms for Client Onboarding.
Should you use a template or build from scratch?#
Start with a ready-made template unless it fails your real approval, access, or maintenance needs. The goal is not just to stand up a portal fast. It is to reduce operational risk so one client request, one scope change, or one sharing mistake does not force a rebuild later.
Use your prep work to judge how the portal will behave under live use. A template helps when it already fits your core databases, your client-facing document boundaries, and the way one person will maintain it each week. Build custom when you can already see workarounds piling up before launch.
| Decision point | Adapt a template | Build a custom core |
|---|---|---|
| Approval flow complexity | Often workable if approvals follow one visible path | Consider this when approvals vary by client, service, or project stage |
| Permission architecture | Often workable if shared areas are predictable and easy to separate from internal pages | Consider this when access needs differ across clients or content types |
| Change control | Often workable if scope changes can be logged in one place without duplicate updates | Consider this when scope updates, decision logs, and timelines need tighter alignment |
| Weekly maintenance ownership | Often workable if one owner can update status, files, and next steps from a small set of linked views | Consider this when a template forces page-by-page cleanup or repeated sharing checks |
A common breaking point is scope change handling. If the template puts approvals in one place, timelines in another, and final client decisions in a third, teams can start missing updates. That is when the portal becomes the thing you have to explain around instead of the thing that keeps everyone aligned.
Run a go or no-go check before you build#
-
Test scope mapping. Can the template represent your actual Clients, Projects, and Tasks structure without manual side notes? A practical bar is that each client-facing item ties back to a project and client, and approved scope is easy to find. If not, build a custom core around those databases first.
-
Test document handling. Can you keep client-facing documents in one clear location while keeping internal notes outside the portal? A practical bar is that each document is clearly labeled for audience and has a named owner for updates.
-
Test admin overhead. Can one person maintain the portal weekly without hunting through scattered pages? A practical bar is that this owner can update status, deliverables, and next steps from a stable hub. If you manage multiple clients, this is where a master dashboard earns its keep.
-
Verify the build path. Review whether the setup you chose supports the required databases, permissions, and later automations. If you are adapting a template, strip it down to the minimum client hub and relink only what passed your checks. If you are building custom, start with the core databases and one clean client portal page. Add views only after permissions and document placement are proven. That decision sets up the next step: build the minimum professional version first, not the prettiest one.
Need the full breakdown? Read How Agencies Run Notion Teamspaces as a Client System of Record.
How do you build a Minimum Professional Portal in Notion step by step?#
Build in this order: hub page first, source database second, client-facing docs third, status governance fourth, and launch review last. Starting from a blank page and locking the structure before views keeps you from rebuilding links, statuses, and permissions later.
| Step | Action | Verify |
|---|---|---|
| 1 | Create the hub page first | A new client can open the hub and identify current phase and next action in under 30 seconds |
| 2 | Build one source database before any client views | Every client-facing row maps to one client, one project, one owner, and one status |
| 3 | Separate client-facing docs from internal drafts | In guest testing, approved docs are visible and internal drafts are not |
| 4 | Set status governance and ownership rules | No active item is missing owner, due date, or status |
| 5 | Run launch review before sharing the portal link | Navigation is clear, shared access matches intent, and one person owns weekly updates |
Follow the build order, not your design impulse#
- Create the hub page first. Start with a blank page named for the client portal. Add a top callout block with client name, primary contact, project owner, current phase, and next review date. Under it, add only the pages clients need quickly: summary, timeline, deliverables, approvals, notes, payment touchpoints, and docs. If you handle multiple clients, link each portal from one master dashboard after your first portal works cleanly.
Verify: A new client can open the hub and identify current phase and next action in under 30 seconds.
- Build one source database before any client views. Create the core database, then define properties before you create linked views. Use stable fields such as
Client,Project,Status,Owner,Due Date, andClient Facing, and keep naming consistent (Project | ...,Task | ...) so filtering stays clean. If helpful, add separate Tasks and Projects subpages, but keep both tied to the same source data.
Verify: Every client-facing row maps to one client, one project, one owner, and one status.
- Separate client-facing docs from internal drafts. Keep one docs area in the portal for approved client-facing files, and keep draft or internal files outside the portal. This keeps the portal readable for clients and reduces accidental exposure during sharing. If uploaded files affect the portal, record any plan limit in the launch checklist only after verifying it from the provider, policy, or source records. For onboarding flow, align this with your client welcome packet.
Verify: In guest testing, approved docs are visible and internal drafts are not.
- Set status governance and ownership rules. Decide your status options once, keep them short, and avoid overlap. Require one owner per active item, and make that owner responsible for status updates. If timeline and task views disagree, treat that as a structure issue and simplify until one source controls both.
Verify: No active item is missing owner, due date, or status.
- Run launch review before sharing the portal link. Test with the exact guest-sharing setup you plan to use. Check each role-specific view, confirm linked databases do not reveal unintended pages, and confirm docs stay in the intended client-facing area. Where guest limits, sharing limits, or file constraints affect launch, record only the detail verified from the provider, policy, or source records.
Verify: Navigation is clear, shared access matches intent, and one person owns weekly updates.
Pre-launch pass or fail checklist#
- Step 1 pass: Hub clearly shows phase, owner, and next action. Fail if basics are hard to find.
- Step 2 pass: One source database powers all client views. Fail if records are duplicated or views were built before structure stabilized.
- Step 3 pass: Client-facing docs are visible and internal drafts are not. Fail if internal material is reachable.
- Step 4 pass: Every live item has one owner, one due date, and one status. Fail if accountability is split.
- Step 5 pass: Guest tests match intended access for each role-specific view. Fail if any linked view exposes unintended content.
When this passes, share with one test client or internal reviewer first, log exactly how access was granted, then continue to the secure-sharing checks in the next section.
Related: How to Create a Project Timeline in Notion.
How do you share the portal securely without creating confusion?#
Share by access zone, then test what each person can actually open before you hand off. Use least-privilege and need-to-know as your default: grant only the minimum access required for the task. This matters even more if you manage multiple clients in one master database, because published 2025 guidance still noted limits around sharing only part of a database safely.
| Portal zone | Who gets access | Include | Exclude | Risk if misconfigured |
|---|---|---|---|---|
| Client hub | Invited client guests | Project summary, timeline, approved deliverables, next actions | Internal notes, staffing comments, draft approvals | Clients see unfinished or irrelevant material and confidence drops |
| Client docs and approvals | Invited client guests involved in review/sign-off | Final SOW, approved files, decision-ready approvals, clear version labels | Negotiation history, internal legal comments, superseded drafts | Outdated or partial documents are treated as current |
| Internal ops | Internal team only | Risk notes, escalations, internal decisions, prep notes | Anything intended as final client-facing truth | External access reaches internal commentary |
Use this handoff checkpoint every time:
- Assign roles by zone. Invite people to the smallest necessary area, not by habit.
Verify: Each invite has a named business reason.
- Check page structure before sending links. Review shared pages and their subpages.
Verify: Access matches your intended boundaries at every level.
- Test effective access. Open the portal through the same route the client will use.
Verify: They can access only the pages you intended.
- Inspect linked exposure. Open every linked database, mention, and document from the client view.
Verify: Nothing leads to multi-client or internal-only content.
- Log exceptions. Record who requested the change, what changed, why, and who approved it.
If a client asks for edit access, decide in this order: page, business need, scope impact, rollback plan, approver. If the request touches approvals, records, or shared databases, hold access until review is complete and record the current approval threshold only after verifying it from the contract, policy, client, or source records.
For a step-by-step walkthrough, see How to Automate Client Onboarding with Notion and Zapier.
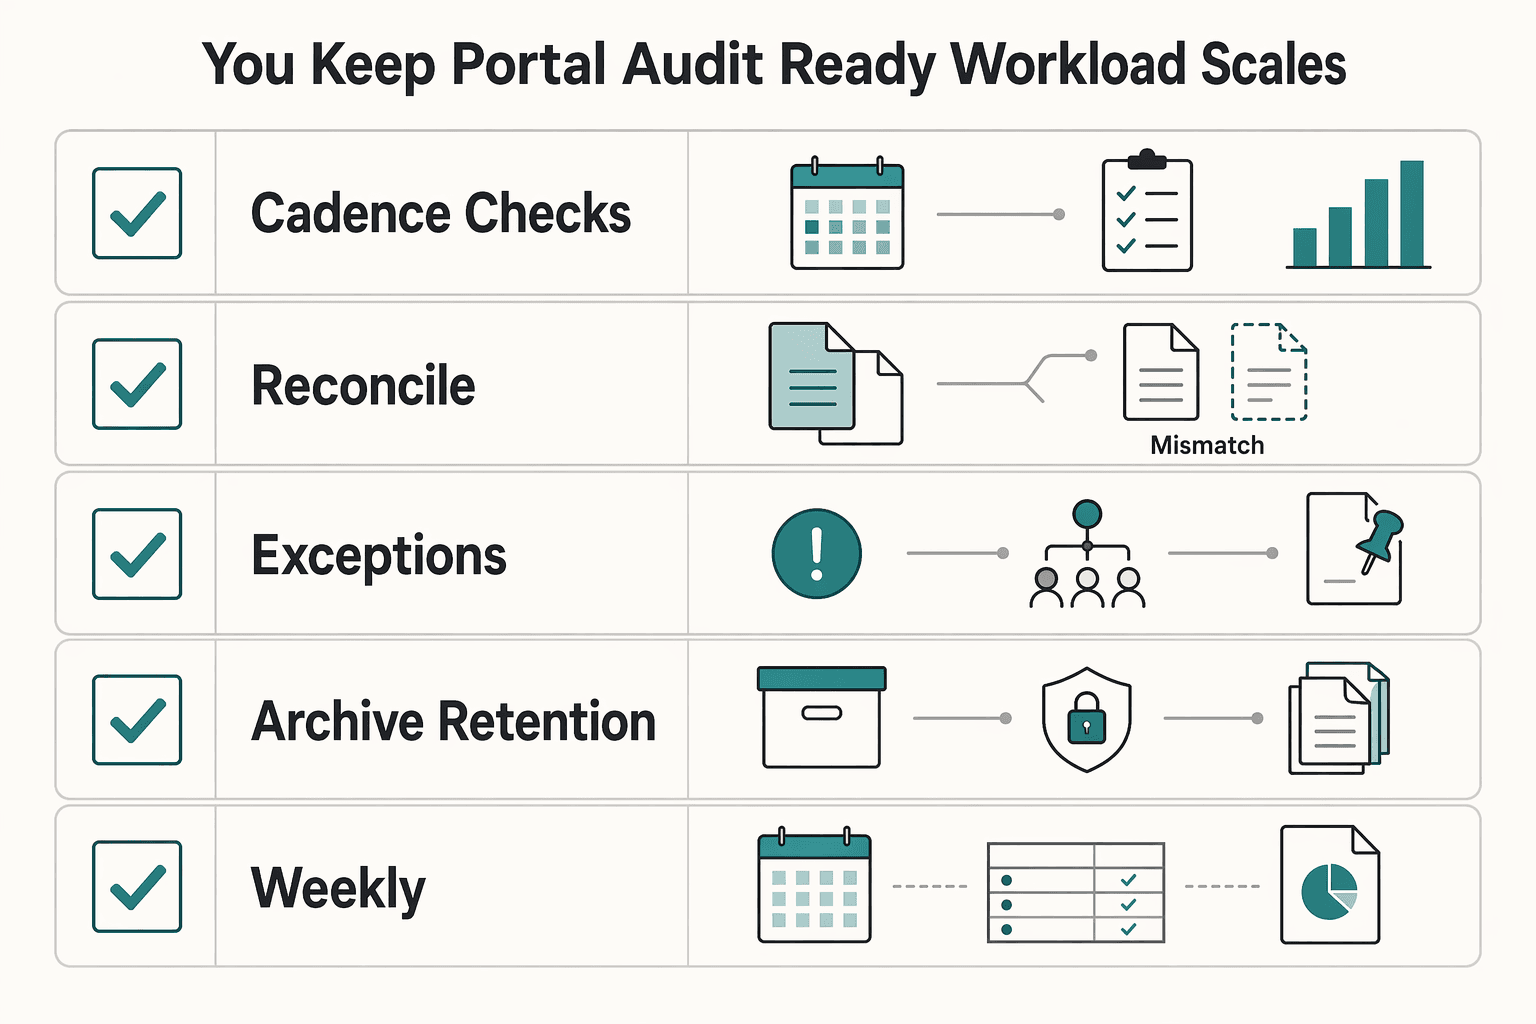
How do you keep the portal audit ready as your workload scales?#
As workload grows, portal drift is the main risk. Keep one governance loop in place: run cadence checks, reconcile scope and legal docs, route exceptions through one escalation path, and close work with a clear archive decision.
| Control | Action | Evidence | Verify |
|---|---|---|---|
| Cadence checks | review active client pages in the project tracker using saved views | Dated review note plus updated ownership fields on active client pages | Every live page shows one owner, one next action, and no unexplained change |
| Scope and legal reconciliation | compare the signed SOW with visible deliverables and deadlines in the portal | Short SOW-to-deliverable reconciliation note on the client record | Each visible deliverable maps to current scope or a documented exception |
| Escalation path | log blocked approvals, missing client inputs, and expanded-access requests in one exception log, then route to the named approver | Exception entry with requester, requested change, reason, approver, and outcome | No client-facing change appears without a matching log entry |
| Archive and retention decision | decide what stays visible, what is locked, and what leaves active views | Archive note with owner, date, and reason | Closed items are removed from active views, and retention/removal rationale is recorded |
If updates live across email, chat, and scattered pages, you lose time reconstructing what changed. Keep briefs, notes, feedback, documents, and your project tracker database in one portal hub so your review happens in one place.
| Review rhythm | Use it when | What to check | Pass looks like |
|---|---|---|---|
| Weekly | Active clients have frequent edits, deadlines, or approvals | Recent page changes, ownership fields, client-facing Calendar deadlines, internal Board blockers | Each active client page has one owner, one next action, and no unexplained change |
| Monthly | Delivery is steady and change volume is lower | Structure drift, stale pages, saved views, archive candidates, unresolved exceptions | No orphan pages, no unclear ownership, and only current instructions visible |
| Event-triggered | Scope changes, approval disputes, handoffs, pauses, or offboarding | SOW-to-deliverable reconciliation note, access changes, exception log, archive decision | Portal state matches the new reality, and the reason is documented |
- Cadence checks
Action: You or your operator review active client pages in the project tracker using saved views (client-facing Calendar, internal Board with To Do, In Progress, Review, Completed). Evidence artifact: Dated review note plus updated ownership fields on active client pages. Verification: Every live page shows one owner, one next action, and no unexplained change; if page history is available, use it to spot-check moved or removed content.
- Scope and legal reconciliation
Action: Your client-facing owner compares the signed SOW with visible deliverables and deadlines in the portal. Evidence artifact: Short SOW-to-deliverable reconciliation note on the client record. Verification: Each visible deliverable maps to current scope or a documented exception.
- Escalation path
Action: You log blocked approvals, missing client inputs, and expanded-access requests in one exception log, then route them to the named approver. Evidence artifact: Exception entry with requester, requested change, reason, approver, and outcome. Verification: No client-facing change appears without a matching log entry.
- Archive and retention decision
Action: At close, pause, or reset, you decide what stays visible, what is locked, and what leaves active views. Evidence artifact: Archive note with owner, date, and reason. Verification: Closed items are removed from active views, and retention or removal rationale is recorded.
After this baseline is running, you can expand your system with A Guide to Notion for Freelance Business Management. If you also want to tighten relationship tracking, pair it with How to Use Notion as a CRM.
Common mistakes that break client portals and how to recover fast#
When your portal starts breaking, recover by simplifying first: reset to a small core, fix access boundaries, then restore clear ownership and logging before you reopen to clients.
- Step 1: Reset to a minimum core first.
Use this as your triage checklist for the reset: Hub, Deliverables, Timeline, Approvals, and Legal-doc rails. This is your recovery baseline, not an official Notion standard. Remove or hide anything that does not support an active client need right now, especially duplicate views or extra modules that force clients to hunt for answers. Use one full-page database in a Table layout as your checkpoint, with only the properties needed to run current work. If files are getting misplaced or conversations are getting lost across channels, your setup is too spread out. Verification: from the hub, the client can reach the next deliverable, next date, and approval path in one click each.
- Step 2: Split client-facing pages from internal legal context.
Review Share settings for every legal page and every page linked from the portal home. Keep client-facing legal documents separate from internal notes, redlines, and dispute-handling commentary. Invite clients as guests only to the approved home page and approved linked pages. Before reopening, run a quick access pass as if you were the client: click the hub, legal-doc rails, and linked deliverable views. Verification: clients only see approved pages, and no internal-only legal commentary is exposed.
- Step 3: Re-establish ownership, cadence, and traceability.
Assign one accountable portal owner. Use a Person property so ownership is visible, a Status property so stage is visible, and an internal Board view grouped by Status so movement is easy to review. Set one update cadence and keep one exception log for blocked approvals, scope questions, and access requests. This prevents conflicting updates and missing decisions. Verification: each live item has one owner, one current Status, and each unusual change has a matching exception-log entry.
| Failure pattern | Likely root cause | Immediate fix | Prevention control |
|---|---|---|---|
| Client cannot find the latest answer | Too many modules or duplicate views | Reduce to the five-part reset core | Remove any module that does not support active delivery |
| Client sees the wrong document | Shared links and legal pages were not reviewed together | Recheck Share settings and relink only approved pages | Keep client-facing legal pages separate from internal legal context |
| Status is outdated or conflicting | No single owner or no shared update rhythm | Assign one owner and normalize live item status | Keep Person, Status, and one review cadence |
| Decisions disappear into chat or email | No exception log | Record requester, blocker, approver, and outcome in one place | Require portal changes to map to log entries |
After urgent cleanup is stable, use A Guide to Notion for Freelance Business Management as an optional next step. For file-delivery workflows, How to Use Google Drive for Client Collaboration and File Delivery can help.
Launch with a system you can trust#
Launch when three conditions are true: clients can only see approved pages, every live item has one owner, and your legal documents control delivery decisions. Treat this as an acceptance test, not a publish button.
| Readiness check | Template path | Custom path |
|---|---|---|
| Structure fit | Choose this if the homepage, approval flow, and page types already match how you deliver. | Choose this if you need to shape the portal around your delivery logic from day one. |
| Cleanup load | Ready when you are removing a few blocks, not relabeling half the portal. | Ready when you can name the minimum pages and core operational databases before launch. |
| Client clarity | Ready when a client can find status, next action, and approved files from the hub quickly. | Ready when your master client dashboard is already clearer than templates you tested. |
| Maintenance risk | Lower at launch if you strip unused modules before sharing. | More upfront work, but stronger fit if templates keep fighting your scope or approval controls. |
Launch sequence#
Step 1. Confirm scope and ownership. Set the signed SOW as the operating boundary in the portal, and assign one owner to each live item plus one owner for the portal system. Verify: each client-facing page has a clear purpose, and each active record has one named owner.
Step 2. Choose template or custom. Keep the template path only if it fits your current delivery model without heavy rework; switch to custom if you keep deleting or renaming core parts to make it usable. Verify: the hub includes only pages that support active delivery now.
Step 3. Build one hub with linked views. Publish a master client dashboard and connect linked views from your core operational databases so clients see filtered information without touching source records. Verify: from the client view, the next deliverable, next date, and current approval item are easy to find.
Step 4. Use legal documents as controls. Treat the SOW as scope control, the NDA as confidentiality control, and the DPA as data-handling control where applicable; add plain-language notes that flag governing law, confidentiality terms, DPA applicability, and required clauses for verification from signed agreements, policy, client, or source records before use. Verify: approved legal documents are visible to the client, and portal content does not extend beyond those controls.
Step 5. Test access before invite. Review sharing with a test guest and click through every linked page in the client path to catch unintended exposure. Verify: no internal notes, redlines, or private views are reachable from client access.
Step 6. Publish onboarding and fallback support. Add a welcome page with first steps, response points, and one contact path for unclear requirements; for onboarding structure, use How to Create a Client Welcome Packet That Wows, and if requirements are still unclear, Talk to Gruv before launch. Verify: a new client can start, respond, and get help without leaving the portal flow.
Step 7. Lock in governance now. Schedule a weekly review before client access begins. Verify: the review checks scope drift, stale items, ownership gaps, and permission mismatches every week.
Copy and paste launch checklist#
- SOW boundary is visible in the portal, and every live item has one named owner
- Template or custom path is selected, and unused client-facing modules are removed
- Master client dashboard is live with linked views filtered for client visibility
- NDA and DPA controls are noted where relevant, with jurisdiction-specific points flagged for verification
- Test guest pass is complete, and no internal content is reachable through shared links
- Welcome page is published with first steps, approval points, and a contact fallback
- Weekly governance review is scheduled for status, ownership, scope, and access control checks
Related reading: How to Create a Brand Style Guide for a Client.
Frequently Asked Questions
How do I create a client portal in notion step by step without overbuilding it?
Build the spine first: create the homepage, create the data page, and create your master databases before you decorate anything. Then give the client one clear entry point they can save as a single bookmark, and keep the client-facing side limited to what they need to act on now. Your check is simple: open the hub like a client and confirm they can quickly reach the current work and next action.
What should a client portal include at minimum for professional client delivery?
Start with the concrete core: one homepage, one data page, and your master databases. Then keep the client view tight and focused on what they need right now. If a page does not help the client understand current status or the next action, hide it.
Is a client portal template in Notion enough or should I build custom?
Use a template when speed matters and your delivery model is still straightforward, but treat it as starting material, not a finished answer. The official Notion Marketplace has many templates, which is helpful, but it can also replace blank-page panic with choice overload. Build custom when the template fights how your clients actually review and work. If you keep deleting and relabeling half the template, that is your sign to stop forcing the fit.
How do I share a Notion portal securely while keeping internal notes private?
Invite clients only to client-facing pages and review linked pages before you send the invite. Do not give clients “full access” unless you have a very specific reason. “Can edit” or “can comment” is usually the real decision point, and the better choice depends on the client’s role and how comfortable they are in Notion. Before launch, click through the portal from the client side and make sure no internal notes or private views appear.
Can Notion work as a professional portal for freelancers handling complex SOW terms?
It can, if you keep the portal focused on clear, current client information and deliberate sharing permissions. Use it to centralize updates in one place, and adapt the structure because client workflows vary. For complex contract terms, treat the portal as an operating view, not a replacement for the contract itself.
How do I keep a Notion portal audit ready as clients and projects increase?
Keep your review process simple and repeatable. Recheck sharing levels (“full access”, “can edit”, “can comment”) based on the client’s role and Notion experience, and confirm only client-facing content is visible. A practical checkpoint is that the homepage still leads to the current work and next action without exposing internal notes.
What should I do first if my portal is messy and clients are already using it?
Stop adding features and reduce the portal back to the minimum professional shape before you try to improve it. Separate client-facing pages from internal context, recheck sharing, and keep one clear client entry point visible while you clean up the rest. If you are deciding between "new template" and "repair what exists," choose repair first when clients are already active, because access confusion is a bigger immediate failure than an ugly layout.
Try a related tool
Imani writes about the human side of professional control—setting boundaries, offboarding gracefully, and protecting your reputation under pressure.
Sources
Includes 2 external sources outside the trusted-domain allowlist.
- dol.gov/sites/dolgov/files/ETA/publications/2004_02_...trusted
- dot.ca.gov/-/media/dot-media/programs/research-innovati...trusted
- govinfo.gov/content/pkg/FR-2013-02-06/xml/FR-2013-02-06.xmltrusted
- macpac.gov/wp-content/uploads/2026/03/03-05-26-and-03-0...trusted
- macpac.gov/wp-content/uploads/2025/09/09-18-25-and-09-1...trusted
- wwwnc.cdc.gov/eid/content/18/7/pdfs/v18-n7.pdftrusted
- agencyhandy.com/create-a-client-portal-in-notionexternal
- diva-portal.org/smash/get/diva2:1459935/FULLTEXT01.pdfexternal
Educational content only. Not legal, tax, or financial advice.
Related Posts

How to Create a Freelance Client Welcome Packet That Actually Protects You
**A welcome packet is one of the first repeatable documents that shows a client you run this like a real business, and it starts doing that work before the kickoff call even happens.**

A Guide to Notion for Freelance Business Management
If your workspace feels busy but fragile, you do not need more pages. You need one connected system. Treat your freelance business like a business-of-one and use Notion as the control layer that connects client decisions, delivery, and billing in one place.

How to Respond to a Subpoena for Business Records
Move fast, but do not produce records on instinct. If you need to **respond to a subpoena for business records**, your immediate job is to control deadlines, preserve records, and make any later production defensible.