
Quick Answer
Separate Wise from ConnectWise first, then connect the correct Wise Business profile to the intended Xero organization in Settings > Connect and Manage apps > Xero. Keep scope narrow by enabling core sync before add-ons, map each active currency to a uniquely named Xero bank account, and run one inbound and one outbound test with expected-versus-actual notes. Expand only after both records post to the right destination.
Connect Wise to Xero without reconciliation surprises#
Short answer: To connect Wise to Xero without reconciliation surprises, first confirm you mean Wise rather than ConnectWise, connect the correct Wise Business profile to the correct Xero organisation, document where each active currency should appear in Xero, and test one real transaction before you turn on more features.
Cleanup usually starts earlier than people expect: when Wise gets confused with the PSA route, currency handling is unclear, or too many features are turned on before the base connection is proven.
Use this sequence to keep setup controlled:
- Confirm the product path before changing any settings.
If client money lands in Wise Business, treat it as a business-account-to-Xero setup first. Wise describes that account as its global business account and says it integrates with Xero. If your accounting flow is centered on ConnectWise PSA, that is a different route, where tools like Wise-Sync and the later WisePay brand may apply. Checkpoint: write down the exact product names in your stack and who owns each login. Red flag: if you list both vendors but cannot clearly say which system holds cash, pause before setup.
- Build a small evidence pack before you connect.
Use a minimal test set: one customer payment, one outgoing payment or fee, and the currencies you actively use. For each currency, note where you expect entries to appear in Xero so review is straightforward. Checkpoint: each active currency has one clearly named destination for review. Failure mode: vague or reused account names can make reconciliation review harder.
- Start with the smallest useful scope.
Do not start by enabling everything. Start with the base connection, confirm you are in the intended Xero organization, and trace one real transaction from start to finish before adding more behavior. Checkpoint: save proof of one transaction appearing as expected in both systems. Tradeoff: this takes longer up front, but it reduces cleanup risk later.
- Use third-party connectors only when your workflow requires them.
If you need a PSA-led flow, mapping depth and validation controls matter. PSA-Sync describes invoice sync that carries line items, tax codes, and customer details, and says validation catches mismatches early. Treat those as must-test fields in any connector path. Flexpoint also notes that ConnectWise acquired Wise-Sync in 2022 and that some users reported limitations after consolidation into WisePay, so document which vendor owns each failure path before you escalate.
Use this copy-and-paste checklist before your first live week:
- Confirm whether your path is Wise Business or ConnectWise PSA
- List active currencies and where you expect them to appear in Xero
- Save one real inbound payment and one outbound transaction as test cases
- Connect the base path first and verify you are in the correct Xero organization
- Trace one transaction from start to finish and keep proof screenshots
- Add extra connector behavior only after the base path is stable
For the reconciliation side, see How to Reconcile Bank Statements in Xero.
Confirm the product names before you configure anything#
The first decision is simple: treat Wise and ConnectWise as different products, then choose the path based on where money actually lands.
First, identify the account that holds cash. If client payments land in Wise Business, start with the native Wise-to-Xero flow. Connect your Xero account to your Wise account, then go to Settings > Connect and Manage apps > Xero in that business account.
Before you change anything else, confirm you can log in to the account that holds the funds and reach the Xero connection area.
Next, keep PSA sync separate from native banking sync. If your workflow is centered on ConnectWise PSA, that is a different route, such as Wise-Sync via the Marketplace. It is not the native business-account connection path.
If you find yourself in Wise-Sync troubleshooting or marketplace documentation when your goal is simply to sync account activity to Xero, reset scope and go back to the product that holds the cash.
Use one rule before you configure anything. If funds land in Wise accounts, start with native Wise Connection settings. Move to a PSA-led connector only when your process genuinely needs to be driven from the PSA.
While setting up Wise Connected accounts, map each currency to an existing or new Xero bank account. Keep account names unique in Xero to avoid setup errors. For a related walkthrough, read How to use Wise to pay yourself a 'salary' from your foreign corporation.
Prepare the accounts and evidence you need before setup#
Most setup problems are easier to prevent than unwind. Prepare first so you can verify outcomes quickly and avoid cleanup later.
| Item | What to note | Why |
|---|---|---|
| Wise profile and Xero organization | Write down the precise entity and organization names | Do not connect the wrong tenant by mistake |
| Wise currency accounts and Xero bank accounts | List them side by side and note the date range you want to monitor after setup | An initial connection can pull in up to 12 months of historical data |
| Controlled test | Keep dates, amounts, currencies, and reference IDs in one note | Compare expected versus actual results |
| Fallback import file | OFX, QIF, QBO, QFX, or CSV | Use manual upload if a feed is unavailable |
Start by confirming access to the exact Wise profile and Xero organization you plan to use. Before setup, write down the precise entity and organization names so you do not connect the wrong tenant by mistake. If access is unclear, resolve ownership and login routing first.
Then list active Wise currency accounts and current Xero bank accounts side by side. Your goal is a clean checklist before transactions start flowing into Xero bank feeds. Xero describes bank feeds as automatic transaction imports, and an initial connection can pull in up to 12 months of historical data. Note the date range you want to monitor after setup.
Validate workflow assumptions before you go live. Capture the currencies involved and the exact result you expect so you can separate setup issues from feature-scope limits.
Build a small evidence pack for controlled testing. Use one real transaction you can verify end to end, and keep dates, amounts, currencies, and reference IDs in one note so you can compare expected versus actual results.
Add one fallback file in a Xero-supported import format (OFX, QIF, QBO, QFX, or CSV). If a feed is unavailable, Xero supports manual upload and states it excludes duplicate transactions during import. Xero also states bank-feed connections are encrypted and cannot be used by Xero to move money. Wise pricing can vary by route or payment method, so recheck pricing at setup time if fees affect your workflow.
You might also find this useful: A Guide to Xero for Freelancers and Small Businesses.
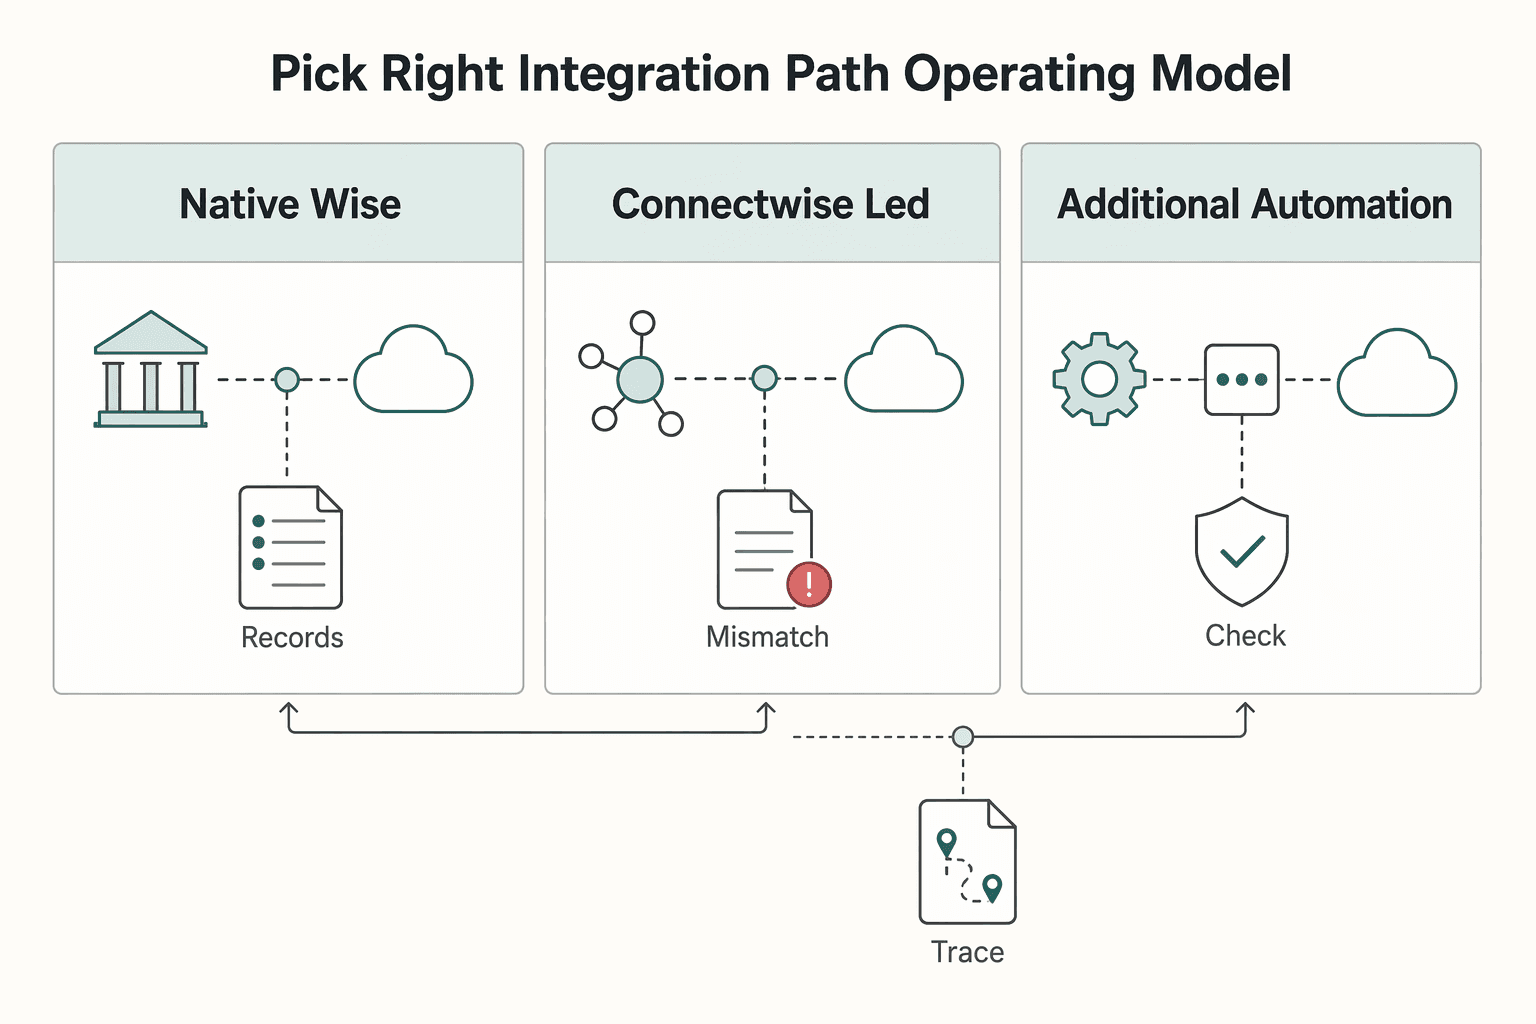
Pick the right integration path for your operating model#
Choose one primary route before setup. If your workflow is mostly money activity flowing into accounting, a direct Wise Business to Xero route can be a practical starting point, with middleware added only when PSA-driven workflows are required. Extra layers can add flexibility, but they also add support boundaries.
Wise defines Xero integration as a third-party app connecting directly to your Xero account, with information flowing between tools in real time. If your operating model is mostly "money activity into accounting," that direct path can be the lower-friction place to start.
| Path | Best fit | What to verify first | Main tradeoff |
|---|---|---|---|
| Native Wise Business + Xero | Teams where Wise is the money account and Xero is the ledger | Correct Wise profile, correct Xero org, currency/account mapping, expected transaction behavior | Direct-connection scope with fewer handoffs |
| ConnectWise-led middleware (for example CloudBanking) | Teams where PSA processes drive invoicing and finance operations | Whether invoices, payments, expenses, and procurements map to your real workflow | Broader orchestration, but another dependency to support |
| Additional automation layer | Only after a proven primary route still has a specific gap | Exact trigger, destination record, duplicate handling, and ownership for failures | More flexibility, but more coordination risk across tools |
CloudBanking markets a ConnectWise-to-Xero sync for invoices, payments, expenses, and procurements, and also advertises a gateway-only mode with 150+ payment processor integrations. Xero's network includes 1,000+ connected apps, so choice is broad, and disconnected stacks can raise duplication risk.
Before rollout, define one creation path and one update path per record type. Loosely connected stacks can create duplicate entries, missed charges, payment-collection delays, extra manual work, and data errors.
Once you choose the route, prove it in a contained test before you scale. Run one payment, one bill-related event, and one attachment through your chosen path, then confirm Xero shows the expected result. If you evaluate middleware, require a trial model first. For example, Flowgear offers a complimentary proof of concept.
For a related walkthrough, see Freelance Finance Automation with Zapier for Stripe, QuickBooks, and Wise.
Connect Wise Business to Xero in the base settings#
Keep the first connection narrow: connect the correct Wise Business profile to the correct Xero organisation, then leave extra features off until the base link is verified.
| Stage | Action | Verify |
|---|---|---|
| Open connection settings | Go to Settings -> Connect and Manage apps -> Xero in Wise Business | You can also start the integration from Xero |
| Check account scope | Confirm the intended Wise Business profile and Xero organisation | Within a Xero organisation, one Wise account can be connected to one Xero account |
| Finish authorization | Authorize the connection with the intended Xero organisation | Wise shows Xero as connected and you see Manage next to Xero |
| Start with core sync | Sync bank feeds and leave other features off | If something is wrong, isolate authorization, mapping, or a later feature toggle |
| Review currencies and mapping | Confirm the currencies to sync and use Edit to change or remove a wrong mapping | Each connected Xero bank account name is unique |
Start in the Wise Business account. Go to Settings -> Connect and Manage apps -> Xero. You can also start the integration from Xero if you prefer.
Before approving, confirm the exact entities. Within a Xero organisation, one Wise account can be connected to one Xero account. If you use multiple profiles or orgs, double-check the names before continuing.
Finish authorization and confirm the connection actually completed. In Wise, Xero should show as connected and you should see Manage next to Xero.
If Manage is missing, treat setup as incomplete and rerun authorization with the intended Xero organisation.
In Connection settings, enable only core sync first. A practical starting point is to sync bank feeds and leave other features off.
That keeps troubleshooting simpler. If something is wrong, you can isolate whether the problem is authorization, mapping, or a later feature toggle.
Then choose the currencies to sync and review the mapping to Xero. After connection, some currency accounts may already appear. Confirm they are correct before saving.
If a suggested mapping is wrong, use Edit to change or remove it. Also confirm each connected Xero bank account name is unique.
For multi-currency setups, activity sync supports over 50 currencies, but available options can vary by region. If something is missing, check region availability first, then recheck selected currencies and mappings.
Before you move on, confirm three things: the right entities are connected, Wise shows Xero as managed, and connected accounts plus sync controls are visible and correct.
If you want a deeper dive, read How to Connect Wise to QuickBooks for Automatic Reconciliation.
Enable features in the safest order#
Turn features on in stages. Start with the easiest behavior to verify, then move to higher-impact automations only after each check passes. This is not a vendor-mandated sequence. It is a practical way to catch data-flow issues before they spread.
| Phase | Enable | Check |
|---|---|---|
| First | Lower-impact sync | Run one controlled transaction test and confirm it appears in the intended place |
| Next | Higher-impact automations | Test one low-risk workflow from start to finish and validate the exact outcome in Xero |
| Last | Document automation in review-first mode | Verify where documents land and how they are handled before you rely on automation at scale |
| For each feature | Keep one controlled test with expected versus actual results and evidence | Confirm whether the connected app's sync model is one-way or bidirectional |
Enable lower-impact sync first. Run one controlled transaction test and confirm it appears in the intended place before you enable anything that changes records across systems.
Enable higher-impact automations next. Test one low-risk workflow from start to finish. Validate the exact outcome you expected in Xero, and if anything is unclear, pause and fix that behavior before widening scope.
Enable document automation last, in review-first mode. Verify where documents land and how they are handled before you rely on automation at scale.
For each feature, log one controlled test with expected versus actual results and evidence. Also confirm each connected app's sync model, because some Xero-connected apps are one-way while others are bidirectional. An app-store listing alone does not guarantee fit for your workflow.
Before you scale automation, tighten invoice consistency so reconciliation stays clean with this free invoice generator.
Map currencies and account names correctly the first time#
Currency mapping is not admin busywork. It is a reconciliation control. If you document how Wise currency activity maps into the Xero accounts you reconcile against, early checks get easier and errors are easier to isolate.
Start with an explicit mapping list. List the Wise currencies you actively use and record the Xero account(s) you intend to reconcile against. Keep the record explicit and standardized, with a unique internal reference for each mapping so you or someone else can verify it quickly later.
This follows a solid reconciliation baseline. Map incoming and outgoing money deliberately, not with broad placeholders.
Use account names that stay clear during review. Clear labels support line-by-line matching and reduce avoidable confusion when accounts are similar.
Automated bank feeds can save time and reduce errors, especially when account purposes are clearly documented.
Validate your mapping in practice before you scale volume. Run a controlled check, confirm transactions land where you expect, and log the result with your reference-number system.
When something does not match, investigate it as part of normal reconciliation flow, especially for missing payments, unexpected fees, and currency conversion differences.
Validate the first week before trusting automation#
A successful connection is only the start. The first week is where you prove whether transactions are actually posting correctly in your books.
Sample real transactions each day from Wise and trace them into Xero. Check amount, currency, date, account, and final ledger impact.
Use a simple pass-or-fail check: each sampled transaction appears once, in the expected account, with no ambiguity. Flag missing entries, duplicates, inconsistent fee treatment, or activity posted to the wrong currency account.
Keep an evidence note for each check, including the transaction reference, supporting screenshot if needed, and the Xero record, so you can compare outcomes across the week.
Verify observed sync behavior before you change mappings. Materials for tools in this category describe both scheduled sync and real-time auto-sync. So "connected" is not enough to diagnose timing issues.
If your setup shows sync status details, record what you see and recheck the same transaction after the next refresh signal. If a manual sync control is available in your setup, use it during investigation. If not, treat timing as unresolved until the next expected refresh window.
Practical rule: separate "not synced yet" from "synced wrong" before you reconfigure anything.
Reconcile a mixed sample so you test workflow outcomes, not just feed activity. Include incoming and outgoing records, and review attachment behavior if document import is enabled in your setup.
For payable-side records, confirm the bill content against your own source documents. If you already run stricter AP controls, keep that discipline here, including three-way matching where applicable.
If your workflow is configured to create records in Draft or Approved status, verify status and details directly in Xero before approving anything downstream.
Track exceptions from day one so repeated issues become visible early. Use a simple log like this:
| Field | What to capture |
|---|---|
| Date and reference | When it happened and which transaction or record |
| Expected vs actual | What should have happened and what occurred |
| Root cause | Confirmed cause or current hypothesis |
| Fix | Action taken |
| Owner and recheck | Who owns follow-up and when to verify |
Capture exact error text when available. In troubleshooting materials for similar toolchains, specific messages such as invalid item code errors or inventory COGS dependency errors can make diagnosis and escalation faster.
If the same exception repeats, pause expansion of that automation path until the cause is fixed.
This pairs well with our guide on How to Use Wise to Pay International Invoices with a US Credit Card.
Fix common failures without creating new ones#
Handle issues as triage first, not as a broad reconfiguration project. Confirm the expected feature, isolate the mapping path, verify the integration route, then escalate with evidence. Avoidable errors can happen when those layers get mixed.
If records are reaching Xero but not reaching the status you expected, narrow the issue to that specific outcome before you change anything else. If the flow involves more than one currency, confirm your Xero setup and workflow are aligned for that use case. Then capture one bill number, payment reference, currency context, and screenshot.
If the feed looks wrong, run a single-transaction test for each active currency. Check, in order, the currency, the destination account in Xero, and whether the transaction appears once.
Change only the path that fails. Avoid broad remaps or account renames in one pass, or you lose a clean cause-and-effect trail.
Reset scope if you may have followed a ConnectWise guide by mistake. Xero connects with 1,000+ apps, so search results can mix different integration paths.
If your payment flow is Wise Business to Xero, stay on that path. If your workflow starts in ConnectWise or another upstream system, treat it as a separate integration route and use the matching troubleshooting flow.
Before escalating, document the exact integration layer where the issue appears. If a third-party connector is involved, name it and show where data stops. Include:
- app path used (for example: Wise Business flow, Wise-Sync, or a ConnectWise-to-Xero connector)
- one transaction reference and expected result in Xero
- exact error text
- scope of failure (all items or only specific currencies or record types)
Exact message text speeds diagnosis. In Wise-Sync troubleshooting, entries are organized by specific errors, including item-code errors, Inventory COGS-related failures, and connectivity-test failures despite correct credentials, so vague reports like "sync failed" usually delay resolution.
If the symptom is still unclear after these checks, pause setting changes and classify the failure by layer first. Related reading: A Deep Dive into Wise's API for Automated Payments.
Add third-party automation only after native stability#
Once the direct flow is stable, add only one external layer at a time. That keeps failures diagnosable and avoids adding tool overhead before the core path is reliable.
First confirm your current workflow is consistently landing where you expect before you add any external automation or PSA-linked connector. If you still cannot quickly tell whether an issue starts in the source system, destination system, or mapping, pause and fix that first.
Add a third-party automation layer only when you can state the exact trigger-action outcome you need and why your current route does not already cover it. Before enabling any connector, verify its own documentation for functionality and region availability.
Use connector catalogs carefully. They can be scoped views, not a full market map. For example, Microsoft's Power Automate connector page explicitly shows only connectors available in Power Automate.
Keep a small evidence pack for the first automation layer:
- exact trigger, action, and expected result
- one test reference
- proof of what ran and what appeared in your destination system
- connector-doc notes on functionality and region availability
Use an additional platform only when your workflow is truly anchored to ConnectWise Manage or PSA processes. ConnectWise is a modular suite, not a single product, and ConnectWise PSA is the system of record for ticketing, projects, and billing. If that system is not driving your workflow, an extra layer can add complexity without a clear benefit.
If vendor trust is part of your decision, validate it directly in the channels you rely on, then roll out one layer at a time.
Build a reusable cashflow control checklist for each new client#
A repeatable client checklist is worth building. The practical sequence is to lock payment terms first, verify current Wise costs for that exact route, then confirm the first live payment matches what you expected before you automate accounting.
Set payment terms and rail before work starts. Put the due date, payment currency, and payment method in writing, then check Wise pricing for that exact route at execution time rather than using old assumptions.
Wise states fees depend on transfer specifics and that you see the fee and exchange-rate breakdown before confirming. If conversion is involved, note Wise's mid-market rate position. If the client will send a USD wire or Swift payment, record the published receiving fee shown for that route, for example 6.11 USD where listed. Save the pricing or preview capture in the client file, because Wise also states fees can change.
Run the same onboarding review every time, and keep it as a short evidence pack.
- invoice terms and agreed payment rail
- Wise transfer preview capture (fee and exchange-rate breakdown)
- route-specific receiving fee assumptions (for example
6.11 USDfor USD wire/Swift where listed) - if cash withdrawal is in scope, the Wise
View ATM feescheck (free allowance, reset timing, and fees from the third withdrawal onward) - first live transaction reference and expected versus actual fee/rate outcome
After the first real payment, compare expected versus actual outcome and update the checklist where anything was unclear. If ATM withdrawals are part of the flow, avoid ATM-side currency conversion when possible, since Wise warns those rates are often unfavorable.
Pair this with basic finance hygiene so payment tracking stays clean: Separating Business and Personal Finances: A Important Step for LLCs.
Then align pricing discipline with payment operations: Value-Based Pricing: A Freelancer's Guide. If monthly send volume may exceed 25,000 USD (or equivalent), recheck Wise discount pricing assumptions before renewal or scope expansion, including cases where that volume is split across multiple transfers.
For marketplace payment-flow context, see How to use 'Stripe Connect' to build a marketplace.
Set it up once then operate it with weekly control checks#
The low-risk model is straightforward: start with a direct Wise plus Xero path, prove it in a controlled first week, and add extra tooling only when you can name the exact gap. Fewer moving parts, frequent reconciliation, and clear exception handling beat a more complex setup that no one can debug quickly.
- Confirm product intent first.
Verify you mean Wise and not ConnectWise before you authorize anything. This keeps you on the right path from day one.
- Confirm account scope and access.
Make sure you are in the correct Wise Business account and Xero organization, and that you can reach the connection settings you need to review after setup.
- Set up the core feed first.
Xero frames bank connection as a one-time setup, with transactions imported automatically after that. Use this as your first layer before adding anything more complex.
- Map connected accounts carefully.
Make each active account mapping explicit and verify transactions land in the intended Xero bank feeds account.
- Enable features one at a time and test each with one known transaction.
Compare expected versus actual results in Xero before expanding scope.
- Run control checks on schedule.
During week one, spot-check daily. After that, move to a weekly exception review. Reconcile often, approve suggested matches, and log the issue, root cause, owner, and fix.
- Use fallback import when the direct connection is the issue.
If needed, upload a PDF statement directly into Xero to keep records moving while you investigate the mismatch.
- Add middleware only after the native flow is stable.
Xero supports a large app network, and PSA-oriented middleware such as Wise-Sync can add extra decision points like "proceed with warning," "halt," or "take no action," which also adds review overhead.
Use this copy-and-paste checklist in your weekly review:
- Confirm Wise vs ConnectWise intent
- Verify Wise Business and Xero access
- Map connected accounts to the right Xero bank feeds accounts
- Enable features in order and test each with one transaction
- Reconcile often and approve suggested matches
- Run a weekly exception review and fix root causes, not symptoms
If your weekly checklist is getting heavy, evaluate whether a single operating model might simplify payment handoffs, such as Merchant of Record for freelancers.
Frequently Asked Questions
Is “connect wise to xero” about Wise or ConnectWise?
This evidence set does not establish which product that phrase refers to. Confirm the exact vendor and product in the documentation for the tool you are using before making changes.
How do I connect Wise Business to Xero step by step?
Step-by-step connection instructions are not supported by the provided evidence. Use current official documentation for your exact account and integration route.
How often does Wise sync data into Xero?
Sync frequency is not established in this evidence set. Treat cadence as unverified until you confirm it in current documentation or controlled testing.
Why are my Wise currencies not syncing correctly in Xero bank feeds?
The provided evidence does not cover Wise-to-Xero currency sync causes or fixes. Treat this as unresolved here and verify troubleshooting steps in official support documentation.
Can every business import bills from Xero into Wise, or are there location limits such as UK availability?
Location or country availability limits for this flow are not supported by the provided evidence. Confirm current eligibility and regional limits in official documentation before relying on it.
Do I need Xero multicurrency for mark-as-paid behavior?
That requirement is not established by the supplied excerpts. Verify behavior in official documentation and with a controlled test before relying on it in production.
What should I do if I actually meant ConnectWise Manage to Xero?
This evidence set does not provide ConnectWise-to-Xero troubleshooting guidance. Treat it as a separate integration path and use product-specific documentation.
Try a related tool
Yuki writes about banking setups, FX strategy, and payment rails for global freelancers—reducing fees while keeping compliance and cashflow predictable.
With a Ph.D. in Economics and over 15 years of experience in cross-border tax advisory, Alistair specializes in demystifying cross-border tax law for independent professionals. He focuses on risk mitigation and long-term financial planning.
Sources
Includes 4 external sources outside the trusted-domain allowlist.
- admisiones.unicah.edu/book-search/GteUXO/1OK028/ConnectwiseProject...trusted
- wise.com/help/articles/2960344/how-does-my-connection...trusted
- gov.uk/set-up-businessexternal
- gov.uk/log-in-file-self-assessment-tax-returnexternal
- marketplace.connectwise.com/cloud-accounting-integration-by-wise-syncexternal
- xero.com/au/accounting-software/connect-your-bankexternal
Educational content only. Not legal, tax, or financial advice.
Related Posts

How LLC Owners Separate Business and Personal Finances
For an LLC, separating business and personal money is best treated as a weekly habit, not a one-time bank setup. It keeps records cleaner, cuts month-end cleanup, and creates clearer boundaries as the company grows.

Value-Based Pricing for Freelancers Under Real Payment Risk
Value-based pricing works when you and the client can name the business result before kickoff and agree on how progress will be judged. If that link is weak, use a tighter model first. This is not about defending one pricing philosophy over another. It is about avoiding surprises by keeping pricing, scope, delivery, and payment aligned from day one.

How to Respond to a Subpoena for Business Records
Move fast, but do not produce records on instinct. If you need to **respond to a subpoena for business records**, your immediate job is to control deadlines, preserve records, and make any later production defensible.