
Quick Answer
Start with a project pre-mortem freelance session before kickoff, then convert the decisions into your SOW. In the Risk Alignment Session, pin down three failure points: invoice approval path, out-of-scope requests, and acceptance criteria. Assign an owner and approval route for each item, and document the update that will appear in contract language. Before signing, run a red-flag read-through so payment timing, change control, and sign-off are explicit in writing.
Why Imagining Failure is Your Most Powerful Business Tool#
If you want fewer project surprises, do the risk planning before launch, not after problems show up. A pre-mortem helps because you assume the current plan has already failed, then work backward to identify what likely caused it and how you will prevent it.
For freelance work, that keeps the conversation on failure modes you can address early. Think deadline pressure, timeline changes, scope creep, and budget concerns. It is easier to test those assumptions before they turn into rework. It is also a practical working format: you surface risks early, capture action items tied to the issues you find, and carry those decisions into later planning.
| Reactive handling | Pre-mortem-led planning |
|---|---|
| Risks are discussed after work starts | Risks are surfaced before launch |
| Timeline drift is discovered mid-project | Timeline pressure is flagged early |
| Scope creep is handled case by case | Scope boundaries are clarified up front |
| Budget issues emerge late | Budget concerns are identified before execution |
| Next steps are vague | Action items are documented against key risks |
The upfront conversation can feel slower, but it gives you a chance to fix a weak plan before launch. For a step-by-step walkthrough, see How to use 'escrow' for a large freelance project payment.
The Psychological Shift: Why Imagining Failure Works#
If you want better risk detail before launch, ask your client to explain a failed outcome, not a successful plan. In practice, that framing pulls out clearer causes you can act on before kickoff.
A pre-mortem is a pre-launch exercise. You treat the current plan as failed, then work backward to identify why and how to prevent it. Used this way, it surfaces concrete risks earlier and helps you agree on prevention steps before they turn into delivery problems.
Step 1 Assume failure to get past kickoff optimism#
Standard kickoff questions can leave you with broad reassurance. A failure-first prompt is designed to make people name specific breakdowns in timeline, scope, and budget.
| Topic | Standard kickoff question | Failure-first prompt |
|---|---|---|
| Timeline | "Any timeline risks?" | "It is six weeks from now and we missed the launch date. What caused the slip?" |
| Scope | "Is the scope clear?" | "The project stalled because the work kept expanding. Where did that expansion start?" |
| Budget | "Any budget concerns?" | "We finished late and over budget. What decisions or assumptions drove that outcome?" |
Use this quality check: if the answer is still generic, keep probing. "Communication issues" is vague. "Three reviewers give feedback with no final approver" is practical.
Step 2 Use the conversation to act like an advisor, not an order taker#
Leading this session positions you as the person helping the client pressure-test the plan before time and budget are committed. You are not just collecting requirements. You are helping define how failure will be prevented.
Keep it concrete so the discussion does not stay theoretical. Ask for observable details: who approves, which inputs are client-owned, what happens when feedback is late, and which assumption would cause the earliest miss.
Step 3 Convert imagined failure into planned controls#
The session works best when it produces action items tied to the risks you surfaced. For each risk, capture the cause, prevention step, owner, and where it will be reflected in project documents.
Then verify follow-through. Those decisions should appear in your proposal, timeline, and payment workflow before launch. Once you have that mindset, the next step is to focus it on the risks most likely to damage the project.
You might also find this useful: A guide to 'Inversion' for de-risking freelance projects.
The Freelancer's Pre-Mortem: Stress-Testing for Catastrophic Risk#
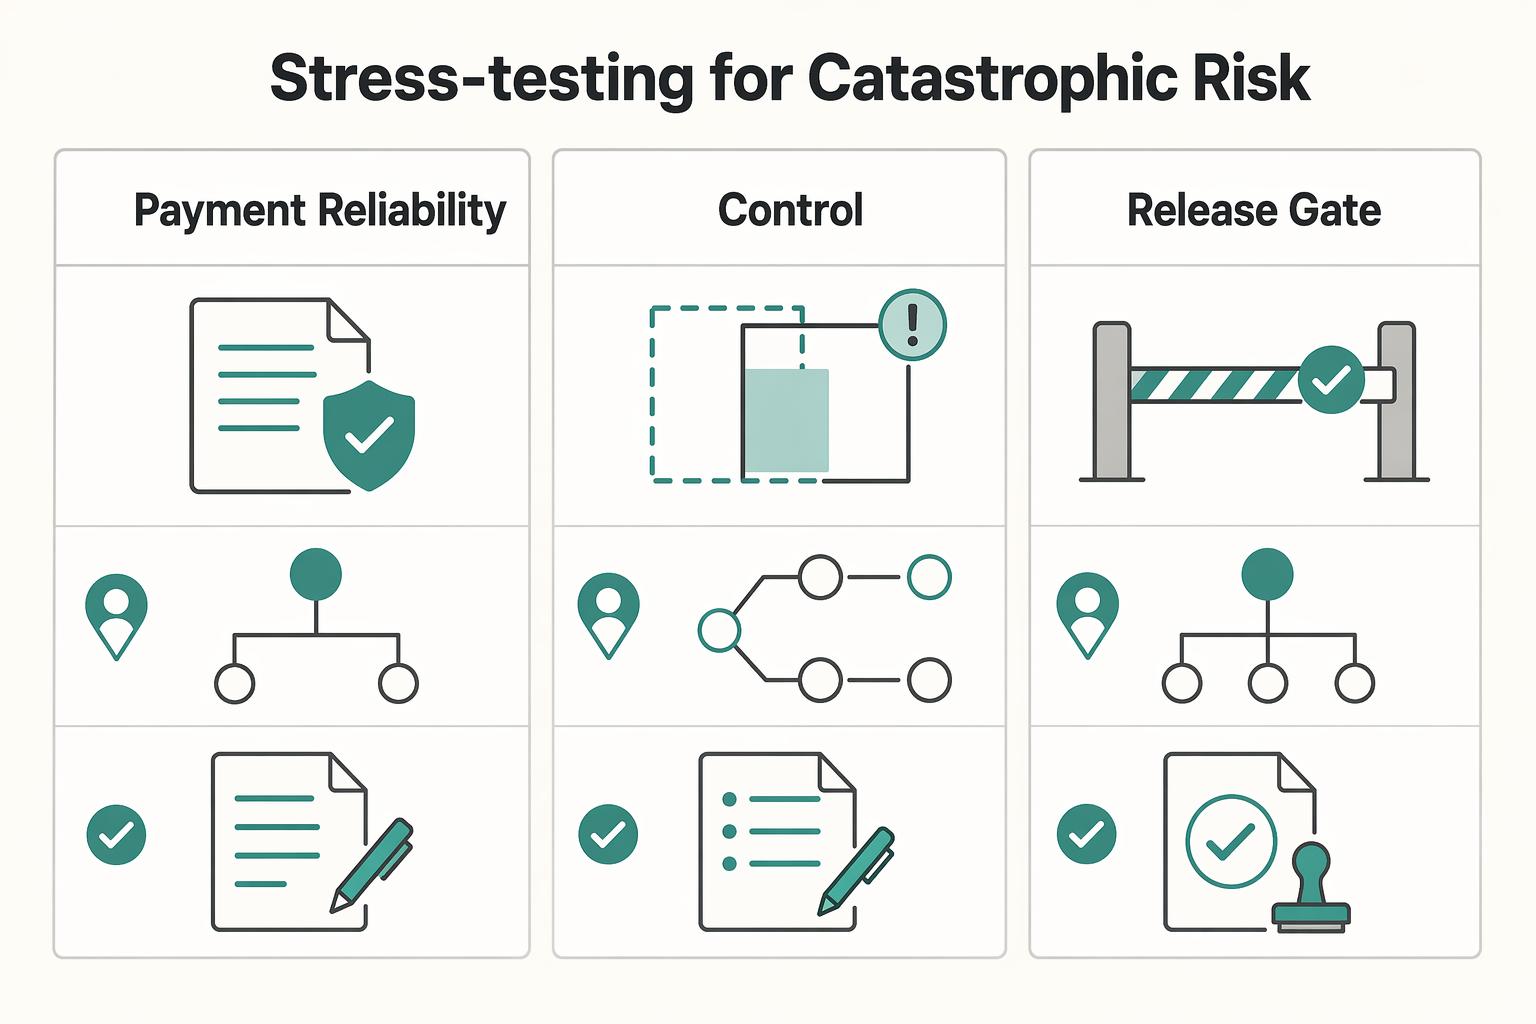
Focus your pre-mortem on three risks that often have the most direct effect on business outcomes: payment reliability, scope control, and acceptance clarity. For each one, leave the session with a decision owner, an approval path, and contract-ready language.
| Risk domain | Imagine this failure | Ask this now | Contract control to trigger | What you document next |
|---|---|---|---|---|
| Payment reliability | "The work is complete, but the invoice is still unpaid and no one can confirm who approves it." | "Who approves invoices, what is your accounts payable path, and what payment date are we agreeing to?" | Payment clause covering date, invoice procedure, late-payment handling, and pause rights where appropriate | Invoicing schedule, approver name or role, billing contact, milestone dates |
| Scope control | "Small extras kept getting added, and the margin disappeared." | "What is out of scope, and who can approve additions before I start them?" | Written change-request process with pricing, timeline impact, and named approval authority | Scope boundaries, change-request format, approval chain |
| Acceptance clarity | "I delivered, but review loops continue because 'done' was never defined." | "Which objective deliverables and review steps count as complete and accepted?" | Acceptance criteria plus acceptance procedure tied to stated requirements | Deliverable list, review window, revision limits, sign-off method |
Step 1 Protect payment reliability#
Start by identifying who actually controls payment, not just your day-to-day contact. Confirm the invoice approver, accounts payable contact, payment cycle, and whether approval happens before or after invoice submission.
| Checkpoint | Confirm |
|---|---|
| Invoice approver | Confirm the invoice approver |
| Accounts payable contact | Confirm the accounts payable contact |
| Payment cycle | Confirm the payment cycle |
| Approval timing | Confirm whether approval happens before or after invoice submission |
| Approver role and path | Name the approver role and describe the exact path from delivery to payment |
Before kickoff, you should be able to name the approver role and describe the exact path from delivery to payment. If the answer is "send it to me and I'll handle it," treat that as incomplete until the path is explicit.
Jurisdiction matters. In NYC, contracts at $800 or more must be in writing. That includes agreements totaling $800 within a 120-day period. If no payment date is written, payment is generally due within 30 days after completion. Treat that as a reminder to define payment timing clearly in the contract, not as a universal rule.
Step 2 Lock scope control#
Scope pressure often shows up through small requests rather than one dramatic change. The practical control is to define customer specifications clearly at the start and set the additions process before work begins.
Set the rules now: who can request a change, who can approve added cost, and how approved changes affect deadlines. Keep one operating rule in place: informal requests do not bypass change control. Your verification point is simple. No extra work starts until scope, fee, and timeline impact are approved in writing.
Step 3 Define acceptance before delivery#
If acceptance is subjective, disputes are predictable. Separate two things: your Definition of Done, which is your internal readiness standard, and the client's acceptance criteria, which are the objective checks against agreed requirements.
Document concrete deliverables, review steps, and final sign-off authority. Tie completion to observable outputs, then define the acceptance procedure, including the review window and sign-off method. When these three risk tests are clear, you are ready to convert them into clear SOW language in the next section.
How to Lead a "Risk Alignment Session" Without Scaring Your Client#
Lead this as collaborative execution planning, not a failure exercise. Your goal is to surface risks early and leave with decisions that can be written into the SOW.
If you frame the session as "success planning," clients may be more willing to share real blockers. If you frame it as "project failure analysis," people may hold back or get defensive.
Before you start#
Keep the room tight. Invite only people with a clear role in payment, scope, acceptance, or dependencies. If someone has no decision or input role, leave them out so the meeting stays focused.
Define the required outputs in advance:
- risk log
- decision owner for each item
- approval path
- SOW update list
- Open as joint planning.
Start with the shared outcome: smoother delivery, billing, and sign-off. Talk track: "Before kickoff, I run a short alignment session to remove avoidable friction in delivery, payment, and acceptance."
If you hear "This feels negative," reframe quickly: "Fair point. This is not about predicting failure. It is about preventing delays and confusion."
- Use prompts that get concrete answers.
Do not ask, "Any risks?" Ask for specific handoffs and decisions:
- "Where does approval usually slow down?" * "What creates surprise work after kickoff?" * "Who signs off before payment is released?" * "What would make delivery feel incomplete?"
If responses are vague, ask follow-ups: "Who is the owner?" and "What happens right before that step?"
- Probe risks and drive present decisions.
Let the client speak first, then map what you hear to payment reliability, scope control, or acceptance clarity.
Watch for two patterns:
- discussion drifts into abstract debate without decisions * participants defer decisions "for later" or stay quiet to avoid pushback
When that happens, bring it back: "What do we need to define now so this does not become a delay later?"
If you hear "We do not have time," narrow the scope instead of skipping the exercise: "Then let us lock payment approval, change approval, and acceptance criteria today."
- Close with assignments, not a recap.
Read decisions back in plain language, confirm owners, and state what gets documented.
Talk track: "I will update the SOW with invoice path, change approval, and acceptance process. You will confirm approver roles and review window."
Treat a risk as closed only when it has all three:
- owner * approval path * document update
Phrasing that lowers friction#
| Ineffective phrasing | Effective phrasing |
|---|---|
| "Let us talk about how this project could fail." | "Let us identify where execution could get stuck so we can prevent it now." |
| "Who is responsible if payment gets delayed?" | "Can we map the invoice approval path so billing is predictable?" |
| "We need to stop scope creep." | "Let us define what is out of scope and how additions get approved." |
| "How do I prove the work is done?" | "What specific deliverables and review steps count as accepted?" |
Meeting output checklist#
Before ending the call, confirm you captured the essentials:
- each risk in specific terms
- a decision owner for every open item
- approval paths for payment, changes, and acceptance
- exact SOW updates to draft next
The meeting itself does not protect the project. Protection starts when those decisions are converted into clear SOW language in the next section.
Turning Session Decisions into Approved SOW Terms#
Your risk session is most useful when each decision is written into your SOW as a clear, approved term. Notes alone will not protect delivery, payment, or sign-off.
Keep one limit in mind: unverified terms are not final terms. Before you send the draft, verify any timing, pricing method, review window, or other item still marked for confirmation.
Step 1 Pull only decisions that change risk#
Take the session outputs and convert each one into draft language your client can approve in writing: payment path, scope-change path, acceptance path, and owners.
If your SOW still uses words like "timely," "as needed," "reasonable," or "to client satisfaction," it may still be too vague. Write who does what, how it happens, and what record proves it happened.
| Risk signal | Weak clause | Clearer draft prompt |
|---|---|---|
| Payment stalls in client workflow | "Invoices will be paid promptly." | Document invoice recipient, submission method, receipt confirmation, review path, and the exact due timing and late-payment handling to verify from the contract, SOW, approval trail, or adviser/source record before use. |
| Extra work appears outside agreed deliverables | "Additional work may be billed separately." | Consider requiring a written Change Order for out-of-scope work, including scope, price impact, timeline impact, and a named approver before work starts. |
| Acceptance becomes subjective at delivery | "Project is complete when delivered." | Define deliverables, review method, reviewer, revision allowance, valid rejection reasons, and the exact acceptance timing to verify from the contract, SOW, or approval trail before use. |
Step 2 Write the payment workflow, not just the price#
Draft the payment workflow end to end: billing contact, where invoices are sent, required invoice details, dispute path, and payment release owner.
Before kickoff, read the workflow back and ask: "If I send an invoice tomorrow, what happens next, and who touches it?" That check can expose missing handoffs, reviewers, or approval steps.
Step 3 Build a usable Change Order sequence#
Keep the process short enough to use every time:
| Step | Include |
|---|---|
| Trigger | Requests outside listed deliverables, revision limits, assumptions, or client responsibilities can trigger a Change Order |
| Draft fields | Request description, added or removed work, price impact with the pricing method verified from the contract, SOW, or approval trail before use, timeline impact, and requester |
| Approval path | Name who reviews and who can approve on each side |
| Start rule | Set a rule such as "no added work begins before written approval from both sides" |
If a change is not documented and approved under your chosen process, treat it as not approved.
Step 4 Define acceptance before delivery#
Draft acceptance so "done" can be determined from the SOW itself. Include deliverables, delivery format, review method, valid rejection basis, and included revision rounds.
| Acceptance area | Weak clause | Clearer draft prompt |
|---|---|---|
| Completion standard | "Done when delivered." | Done when listed deliverables are submitted in agreed format and reviewed through the defined process. |
| Rejection basis | "Client may request fixes as needed." | Rejection maps to agreed deliverables or review criteria; revision scope stays within agreed limits. |
| Review timing | "Client will review promptly." | Review window must be verified from the contract, SOW, or approval trail before use, with a named reviewer or sign-off owner. |
Pre-kickoff SOW checklist#
| SOW check | Confirm |
|---|---|
| Payment workflow | Recipient, submission method, review path, payment timing, and late-payment handling verified from the contract, SOW, or approval trail |
| Change-control workflow | Trigger, draft fields, approval path, no-start-before-approval rule |
| Definition of done | Deliverables, review method, revision limits, and acceptance timing verified from the contract, SOW, or approval trail |
| Final client sign-off owner | Named |
If a protection is not written, assigned, and approved, assume you do not have it.
Before you send the draft, map your deliverables, change control, and acceptance criteria in the SOW Generator.
Conclusion: Your Contract is Your Shield#
Your contract is the final risk-control checkpoint before work starts. If your SOW leaves key decisions or responsibilities unclear, you are still relying on assumptions. Treat this as a practical business screen, not legal advice.
Run one last red-flag review before you sign. Read the draft as if the project has already failed, then revise anything that does not clearly show who decides, who confirms, and what record proves agreement.
- Time: Clear scope boundaries and revision expectations can reduce the risk of unpaid extra work.
- Cash flow: Clear financial expectations can reduce avoidable payment friction.
- Peace of mind: Clear ownership for approvals and completion can reduce open-ended disputes.
Before you sign, confirm:
- Red flags: what would make you pause or walk away.
- Decision clarity: who decides, who confirms, and how agreements are documented.
- Scope and completion clarity: how changes and final approval are handled in writing.
Then use this on the project in front of you: review the draft SOW, validate any verbal assumptions in writing, and confirm the approval path before work starts.
Frequently Asked Questions
What should you ask in a pre-mortem?
Ask the team to assume the project failed, then list likely causes in plain language, such as scope drift, timeline pressure, budget strain, or other risks that could derail delivery. That helps you surface risks early that confidence can hide. Then convert each major cause into preventative action items with clear owners.
How do you run the session without making it feel negative?
Set the tone as success planning. You are stress-testing the plan, not assigning blame. Have each participant review the plan, explain why it failed, and then work backward to prevention steps. Use a simple template and leave with prioritized action items.
How does this help you control scope creep?
Ask which small extras usually appear after kickoff and how priorities tend to shift. Scope creep is a common project pressure, so naming it early helps prevent timeline and budget problems. Turn the agreed prevention steps into clear checkpoints the team can follow.
When should you do the pre-mortem?
Run it before launch, while the plan is still easy to revise. That gives you room to fix weak points before assumptions harden. If a key detail is still unverified, mark it as open and confirm it before execution.
What if a client does not want to participate?
If a client does not want to join a live session, start with a lightweight written pre-mortem. Ask participants to review the plan and state why it failed, then work backward to prevention steps. If major risks remain vague, pause and clarify actions before launch.
How is a pre-mortem different from a standard risk assessment?
A standard risk assessment asks what might go wrong. A pre-mortem assumes failure already happened and asks what caused it. That framing often reveals root causes more clearly and counters early overconfidence. Use those causes to prioritize preventative actions.
What should you put in the SOW after the session?
If you are updating an SOW, avoid copying raw workshop notes directly. Convert high-impact risks into clear preventative actions and checkpoints, and keep detailed brainstorming notes in your working docs. The goal is to carry forward the decisions that keep work on track.
How do you document pre-mortem outputs before signature?
Create a short pre-launch checklist from the session and map each major risk to a preventative action item. Then verify that someone outside the session could read the plan and understand what might fail and what will be done to prevent it. If that is not true, the checklist is not finished yet. When you are ready to convert your risk decisions into a signable agreement, create a first draft with the Freelance Contract Generator.
Try a related tool
Researched and edited by the Gruv editorial team. Gruv builds cross-border billing, payouts, and finance-operations software for global businesses.
Sources
- acquisition.gov/far/subpart-46.5trusted
- acquisition.gov/far/part-43trusted
- boonemo.gov/oem/common/pdf/BooneCountyEOP.pdftrusted
- canton.edu/media/pdf/catalog0908.pdftrusted
- dol.ny.gov/freelance-isnt-free-acttrusted
- ecfr.gov/current/title-48/chapter-1/subchapter-G/part-43trusted
- etd.ohiolink.edu/acprod/odb_etd/ws/send_file/sendtrusted
- in.gov/idoi/files/MK-2025-IND.pdftrusted
Educational content only. Not legal, tax, or financial advice.
Related Posts
Canada Digital Nomad Visa Planning for Visitor Status and Work Permits
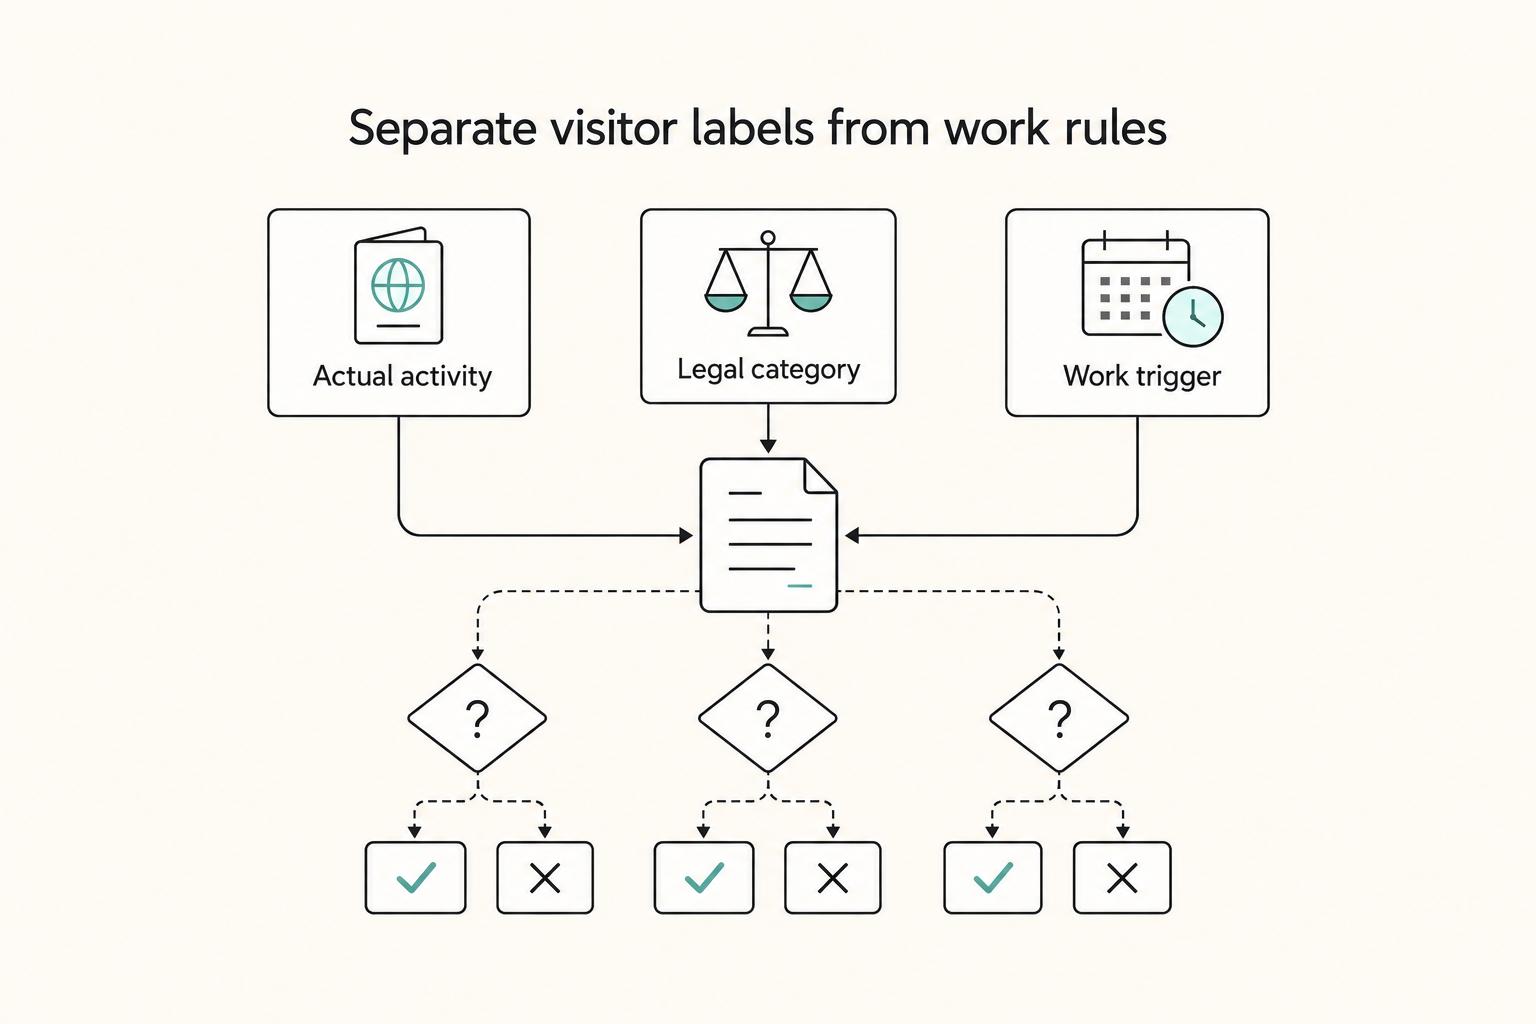
The phrase `canada digital nomad visa` is useful for search, but misleading if you treat it like a legal category. It is shorthand for existing Canadian status options, mainly visitor status and work permit rules, not a standalone visa stream with its own fixed process. That difference is not just technical. It changes how you should plan the trip, describe your purpose at entry, and organize your records before you leave.
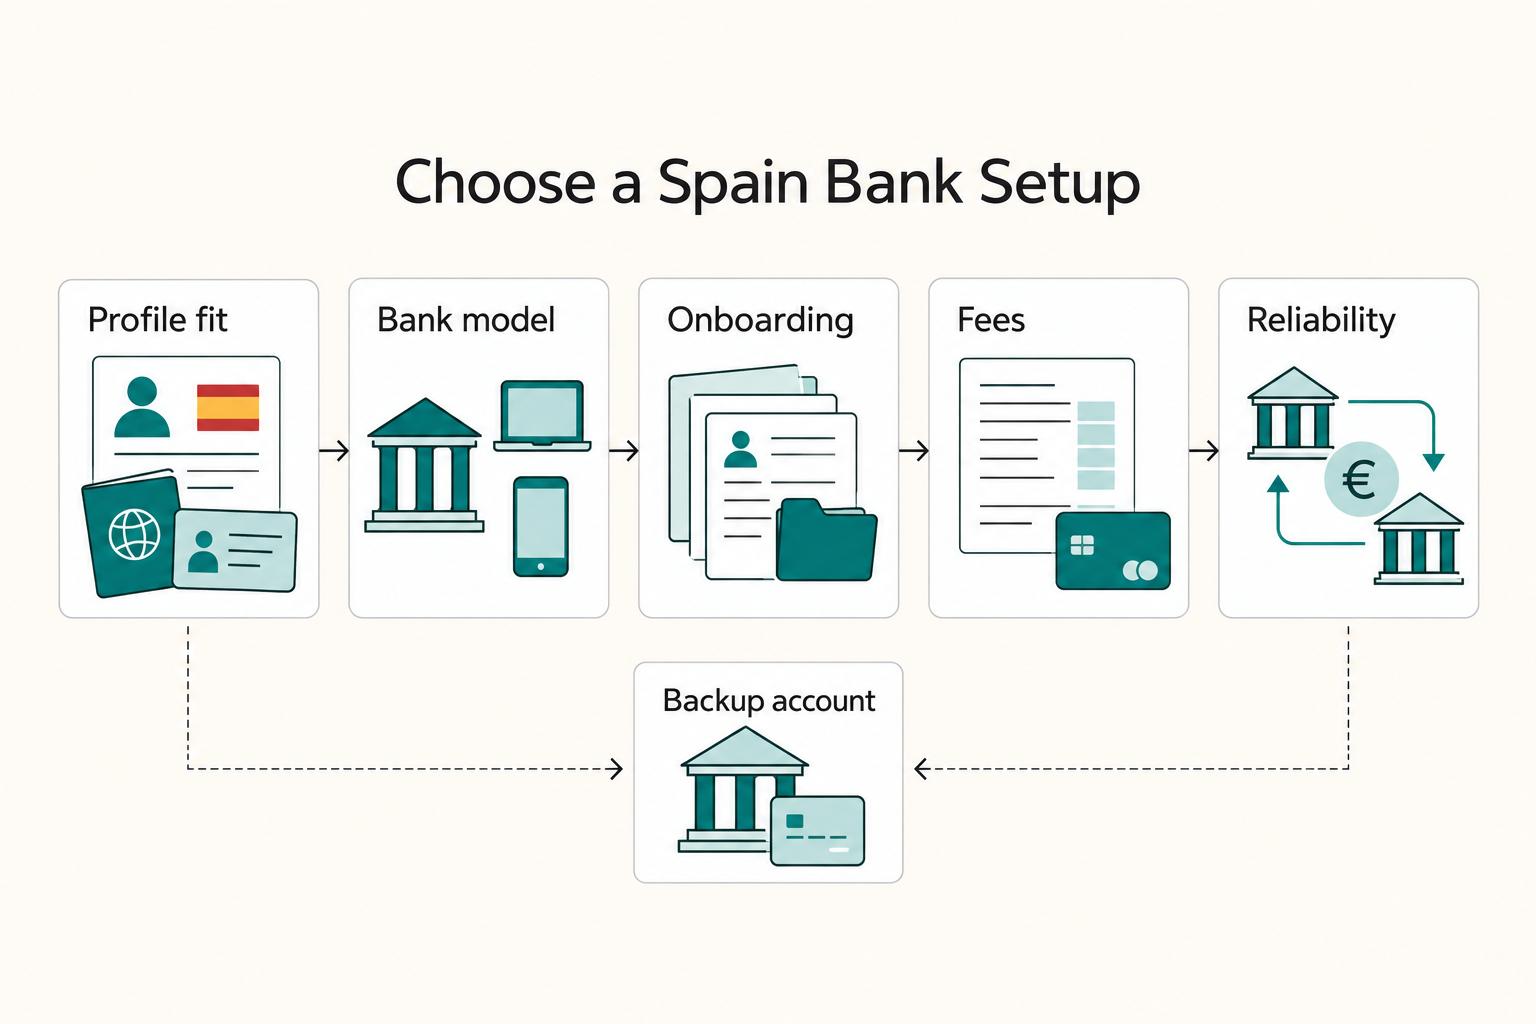
Freelancer Bank Accounts in Spain: Choosing a Primary and Backup Setup
Choose your setup as a risk decision, not a brand ranking. Pick one primary account for daily inflows and keep one backup account active in the same planning session.

The Freelance Payment Penalty: A Modeled Audit of Platform Fees, FX Spreads, and Payout Delays
The money rarely disappears through a single, easy-to-spot fee. The real loss is stacked. A marketplace takes its commission, a processor adds a charge for international cards, a bank or payment company converts the currency at a spread, a platform holds the funds before release, and a wire sheds a little to intermediaries on the way in. Each layer looks defensible on its own, but the worker feels the combined result as a smaller deposit and a later payday.