
Quick Answer
Automate invoicing with Stripe for a Webflow site by choosing the lowest workflow stage that still gives you clean records and reliable review: Starter for simple manual payments, Automator for draft creation through connectors, and Strategist for documented rules, checks, and auditability. In this model, automation should speed data handoffs, not replace compliance review. Test one end-to-end flow before relying on it.
How to Automate Invoicing with Stripe for a Webflow Site: A 3-Stage Maturity Model#
Your real decision is the invoicing model you operate, not just whether two tools can connect. Use this 3-stage model to decide how much control, review, and process discipline you need before invoices go out.
Treat these stages as a workflow model, then verify product-specific behavior in live docs and test runs.
Define the stages in one line each#
- Starter: mostly manual sending and review; you own most risk; a common failure mode is inconsistent execution.
- Automator: data moves through connectors into invoice workflows; you still own exceptions; a common failure mode is scaling bad inputs faster.
- Strategist: invoicing is governed by documented rules, checks, and records; setup effort is higher; a common failure mode is weak process governance.
Self-check your current fit#
Review your last 10 invoices, payment requests, or billing emails against these points:
- Client type: are you serving mostly individual buyers or procurement-driven business clients?
- Invoice complexity: are you handling simple flat fees or more custom billing structures?
- Cross-border exposure: do country and currency differences increase your review needs?
- Manual review tolerance: can you reliably inspect each invoice before it is sent?
A quick signal is repeated corrections, missing-detail requests, or manual record patching. If that keeps happening, your current stage is probably too lightweight.
Stage comparison at a glance#
| Stage | Workflow control | Process readiness | Scalability |
|---|---|---|---|
| Starter | Manual control, minimal automation | Relies on manual checks | Works at low volume |
| Automator | Shared control across tools | Improves when input quality is stable | Better for repeatable flows |
| Strategist | Structured control with defined checkpoints | Strongest when rules and records are documented | Best for growth and handoffs |
Before you adopt any specific setup, run one end-to-end test and keep the output artifacts: the invoice, payment record, and client-facing result. That gives you a process based on verified behavior instead of assumptions. If you want a deeper dive, read Value-Based Pricing: A Freelancer's Guide.
Stage 1: The Starter Model - Are Simple Stripe Payment Links Enough?#
Stage 1 is only a good fit when speed matters more than structure and you can handle the checks and recordkeeping yourself. If you are already seeing repeated corrections or record patching, treat it as a temporary stop, not a durable setup.
Treat product-level invoicing behavior for Stripe plus Webflow as unconfirmed. Use this stage as a working assumption: collect payment quickly, then verify every documentation and compliance requirement in your live setup before you rely on it.
Step 1. Scope Stage 1 tightly#
Treat checkout as the payment step, not proof that your full billing process is complete. In the workflow described here, checkout is only one step. You still need to account for payout timing and post-payment handling afterward.
Run one end-to-end test and confirm you can trace each payment cleanly back to your own records. If that takes too long or breaks down quickly, Stage 1 is too thin for your needs.
Step 2. Decide quickly with a fit check#
Use Stage 1 when the work is simple, the billing is straightforward, and one person can reliably review every payment before it goes out.
| Use Stage 1 if | Avoid Stage 1 if |
|---|---|
| You need a fast way to collect simple one-off payments | You need repeatable invoicing with low manual effort |
| One person can manually review each payment and record | Multiple people need clean handoffs across finance, ops, or bookkeeping |
| You can tolerate manual follow-up for documentation | Clients expect formal, easy-to-reconcile billing records up front |
Step 3. Run a manual compliance checklist every time#
In Stage 1, discipline is your control. Before sending a payment request, verify and document:
- Any client legal-name or tax-ID fields your process requires: confirm the current requirement against your jurisdiction's rules and your advisor
- Any seller and client jurisdiction checks your process requires: confirm the current check against your jurisdiction's rules and your advisor
- Any invoice text your process requires: confirm the current requirement with the official source and your advisor
- Validation ownership: name who checks and who stores records
Also confirm the provider checkpoints already noted in your criteria, including transaction limits and current security or compliance documentation.
Step 4. Keep a consistent records stack aligned#
Stage 1 is easier to run when you can trace every payment without hunting across tools. One practical way is to keep a consistent records stack for each payment:
| Record | What it shows |
|---|---|
| Webflow source record | what was requested |
| Stripe payment record | what was paid |
| Signed contract or SOW | what authorized the charge |
| Bookkeeping entry | how you recorded it |
If tracing one payment across this stack is slow or inconsistent, move to Stage 2. Related: How to Use Stripe Payment Links for Easy Invoicing.
Stage 2: The Automator Model - Can Zapier Protect You As You Scale?#
Stage 2 works when your main problem is moving data, not making compliance judgments. You automate handoffs so invoice prep can get faster, but you still decide whether each invoice is correct and safe to send.
For stripe invoicing for webflow, one possible setup is a Webflow form submission through an automation layer (for example Zapier, Make, or n8n) into an invoice draft or billing record. Treat the exact flow as implementation-specific and validate it in your own setup. Automation can move fields and trigger actions. It does not, by itself, perform compliance judgment.
Step 1. Start with draft creation, not approval#
Use automation to create drafts, not to make final decisions. Run an end-to-end test and confirm that one submission can be traced cleanly across:
- Webflow source submission
- Automation run or log
- Invoice draft or billing record
If the mapping is wrong, fix it before you scale. Faster handoffs only help when the fields land correctly.
Step 2. You still own these checks before send#
This is where many teams get overconfident. Automation can prepare invoice data, but you still own final approval before send. Before sending, verify:
| Check | What to verify |
|---|---|
| Client legal entity data | legal name, billing address, and billing contact against your approved client record |
| Tax ID validation | Confirm the current tax ID validation method for the client's jurisdiction with your advisor |
| Required invoice language | Confirm the current invoice-language requirement with the official source and your advisor |
| Invoice approval before send | assign one clear approver for final review and send authorization |
Automation prepares data. It does not certify compliance.
Step 3. Decide with operational criteria#
Stage 2 makes sense when volume is repeatable and exceptions are still manageable. Use the table below to judge whether automation is helping or just moving the bottleneck.
| Decision criterion | What Stage 2 improves | What still stays manual | Bottleneck signal |
|---|---|---|---|
| Time saved | Can reduce copy and paste and speed draft preparation | Final review and send decision | Review time starts exceeding draft-creation time |
| Residual manual review load | Can standardize handoffs between tools | Entity, tax, wording, and approval checks | Unsent draft queue grows week to week |
| Error exposure | Can reduce manual transcription mistakes | Bad source inputs and mapping mistakes still need review | Invoice correction requests become frequent |
| Scaling bottleneck | Potentially higher draft throughput for a period | Compliance review effort grows with invoice complexity | Throughput slows as client complexity rises |
Step 4. Stay in Stage 2 or move to Stage 3#
Stay in Stage 2 when your client mix is relatively simple, invoice patterns are consistent, and you can maintain a documented manual review before sending.
Move to Stage 3 when cross-border complexity rises, exceptions become frequent, or your tolerance for manual controls drops. If approval queues delay collection or one reviewer becomes a standing bottleneck, Stage 2 may be reaching its limit.
We covered this in detail in Set Up a Recurring Client Retainer with Stripe Invoicing.
Stage 3: Risk Controls, Manual-Review Holds, and a Record Trail#
Stage 3 is a risk-control model. Since the current grounding for this section does not include authoritative payment-compliance documentation, treat unverified checks or rules as manual-review holds instead of auto-send logic.
Step 1. Standardize the client billing record#
Start by standardizing one approved client billing record and issue invoices from that record, not from scattered form submissions or email threads. Define the identity and billing fields your team has approved for this workflow, keep them current, and hold send when records conflict.
Step 2. Make tax handling auditable#
Tax handling should be an explicit decision flow you can audit. Capture tax data, run the configured check, log the result, choose the invoice rule, then allow or block send.
For checks such as VIES, treat them as checks that require current verification in your own process, not memory checks. If a check fails, is unavailable, or cannot be confirmed, route the invoice to manual review.
Step 3. Control invoice language the same way#
Apply the same discipline to invoice language rules. For terms like reverse charge, encode a reviewable rule in your process and template logic, and keep final invoice wording pending official and advisor verification until it is confirmed.
If wording requirements are uncertain, hold the invoice until it is reviewed.
Step 4. Define post-payment handling rules#
Post-payment handling also needs rules. Use a written funds-handling playbook that covers receiving currency, hold policy, conversion timing policy, and payout routing. The goal is consistent execution and fewer ad hoc transfer or FX decisions.
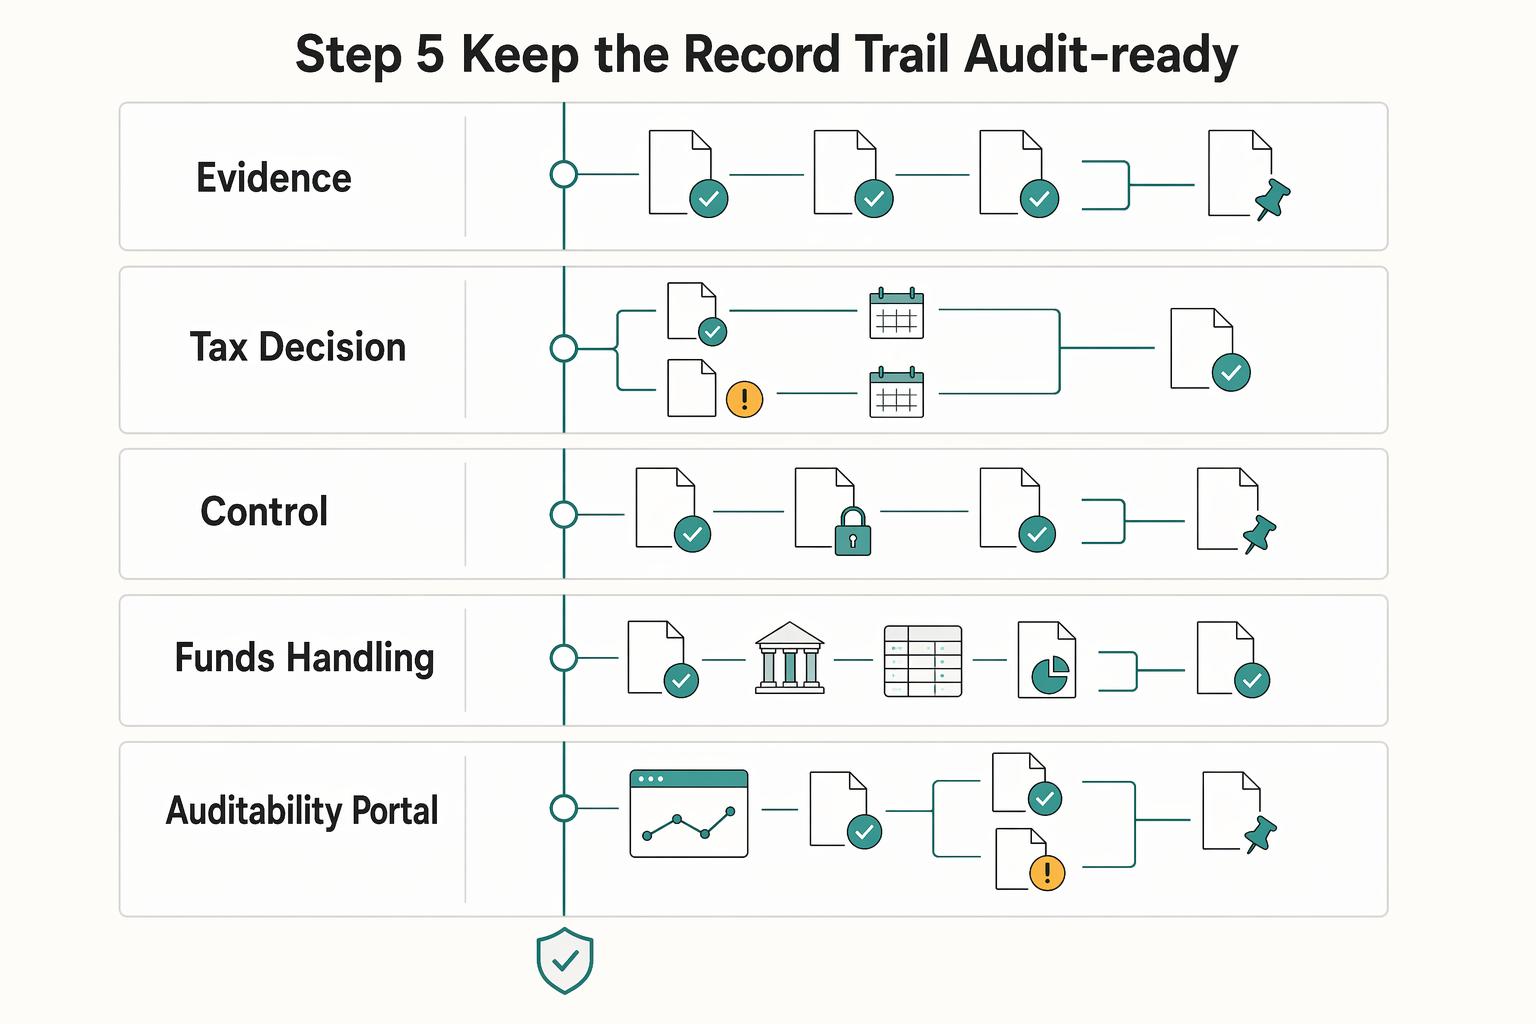
Step 5. Keep the record trail audit-ready#
Auditability is what makes Stage 3 hold up. Keep one source of truth with a defensible record trail for each invoice.
Use this as an internal operating baseline, not a jurisdiction-specific legal checklist: keep the approved client record, invoice version and status history, approval decision, and payment or payout records together so disputes and support requests can be resolved quickly. Use a client portal only if it reduces support load and improves record clarity.
| Capability area | Operational baseline | Optional reinforcement | If missing |
|---|---|---|---|
| Client record control | One approved billing record per client | Auto-sync from intake tools | Manual identity review before send |
| Tax decision flow | Logged check result and send or block rule | Automated reminders or rechecks | Manual tax review hold |
| Invoice language control | Rule-linked template step before send | Template version or change history | Manual wording review hold |
| Funds handling | Written receive, hold, convert, and payout policy | Scheduled policy review cadence | Ad hoc handling and higher error risk |
| Auditability and portal | Unified invoice, approval, and payment trail | Client self-service status or history view | Slower dispute response and higher support load |
If your current stack cannot support most baseline controls, keep automation for draft speed. Do not treat Stage 3 as verified compliance yet, and keep manual review as the fallback.
This pairs well with our guide on How to Open a Stripe Account for a Non-US Business.
Which Invoicing Model is Right for Your Webflow Business?#
Choose the lowest stage that still lets you explain each invoice, each fee, and each exception from one clear record trail. If you cannot do that quickly, move up a stage.
| Fee signal | Amount | Note |
|---|---|---|
| Domestic cards | 2.9% + 30¢ | Base fee per successful payment |
| Manual entry | +0.5% | Possible add-on |
| International cards | +1.5% | Possible add-on |
| Currency conversion | +1% | Possible add-on |
| Dispute fee | $15.00 | Shown for some methods |
To keep the choice grounded, use these working definitions for this section (not Stripe terms):
- Transactional setup: you mainly need to collect a payment fast for simple, one-off work.
- Automation: software handles repeat invoice steps so you stop recreating the same process.
- Compliance ownership: how much pre-send checking still depends on your manual review.
- Financial control: you can show what a payment cost, why it cost that, and what happened when something went off-path.
Use Stripe's pricing signals as a self-check baseline. Stripe says offering more payment methods can expand customer reach, increase conversion, and lower transaction costs. Fees are listed per successful payment, with a base 2.9% + 30¢ for domestic cards. Possible add-ons include +0.5% for manual entry, +1.5% for international cards, and +1% for currency conversion, and some methods show a $15.00 dispute fee. If you are not checking how often those conditions show up in your own payments, your stage choice is guesswork.
| Stage | Choose this if | Tradeoff | Risk profile | Move up when |
|---|---|---|---|---|
| Stage 1 Starter | Low invoice volume, mostly simple one-off invoices, and you accept manual review | Fast setup, minimal structure | Higher process risk when details are spread across tools | You repeat the same invoice tasks weekly, clients ask for status or history often, or fee add-ons keep appearing |
| Stage 2 Automator | Repeated invoice patterns and clear admin-time pain, with capacity to review exceptions | Better speed, but exception quality still depends on you | Medium risk if bad inputs flow through automation | Exception handling, approvals, or record reconstruction starts consuming meaningful time |
| Stage 3 Strategist | Cross-border fee conditions and tighter control needs are now normal, not occasional | More operational discipline before send | Lower avoidable process risk when records stay clean | Stay here and review fit as volume and needs change, including whether custom pricing discussions make sense |
Then use this practical rule set:
- If invoices are mostly simple and domestic, and manual checks are still reliable, choose Stage 1.
- If your invoice flow is repetitive and the main issue is admin drag, choose Stage 2.
- If exceptions, approvals, and audit-ready records are routine requirements, choose Stage 3.
Watch for these red flags that your current stage is too light:
- You cannot explain why a payment cost more than 2.9% + 30¢.
- Manual-entry, international-card, or currency-conversion add-ons appear regularly without a clear reason.
- A support question forces you to rebuild invoice history from multiple systems.
- You cannot assemble one recent sample packet with billing record, invoice version, payment result, and exception notes.
Two boundary paths are worth noting. They are not automatic upgrades:
- If your core model is product catalog plus checkout, evaluate a store-first path separately instead of forcing this service-invoice framework.
- If you are considering custom Stripe API work, define your required billing events, block conditions, and retained records first. Treat implementation effort or maintenance scope as unconfirmed, so validate that scope before choosing a custom build.
You might also find this useful: A Guide to Webflow for Freelance Designers.
Conclusion: Your Invoicing System is Your Brand#
Your invoicing workflow is a client-facing trust signal, not just a back-office task. The right model is the one that fits your risk profile and keeps manual work, payment delays, and avoidable rework under control.
Step 1. Pick the model by risk, not convenience#
Use the three-model lens as a final decision check:
- Starter is acceptable for simple payments with Payment Links when you do not need a customer-specific invoice.
- Automator is acceptable when your Webflow intake data is stable, Zapier mappings are tested, and a human still reviews drafts before sending.
- Strategist is the safer default when you handle cross-border invoicing, tax IDs, invoice collection with recovery logic, or client self-service via Hosted Invoice Page and customer portal.
Step 2. Use clarity to reduce avoidable delays#
A strong setup can help invoices get approved and paid with less back-and-forth. Keep the sequence explicit: collect billing data, validate it, then send.
For EU VAT flows, treat VAT ID validation as one checkpoint, not full verification. Stripe states EU VAT numbers are validated against VIES, and also states you still need to verify customer name and address.
Step 3. Define a brand-safe operating standard#
Before you scale, your standard should cover:
- Data quality checks before invoice creation.
- Compliance checkpoints before send.
- Client-facing clarity in invoice presentation and terms.
- Collections control rules after send.
Step 4. Run this audit before scaling#
Use this audit before you automate further:
- Intake fields: legal name, billing address, tax ID, currency, and payment terms, for example due in 30 days.
- Validation flow: VIES where relevant, manual name and address verification, and tested Zapier field mapping.
- Client experience: branded invoices, Hosted Invoice Page access, and portal self-service for invoice viewing or downloading.
- Collections handling: reminder or retry configuration where used.
If any checkpoint is unclear, fix that first, then automate further.
For a step-by-step walkthrough, see Best invoicing apps with Stripe for freelancers and small teams in 2026. Before you lock your long-term setup, compare card, conversion, and payout cost paths using the Payment Fee Comparison tool.
Frequently Asked Questions
How do I create B2B compliant invoices for EU clients in Webflow?
Creating a compliant invoice for EU B2B clients is critical for getting paid without delays. It must include:
- Client's VAT Number: You must collect and display your client's valid VAT (Value Added Tax) identification number.
- Reverse-Charge Clause: For most cross-border B2B services within the EU, you must include the phrase "Reverse-Charge" on the invoice, indicating that the client is responsible for remitting VAT.
- Validation is Non-Negotiable: Simply adding a VAT number isn't enough. It must be validated through the European Commission's VIES system. An intelligent invoicing platform (the "Strategist" model) automates this check, while a manual or "dumb pipe" setup leaves this critical validation step entirely up to you.
What is the best way to handle recurring retainers and subscriptions in Webflow?
While Webflow Ecommerce is not built for subscriptions, Stripe's billing engine is excellent for it. The best method depends on the client experience you want to provide.
- Basic Subscriptions: For simple, fixed recurring payments, you can create a subscription product in Stripe and share a Payment Link. This is fast but offers the client little control.
- Professional Subscription Management: A strategic approach uses a system that provides a client portal. This allows your clients to self-manage their subscriptions, update payment methods, and view their invoice history without contacting you, elevating your professionalism and reducing your administrative burden.
Can I use Zapier to build a fully automated, compliant invoicing system?
No. You can use a tool like Zapier to trigger the creation of a Stripe invoice from a Webflow form, but this falls into the "Automator" model. It automates the action, but not the intelligence. This workflow cannot verify B2B compliance data like a VAT number or apply the correct legal clauses based on your client's location. You will still need to manually review and approve each invoice in Stripe before sending it to ensure it's legally sound, which means the system is neither fully automated nor compliant on its own.
How can I avoid high currency exchange fees when getting paid by international clients?
This is a crucial issue for any Global Professional. When Stripe converts funds from a client's currency (e.g., EUR) to your home currency, it typically charges a currency conversion fee on top of standard processing fees. The most effective way to avoid this "Withdrawal Penalty" is to use a system with an integrated multi-currency wallet. This allows you to receive and hold funds in the client's original currency. You can then choose to convert the money when the exchange rate is favorable or use it to pay business expenses in that same currency, completely bypassing conversion fees.
How do I add a client's VAT number to a Stripe invoice generated from Webflow?
Technically, you can add a "VAT Number" field to your Webflow form and use an automation tool to map this to the customer's Tax ID field in Stripe. However, the critical point is that Stripe will display whatever number is provided, whether it is valid or not. While Stripe validates EU VAT numbers upon initial entry, it does not re-validate them for recurring charges, leaving a compliance gap. A true "Strategist" system ensures this number is validated against the official VIES database every time an invoice is created, protecting you from sending a non-compliant invoice.
Try a related tool
Researched and edited by the Gruv editorial team. Gruv builds cross-border billing, payouts, and finance-operations software for global businesses.
Sources
- cga.ct.gov/2024/gldata/TMY/2024SB-00002-R000229-Bastian...trusted
- docs.stripe.com/invoicing/automated-collectionstrusted
- docs.stripe.com/invoicingtrusted
- ec.europa.eu/taxation_customs/viestrusted
- europa.eu/youreurope/business/taxation/vat/check-vat-n...trusted
- sec.gov/Archives/edgar/data/1576789/0001178913210011...trusted
- stripe.com/pricing/local-payment-methodstrusted
- stripe.com/en-br/guides/no-code-tools-to-launch-and-gro...trusted
Educational content only. Not legal, tax, or financial advice.
Related Posts
Value-Based Pricing for Freelancers Under Real Payment Risk
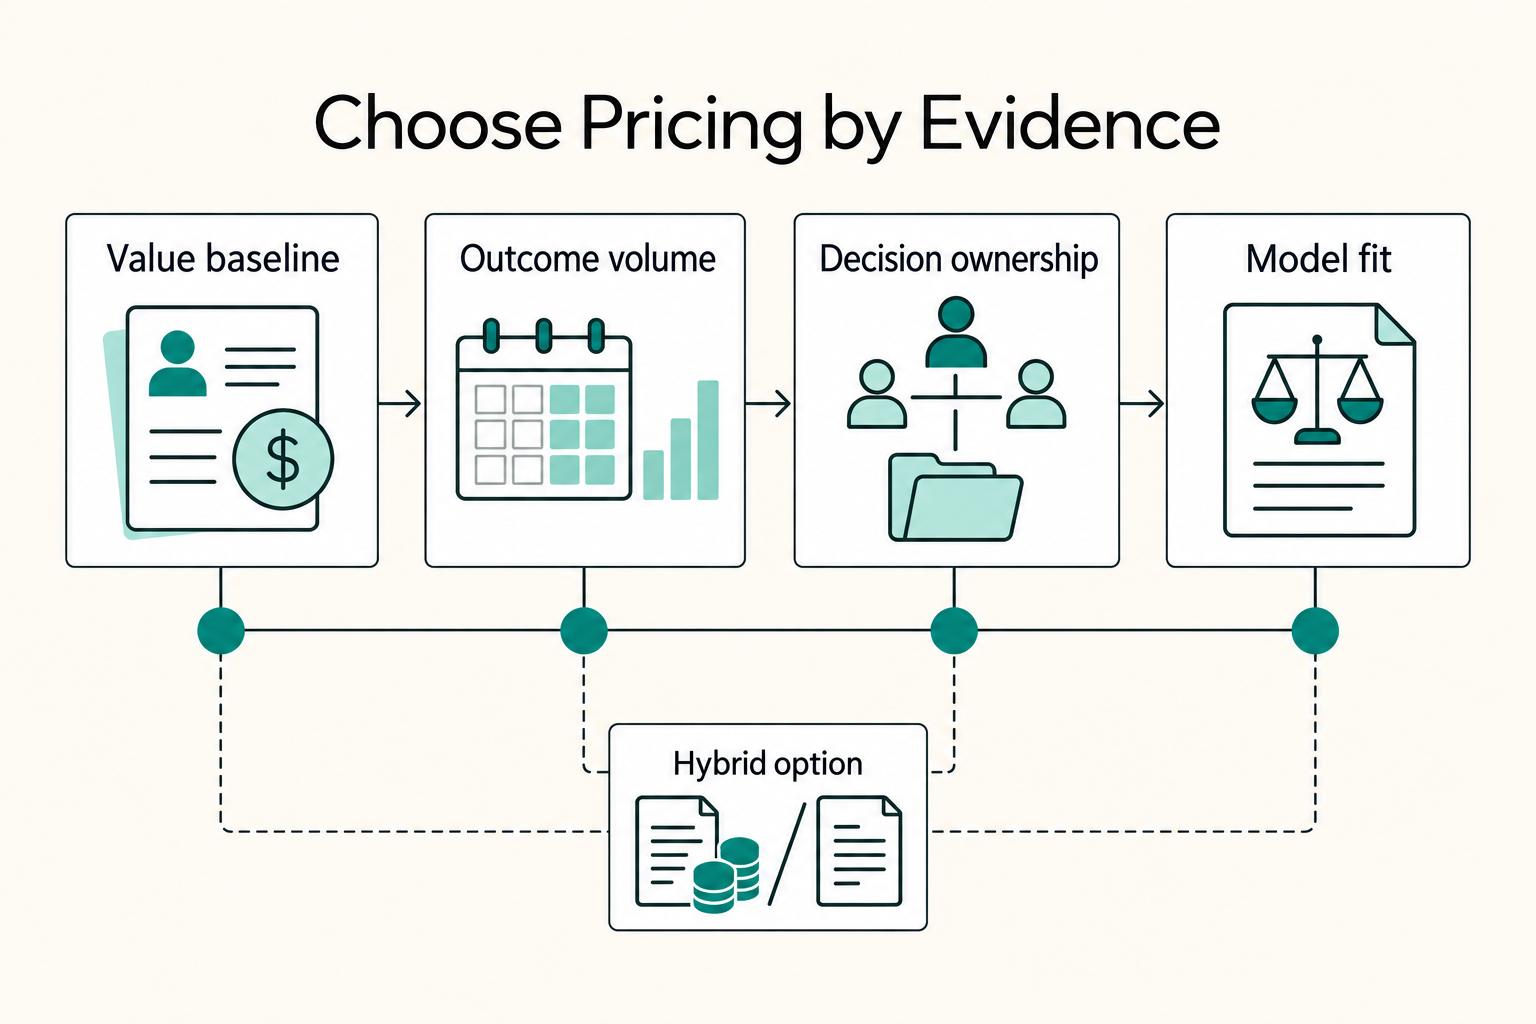
Value-based pricing works when you and the client can name the business result before kickoff and agree on how progress will be judged. If that link is weak, use a tighter model first. This is not about defending one pricing philosophy over another. It is about avoiding surprises by keeping pricing, scope, delivery, and payment aligned from day one.
How to Use Stripe Payment Links for Easy Invoicing
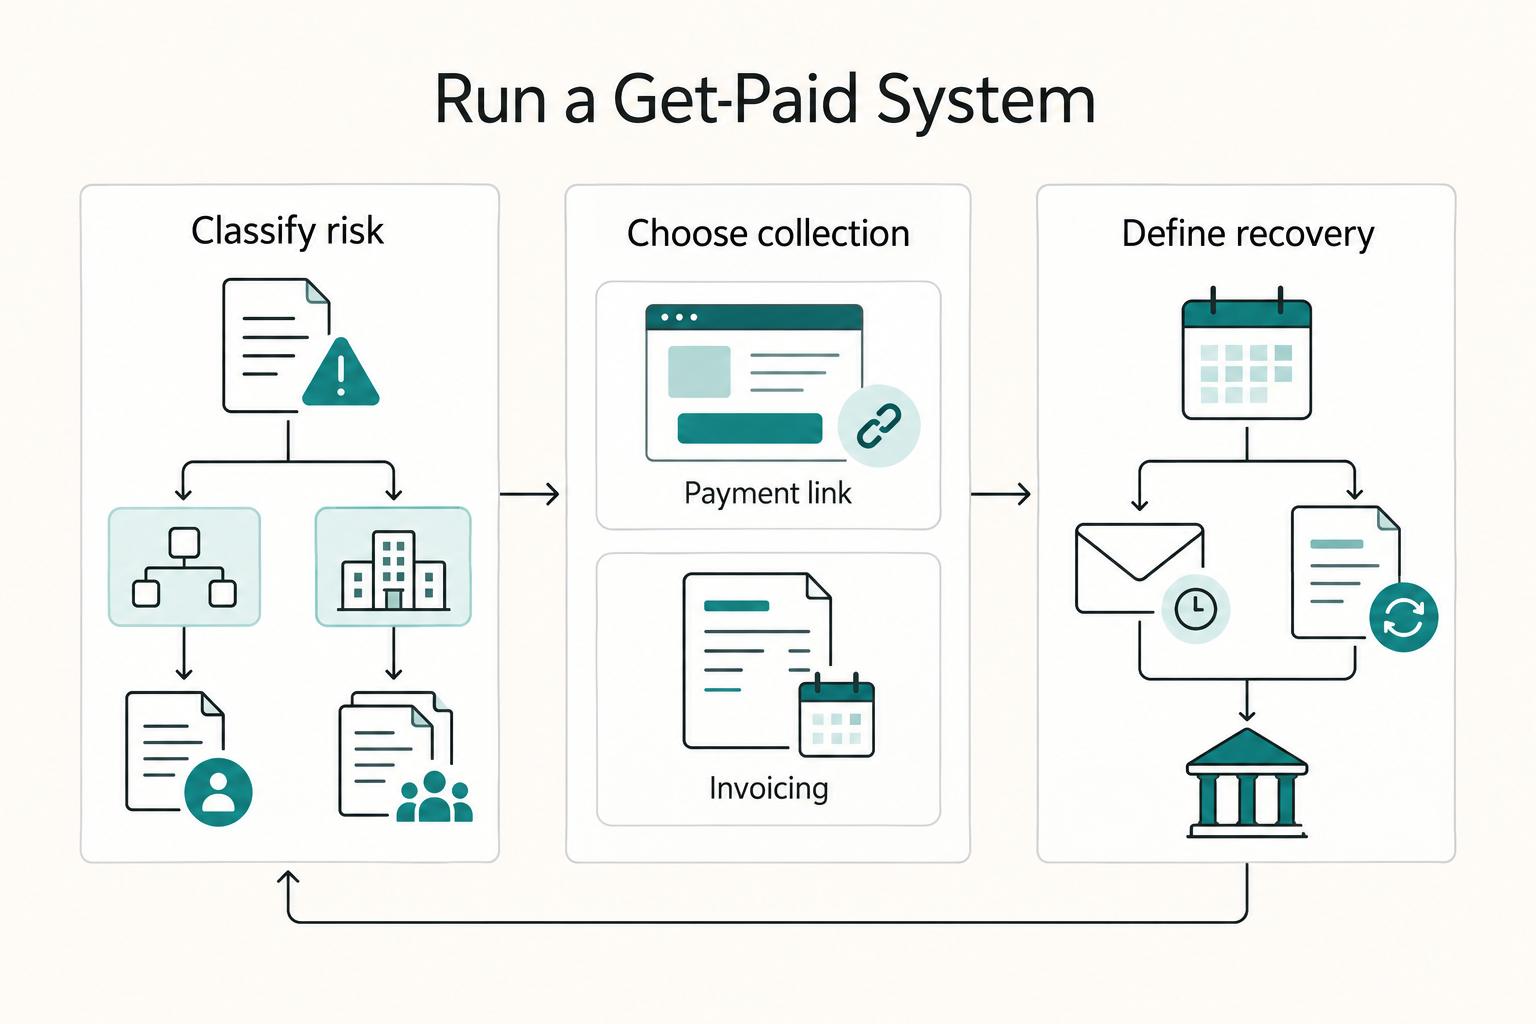
**Build a risk-first get paid system with Stripe Payment Links for fast collection and Stripe Invoicing for controlled follow-through.**

Webflow for Freelance Designers Who Want Predictable Client Work
If you want **webflow for freelance designers** to pay like a business rather than a string of one-off builds, you need three things working together: a way to accept only the right projects, a repeatable delivery path, and controls for the moments when scope and risk start drifting. By the end of this guide, you should have a practical way to qualify leads faster, run one clear approval path, and reduce the chance of mid-project expansion quietly hurting your margin.