
Quick Answer
Start with one Notion Client Onboarding Database, then trigger onboarding from a single Ready for onboarding state and let Zapier handle only cross-app handoffs. Keep approvals and exceptions manual, and require every step to write status back to the same record. A practical first run is intake from a Tally form, baseline task generation, Google Drive folder creation, Slack notification, and only then link publishing or welcome email send. Route any missing field or failed action to Needs attention with a named owner.
Start Here and Decide What to Automate#
Automate repeatable steps first, and keep judgment calls manual. If you want to automate client onboarding in Notion, the goal is consistent execution, not full autopilot. Give every new client the same intake, setup, task handoff, and first message, with a named human owner for exceptions.
Use one boundary rule before you build: automate steps with the same input and output most of the time; keep approvals and edge cases manual. That keeps scope under control as you add app connections. It also makes weekly reviews easier because failures are more likely to trace back to either data or a decision.
- Map the onboarding path in one place.
Sequence the flow in order, for example: Onboarding form submitted, Client Portal created, Onboarding tasks assigned, Welcome email sent. Add an Owner and a Failure owner to each step so issues do not sit unclaimed. If two people could own a failed step, assign one primary owner now and keep the backup owner for escalation only.
- Separate repeatable actions from judgment calls.
Tag each step as Auto or Manual. Keep data transfer and status updates in Auto; keep approvals, exception handling, and custom decisions in Manual. A simple check: if you would still want a human to review it when the client record is incomplete, keep it manual.
- Set the automation boundary.
Use native Notion automations for repetitive in-workspace actions where they fit. One published case study described built-in Notion automations handling about 30-40% of repetitive Notion work in a 60-day experiment, so treat that as planning context, not a guarantee. For cross-app handoffs, use Zapier to move form output into a Notion database and track completion there.
- Define verification checks before launch.
Confirm each client run creates one Notion record and completes each downstream step you defined, such as portal link, task set, and welcome message. Add a checkpoint field like Onboarding started so the trigger runs once and avoids duplicates. Keep the pass or fail result for each test in the same table where you track status.
Start small, review failure points, and automate one additional repeatable step at a time. Once that boundary is clear, lock prerequisites before adding more triggers.
Gather Your Prerequisites Before You Build#
Lock down the setup before you create triggers. Many launch issues start with unclear ownership and inconsistent records.
That cleanup pays off later because every automation branch depends on predictable fields, owners, and status language. If those basics are unstable, adding more logic can hide the real issue.
- Create one canonical
Client Onboarding Databasein Notion first.
Create or clean the database before your intake goes live. Keep Day 0 intake tight at 4-7 fields, and define only 1-3 onboarding paths at launch so records stay consistent.
- Connect only the tools you need for Day 0.
Start with your core handoff tools, then add other apps only when they support a real step. Run one test intake and confirm it lands once in your source of truth before you expand. Add validation so downstream steps do not continue when provisioning fails.
- Use a template as a draft, then simplify.
If you start from a template, trim aggressively. Keep only fields and action items you will actively use, with a named owner and deadline for each follow-up. Remove extra structure that makes the handoff harder to read.
- Assign ownership and failure handling before launch.
Decide who reviews the Onboarding form and who resolves failed automations. Log failures in a shared tracker so the team has visibility and can follow up.
Finish with a readiness check: one intake test passed, one failure path tested, and one named failure owner. If any of those are missing, pause here before building more logic. If you want a deeper dive, read Automating Your Freelance Finances: A Guide to Tools and Workflows.
Should You Start with Notion Alone or Add Zapier Now#
Start with Notion alone if onboarding stays inside Notion. Add Zapier when one client event must update multiple tools, because that is where manual updates tend to drift.
| Option | Use when | Article note |
|---|---|---|
| Notion alone | Onboarding stays inside Notion and intake, status changes, and follow-up tasks all happen in Notion | Stay native until your baseline is stable |
| Zapier | One client event must update multiple tools or two or more tools must update from one trigger | Use it for recurring multi-tool handoffs; the value is consistency, not complexity |
| n8n | You need broad Notion-to-stack automation | Treat it as a scope choice, not a default |
If you're unsure, use this decision rule: if two or more tools must update from one trigger, consider moving that handoff into Zapier. If everything stays in Notion, stay native until your baseline is stable. That makes your first version easier to debug and reduces the chance that early failures get blamed on the wrong app.
- Start native for single-workspace flows.
If intake, status changes, and follow-up tasks all happen in Notion, keep it there first. You get one path to validate before adding more moving parts. This also makes failures easier to spot because every status change lives in one place.
- Add Zapier for recurring multi-tool handoffs.
When a client close or similar trigger must update two or more tools, move that step into Zapier instead of relying on repeated manual updates. The value is consistency, not complexity. If the same copy and paste happens every time, it is a strong automation candidate.
- Use a drift check before deciding.
Manual upkeep can look fine until you compare counts. A published example showed a team with 67 people but only 58 entries in a Notion directory. Use that kind of count check to see whether your current process stays accurate. You can run the same check on active clients versus active folders or channels.
- Treat n8n as a scope choice, not a default.
n8n supports broad Notion-to-stack automation and promotes adaptable workflows across your stack. If you do not need that breadth today, keep your first multi-app chain simpler. Pick the tool that matches the workflow scope you actually have right now.
Before expanding, run one test close event and confirm each required destination updates once, with failures visible to a named owner. Then compare destination counts against Notion so drift is visible before launch.
Build a Client Record That Automation Can Trust#
Reliable automation starts with one structured client record and one intentional trigger. Every tool should reference the same core client details and identifiers.
If your record design is loose, automation gets unpredictable because each app interprets missing or inconsistent values differently. A strict record shape helps reduce that drift before it starts.
- Define core fields in
Client Onboarding Databasebefore enabling triggers.
Define a small set of required fields first, including contact details and the values your downstream actions depend on. Add a structured communication log or linked table so key decisions and messages stay in one history. If a field is required for downstream actions, mark it clearly and block kickoff until it is filled.
- Use controlled status values across tools.
Keep a short, fixed set of statuses and mirror the same labels anywhere your workflow routes work. Test one sample record through each status to confirm each step maps correctly. If one status label is unclear, rename it now instead of adding another similar label.
- Use one client identifier everywhere.
Use one consistent client identifier in your system of record, and carry it into downstream tools where possible. Keep a consistent file naming pattern, for example [email protected], so parsed client, project, and contact fields stay predictable. If a team member can create a file without that naming pattern, add a reminder in the task template.
- Start onboarding from one gated trigger field.
Use one controlled state such as Ready for onboarding, and limit who can set it. Keep a simple tracking sheet with project details and status so you can spot misses or duplicates during review. This gate helps reduce accidental launches from unrelated edits.
Before you scale, run one test client end to end and confirm one record, one trigger event, and one set of downstream outputs. If any output appears twice, stop and resolve the trigger condition before adding new automations.
Create the Intake Trigger and First Task Set#
Use intake to start one clear sequence: capture form answers in your Client Onboarding Database, then move the record through a defined readiness step.
The main goal is clean routing, not maximum form length. Intake should focus on the details needed for kickoff and keep records structured for review.
- Build the
Onboarding formand map inputs to database fields.
A Tally form connected to Notion can map each question to a specific property so each submission lands as a structured client record. Keep the questions aligned to the fields your team actually uses during kickoff.
- Use one readiness status as the automation start point.
Use that status as the handoff into the next steps so the sequence stays controlled.
- Create baseline
Onboarding tasksinNotion.
Generate the same first task set for each new client so onboarding starts from a consistent baseline, then handle exceptions during review.
- Run one verification pass before going live.
Submit a test form, confirm a client record is created, and verify the first task set is generated as expected.
Manual onboarding creates delays and confusion. A structured sequence can cut that noise at launch. Related: The Best Proposal Software for Freelancers and Agencies.
Automate Cross-Tool Setup in the Right Order#
Run cross-tool setup from a single workflow, and write each result back to Notion so your team can verify progress in one place.
| Step or rule | When | Required action |
|---|---|---|
| Create Drive folder first | At the start of the workflow | Record the folder output in Notion as soon as it succeeds |
| Send Slack notification next | After the Drive folder step | Write notification status and details back to Notion right away |
| Update Notion links last | Only after both prior steps succeed | Publish links only after both prior steps succeed |
| Needs attention branch | If required inputs are missing | Branch to Needs attention with an owner |
| Failure visibility | For each step | Decide how failures report and alerts work, and prioritize failed Notion write-backs |
For this build, use this order: create the Google Drive client folder, send the Slack team notification, then update project links and status in Notion. This order is practical for this setup, not a universal rule. What matters is that partial success is visible and does not publish client-facing links before prerequisites are complete.
- Create the Drive folder first. Record the folder output in
Notionas soon as it succeeds. This gives you a durable file location before later steps rely on it. - Send the Slack notification next. Write notification status and details back to
Notionright away so communication setup is visible to everyone. - Update
Notionlinks last. Publish links only after both prior steps succeed, so the page never points to missing assets. - Handle edge cases explicitly. If required inputs are missing, branch to
Needs attentionwith an owner. Do not force partial setup and hope someone notices later. - Define failure visibility per step. Decide how each step reports failures and alerts so one failed action does not silently block onboarding, and prioritize failed
Notionwrite-backs.
A practical checkpoint is to review one completed client record without opening Zapier. If the record alone cannot tell you what succeeded, what failed, and who owns the next step, write-back fields are incomplete.
Before launch, test at least three paths: complete intake, missing required fields, and a forced step failure. Each path should end in a clear status in Notion, with links shown only when valid.
Send a Welcome Email That Reduces Back-and-Forth#
Send a short, structured Welcome email from Notion record data, and pause the send if required fields are missing.
A good first-touch message answers immediate questions before the client asks them, then gives one clear reply path. That can reduce back-and-forth and keep ownership obvious.
- Generate from
Notionfields only.
Pull client name, service type, onboarding owner, intake doc link, and current timeline from the same record your team updates. Include only what the client needs now: Client Portal, intake docs, and immediate next steps. If a required field is empty, route the record to Needs attention with an owner instead of improvising text.
- Use one approved template per service type.
Keep one base template per package so legal and admin language stays consistent. Keep templates editable and trimmed to essentials. If a template is hard to modify or overloaded with features you do not use, replace it before launch.
- Make ownership and replies explicit.
Add a clear reply path and name the onboarding owner in the signature. Keep owner details in Contact Management, and record client replies and follow-ups in Communication Logs so handoffs stay clear. This helps avoid handoff issues, including replies to a mailbox no one is actively watching.
- Test sends and escalation before going live.
Run internal test emails and confirm fields render as final text, links resolve, and owner and timeline text is correct. After each send, write status and timestamp back to Notion. For failures, use an explicit escalation path like On Error -> Email Owner so first-touch issues are visible quickly. If a required link is blank, pause the email and fix it first. Sending fast is less important than sending accurate first-touch instructions.
Add Guardrails So Automation Fails Loudly Not Quietly#
Set guardrails where errors can become client-facing: make failures visible, assign ownership, and define recovery before launch.
One published case reports 147 tools and 80+ rules under a single GTM control layer. Even with a smaller stack, hidden failures are easy to miss unless each one has a clear status, owner, and next action. Keep a simple failure log tied to the same onboarding records so recurring issues are visible without separate reporting work.
- Step 1: Create a hard-stop status in your tracking system. Add a
Needs attentionstatus (or equivalent) and set it when any automation action errors, with record ID, client name, failed step, and current owner captured in the log. - Step 2: Classify failures with a small taxonomy. Start with a few practical classes based on your own logs, for example intake-data issues, app auth issues, and duplicate triggers, then map incidents to each class.
- Step 3: Define one manual recovery path per class. Document who handles each class and what they do to recover in the same tracking table.
- Step 4: Test failure paths before live traffic. Intentionally trigger representative failures and confirm status changes and owner assignment work end to end.
- Step 5: Run a recurring exception review. Close unresolved onboarding tickets and remove repeat root causes so the same failures do not keep returning.
Keep one short recovery note per failure class so handoffs stay consistent even when different people handle incidents. The note should say what to check first, what to update in your tracker, and when to escalate.
If a failure has no owner, treat that as a critical failure. If a failure repeats with no documented fix, treat that as a process defect, not a one-off mistake.
Keep Records Professional and Audit-Ready as You Scale#
As volume grows, record quality becomes an execution issue, not just documentation. Keep each client in one structured Notion record and link supporting files so decisions are easy to confirm later.
Use a simple standard: a teammate who did not work the account yesterday should still be able to understand status, approvals, and evidence quickly from the record alone.
- Step 1: Create a canonical client record in
Notion. Use one full-pageTabledatabase so client information is scannable at a glance. Create a new entry for each prospect or client, then keep properties such as owner, status, service package, and key dates consistent. - Step 2: Keep commitments in
Notionand link supporting evidence. Record client-facing decisions and status updates in the client entry, then attach relevant file links, for example fromGoogle Drive, to that same entry. If a decision happens in chat or email, add a dated summary before moving status forward. - Step 3: Make key events explicit in the record. Add clear fields for who changed status and when, with an assigned owner to maintain those fields.
- Step 4: Add a review checkpoint before major status changes. Before moving a client to the next stage, confirm required information is complete and note where supporting evidence is stored.
- Step 5: Keep systems aligned where supported. For teams using Gruv, keep milestone language consistent between
Notionand your operational workflow, and update both on a regular cadence.
A practical review test is to open a single client record and answer three questions quickly: what changed last, who approved it, and where the supporting file lives. If any answer requires searching multiple tools, tighten your record fields.
If you cannot answer who approved a milestone, when it changed, and where evidence lives in under two minutes, the record is not review-ready yet.
Test End to End Before You Roll This Out to Real Clients#
Test the whole flow before live use. In Notion-based onboarding, progress can still depend on manual updates, so your test should focus on whether status changes stay clear and trustworthy across your workflow.
A Notion page or database with ordered steps can work at very small volume. Some teams find it manageable for the first five or ten customers, then start to feel strain around customer 20 or 30, sometimes sooner. Give each test run a simple run ID so differences, delays, and ownership gaps are easier to compare across repeated scenarios.
- Step 1: Run a few scenarios with expected outcomes up front. Test cases can include
clean intake,incomplete intake, and a repeated submission case. Write expected end status and ownership before each run so pass and fail are unambiguous. - Step 2: Verify each step against one source of truth. For each scenario, confirm
Notionupdates correctly and that connected tools create or skip actions as intended. - Step 3: Validate timing in your own environment. Measure how long each path takes and define when owners should step in based on observed runs.
- Step 4: Rehearse once with an internal fake client before enabling live triggers. Document that statuses match expectations, handoffs are clear, and failure ownership is assigned.
Add one more check before launch day: repeat the same scenario twice and compare outputs. If the second run produces different statuses or extra actions, review the trigger or mapping logic before going live. If any scenario ends with unclear ownership, missing final status, or manual guesswork, pause and fix that path first.
Common Mistakes and Fast Recovery Steps#
Many onboarding failures come from added complexity and untested assumptions, not from the tools themselves.
| Mistake | What the article says | Recovery move |
|---|---|---|
| Overbuilding from day one | Start with one service package, one intake path, and one baseline checklist | Pause new branches, return to the baseline path, and confirm clean test results before adding complexity again |
| Keeping a template you never trimmed | Imported templates can include extra fields and noisy statuses | Run a field-by-field review and remove every property that has no clear owner |
| Allowing multiple kickoff triggers | Duplicate onboarding can start when more than one event launches the process | Disable secondary triggers, rerun duplicate-submission tests, and confirm one final status per client |
| Trusting one-click claims without local testing | Treat reported outcomes as directional until your own test log confirms expected results | Require a short test record before adopting any new automation pattern |
When you need to recover, change one variable at a time and retest. If you change several things at once, it becomes harder to tell what actually fixed the issue.
- Overbuilding from day one.
Start with one service package, one intake path, and one baseline checklist. Add variants only after the baseline run is stable so ownership and handoff issues are visible early. Recovery move: pause new branches, return to the baseline path, and confirm clean test results before adding complexity again.
- Keeping a template you never trimmed.
Imported templates can include extra fields and noisy statuses. Remove anything that does not drive a decision, archive confusing properties, and keep kickoff status clear in the main view. Recovery move: run a field-by-field review and remove every property that has no clear owner.
- Allowing multiple kickoff triggers.
Duplicate onboarding can start when more than one event launches the process. Use one kickoff trigger condition, and keep launch edits controlled so each client run produces one clean path. Recovery move: disable secondary triggers, rerun duplicate-submission tests, and confirm one final status per client.
- Trusting one-click claims without local testing.
Forum posts and creator demos can generate ideas, but they are not proof for your setup. Treat reported outcomes as directional until your own test log confirms expected results. Recovery move: require a short test record before adopting any new automation pattern.
If performance drops after launch, review failed cases first, fix the highest-friction step, then expand. Keep the baseline predictable before tailoring by use case.
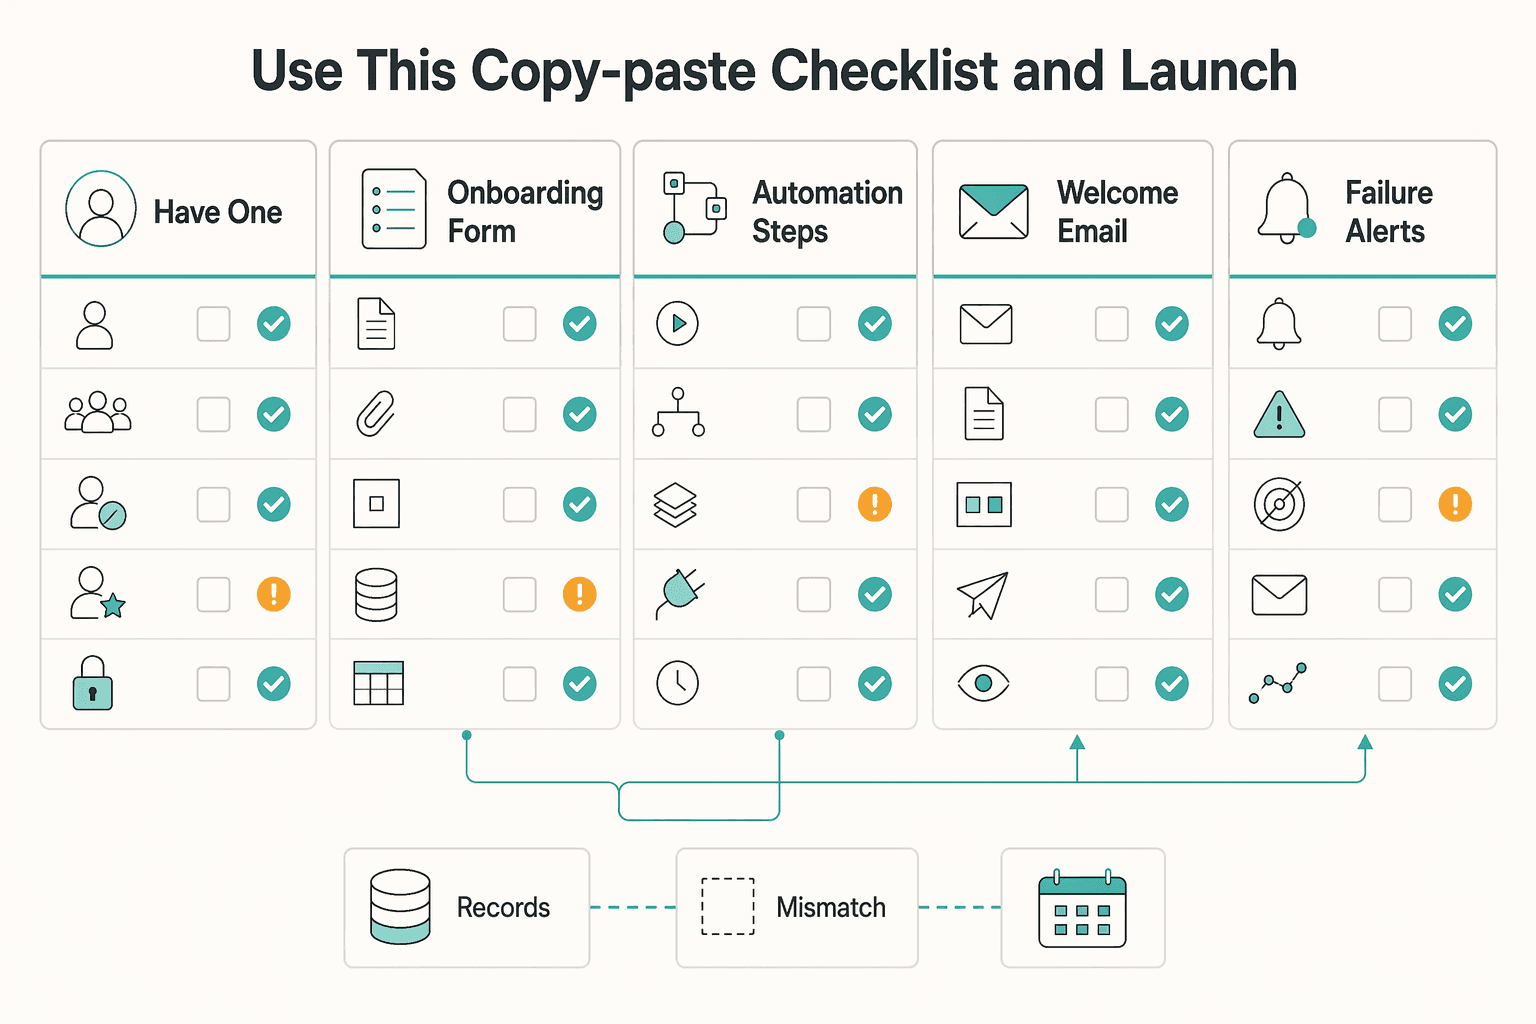
Use This Copy-Paste Checklist and Launch#
Launch only when every item is checked. If one box stays open, pause and fix it before turning on live triggers.
Before you mark the list complete, assign one person to review each line and one person to sign off on launch. The reviewer confirms evidence in records, and the sign-off owner confirms risk acceptance for any known gaps. Date each checklist cycle so you can compare what changed between launch week and later review weeks.
- I have one source of truth in
Client Onboarding Databaseand a clearly defined onboarding trigger status for my workflow. - My
Onboarding formmaps cleanly intoNotionwith required fields only. - My automation steps (in
Notionor an external tool) run in the order I configured and write links/status back toNotion. - My
Welcome emailtemplate is tested with real merge fields. - My failure alerts route to my team channel (for example,
Slack) with a named owner and recovery steps. - I ran representative test scenarios (including clean, incomplete, and duplicate submissions) before launch.
- I scheduled a recurring review cadence (for example, weekly) to fix recurring onboarding failures.
After launch, keep the same checklist for the first review cycle and mark any drift directly on the list. That gives you a stable baseline and makes future updates easier to compare against what already works. Want to confirm what fits your setup? Talk to Gruv.
Frequently Asked Questions
What is the minimum setup to automate client onboarding notion without overengineering?
Start with one source-of-truth setup, one kickoff path, and one baseline checklist you can test repeatedly. Keep version one intentionally small so failures are easy to spot and fix. One published walkthrough estimates about 45 minutes for an initial build, which is a useful scope check, not a guaranteed timeline. If your first build takes longer, that can be a sign your data model is still too broad.
When should I use `Notion Forms` and `Notion Buttons` instead of `Zapier`?
There is no reliable sourced threshold, so treat this as a practical decision. Use native Notion actions when the sequence begins and ends in Notion, and add Zapier when onboarding must coordinate with other tools. If complexity starts creating duplicate actions, simplify back to one clear kickoff path first. Keep one owner responsible for the trigger field so edits do not relaunch onboarding by mistake.
Which onboarding steps should stay manual even after automation?
Keep judgment calls manual. Approval-sensitive communication, exceptions, and edge-case decisions usually need a human owner. Use automation for repeatable handoffs and tracking, then keep final quality decisions human. A practical split is to automate data movement and task creation while keeping client-specific decisions with the onboarding owner.
How do I prevent silent failures between `Notion`, `Google Drive`, and `Slack`?
Make each cross-tool step leave a visible status in your onboarding record so missing handoffs are obvious. Track successes and failures in one place, then review exceptions on a regular cadence. Silent failures often persist when ownership and status are unclear. If a step fails and no owner is assigned, treat that as a launch blocker, not a minor issue.
How do I keep onboarding consistent if I use a `Client Onboarding Automation Template`?
Treat templates as a starting point, not a finished setup. Keep content clearly categorized and easy to search so answers are easy to find. Also design around a known constraint: there is no simple Notion API endpoint that duplicates full page content in one step. When in doubt, trim properties first and add only what your team actually uses every week.
Is `n8n` a better fit than `Zapier` for independent professionals?
Not universally. One comparison frames n8n as a self-hosted option for technical teams, while Zapier is positioned for enterprise orchestration. Choose based on who will own hosting, maintenance, and troubleshooting day to day. If maintenance ownership is unclear, keep your stack simpler until it is clear.
What should I check before going live with automated onboarding?
Run test scenarios that cover clean submissions, incomplete submissions, and duplicates before turning on live triggers. Confirm each path ends with a clear final state and owner. Launch only after repeated tests behave the same way. Keep those test results in the same place as your onboarding records so your team can verify readiness quickly.
Try a related tool
Researched and edited by the Gruv editorial team. Gruv builds cross-border billing, payouts, and finance-operations software for global businesses.
Sources
Includes 4 external sources outside the trusted-domain allowlist.
Educational content only. Not legal, tax, or financial advice.
Related Posts

Automating Freelance Finances Without Losing Cashflow Control
You can [automate freelance finances](https://solofinancehub.com/blog/how-to-automate-freelance-finances) and still keep control over key cash decisions. The practical target is simple: automate repetitive admin, then keep human approval for higher-risk exceptions.

The Best Proposal Software for Freelancers and Agencies
**Pick proposal software based on your ability to produce a clear, retrievable "what was sent and what got accepted" record, not on how pretty the template looks.** As a business-of-one, your proposal process is not admin. It is a control system for scope, timing, and cash.

The Freelance Payment Penalty: A Modeled Audit of Platform Fees, FX Spreads, and Payout Delays
The money rarely disappears through a single, easy-to-spot fee. The real loss is stacked. A marketplace takes its commission, a processor adds a charge for international cards, a bank or payment company converts the currency at a spread, a platform holds the funds before release, and a wire sheds a little to intermediaries on the way in. Each layer looks defensible on its own, but the worker feels the combined result as a smaller deposit and a later payday.