
Quick Answer
Yes - the colombia digital nomad visa is commonly framed as Visa V Nomadas Digitales for foreigners doing remote work with non-Colombian income, not local hiring. Public guidance in the article reports stays up to 2 years, but approval timing and renewal handling still need a fresh check before filing. The practical path is to confirm route fit, build a coherent evidence set, submit online, and complete post-arrival registration and Cedula processing within 15 days.
Start Here Before You Book a Flight#
Treat this as a legal-stay decision first, and a city move second. The safest sequence is simple: start with what is stable, verify what can change, and do not lock in costs until your filing is truly ready. If you are thinking about Medellin, Bogota, or Cartagena, decide on your stay path before you commit to flights, leases, or a move date.
Most public summaries agree on the broad outline. This route is commonly described as a Visa V visitor option for remote workers, freelancers, and online entrepreneurs earning from outside Colombia. Those same summaries usually point to an online filing process and stays of up to 2 years, while still treating it as temporary status rather than a direct path to permanent residency or citizenship.
| What you can treat as stable now | What still needs a fresh check before filing |
|---|---|
| Route purpose: remote work tied to foreign income | Exact eligibility details by nationality, including visa-exempt conditions |
| Process shape: online filing is reported in guides | Case-by-case document requests that can go beyond published summaries |
| Early post-arrival duty: register the visa and apply for Cedula within 15 days | Current interpretation of edge cases and discretionary requirements |
| Planning input seen in guides: 30 to 45 days | Your real timeline, which may run shorter or longer |
Build your plan in that order: confirm fit, assemble documents, submit, wait with a buffer, then complete arrival tasks. In practice, much of the wasted time comes from reversing that order and trying to plan housing or flights around a file that is not yet coherent. The usual failure mode is not some exotic legal problem. It is a packet with mismatched details, stale documents, or unclear evidence that triggers follow-up requests, delays, or a full round of rework.
Before you spend money, create one simple decision record for yourself. Track what you have verified, what still needs confirmation, and what could expire before filing. People lose time when they work from memory and can no longer tell which detail came from a current rule and which came from an older checklist. A one-page tracker is often enough to prevent that.
Before you book anything non-refundable, run four checks:
- Confirm your income and work narrative are clearly foreign-facing across all core documents.
- Re-check nationality-sensitive rules right before submission.
- Keep flight and housing terms flexible until approval is in hand.
- Hold time in your first 15 days after entry for registration and Cedula steps.
That structure carries through this guide. First confirm what the route actually covers, then choose the right path, build the evidence in sequence, submit with fewer avoidable mistakes, and finish the early compliance tasks after arrival.
What the Colombia Digital Nomad Visa Actually Covers#
This route works when your work and income remain tied to non-Colombian employers or clients. Public guidance generally describes it as legal stay for remote work linked to non-Colombian companies or international clients, with reported validity of up to 2 years.
Many guides call the category Visa V Nomadas Digitales. The label helps you find the right route, but it does not answer the hard questions on its own. Public summaries can differ on legal framing, edge cases, and how specific eligibility points are being applied when you file. That is why the category name is a starting point, not the final decision.
The practical boundary is fairly clear: foreign-sourced work and income are in scope; local Colombian employment is not. Just as important, this status does not on its own grant permanent residency or citizenship. That matters because some people plan the move as if a temporary visitor route will also answer long-term settlement questions. It will not, and treating it that way leads to avoidable mistakes later.
| What this route generally covers | What it does not settle for you |
|---|---|
| Legal stay while doing remote work tied to non-Colombian companies | Permission to work for a Colombian employer |
| Reported stay length up to 2 years | Automatic permanent residency or citizenship |
| A route for remote professionals with foreign income | One definitive monthly threshold across all public guides |
| A process some guides place around 2 to 6 weeks | Guaranteed approval timing or renewal outcome |
Use this section as a scope filter. If your planned income source, client base, or work arrangement falls outside foreign remote activity, stop and verify before you build documents. Filing under the wrong assumption creates friction later, especially when your supporting records tell a different story from the route you selected.
Another early planning point reported in many guides is visa registration and Cedula processing within 15 days of arrival. Keep that on your radar now, not after approval, so your first weeks in country are not already overcommitted.
Once the scope is clear, the next decision is more practical: whether this route actually fits better than tourist status or a passive-income path.
Choose Between the Digital Nomad Visa Tourist Visa and Rentista Visa#
Choose based on stay length, income type, and how much paperwork you are willing to carry upfront. If you are actively working remotely for foreign employers or clients, the nomad route is usually a better fit than tourist status. If your case is based on passive income and no work activity, Rentista may be cleaner.
Tourist status is the lightest option for many people, but it is built for shorter stays. Public guidance often frames it as 90 days plus one extension up to 180 days in a calendar year. That can work well if your plan is exploratory, time-limited, or still uncertain. The tradeoff is that you buy simplicity now by taking on more timing pressure later.
If you already expect to work remotely from Colombia across multiple quarters, the heavier document load often buys better continuity. If you only need one short project cycle and your next move is still unclear, tourist status may still be the sensible first step. The mistake is not choosing the lighter option. It is choosing it because it feels easier today when your actual plan already looks longer and more settled.
| Path | Best fit | Stay profile | Paperwork and risk |
|---|---|---|---|
| Tourist status or Tourist Visa where required | Short, uncertain plans | 90 days with one extension up to 180 days in a calendar year | Lower upfront paperwork, but no work authorization and tighter timing pressure |
| Digital Nomad route under Visitor Visa logic | Remote workers paid from outside Colombia | Up to 2 years in public guidance | More documentation upfront, and no work for Colombian companies or clients |
| Rentista Visa | Passive-income holders who do not plan to work | Up to 2 years in public guidance | Income-proof requirements and strict activity limits |
A simple decision rule works well here. If your plan is short and uncertain, tourist logic can be enough if you accept hard limits. If your stay is longer and your work is clearly foreign-facing, prioritize the remote-work route. If your case is passive-income driven, evaluate Rentista first instead of forcing a work-based category to fit.
One common trap is over-optimizing for fewer forms today. That can feel efficient, especially when you are also planning housing, storage, travel, and everything else that comes with a move. But less paperwork now can mean more calendar pressure, more border pressure, and less flexibility once you are already in the country. On the other hand, the visa route only pays off if your documents truly support it. There is no point choosing the longer-stay option if your evidence still reads like a tourist trip with a vague work story attached.
Before you lock your path, use this checkpoint:
- Confirm your passport has at least 6 months of validity.
- Check whether you can produce recent bank statements and health coverage evidence often requested for visa applications.
- If you start on tourist status, set a calendar trigger before your initial period expires.
- If public income thresholds conflict, verify the current requirement before paying for extra document prep.
Make this choice before you translate, notarize, or apostille anything. Once paid document work starts, changing routes becomes more expensive, slower, and more annoying than it needs to be.
Confirm Eligibility Before You Spend on Documents#
Do a fail-fast review before you pay for document prep. If you cannot clearly show foreign income, remote-work activity, and the income floor currently being applied, pause and fix that first. The easiest way to sort your case is by how income reaches you, then test whether your evidence is clear enough for that story.
| Applicant profile | What to prove early | Fail-fast signal |
|---|---|---|
| Employee | Foreign salary income and remote-work activity | Deposits exist, but the foreign income source is unclear in official statements |
| Freelancer | Foreign client income and remote-work activity | Payments appear, but foreign-source client income is not clearly traceable |
| Business owner | Foreign business earnings traceable to personal income | Business revenue appears, but personal income proof is unclear |
The broad guidance is consistent on one point: this route is built around remote work with foreign income. Local Colombian employment conditions should be verified directly against current official rules before you spend money on certifications, translations, or legalization.
Use official bank statements from savings or checking accounts as your primary financial proof. Keep the account-holder name exactly aligned with your passport and use statements covering the last three months before your filing date. Paystubs, credit card statements, and investment portfolios should not be treated as substitutes for this proof item. They may help reinforce the story, but they should not carry the file on their own.
Public sources still conflict on the exact monthly threshold, so use a spending gate. Confirm the active requirement first, then finish paid prep. That one step can save you from translating or legalizing a packet that still misses the number being applied on your filing date.
If you are unsure whether your evidence is strong enough, run a quick coherence check in this order: identity match first, payment traceability second, role narrative third. Weakness in any one of those can create delays even when the totals look fine on paper. A clean financial file is not just about showing enough money. It is about whether a reviewer can follow the story without guessing where the money came from, how it reaches you, and why it matches the route you chose.
Run this gate before document spend:
- You have the required recent official statements with passport-name alignment.
- Your file clearly shows foreign income.
- Your evidence shows remote work tied to foreign-sourced activity.
- Your monthly totals satisfy the requirement confirmed for your filing date.
Once those checks pass, move on to building the packet in sequence rather than collecting everything at once. That keeps the process focused and prevents you from paying for final steps on documents you may still need to replace.
Build Your Document Pack in the Right Order#
Build your file in passes, not in a pile. The practical sequence is to lock identity and file quality first, assemble work and income evidence second, then legalize foreign-issued records where required. That order reduces rework and keeps you from spending money on final steps before the underlying documents are stable.
Start with passport validity and upload quality. One checklist cites 6+ months of passport validity, and that is an easy gate to clear first. Because the process is online, every file should be clear, readable, and consistently formatted as a PDF. Poor scans and partial uploads create avoidable problems that have nothing to do with eligibility, and they tend to surface only after you have already convinced yourself the hard part is done.
Then assemble the core evidence set: a remote-work contract or letter, proof of foreign income, health insurance valid in Colombia, a photo, and Spanish translations or apostilles where needed. Use bank statements from the last three months as the anchor. Contracts, payment records, and supporting documents should all tell the same timeline. If one document suggests you started working in March and another suggests June, fix that before anything else.
A useful way to think about the packet is that some documents prove identity, some prove activity, and some prove continuity. Your passport and photo cover identity. Your contract, employer letter, and client records cover activity. Your recent bank statements and other support documents help show continuity. If any one of those layers is weak, the whole file feels less trustworthy even when the other pieces are strong.
Before upload, run a strict consistency check across the full packet. Names, amounts, and dates should match everywhere. Inconsistent evidence across documents is a known rejection risk, and it is one of the easiest problems to catch before submission if you review the file as a set instead of one document at a time. Read it once as if you were seeing it cold for the first time. If you have to stop and explain a discrepancy to yourself, a reviewer will likely do the same.
If you are filing with beneficiaries, treat that checklist as variable and confirm current requirements in official guidance before final submission. Do not assume the principal applicant list covers everyone. That assumption causes a lot of avoidable last-minute scrambling because relationship evidence and identity records often require their own cleanup.
Complete apostille or legalization only for documents issued abroad, and do it after the document details are final. If requirements shift, re-check current immigration guidance before your last legalization and submission step. Apostilling the wrong version of a document is a slow and expensive mistake, and it usually happens when people try to do everything at once instead of freezing the underlying file first.
Keep version control simple. Label files with stable names and dates, archive replaced drafts, and maintain one final folder that mirrors what you intend to upload. That habit matters most when you are revising translations, replacing scans, or swapping in newly issued statements close to filing day. It also makes the final review calmer, because you are not guessing which PDF is current.
Before you submit, run your packet against a structured checklist so you catch missing evidence early: Visa Cheatsheet for Digital Nomads.
Follow a Realistic Timeline From Prep to Arrival#
Once your documents are coherent, timing becomes the main risk. Plan in six phases: pre-check, document build, translation and insurance checks, apostille, submission wait, and move planning. On paper that looks straightforward. In practice, you want slack between those phases because one correction can push several later steps.
Treat published processing estimates as directional, not guaranteed. Income thresholds tied to SMMLV can change, so verify the current figure on your filing date and keep major travel and housing decisions flexible. The most useful timeline is not the fastest one. It is the one that leaves room for a document refresh without breaking your move.
A practical order for passport, income evidence, and apostille tasks looks like this:
- Week 1 pre-check: confirm your passport has at least six months of validity and list the required documents you must obtain in your home country before filing.
- Weeks 1 to 2 document build: collect income evidence and any required police record documents, typically covering the past three years, then align names, dates, and identity fields.
- Week 2 translation gate: if a document is not in Spanish, complete an official translation with a certified translator recognized in Colombia.
- Week 2 or 3 insurance check: confirm your policy is valid for at least one year and explicitly includes repatriation coverage.
- Week 3 or 4 apostille: finalize document details first, then apostille foreign documents in the country of origin.
- Submission and wait: file, then keep flights and housing terms flexible until a decision arrives.
The reason this sequence works is that it protects you from redoing paid steps. Translation, insurance review, and apostille are manageable on their own, but they become expensive and slow when you discover too late that a name does not match, a contract date is wrong, or a statement cycle needs updating. A lot of frustration in this process comes from fixing the same problem twice because it was caught after the packet had already moved to a more final stage.
Two risks are worth planning around early because they create the most unnecessary rework. The first is apostilling documents before details are final. The second is finding out too late that the insurance wording does not clearly include repatriation coverage. Prevent those first. Speed only helps after file quality is stable.
Add a calendar buffer between phases so one correction does not collapse the rest of your plan. Even a small mismatch can trigger a new statement cycle, a revised translation, or a replacement scan. If your move date is fixed for personal reasons, protect that date by finishing eligibility and document coherence earlier rather than trying to compress submission week.
If approval timing conflicts with your planned lease start, use a contingency branch instead of hoping for the best. Negotiate delayed lease activation or use short, flexible housing while the decision is pending. That keeps your housing plan aligned with immigration reality instead of forcing one to gamble on the other.
By the time you submit, the goal is simple: a file that is complete, current, and easy to follow on the first review. If you can reach that point without rushing, the rest of the move becomes much easier to manage.
Submit the Application Without Avoidable Delays#
Most delays start in the packet, not at the portal. Submit only when your file is internally consistent on the first pass.
Use this sequence:
- Confirm eligibility still matches the route you selected.
- Review the foreign employer letter, contracts, and foreign-income proof together.
- Verify document integrity across names, dates, translations, legalizations, and validity windows.
- Submit online, then complete fee steps in order.
Before you click upload, run a focused wording and traceability check. Your employer letter should make the employer, contract terms, remote arrangement, and foreign income source explicit. Where bank statements are required, they should cover the last three months, and the account-holder name should exactly match your passport name. Supporting documents should reinforce the core story rather than try to replace missing primary evidence.
The most common preventable failures are usually straightforward:
- Details do not match across employer letter, contract, and payment records.
- Remote-work language is too vague to show where income is generated.
- Required evidence is missing, untranslated where needed, or outside validity windows.
Use a final two-pass habit. First pass is technical quality and completeness. Second pass is narrative coherence across all records. That second review is where you catch problems that look fine in isolation but do not line up once the whole packet is read together. In practice, that is often the difference between a file that moves cleanly and one that comes back with avoidable questions.
If one check fails, pause and fix the packet before filing. A clean first submission is usually faster than a rushed one, even if waiting another few days feels frustrating. Once the file is submitted, your leverage mostly comes from how well you prepared it beforehand.
Handle First Month Tasks After Approval#
Approval is not the finish line. It is the point where planning turns into execution, and your first month should focus on entry logistics, local admin, and disciplined recordkeeping.
Travel with identity details that match your application exactly, and keep your core files in both digital and offline form. If any follow-up appears after submission, respond quickly and keep names, dates, and amounts aligned with your original packet. Small inconsistencies are easier to prevent than to explain later, especially once you are also dealing with housing, SIM cards, banking, and the general chaos of arrival.
In month one, start the Cedula de Extranjeria process if it applies to your case. Many guides frame it as the practical ID that helps with renting, account opening, and day-to-day setup. Keep receipts, confirmations, and status updates organized from day one. The same filing discipline that got the visa approved will make local setup easier, and it also gives you a clean record if you need to prove continuity later.
This is also the right time to separate immigration planning from tax planning. They interact, but they are not the same thing. Stay length can affect tax status, and crossing 183 days within any 365-day period may change obligations. Do not assume that because your immigration path is settled, your tax position is settled too. People often leave that question until they are already near a threshold, which is exactly when their options are narrower.
Use one running records checklist wherever you base yourself:
- Passport, e-visa file, and entry records
- Cedula receipts and status messages
- Signed lease, payment receipts, and landlord contacts
- Bank onboarding records and verification messages
- Work contracts, client agreements, and foreign-income support documents
- A simple day counter for the 183-day threshold
Give yourself a first-week operating rhythm: legal-status tasks first, then housing and banking, then close any documentation gaps the same day they appear. That sequence reduces the chance that a missing receipt or mismatch blocks a practical task later in the month. It also keeps the administrative work from disappearing behind the more visible parts of the move.
If a task affects identity, status, or money flow, document it the same day. That habit removes friction now and leaves you better prepared if you need to show continuity later, whether for a renewal question, a tax review, or simply cleaning up your records after a busy first month.
Add Family Beneficiaries Without Slowing the Main Case#
Protect the main timeline first. Beneficiary filings are easier to manage when the principal applicant has already applied and been accepted.
Current public guidance frames beneficiaries as spouse or partner and children, with separate applications and separate decisions for each person. Details can vary by nationality and work profile, so build the principal packet first, then prepare each dependent packet with consistent identity and relationship details. That approach keeps the core case moving while giving you room to fix weaker family files without turning every deadline into a group problem.
Because beneficiary filing requires the principal holder's visa number, timing matters. Start only when each beneficiary file is complete enough to finish the online flow in one go. A half-ready dependent file is rarely worth forcing through just to keep everyone on the same calendar.
| Filing option | When to use it | Advantage | Main tradeoff |
|---|---|---|---|
| Submit separate beneficiary applications in one round | Every dependent file is complete and internally consistent | Fewer submission rounds | One weak file can delay part of the family plan |
| Staggered filing | Move timing is tight or one file is not ready | Keeps the main move on track | Family arrival timing may split |
Use a readiness gate for each dependent before submission: identity consistency, relationship clarity, and complete materials. If one dependent packet fails that gate, do not let it hold the principal file unless your move depends on a single arrival date. If the family must arrive together, then the weakest packet becomes the real schedule driver, and it is better to admit that early than pretend everything is equally ready.
Most problems here come from timing and rule-tracking. If your calendar is tight, file only the fully ready beneficiary cases first and clean up the rest after. That is usually less stressful than trying to solve every file at the same speed.
Manage Renewal Uncertainty With a Verification Plan#
Assume future filing conditions will need to be met again unless current official guidance says otherwise for your case. That is the safest way to protect continuity when terminology and practice are not fully aligned across sources.
Treat any renewal or follow-on filing as a fresh review with updated evidence. Prior approval helps with context, but it does not remove the need to meet active requirements again. In practical terms, that means you should not rely on memory, old screenshots, or last year's checklist once your current status starts moving toward expiry. Build a habit of checking what is still valid, what needs refreshing, and what could change.
A simple verification plan is enough if you start early:
- Confirm how Visitor (V) visa rules apply to your next filing.
- Recheck records likely to lapse first, including background checks and health-policy coverage.
- Refresh core supporting evidence.
- Recheck for policy updates since last approval.
- Set an internal filing buffer based on uncertainty, not best-case timing.
The point is not to predict every future rule change. It is to avoid getting trapped by the obvious ones, especially expiring documents and stale assumptions. A light review at regular intervals is easier than rebuilding everything at the end, and it gives you more room to react if interpretation or document requirements shift close to expiry.
If the process is still unclear near expiry, prepare as if reapplication-style steps will be required. That is usually the safer operating assumption than planning around a smooth renewal and discovering late that the evidence standard looks closer to a fresh filing.
Avoid the Rejection Triggers Competitor Guides Skip#
Most preventable setbacks come from three places: a route choice that does not match your real plan, process-sequence confusion, and status-history gaps. Run one final consistency pass so your route and timeline still align before you submit. Use this as a practical risk scan, not an official rejection-code list.
A lot of document checklists miss these issues because they focus on what to upload, not on whether the story behind the upload still makes sense. A clean PDF set can still be weak if your status history has gaps, your long-term plan points to a different route, or you are fuzzy on which authority handles which step. Those are the kinds of problems that feel small until they slow the whole case.
| Red flag to catch before submit | Why it creates trouble | What to verify now |
|---|---|---|
| Gaps, lapses, or unplanned absences in status history | Timeline continuity can be affected | Status timeline is complete with no unexplained breaks |
| Route mismatch with real long-term plan | A stay-longer option can fail long-term goals | Chosen visa path still fits the actual plan |
| Process-step confusion between authorities | Filing and post-entry actions are handled by different entities | Submit via Cancilleria, then complete Migracion Colombia steps, including Cedula handling where relevant |
Run this 20-minute pre-submit audit:
- Minutes 1 to 5: route and timeline check for planned stay and continuity.
- Minutes 6 to 10: status-history check for unexplained gaps or lapses.
- Minutes 11 to 15: authority-sequence check for filing and post-entry actions.
- Minutes 16 to 20: final alignment check before submission.
If you find a mismatch, stop and correct the root cause instead of patching one file. A piecemeal fix can create fresh inconsistencies somewhere else. Rebuilding from one clean master set may take longer upfront, but it usually reduces repeated follow-up later because you are fixing the narrative once instead of patching symptoms.
If you hit a setback, use a clean recovery pass:
- Classify the issue: continuity gap, route mismatch, or process-step error.
- Rebuild one master evidence set.
- Re-validate route fit, continuity, and authority sequence.
- If you choose to re-submit, do it only after the full check passes in one review.
That may feel slower in the moment, but it is generally the steadier way to recover. Once a file has started to drift, the fastest way back is usually to simplify, rebuild, and re-check in order.
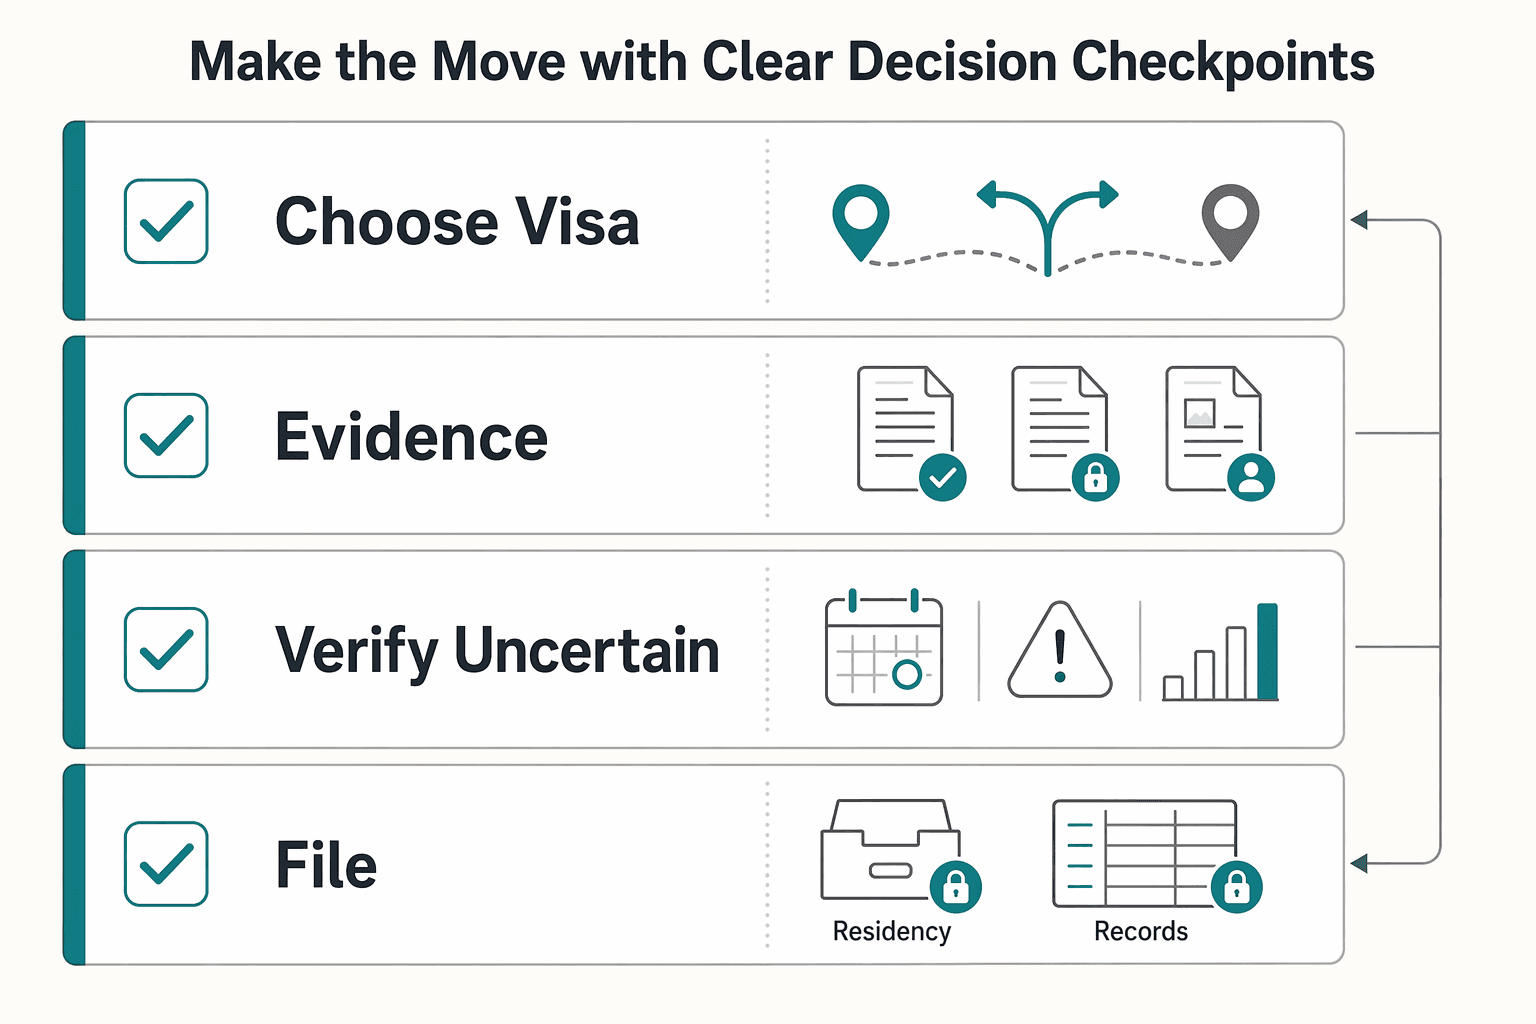
Make the Move With Clear Decision Checkpoints#
You reduce relocation risk by locking three things before submission: the right stay path, a coherent evidence pack, and the rules that still need live verification. A clean filing does not guarantee timing, but it does protect continuity when timing moves around.
Start by choosing the path that matches your real plan now, then pressure-test one fallback. For many people, that means deciding between a visa route and a shorter visa-free plan, then checking whether documents, timing, and budget still support that choice. The point is not to predict every scenario. It is to avoid being surprised by the obvious ones.
Keep timing checkpoints visible. One cited pattern uses the 90-day point as an action trigger and the 180-day calendar-year cap as the hard boundary for visa-free stay. After the full 180 days is used, that same source says a visa run may no longer work in that year. At that point, the choices narrow to applying for a visa route, leaving for the rest of the year, or overstaying and accepting consequences. If you might need more than a short stay, do not wait until the calendar is already tight.
Use this final checklist before spending money, then file only when all four checks pass:
- Choose visa path.
- Complete evidence pack.
- Verify uncertain rules.
- File.
Keep one protective fallback. Some guidance describes extension as easier and cheaper than a visa run in certain cases, while broader migration commentary warns that newer digital nomad programs can face administrative lag. Plan around that uncertainty, verify current program status before filing, and keep non-refundable travel and housing flexible until decisions are final.
Once you have filed, keep the execution order practical: city setup first, legal and tax follow-up second, long-term optimization last. That order helps keep compliance work from getting buried under move logistics and makes it easier to adjust if timing changes after submission or after arrival.
After filing, use Medellin, Colombia: The Ultimate Digital Nomad Guide (2025) for city setup. Compare options with The 2025 Global Digital Nomad Visa Index: 50+ Countries Compared. Then follow up with Taxes in Colombia for Foreigners and Remote Workers before crossing major stay thresholds. If a key rule is still unclear, pause and verify before you lock in non-refundable commitments.
If you want to keep planning momentum after filing, use these practical calculators and generators for your move: Explore Gruv Tools.
Frequently Asked Questions
What is the colombia digital nomad visa and who is it for?
It is commonly described as Visa V Nomadas Digitales, an official path for foreigners living in Colombia while working remotely. Public guidance frames it for remote employees, freelancers, and digital entrepreneurs with foreign income. The same guidance ties it to non-Colombian employers or international clients. If your work income depends on local hiring, treat that as a separate verification issue before filing.
How long can you stay on the Colombia Digital Nomad Visa?
Public guidance often reports validity up to 2 years. Treat that as planning input, not a guaranteed outcome for every case. If your plan is still fluid, compare it against tourist-stay limits often described as 90 days plus one extension up to 180 days in a calendar year. Build move dates around buffer time, not best-case assumptions.
Can you work for a Colombian company on this visa?
Guidance in this article frames the route around foreign remote work, not local hiring. Your file should align with non-Colombian employers or international clients. If local employment is part of your plan, verify current official rules before filing. Do that check early, before you pay for document prep.
Can spouses or children be included as beneficiaries?
Public guidance indicates spouses and children can be included. Use that as a planning signal, not a blanket guarantee. Confirm current dependency criteria and required records when preparing each application. Keep each dependent file complete so one weak packet does not delay everyone.
Is the visa renewable or do you need to reapply?
Some guidance presents renewal as possible if eligibility is still met. Treat renewal as conditional, not guaranteed. Plan early and keep updated evidence ready. If terminology is unclear near expiry, prepare complete documents in case reapplication-style steps are requested.
How long does processing usually take?
A commonly cited range is 2 to 6 weeks. Use it as a buffer, not a fixed deadline. Keep major commitments flexible until a decision is issued. The safest approach is to avoid non-refundable bookings until your status is confirmed.
Does time on this visa count toward permanent residency in Colombia?
Resident accumulated-time guidance cited in this article is tied to Migrant M visa holders. Because this route is framed as Visa V, do not assume automatic residency-time credit. Verify the residency path separately if that is your long-term goal. Keeping immigration and long-term settlement planning separate prevents costly assumptions.
Try a related tool
Researched and edited by the Gruv editorial team. Gruv builds cross-border billing, payouts, and finance-operations software for global businesses.
Sources
Includes 5 external sources outside the trusted-domain allowlist.
- blog.stanfordbaker.com/colombia-digital-nomad-visa-income-requirementexternal
- brighttax.com/blog/colombia-digital-nomad-visa-complete-guideexternal
- colombianpassport.com/newsroom/colombia-digital-nomad-visa-masteri...external
- quantamnomad.com/2025/12/24/colombia-digital-nomad-visaexternal
- rippling.com/blog/colombia-digital-nomad-visaexternal
Educational content only. Not legal, tax, or financial advice.
Related Posts

Moving to Medellin as a Digital Nomad in 2026
If you want Medellin to work on the first try, make one written decision before anything else: are you testing a short stay, or trying to build a longer base in Colombia? The city can feel easy on the surface, but the move usually works when paperwork, timing, and housing line up in that order.

The 2026 Global Digital Nomad Visa Index for 50+ Countries
Start with legal fit, not lifestyle filters. The practical order is simple: choose a route you can actually document, then decide where you want to live. That single change cuts a lot of wasted comparison work and stops you from falling in love with places that were never a real filing option.

Taxes in Colombia for Foreigners and Remote Workers
Most avoidable filing mistakes happen because people do the right work in the wrong order. If you get the sequence right, the rest of the year becomes much easier to manage. Start with status, then define filing scope, then build the record set that supports your position.