
Quick Answer
Build your home video studio on a budget by locking a repeatable setup first, then upgrading only when a specific bottleneck appears. Start with a microphone, basic lighting kit, and consistent framing, then run a private YouTube test on phone and laptop playback before buying anything else. Keep a small reserve for replacements and track return windows so one failed item does not derail client-facing work.
Start with the outcome you need from your home video studio#
Start with the job, not the gear. For most independent professionals, the target is straightforward: produce client-ready content with clear audio and repeatable framing, without rebuilding your setup every time you record.
That goal changes how you buy. You are not trying to assemble the most impressive desk setup on YouTube. You are trying to cut ad hoc purchases, get camera-ready faster, and build something you can still maintain when recording volume increases. If a purchase does not improve reliability, speed, or a clear upgrade path, it is probably not the next thing to buy.
A quick scope check helps early. Filming, live streaming, and podcasting overlap, but they are not the same operating problem. One common guide highlights the same basic pillars: lighting, camera, audio, space, and desktop setup. Priorities can still shift by format, so pick your primary use case first.
If you only record occasionally, you may not need a full studio at all. One source makes that point directly, and it matters for budget decisions. In that case, start with a simple setup you can store away and reuse. If you publish frequently or deliver client-facing work, a fixed corner can make setup more repeatable.
Before you price anything, write down the exact outputs you need over the next 90 days. Keep it concrete:
- talking-head client updates
- recorded lessons or YouTube videos
- live sessions
- podcast episodes, audio-only or video-first
Then do one verification pass with what you already have. A smartphone can serve as the primary recording tool in a budget setup, so record a short sample at 1080p or 4K if your device supports it. On replay, check two things. Does your voice stay clear without room noise taking over? Does your framing look intentional rather than accidental? That quick test tells you whether your first money should go into audio, lighting, or simply a better spot in the room.
The main early failure mode is buying as if every use case needs the same kit. It does not. Another common trap is following sponsored or affiliate-heavy recommendation lists and ending up with a pile of mismatched upgrades. A better rule is to choose one primary use case first, buy for dependable capture, and leave room to expand later. That is how you build a setup that still works after the novelty wears off. If channel positioning is part of the plan, see How to Create a YouTube Channel to Showcase Your Freelance Skills.
Define what professional means before you buy anything#
Before you shop, set a pass/fail standard: in a budget setup, "professional and credible" means consistent audio and visual quality, because consistency is what builds trust.
Start with two working definitions:
- Audio quality: your voice is clear, easy to understand, and not competing with distracting noise.
- Video framing: your shot stays stable and intentional, with consistent composition and a background that looks chosen, not accidental.
Treat those as must-pass standards, then separate them from preferences. A better camera, stylized lighting, or background blur can wait. First, plan purchases carefully and evaluate your space, since your room often determines what you actually need.
Use one checkpoint before spending more: record a short private YouTube test and review it on both a phone speaker and a laptop. Check whether every word is easy to follow, whether background noise pulls attention, and whether framing still looks deliberate on a small screen. If it fails, fix placement, sound, or lighting before adding gear. If editing is part of the bottleneck, The Best Video Editing Software for Freelancers may help.
Map your budget tier to real capability, not marketing promises#
Match your budget to what you can deliver consistently, not to "pro-quality" labels. In a home streaming studio, the useful benchmark is repeatable audio quality, stable framing, and a recording cadence you can maintain without frequent breakdowns.
A practical reality check is cost of alternatives: Peerspace says production locations typically cost $60 - $180 per hour, so a modest home setup can be financially sensible if you publish regularly. At the same time, pricing and positioning your work can be hard early on, so your setup should reduce avoidable risk rather than chase novelty.
| Marketing claim | What to benchmark instead |
|---|---|
| "Pro-quality" | Can you produce clear, repeatable audio and stable framing every session? |
| "Upgrade for better results" | Does this purchase remove a real failure point in your current workflow? |
| "More gear = more reliability" | Can you keep a dependable recording cadence with your current room and setup? |
Pick the band that matches the cost of failure#
If your work is client-facing and recurring, prioritize consistency first and keep one reserve line for replacements. The reserve is for session-stopping failures, not cosmetic upgrades. If missing one session would cost more than replacing a key item, fund the spare before buying novelty gear.
Verify capability before moving up#
Before spending more, test your current setup in normal working conditions and look for repeatability, not one good clip. If results are inconsistent, fix the weak link you found first. Accessibility has improved over time, but reliability still comes from disciplined setup choices.
Need the full breakdown? Read The Best At-Home Workout Equipment for a Small Space.
Choose permanent setup or portable kit based on recording frequency#
Choose a permanent corner when fast, repeatable starts matter; choose a portable kit when flexibility and lower upfront commitment matter more.
Before you pick, decide whether you are producing audio-only or audio-plus-video content. EcoFlow notes this decision changes both the equipment you need and the space you need, so it should drive your setup choice first. EcoFlow also notes you do not need a large room or large budget for a home podcast studio, and even a closet can work.
| Criteria | Fixed corner | Portable kit |
|---|---|---|
| Best fit | Frequent recording where startup speed matters | Occasional recording or shared space |
| Main advantage | Less reset work between sessions | More flexible use of room and budget |
| Main tradeoff | Takes dedicated space | More variation each time you set up |
Use one checkpoint before deciding: can you start a session without reworking framing, lighting, and room setup each time? If not, simplify the kit or move to a permanent corner. If you stay portable, keep a reference photo and a complete gear checklist so each setup starts from the same baseline.
If you want a deeper dive, read Value-Based Pricing: A Freelancer's Guide.
Buy in phases so every purchase earns its place#
Buy in phases, and prioritize capture quality before convenience. For most budget setups, that means voice and lighting first, then selective quality upgrades, then polish.
This order helps you avoid a common waste pattern: buying extras for a setup that still has weak audio or uneven video. Plan your full wish list before you buy so you do not end up with costly gear you cannot use, then purchase in sequence instead of all at once.
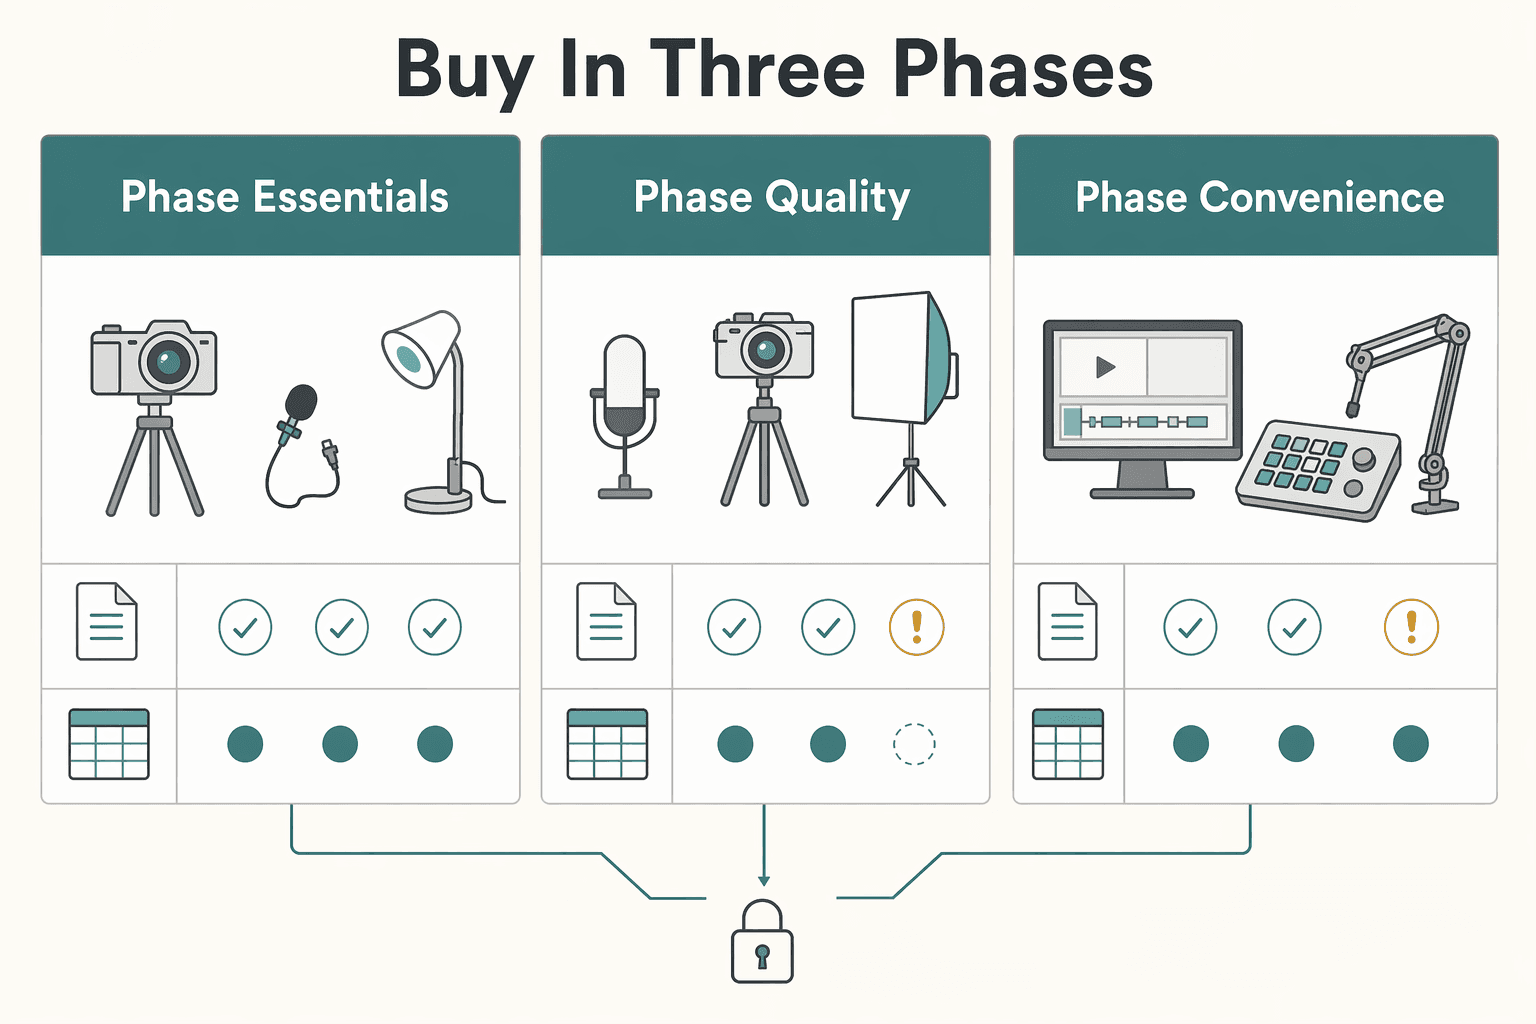
Buy in three phases#
| Phase | What to buy first | Why it belongs here | What to verify before moving on |
|---|---|---|---|
| Phase 1 essentials | microphone, basic lighting kit | These determine whether your footage is usable right away | Record a short test for voice clarity, face lighting, and repeatability |
| Phase 2 quality upgrades | Better support gear, improved background control, selective camera or audio improvements | Upgrade only after you know what is actually limiting results | Compare before/after clips, not specs alone |
| Phase 3 convenience and polish | streaming templates, production accessories, automation, cosmetic extras | These improve workflow, but they do not fix bad capture | Confirm recording quality is already stable |
Keep one rule in view: fix capture quality first, then buy workflow tools. If audio is still distant, lighting is still inconsistent, or framing drifts every session, hold off on polish purchases.
A simpler studio can still meet practical needs. One DIY example reports a setup built for under $350, and another source says a much simpler, lower-cost studio still worked well for its needs. Use that as permission to start lean, not as a universal budget target.
Procurement guardrails that prevent expensive mistakes#
Buying in phases works best when you track decisions. Keep a simple purchase log with:
| Purchase log field | What to record |
|---|---|
| Item | item name and seller |
| Receipt | receipt location |
| Timing | purchase date and return window deadline |
| Compatibility | compatibility notes for your video editing setup |
| Test result | first test result and any issue found |
Compatibility checks are non-negotiable. Before buying, confirm your equipment and software will work together. If compatibility is unclear, pause the purchase and verify first.
Test each new item soon after delivery and before its return window closes. The avoidable failure mode is predictable: unopened boxes pile up, the return window expires, and one missing adapter or software mismatch blocks the setup.
Screen recommendations for bias before copying a gear list#
Treat gear lists as inputs, not instructions. Some recommendation pages and videos use direct retailer links, so check for affiliate links and disclosures before treating the list as neutral advice.
That does not make the advice wrong; it means you should validate it against your room, workflow, and existing gear. If a list pushes polished extras before microphone and basic lighting, treat that as a red flag.
We covered this in detail in Best Teleprompter Apps for Video Recording in 2026.
Tune your room for consistency before you chase better gear#
Before you buy another accessory, stabilize your room and setup routine. In a budget setup, execution usually improves results faster than upgrades: with a strong idea and consistent execution, good video is possible with almost any gear. Better gear can add control and creative options, but it does not fix a setup that changes every session.
Build one setup sequence and keep it fixed#
Use the same order every time:
| Step | Action | Why |
|---|---|---|
| 1 | Choose camera angle first | Pick the position you can repeat, not the one you cannot maintain |
| 2 | Lock video framing | Frame for how you actually present so your shot stays consistent across sessions |
| 3 | Place the lighting kit | Set lights only after framing is fixed so your image stays predictable |
| 4 | Run a short voice-and-picture test | Review a quick sample before recording the full take |
A phone can be enough for usable output, but consistency still depends on the room and your process.
Catch failures before the long take#
Do a short preflight before you commit to a full recording. If the sample sounds off or the image looks inconsistent, adjust setup first and retest. This avoids wasting a full session on problems you could have caught in under a minute.
Use a repeatability checklist before every session#
For a home streaming studio, predictability is a quality upgrade. Keep a short checklist nearby:
- camera in the same position
- framing matches your standard shot
- lights set to the same placement
- background looks clean and intentional
- quick test clip reviewed before the full take
If one line keeps failing, treat that as the bottleneck and fix it before upgrading gear.
For a step-by-step walkthrough, see The best 'Stock Video' sites for creators.
Run your studio like a small operation, not a one-off project#
Once your room is stable, reliability comes more from operations than from buying more gear. A budget setup can still produce strong results when you run it with clear rules, repeatable checks, and a defined finish line for every recording.
Keep one recurring reset#
Use a recurring maintenance reset so small issues do not become recording-day failures. In formal studio environments, access can depend on signing a manual agreement, and not returning a room to its proper configuration can lead to penalties, including a documented $75 cleanup fee in one policy example. Your home setup does not need the same formality, but it benefits from the same discipline.
| Reset item | What to confirm |
|---|---|
| Cables and adapters | check cables and adapters |
| Power | confirm batteries and power for camera, lights, and audio gear |
| Storage | confirm storage and backup destinations |
| Software or firmware | review software or firmware changes only when you can test after |
| Room layout | return the room to its expected layout for consistent framing and lighting |
After any change, run a short test recording and confirm audio input, picture, and save location.
Define the path from record to publish#
Use one fixed pipeline from capture to delivery: record, review the raw file, edit, then export for the actual destination (YouTube or client handoff). Keep this workflow written down so every session follows the same steps and checks before anything is sent or uploaded.
Treat rights and remote sessions as part of production#
Treat usage records as part of the job, not an afterthought. If you use music assets from a service like Epidemic Sound, keep simple project notes so you can quickly confirm what you used and where.
If a session includes interviews or remote capture, pretest Riverside.fm (or your chosen tool) with the same setup you will use live. Related reading: A Guide to Indonesia's 'Second Home' Visa.
Avoid the budget traps that waste money and time#
On a budget, spend for clear audio and a repeatable setup before you spend for visual polish. If people cannot hear you clearly, better lighting or a nicer angle will not save the video. In this research set, lighting kits are shown starting at $56.99, while a high-quality microphone is treated as important for clear audio.
The next trap is copying a generic kit without matching it to your room and workload. If you only record occasionally, a full studio may be unnecessary. Start with your real operating pattern: how often you record and whether you can get the same result each time without rebuilding everything.
Use one checkpoint before adding more paid tools: record three short tests on different days with the same mic position, seat, and framing. Review on a phone and a laptop. If audio or framing is inconsistent, fix placement and room control first.
Before buying more, tighten the basics you already control: dim lights, cover windows when outside light shifts, and keep one camera setup you can repeat. In a budget setup, stable audio and repeatable framing beat a "perfect studio" that changes every session.
This pairs well with our guide on A Guide to Full-Time RVing on a Budget.
Build a reliable setup first, then upgrade with intent#
Build for reliability first: the right setup is the one that gives you consistent results in normal conditions, not the one with the most gear.
Start with a simple content plan, then buy in phases. Define what you record, how often, and what must work every time. Studio setup is best treated as an ordered process, and that structure helps you avoid random purchases.
Use this sequence:
- Lock one repeatable setup for your main format.
- Stabilize audio, framing, and room behavior across sessions.
- Upgrade only when one recurring bottleneck is clear.
Common recurring issues are predictable: rooms can be too dark, windows can over-brighten shots, and household or AC noise can leak into recordings. When those problems keep repeating, a dedicated corner or private video studio can be a practical step for consistency. One documented example was built in a small room, with the takeaway being consistency, not room size.
Be careful with budget examples. An often-cited "under $350" DIY setup explicitly excluded the camera, tripod, and microphone, so treat that number as partial, not all-in.
Keep a short decision log for each upgrade: what you changed, why, and whether it improved results or speed. That record keeps your Home video studio durable as your business grows.
Frequently Asked Questions
How much should I budget for a home video studio on a budget?
Start from the result you need, not a random number from a shopping list. Budget first for clear voice, stable framing, and one controllable light source, then keep a little room for a return, replacement, or one mistake purchase. Planning with a long-term view usually saves more than chasing the cheapest bundle.
What is the minimum gear I need to look and sound professional?
You need a microphone that captures crisp, clear speech, a camera or webcam you can frame consistently, a simple light setup or controlled window light, and a clean background. For many talking-head videos, a cleaned-up area of a bedroom or living room is enough. If you want the simplest audio starting point, USB microphones are often a cost-effective, easy-to-use option.
Should I build a permanent home video studio or start with a portable kit?
If you record frequently or send client-facing videos regularly, a fixed corner can cut setup time and help keep results consistent. If you record occasionally or have limited space, start portable. The decision test is practical: can you be camera-ready in minutes without redoing framing and room sound every time?
What should I upgrade first after my initial setup is working?
Upgrade the bottleneck you can hear or see in test recordings, not the item that looks most impressive online. If your voice still sounds noisy, distant, or echoey, work on mic placement or room control before touching the camera. If audio is already solid but the image changes from session to session, improve your lighting and block shifting daylight.
How can I avoid wasting money on gear recommendations with affiliate links?
Treat gear roundups as potentially biased until you see clear disclosure and compare them with at least one or two independent sources. Many recommendations are sponsored or contain affiliate links, so write down why a product fits your room, your recording frequency, and your existing devices before buying. Also save the receipt, product page, and any seller-specific terms such as a 30-Day return window or 2-Year warranty when those are offered.
Can I realistically start under a very tight budget and still look credible?
Yes, if you focus on credibility instead of "studio" aesthetics. A tidy background, understandable voice, and consistent light matter more than trying to imitate a high-end set. Cheap-looking results usually come from distracting audio or video issues, not from having fewer gadgets.
How do I confirm my setup quality before publishing client-facing videos?
Record a short private test in the same room, at the same time of day, with the same seat, angle, and mic position you plan to use for real work. Review it on both a phone and a laptop. Check for voice clarity, fan noise, glare, and distracting background details, because both audio and video quality shape professional perception in webinars, interviews, and virtual events. If anything shifts between test takes, fix consistency first and publish later.
Try a related tool
Researched and edited by the Gruv editorial team. Gruv builds cross-border billing, payouts, and finance-operations software for global businesses.
Sources
Includes 1 external source outside the trusted-domain allowlist.
- academia.edu/64120034/Voice_Quality_and_TV_Interpreting_A...trusted
- copyright.gov/ai/Copyright-and-Artificial-Intelligence-Par...trusted
- deepblue.lib.umich.edu/bitstreams/7155896d-57fc-4f3e-911d-6f8bebffa...trusted
- docs.fcc.gov/public/attachments/FCC-94-288A1.txttrusted
- olc.blogs.pace.edu/2024/10/09/setting-up-a-budget-home-video-st...trusted
- productioncenter.biola.edu/manual-studiotrusted
- uscode.house.gov/view.xhtml;jsessionid=74AE537F80C1A7E039BD2E...trusted
- agentpulse.ai/blog/best-video-editing-software-for-beginnersexternal
Educational content only. Not legal, tax, or financial advice.
Related Posts

Value-Based Pricing for Freelancers Under Real Payment Risk
Value-based pricing works when you and the client can name the business result before kickoff and agree on how progress will be judged. If that link is weak, use a tighter model first. This is not about defending one pricing philosophy over another. It is about avoiding surprises by keeping pricing, scope, delivery, and payment aligned from day one.

How to Create a YouTube Channel to Showcase Your Freelance Skills
Treat this like a business decision, not a creator identity project. Your goal is to publish videos that attract qualified inquiries instead of random attention.

The Best Video Editing Software for Freelancers
**Choose the best video editing software based on the workflow you can repeat under pressure, not the tool that looks most impressive on YouTube.** You are the CEO of a business-of-one, and your editor is part of your delivery infrastructure. When a client changes scope, sends a new batch of footage, or asks for "one more revision," your editor stops being a creative playground and becomes a system you either trust or fight.