
Quick Answer
Build a reliable travel workstation around three tiers: a Performance Core for screen, keyboard, and mouse position; a Resilience Kit for bad rooms; and an Uptime Hub for power and connectivity. Keep the screen directly in front of you at about arm's length, place keyboard and mouse for relaxed shoulders and straight wrists, then add quick fixes like lumbar support, break cues, tested cables, and a power bank.
Why Your "Comfortable" Setup is a Ticking Time Bomb for Your Career#
A setup that feels fine today can still create strain and downtime over a full travel cycle. The real test is whether your gear lets you stay focused, physically sustainable, and reliable for client delivery across flights, hotel desks, and long work blocks.
| Risk | Main trigger | Common consequence |
|---|---|---|
| Physical strain risk | Awkward positions, repetitive tasks, and long static sessions | Lost or restricted work time |
| Productivity friction risk | Awkward posture, repetitive input, or long static holds | Constant drag to routine tasks |
| Operational interruption risk | Travel logistics, especially power planning | Your setup can fail, and checkpoint outcomes are still decided by the TSA officer |
That is the point of an ergonomic travel setup: fit the work to you so you reduce fatigue and protect output. The risk is not just obvious pain. Over time, awkward posture, repetitive input, and especially staying in one position too long can chip away at physical readiness.
Use this quick risk map before each trip. It helps you spot the most common ways a travel setup fails:
- Physical strain risk: awkward positions, repetitive tasks, and long static sessions can turn into lost or restricted work time.
- Productivity friction risk: setups that force awkward posture, repetitive input, or long static holds can add constant drag to routine tasks.
- Operational interruption risk: travel logistics can break your setup, especially power planning. Power banks belong in carry-on, not checked bags, and checkpoint outcomes are still decided by the TSA officer.
A practical way to manage this is simple: assess the likely failure points, then pack your fixes before you leave. Include posture and input basics. Also check travel compliance, such as battery capacity against the FAA's usual 100 Wh spare-battery limit and airline approval for eligible larger spares.
This guide uses a three-tier operating model. Tier 1 aims to reduce physical strain and fatigue. Tier 2 helps you adapt when the workspace is poor. Tier 3 protects uptime when power or connectivity fails.
Related: How to Pack Light for Long-Term Travel (One Bag Guide).
Tier 1: The Performance Core#
If you want a setup that holds up on real travel days, build Tier 1 around independent screen, keyboard, and mouse positioning. Keep your main display directly in front of you at about arm's length, roughly 20 to 28 inches. Set keyboard and mouse placement so your elbows stay near your sides at about 90 to 110 degrees, your wrists stay straight, and your shoulders stay relaxed.
| Input setup | What to verify | Quick adjustment |
|---|---|---|
| Keyboard | Elbows stay near your sides (about 90 to 110 degrees), wrists stay straight, shoulders stay relaxed | Reposition the keyboard so you can hold that posture; if available, a slight negative tilt can help keep wrists neutral during long typing blocks |
| Mouse | Mouse is on the same plane and within reach of the keyboard | Move it closer and level with the keyboard to reduce shoulder strain risk |
| Display | Main display is directly in front of you at about 20 to 28 inches | Re-center the display and reset distance before you continue |
Watch for visible drift while you work and correct it quickly. The signs usually show up before real pain does:
- Wrist tension or pressure: reset keyboard position so your wrists can stay straight and your shoulders can stay relaxed. If available, a slight negative tilt can help keep wrists neutral over longer typing blocks.
- Neck loading: if your chin starts jutting forward or your eyes keep dropping, re-center the display directly in front of you at about arm's length.
- Typing fatigue with shoulders creeping up: reset chair fit before you swap gear. Set seat height so feet are flat. If not, add a footrest. Keep about 2 to 3 fingers between the seat edge and the back of your knees.
Laptop stand in real travel conditions#
You do not need a perfect stand. You need the screen centered in front of you, around arm's length away. Prioritize in this order: chair and feet, then screen position, then keyboard and mouse placement. If the chair allows it, a slight recline of about 100 to 110 degrees can reduce spinal load.
If you do not have an ideal stand, use a stable support and keep the screen centered. Also watch for static load. Under pressure, you can brace and stay in one posture too long, and static work postures are a primary risk factor for tissue fatigue and long-term injury.
Mouse choice and daily minimum setup#
Placement matters more than features. Keep the mouse on the same plane and within reach of the keyboard.
Use this minimum daily deployment checklist before you settle in:
- Mouse beside the keyboard on the same plane
- Elbows close to your sides, about 90 to 110 degrees, with shoulders relaxed and wrists straight
- Main display directly in front of you at about 20 to 28 inches
- Feet flat after chair adjustment, or supported with a footrest
If you make only one Tier 1 decision, make this one. Set screen, keyboard, and mouse positions so you can stay in your comfort zone instead of adapting to the laptop's default posture. Getting core ergonomic basics right is associated with less fatigue, fewer aches, and better focus. If you want a deeper dive, read The Best Calendly Alternatives for Freelancers.
Tier 2: The Resilience Kit#
Once your core tools are set, the next question is whether you can make a bad room usable quickly. Tier 2 is about fast adaptation, not perfect rooms. You reduce risk by fixing the biggest ergonomic problems first and doing it in the same order every time.
Run the arrival audit in this order#
Start with the chair, because poor support changes everything else. Set seat height so your feet are flat and your knees are level with your hips. If lumbar support is missing, place a cushion or rolled towel at the small of your back.
| Order | Focus | What good looks like |
|---|---|---|
| 1 | Chair support | Feet are flat and knees are level with your hips; add a cushion or rolled towel at the small of your back if lumbar support is missing |
| 2 | Screen position | The screen is directly in front of you, at least 20 inches away, with the top line at or just below eye level |
| 3 | Glare control | The monitor is perpendicular to windows and you can read dark text on a light page without squinting or leaning in |
Then set your screen. Keep it directly in front of you, at least 20 inches away, with the top line at or just below eye level. If the desk is too low, raise the screen on a stable surface. If you raise a laptop, keep your typing setup workable for longer blocks.
Finish with glare control. Place the monitor perpendicular to windows, then adjust desk angle, chair position, or nearby lighting until reflections drop. A quick check is whether you can read dark text on a light page without squinting or leaning in. If you remember one sequence, use this: chair support, screen height, glare control.
Choose your fallback tools by failure mode#
You do not need a big kit. You need reliable options for common failures.
| Need | Improvised fix | Dedicated tool | Comfort | Setup speed | Pack impact |
|---|---|---|---|---|---|
| Lower-back support on poor chairs | Rolled towel or bed pillow at the small of your back | Compact lumbar support | Improvised can be enough for shorter blocks; dedicated support may feel more consistent in longer sessions | Improvised takes a minute and can shift | Improvised adds nothing; dedicated adds small bulk |
| Screen height on low tables | Books, storage box, or stable carry-on under the laptop | Fold-flat laptop stand | A stand can be more stable and repeatable | Setup speed depends on your routine | Improvised adds nothing; stand adds one fixed item |
| Larger display in a hotel room | Use the room TV when inputs are accessible | Portable monitor | TV can work when available, but room-to-room reliability varies | TV setup can be quick or a dead end | TV adds no pack weight; portable monitor adds noticeable bulk |
Choose based on consistency. If you move often and work long blocks, dedicated tools can reduce setup friction. If you travel light and your schedule is flexible, improvised fixes can still work when you apply them quickly.
Using the hotel TV as a monitor#
Treat the hotel TV as optional, not guaranteed. Some hospitality TVs use Lock Mode that can block external input, and input access may still be limited.
Before you travel, verify your laptop's actual ports, since similar-looking ports can differ. Pack the correct cable or adapter path in advance. In the room, check port access, connect, switch the TV to the matching input source, and then extend the display from your laptop settings.
Use a fallback plan when display access fails. If input is blocked, ports are inaccessible, or signal detection fails, return to your single-screen setup. If second-screen work is essential, that is when a portable monitor may be worth the extra bulk.
In transit, aim for harm reduction#
In transit, do not try to recreate a full desk. The goal is to reduce strain enough to get through the work block without creating a bigger problem for later. Use short work blocks, change position often, and avoid staying static for long stretches.
| Tactic | Cadence | Grounded cue |
|---|---|---|
| Frequent short pauses | Five minutes each hour | OSHA supports frequent short pauses |
| Eye routine | Every 20 minutes, look 20 feet away for 20 seconds | Use the 20-20-20 rule during screen work |
| Position change | Do not hold the exact same sitting position for more than 20 to 30 minutes | When you cannot stand, do smaller in-seat resets |
OSHA supports frequent short pauses and gives one practical cadence: five minutes each hour. HSE also emphasizes short, regular breaks over longer, infrequent ones. Keep it sustainable:
- Work in shorter blocks when your surface is poor, especially on tray tables.
- Reset posture at natural pauses: uncurl your spine, drop your shoulders, and change leg position.
- Use the 20-20-20 eye routine: every 20 minutes, look 20 feet away for 20 seconds.
If possible, avoid holding the exact same sitting position for more than 20 to 30 minutes. When you cannot stand, do smaller in-seat resets. A jacket or small cushion behind your lower back can help, but movement is still the main win. You might also find this useful: The Best Travel Backpacks for Digital Nomads.
Tier 3: The Uptime Hub#
Once posture is handled, reliability becomes the next risk. If one dead battery, unstable connection, or missing cable can stop your day, the setup is still fragile.
The Uptime Hub keeps power and connectivity predictable. In practice, that means fewer failure points and fewer cable decisions.
Pick power by day shape, not by gear hype#
Choose your charger and power bank based on how you work that day, not on specs alone. What matters is whether the kit matches a single-device day, a multi-device day, or a transit-heavy day.
| Use case | Charger choice | Power bank role | What to verify first | Main tradeoff |
|---|---|---|---|---|
| Single-device days | One compact USB-C charger that covers your primary device | Can be an optional buffer for short gaps away from outlets | Confirm your laptop charging input and port spec before packing | Lighter kit, less redundancy |
| Multi-device days | Multi-port USB-C charger for laptop, phone, and peripherals | Can help when phone and accessories stay active all day | Check whether your hub or dock expects 85 to 100 W power delivery and whether your laptop port supports needed features | Fewer wall plugs, more dependence on one charger |
| Transit-heavy days | Smaller charger plus an accessible power bank | Can serve as backup when outlet access is inconsistent | Test real charging performance before departure | Portability vs redundancy |
Also confirm your laptop's port standard before you buy or pack accessories. USB-C can mean different capabilities, so verify whether your device supports DisplayPort Alt Mode, Thunderbolt 3/4, or USB4.
Keep network assumptions realistic#
Treat available Wi-Fi as provisional until you test it. Include Wi-Fi/VPN security in your setup routine, and prioritize Wi-Fi 6/6E and Bluetooth 5.x for better headset and peripheral stability.
Use a cable-kit packing protocol#
Poor cable choices can waste money or clutter your desk, so keep your cable setup simple and repeatable:
- Confirm cable and adapter choices against the ports you actually use.
- Use a dock or hub when you want to condense cable clutter into one plug.
- Choose between a compact USB-C hub and a fuller dock based on your video bandwidth and power needs.
A compact hub can simplify setup by condensing cable clutter into one plug. Keep the tradeoff in mind: USB-C hubs are usually smaller and cheaper, while fuller dock options generally offer more video bandwidth and power.
For related travel planning, see A Guide to Travel Vaccinations for Digital Nomads. Before your next move, sanity-check your connectivity plan with the digital nomad WiFi guide.
Conclusion: Your Office is Not a Place, It's a System#
Your travel setup should be something you can repeat, not a room you hope will work. That is why the three tiers matter: Performance Core, Resilience Kit, and Uptime Hub. They help you keep working when the desk, chair, and internet quality change from one stop to the next.
Treat weak points like operating failures, because one gap can stall everything else. A portable stand can make laptop height more usable across common travel settings, but long hours hunched over a laptop can still leave your back and neck sore. In the same way, a decent desk is not enough if your connection drops during calls, file sharing, and team check-ins.
Use the tiers as coverage, not as a gadget list. Your Performance Core sets screen and input position. Your Resilience Kit helps you reset quickly when the space is wrong. Your Uptime Hub covers failures that interrupt real work, like connection gaps or a setup that leaves you hunching for long stretches.
Before your next trip, review each tier and pack the full kit in advance. Keep first-use items easy to reach. On arrival, run a quick check before your first task: set a workable screen position, keep frequently used items within arm's reach, and test the connection you will rely on. If you want help choosing tools, read The Best Ergonomic Gear for Your Remote Work Setup.
We covered related power planning in The Best Power Adapters and Converters for Global Travel. If you want one place to tighten the rest of your solo-business operations, browse Gruv's practical freelancer tools.
Frequently Asked Questions
How do you set up a better workstation in a hotel room fast?
Start with a quick reset before you open your first task. Put the screen directly in front of you and at least 20 inches away, keep the keyboard in front with relaxed shoulders and elbows close to your body, and keep the mouse close to the keyboard. If the chair feels off, adjust your seating and recheck that your joints still feel naturally aligned.
What matters most in that room reset?
Set screen position and input position first, because laptop-only work can get uncomfortable when the screen is low and the input area is cramped. If you cannot raise the screen and use external input devices, take regular breaks and change position regularly instead of staying static. If a basic workstation item gets a no, fix that before you settle in.
Which travel keyboard should you choose?
Choose the keyboard that matches your actual work pattern and helps you maintain a neutral posture. Ultra-portable boards fit lighter admin work and short trips, compact single-piece boards suit regular multi-hour typing, and split ergonomic boards make sense only if you already know that layout works for you. Keep expectations realistic, because evidence on preventing musculoskeletal problems is mixed.
Is a portable monitor worth carrying?
It depends on your workflow. Carry one when you consistently need a second screen for your work, and test your exact cable path and port compatibility before you pack. If second-screen work is only occasional, a single-screen setup or hotel TV fallback may be enough.
Can you rely on a hotel TV instead of a portable monitor?
Sometimes, but do not treat it as your only second-screen plan. TV input access and reliability vary by property and room, so the setup may not be predictable when you need it most. If a second display matters for client work, bring a display option you control.
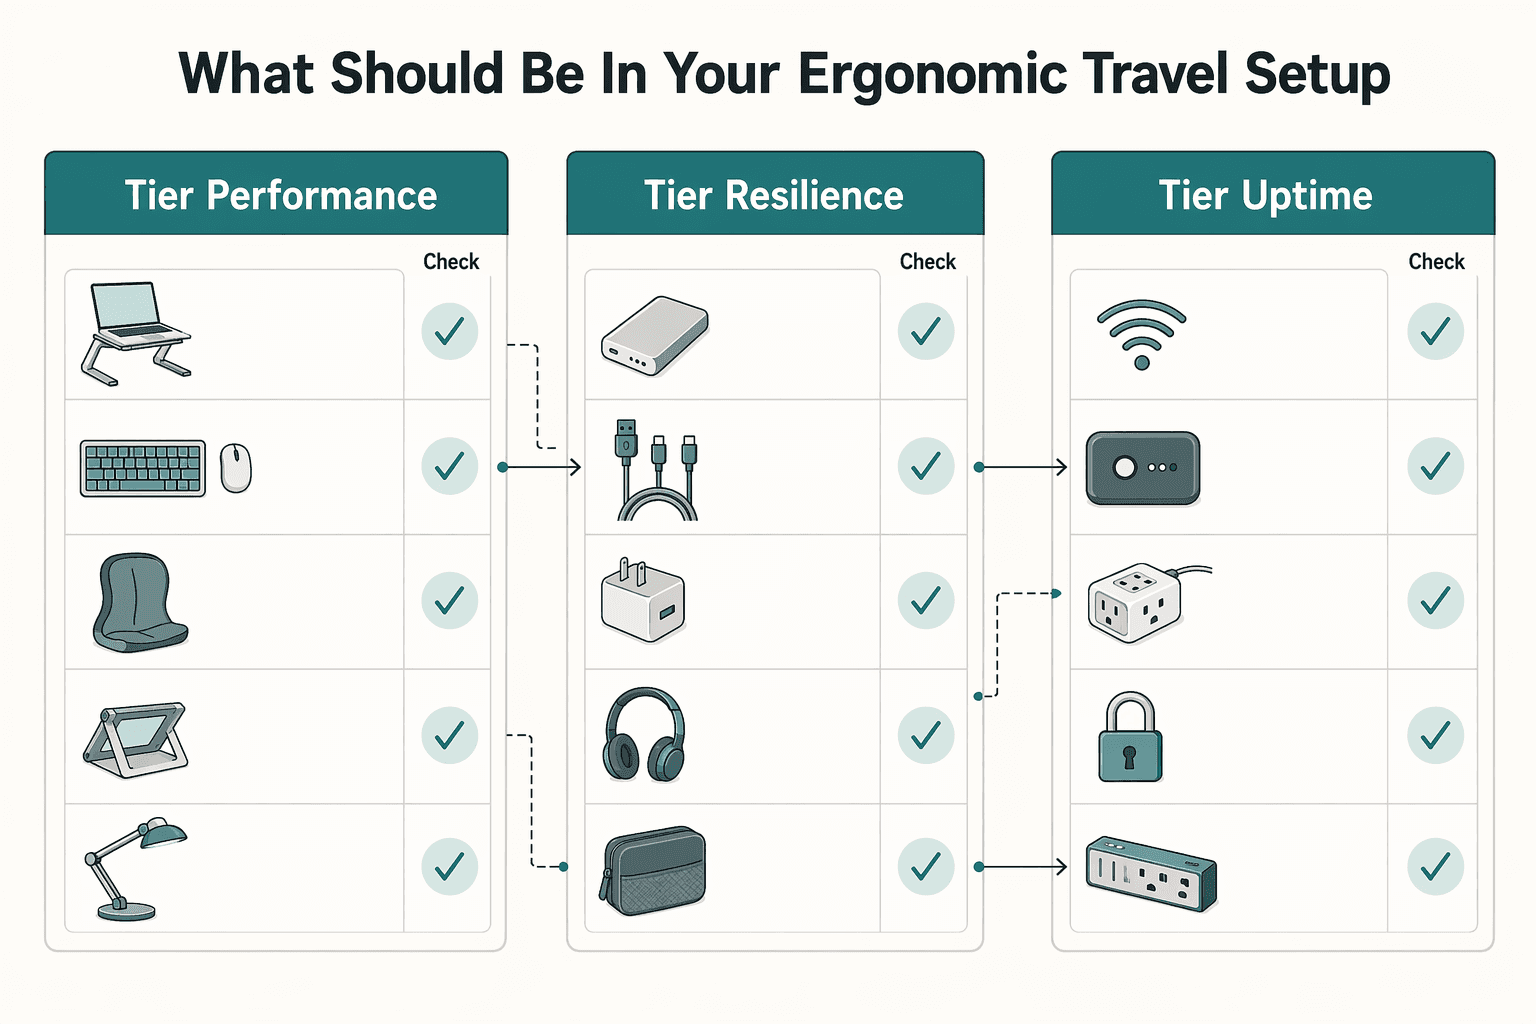
What should be in your ergonomic travel setup?
Use the same three-tier structure on every trip so the kit is easy to scan and audit. Tier 1 is the Performance Core: laptop stand, external keyboard, and external mouse. Tier 2 is the Resilience Kit: a break cue including the 20-20-20 rule plus a quick posture-reset checklist. Tier 3 is the Uptime Hub: a USB-C charger sized to your load, a power bank, and core cables plus minimum adapters.
How much should you budget for this kind of setup?
Budget by travel frequency and by how many hours you work from temporary desks, not by stale round numbers. If you are phasing purchases, start with the Performance Core first. Add the other tiers after the core setup is covered.
How do you pack the kit so it stays usable on the road?
Pack for repeatability so setup and checks are automatic under time pressure. Keep the three tiers physically separated or clearly color-coded, place first-use-on-arrival items at the top, and run one live pre-departure check of the charger, hub, keyboard, mouse, and display cable together. Keep spare lithium batteries and power banks in carry-on baggage only, and protect battery terminals from short circuit.
Do you need to avoid public Wi-Fi entirely?
No. Public Wi-Fi is often usable, but weak device settings or poor connection hygiene can still expose sensitive data. Keep your device current, avoid sensitive work on networks you cannot trust, and keep a fallback connection ready.
Try a related tool
Researched and edited by the Gruv editorial team. Gruv builds cross-border billing, payouts, and finance-operations software for global businesses.
Sources
- bls.gov/iiftrusted
- cdc.gov/niosh/ergonomics/ergo-programs/risk-factors....trusted
- cdc.gov/niosh/ergonomics/about/index.htmltrusted
- consumer.ftc.gov/node/78344trusted
- faa.gov/hazmat/packsafe/lithium-batteriestrusted
- hf.tc.faa.gov/publications/2016-12-human-factors-design-st...trusted
- nccoe.nist.gov/sites/default/files/2022-11/HolidayTravelTip...trusted
- osha.gov/ergonomicstrusted
Educational content only. Not legal, tax, or financial advice.
Related Posts

The Best Ergonomic Gear for Your Remote Work Setup
**Treat your ergonomic remote work setup as operating infrastructure, not a comfort splurge.** When posture breaks down, delivery quality and scheduling usually break down right after. Start by setting a baseline that protects your body and your business before you compare products.

The Best Gear for a Portable Home Office
The evidence here does not directly test portable-office gear decisions, so use this as a practical framework rather than a proven standard.

The Best Calendly Alternatives for Freelancers
If you're shopping for Calendly alternatives, the real risk isn't just picking the wrong interface. It's choosing a tool that books time cleanly but still leaves you chasing missed meetings, sending manual follow-ups, and stitching the next step together by hand.